Okwu mmalite
Thank you for choosing the STRICH SKT-01 Piano Keyboard Stand and Stool Set. This manual provides essential information for the safe and efficient assembly, operation, and maintenance of your new keyboard stand and bench. Please read these instructions carefully before use and retain them for future reference.
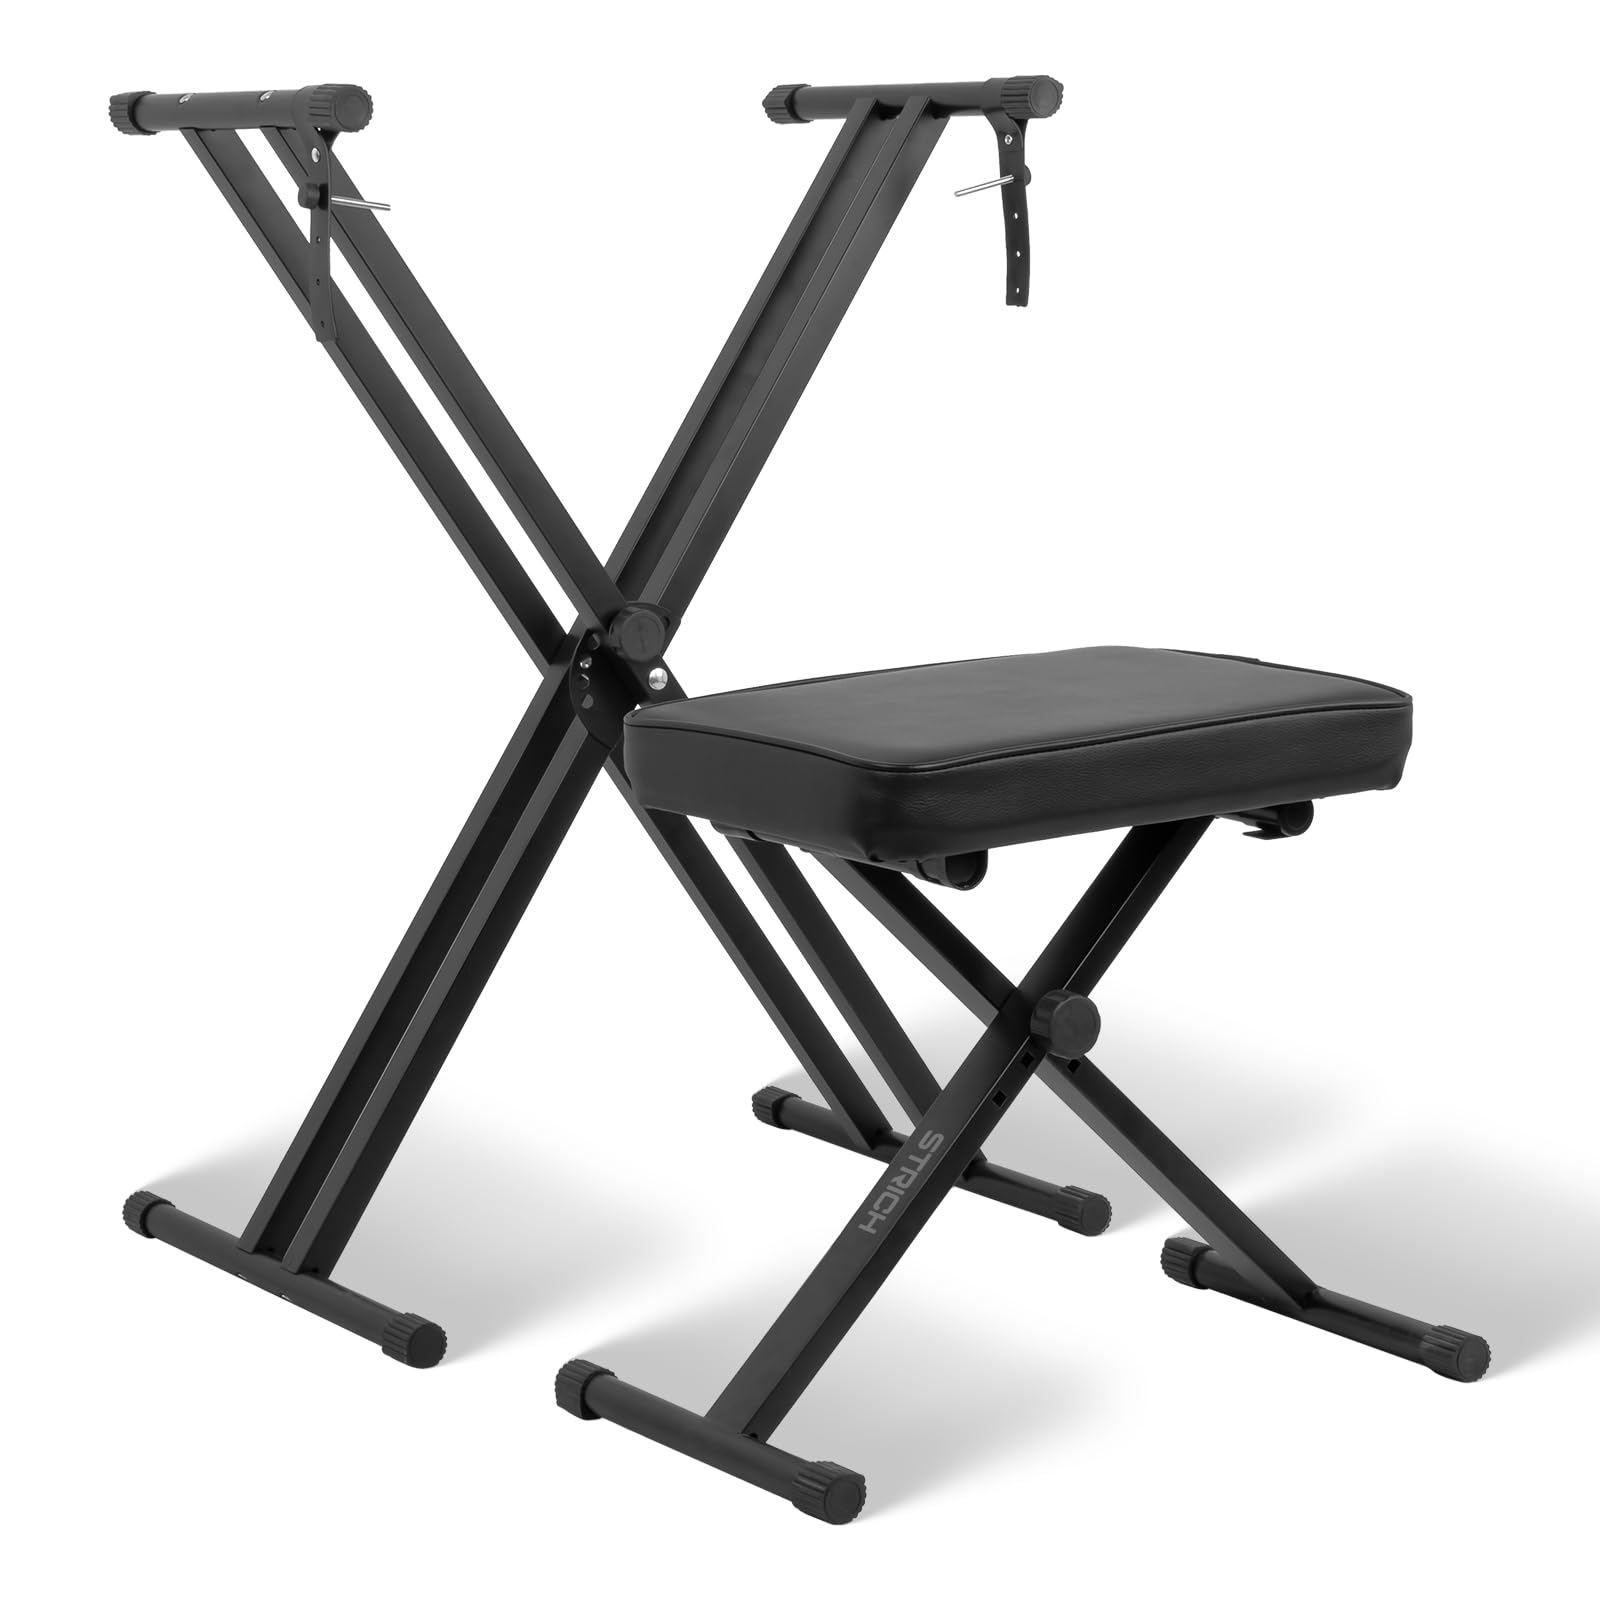
Image: The STRICH SKT-01 Piano Keyboard Stand and Stool Set, illustrating its overall dimensions and design.
Ozi nchekwa
- Ensure all parts are securely fastened before placing a keyboard on the stand or sitting on the bench.
- Do not exceed the maximum weight capacities: 150 lbs for the stand and 220 lbs for the bench.
- Keep fingers clear of moving parts during adjustment to prevent pinching.
- Place the stand and bench on a stable, level surface to prevent wobbling or tipping.
- Regularly inspect the stand and bench for any signs of wear, damage, or loose components.
Ihe ngwugwu
Before assembly, please verify that all the following components are included in your package:

Image: Visual representation of all components included in the STRICH SKT-01 package.
- X-Style Keyboard Stand Frame (Pre-assembled main structure)
- X-Style Piano Bench Frame (Pre-assembled main structure)
- Keyboard Support Arms (2 pieces)
- Bench Seat Cushion
- Locking Straps (2 pieces)
- Ịkwado skru (iberibe 8)
- Allen Wrench (1 piece)
Ntuziaka Mgbakọ
The STRICH SKT-01 set is designed for quick and easy assembly. The bench comes pre-assembled. Follow these steps to assemble the keyboard stand:
- Step 1: Prepare Components. Lay out the keyboard stand frame, the two keyboard support arms, the 8 mounting screws, and the Allen wrench on a clean, flat surface.
- Step 2: Attach Support Arms. Identify the top ends of the X-style stand frame. Align the holes on the keyboard support arms with the corresponding holes on the stand. Secure each arm using four mounting screws. Ensure the arms are oriented correctly so the keyboard can rest flat.
- Step 3: Secure Locking Straps. Attach the two locking straps to the designated points on the stand, typically near the top support arms. These straps help secure your keyboard to the stand.

Image: Step-by-step diagram illustrating the assembly of the keyboard stand's support arms.
The piano bench is pre-assembled and only requires unfolding to its desired height.
Ndozi na arụ ọrụ
Adjusting the Keyboard Stand Height
The keyboard stand features a quick-release locking system for easy height adjustment. It offers 7 height levels, accommodating various playing positions and keyboard sizes (54-key, 61-key, 88-key).
- Locate the quick-release lever or knob on the central X-joint of the stand.
- Loosen or pull the lever/knob to disengage the locking mechanism.
- Adjust the stand to your desired height by expanding or compressing the X-frame. The stand can be adjusted from approximately 12.00 to 37.41 inches.
- Once the desired height is reached, ensure the locking mechanism clicks securely into place. Test the stability before placing your keyboard.
Adjusting the Piano Bench Height
The piano bench also features an X-style design with a quick-release mechanism, offering 3 height options for optimal comfort.
- Locate the adjustment mechanism on the central X-joint of the bench.
- Loosen or pull the mechanism to allow the bench to expand or compress. The bench can be adjusted from approximately 17.71 to 20.86 inches.
- Select your preferred height and ensure the locking mechanism is fully engaged.

Image: Illustration of the adjustable mechanisms for both the keyboard stand and bench.
Ntuziaka ojiji
- Always ensure the stand and bench are fully extended and locked at the desired height before use.
- Place your keyboard centrally on the stand's support arms for balanced weight distribution.
- Utilize the non-slip leveling caps on the feet to ensure stability on uneven surfaces.
- The stand is designed to support keyboards up to 150 lbs. The bench supports users up to 220 lbs.

Image: Demonstrates the weight capacity of the keyboard stand (150 lbs) and bench (220 lbs).
Nlekọta na nlekọta
- Nhicha: Jiri ihe dị nro hichaa etiti ígwè ahụ, damp cloth. For the padded bench seat, use a mild soap solution if necessary, then wipe dry. Avoid harsh chemicals or abrasive cleaners.
- Nchekwa: Both the stand and bench fold flat for compact storage. Store in a dry environment away from extreme temperatures.
- Nyocha: Periodically check all screws and bolts to ensure they are tight. Inspect the rubber end caps for wear and tear.
Nchọpụta nsogbu
| Nsogbu | Ihe nwere ike ime | Ngwọta |
|---|---|---|
| Stand/Bench wobbles | Uneven floor surface; loose locking mechanism; worn rubber feet. | Adjust non-slip leveling caps on feet; ensure locking mechanism is fully engaged; replace worn rubber feet if necessary. |
| Ihe isi ike imezi elu | Locking mechanism not fully disengaged; dirt/debris in mechanism. | Ensure the quick-release lever/knob is fully pulled/loosened; clean the mechanism if obstructed. |
| Screws do not align during assembly | Incorrect orientation of parts; cross-threading. | Review assembly diagram to ensure parts are oriented correctly. Do not force screws; realign and try again. |
Nkọwapụta
- Ụdị: SKT-01
- Ihe: Heavy-Duty Alloy Steel (Frame), Padded Vinyl (Bench Seat)
- Agba: Nwa
- Keyboard Stand Height Adjustment: 7 levels (approx. 12.00 – 37.41 inches)
- Piano Bench Height Adjustment: 3 levels (approx. 17.71 – 20.86 inches)
- Keyboard Stand Weight Capacity: 150 n'arọ
- Piano Bench Weight Capacity: 220 n'arọ
- Akụkụ ngwaahịa (Apịaji): Approximately 16.54 x 35.43 x 35.43 inches (Stand)
- Ibu ihe: 13.17 pound (Ngụkọta Ntọala)
Akwụkwọ ikike na nkwado
STRICH products are manufactured to high-quality standards. For any questions, concerns, or support needs regarding your SKT-01 Piano Keyboard Stand and Stool Set, please contact STRICH customer service through the retailer where the product was purchased or visit the official STRICH website for contact information. Please have your model number (SKT-01) and purchase details ready when contacting support.
Maka ozi ndị ọzọ, gaa na STRICH Store on Amazon.


