1. Okwu mmalite
This manual provides essential information for setting up, operating, maintaining, and troubleshooting your MINIX ER937-AI Mini PC. Please read this guide thoroughly before using the device to ensure optimal performance and longevity.
Ihe ngwugwu
- MINIX Elite ER937-AI Mini PC x 1
- VESA Mount x 1
- Ihe nkwụnye ọkụ 19V/6.32A x 1
- HDMI USB x 1
2. Ngwaahịa gafereview
The MINIX ER937-AI is a high-performance Mini PC designed for demanding tasks, including business applications, gaming, 3D rendering, and AI computing. It features an AMD Ryzen AI 9 HX 370 processor, Radeon 890M graphics, and advanced connectivity options.
Front and Rear Panel Interfaces
Familiarize yourself with the ports and buttons on your Mini PC.

Foto nke 2.1: Front and Rear Panel Interfaces. The front panel includes USB 4.0, USB 3.2, Microphone, Audio Jack, and Power Button/LED. The rear panel features Power Jack, USB 4.0, 2.5G RJ45 LAN, DP 2.0, HDMI 2.1, USB 3.2, and Kensington Lock.
- Ogwe ihu: USB-C 4.0 (x2), USB-A 3.2 Gen2 (x2), Audio Jack, Microphone, Power Button with Fingerprint Sensor, Clear CMOS Button.
- Ngbanwe azụ: Power Jack, USB-A 3.2 Gen2 (x1), HDMI 2.1, DisplayPort 2.0, Dual 2.5G RJ45 LAN ports, Kensington Lock.
3. Ntuziaka Nhazi
3.1 Njikọ mbụ
- Ngwa njikọ: Connect your monitor(s) to the HDMI 2.1 and/or DisplayPort 2.0 ports. For multi-monitor setups, utilize the USB-C 4.0 ports which also support 8K@60Hz display output. Connect your keyboard and mouse to the available USB-A ports.
- Njikọ ike: Connect the provided 19V/6.32A power adapter to the Mini PC's power jack and then to a power outlet.
- Njikọ netwọkụ (Nhọrọ): For a wired connection, connect an Ethernet cable to one of the 2.5G RJ45 LAN ports. For wireless, Wi-Fi 7 is available after initial setup.
3.2 Mgbochi mbụ
- Pịa bọtịnụ ike dị na panel ihu. Ọkụ LED ahụ ga-enwu.
- The system will boot into Windows 11 Pro. Follow the on-screen instructions to complete the initial Windows setup, including language, region, network configuration, and user account creation.
- During setup, you can configure the fingerprint sensor for secure and fast logins using Windows Hello.
3.3 Nwụnye VESA Mount
The included VESA mount allows you to attach the Mini PC to the back of a compatible monitor or TV, saving desk space.
- Attach the VESA mount bracket to the back of your monitor using the screws provided with your monitor (or the VESA mount if included). Ensure the mount is securely fastened.
- Slide the MINIX ER937-AI Mini PC onto the VESA mount until it clicks into place.
4. Ntuziaka ọrụ
4.1 Gbanyụọ/ gbanyụọ ma malitegharịa
- Ike Na: Pịa bọtịnụ ike.
- Mechie: Pịa bọtịnụ Malite na Windows, wee họrọ Ike> Mechie.
- Malitegharịa: Pịa bọtịnụ Malite na Windows, wee họrọ Ike> Malitegharịa ekwentị.
- Mee Ka A Gbanyụọ Ike: Ọ bụrụ na sistemụ ahụ anabataghị ozi, pịa ma jide bọtịnụ ike ahụ ruo ihe dị ka sekọnd 5-7 ruo mgbe ngwaọrụ ahụ gbanyụrụ. Jiri nke a naanị dị ka ihe ikpeazụ.
4.2 Njikọ netwọkụ
- Wi-Fi 7: Access network settings in Windows to connect to available Wi-Fi 7 (2.4GHz/5GHz/6GHz) networks.
- 2.5G LAN: Plug an Ethernet cable into either of the two 2.5G RJ45 LAN ports for a high-speed wired connection.
- Bluetooth Bluetooth: Enable Bluetooth in Windows settings to pair with compatible devices such as keyboards, mice, or audio peripherals.
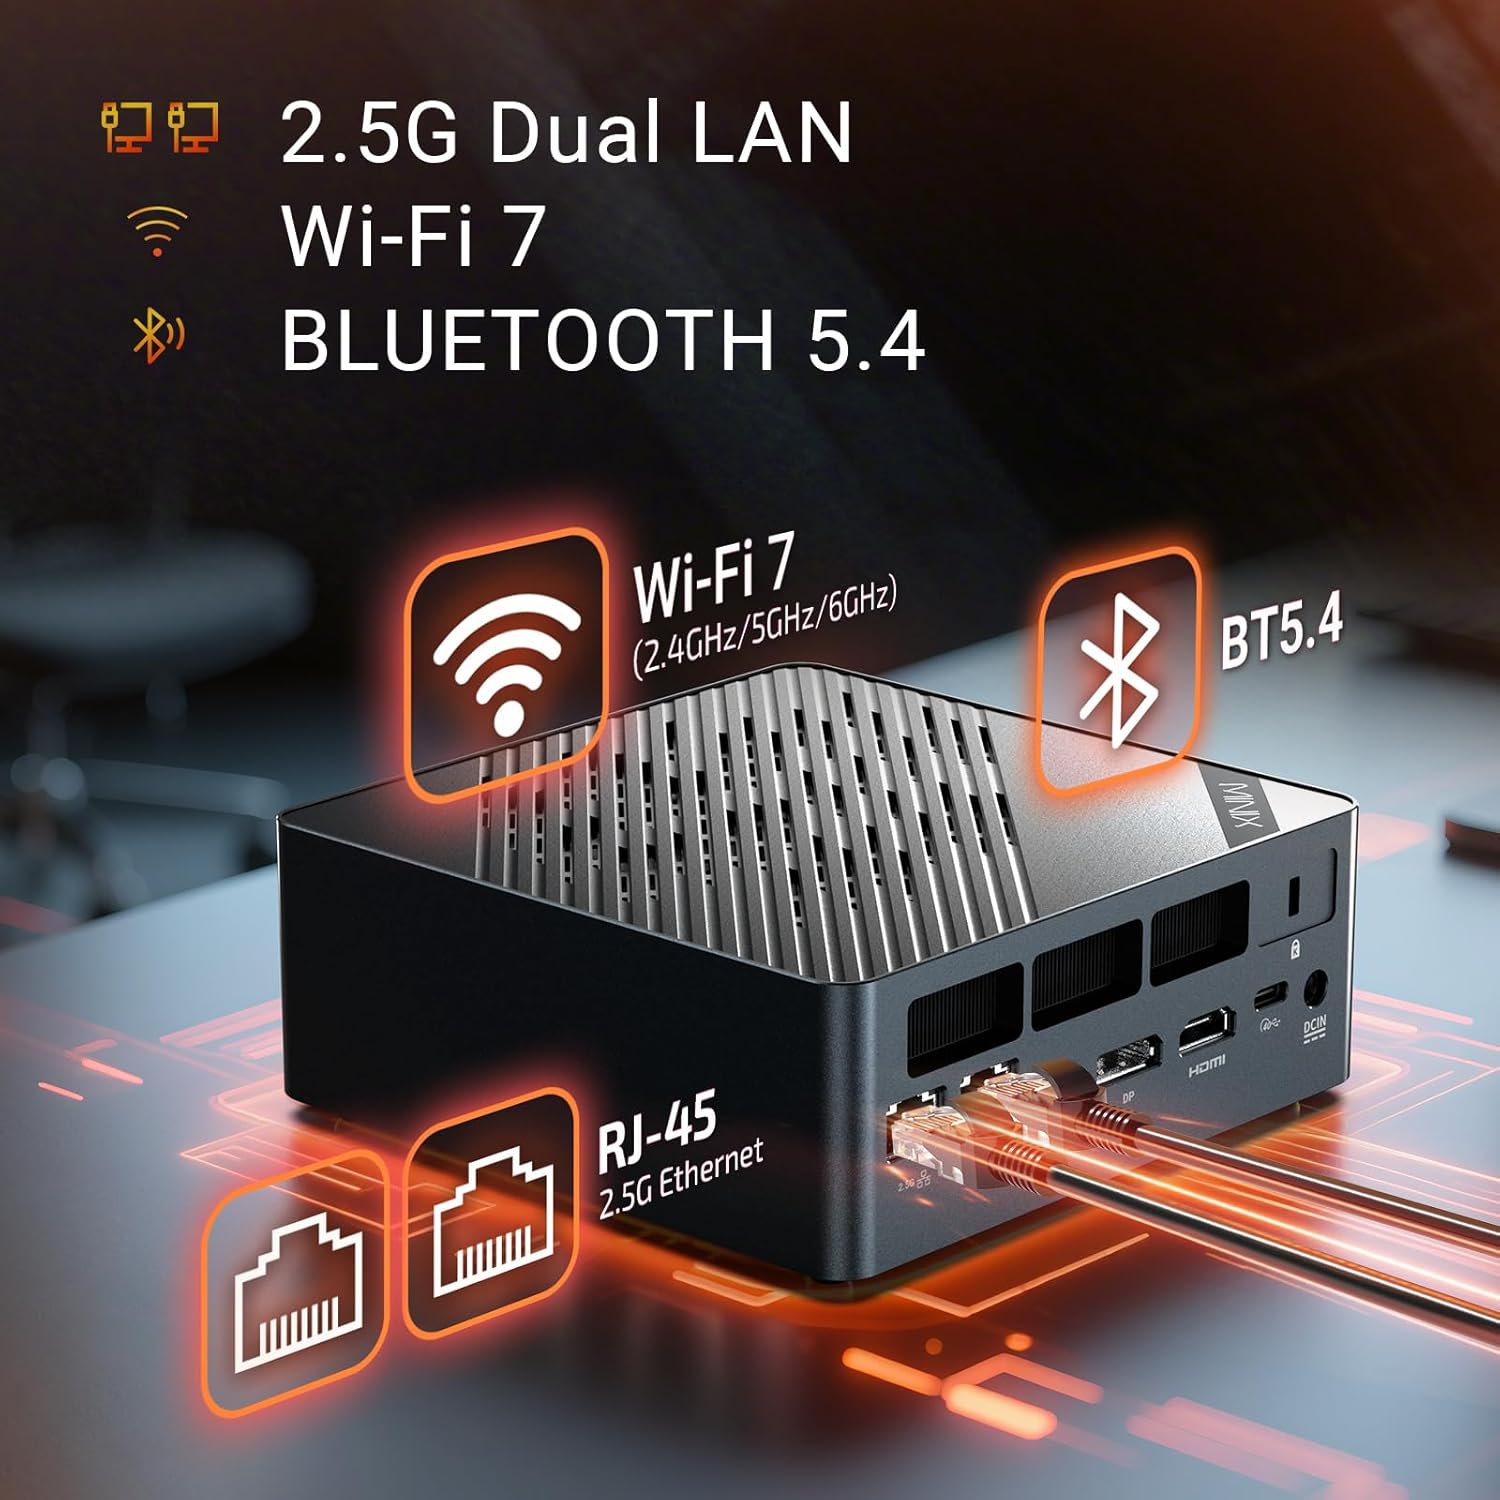
Foto nke 4.1: Ultra-Fast Connections. The Mini PC supports Wi-Fi 7, Bluetooth 5.4, and dual 2.5G Ethernet for robust network performance.
4.3 Nhazi nhazi
The MINIX ER937-AI supports up to four 8K@60Hz displays simultaneously.
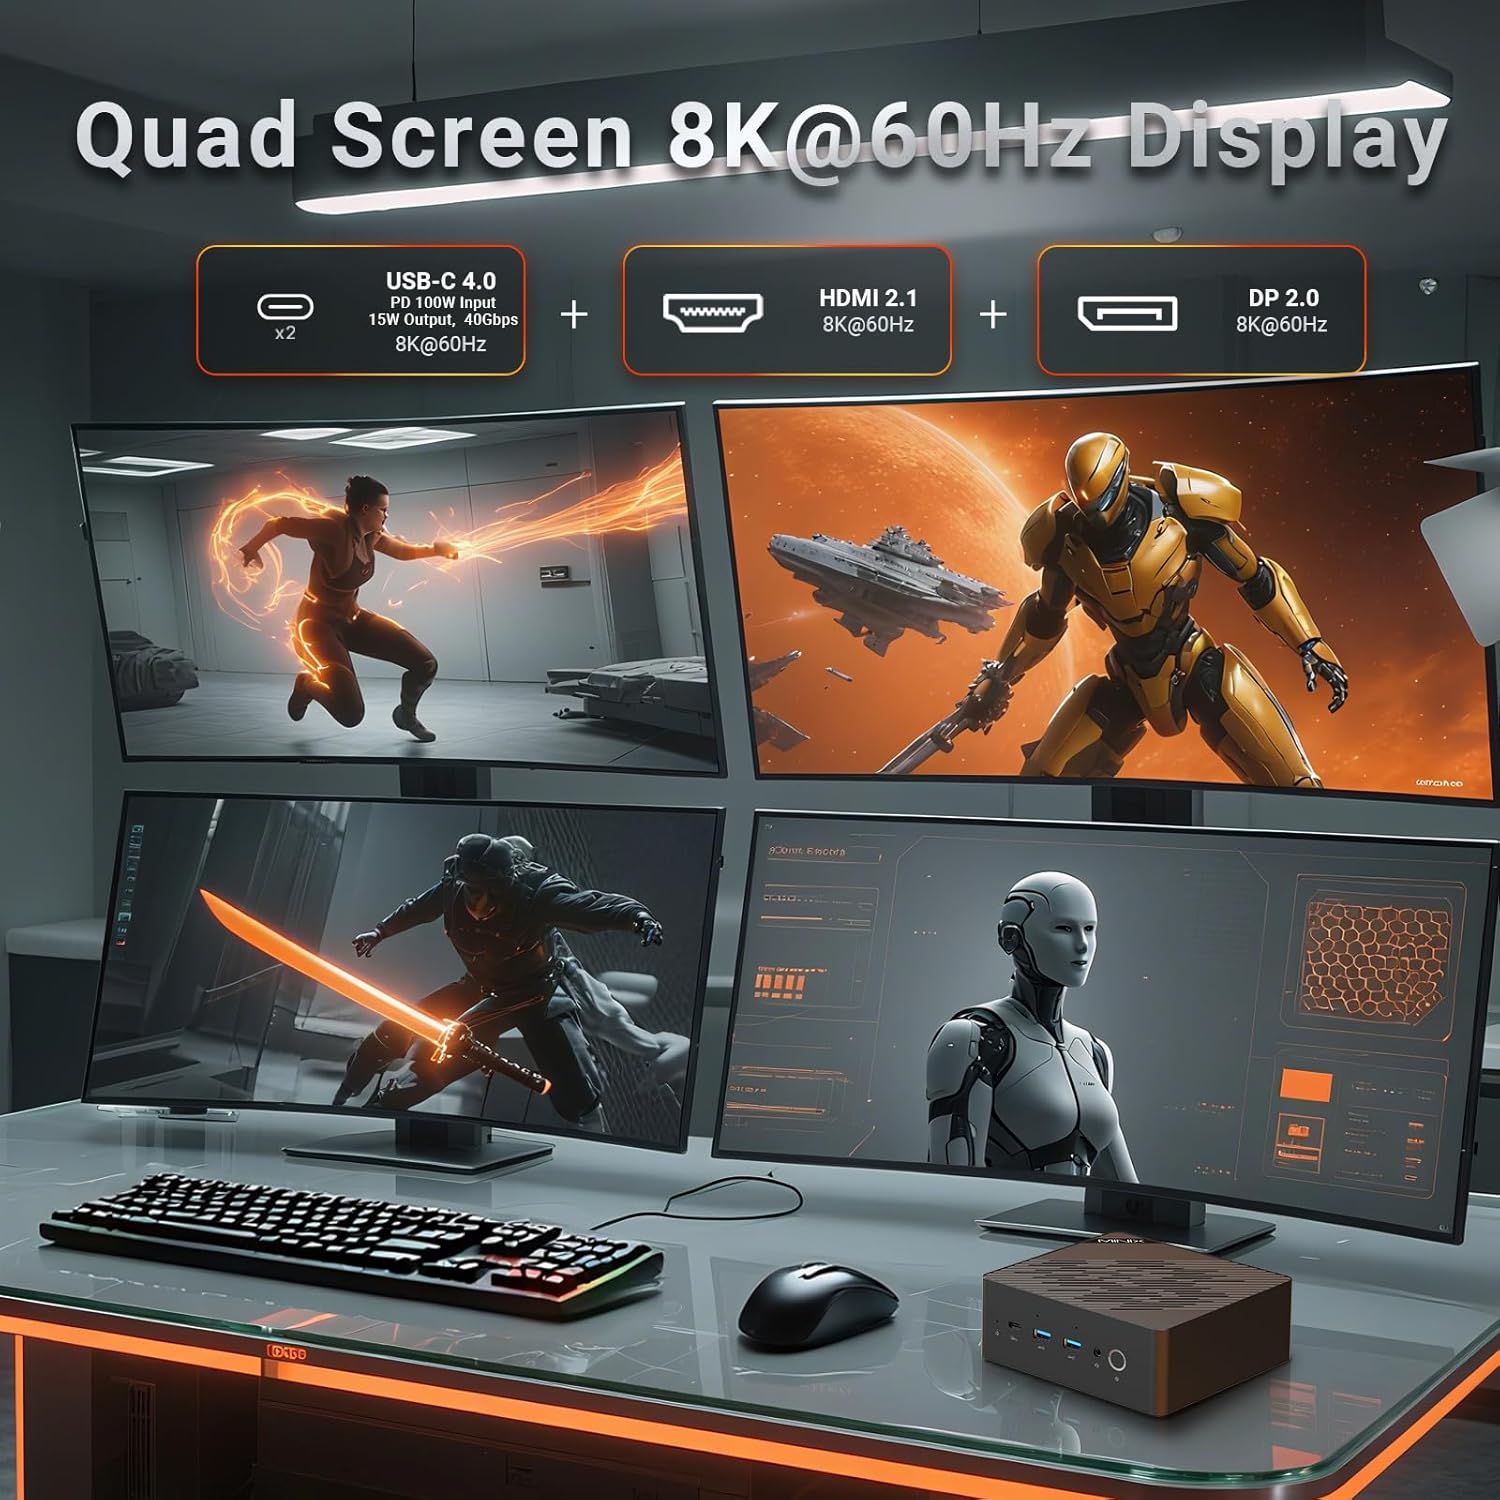
Foto nke 4.2: Quad Screen 8K@60Hz Display. The Mini PC can drive up to four 8K monitors via USB-C 4.0, HDMI 2.1, and DisplayPort 2.0.
- Connect monitors using the HDMI 2.1, DisplayPort 2.0, and two USB-C 4.0 ports.
- In Windows Display Settings, you can configure display arrangement, resolution, and orientation.
4.4 USB-C 4.0 Functionality
The two USB-C 4.0 ports offer versatile functionality:
- Power Delivery (PD) Input: Supports 100W power input.
- Power Delivery (PD) Output: Provides 15W power output for charging compatible devices.
- Nyefee data: Up to 40Gbps for high-speed data transfer.
- Ihe ngosi: Na-akwado mmepụta vidiyo 8K@60Hz.
4.5 AI atụmatụ
Leverage the AMD Ryzen AI 9 HX 370 processor's NPU for enhanced AI capabilities:
- Onye na-arụ ọrụ Windows: Utilize AI-powered features within Windows 11 Pro, such as Recall and real-time translation.
- AI Acceleration: Benefit from up to 80 TOPS (Trillions of Operations Per Second) for AI tasks like drawing and voice interaction in compatible applications.
5. Nlekọta na nkwalite
5.1 Sistemụ jụrụ oyi
The Mini PC features dual independent fans for efficient cooling of the CPU and SSD, ensuring stable performance under heavy loads.

Foto nke 5.1: Dual Cooling Fans. Separate fans cool the CPU and SSD to prevent overheating and maintain performance.
To maintain optimal cooling, ensure the ventilation grilles are not obstructed. Periodically clean dust from the chassis using compressed air. The magnetic quick-release chassis allows for easy access for cleaning.
5.2 Mgbasawanye Nchekwa
The Mini PC comes with a 1TB M.2 2280 PCIe 4.0x4 NVMe SSD and includes a second M.2 2280 PCIe 4.0x4 NVMe slot for additional storage, supporting up to 8TB.

Foto nke 5.2: Ample Memory & Storage. The Mini PC supports 32GB DDR5 RAM and a 1TB PCIe 4.0 NVMe SSD, with expansion options.
To install an additional SSD:
- Gbanyụọ Mini PC wee gbanyụọ eriri niile.
- Carefully open the chassis (refer to the magnetic quick-release mechanism).
- Locate the empty M.2 slot. Insert the new M.2 NVMe SSD at an angle and secure it with the provided screw.
- Close the chassis and reconnect cables. The new SSD will need to be initialized and formatted in Windows Disk Management.
Mmelite RAM 5.3
The device is equipped with 32GB dual-channel DDR5-5600 RAM (2x DDR5 SO-DIMM slots) and is expandable up to 96GB.
To upgrade RAM:
- Gbanyụọ Mini PC wee gbanyụọ eriri niile.
- Carefully open the chassis.
- Locate the DDR5 SO-DIMM slots. If replacing existing modules, gently push the clips on either side of the module outwards to release it.
- Insert new DDR5 SO-DIMM modules at an angle and push down until the clips snap into place.
- Close the chassis and reconnect cables.
5.4 Kpochapụ bọtịnụ CMOS
A Clear CMOS button is available on the front panel. This button can be used to reset BIOS settings to their default values if you encounter boot issues related to BIOS configuration. Consult technical support before using this feature.
6. Nchọpụta nsogbu
If you encounter issues with your MINIX ER937-AI Mini PC, refer to the following common solutions:
- Enweghị ike:
- Gbaa mbọ hụ na ejikọrọ ihe nkwụnye ọkụ na nke ọma na ma PC Obere yana oghere ọkụ na-arụ ọrụ.
- Nyochaa na ntinye ọkụ na-arụ ọrụ site na nkwụnye na ngwaọrụ ọzọ.
- Enweghị Ngosipụta:
- Lelee ma ọ bụrụ na enyochaala ya ma họrọ ebe kwesịrị ekwesị isi mmalite ya.
- Ensure display cables (HDMI, DisplayPort, USB-C) are securely connected to both the Mini PC and the monitor.
- Try connecting to a different display port or using a different cable.
- Okwu Njikọta netwọkụ:
- For Wi-Fi, check Windows network settings, ensure Wi-Fi is enabled, and try reconnecting to your network.
- For wired LAN, ensure the Ethernet cable is properly connected and your router/modem is functioning.
- Restart your router/modem and the Mini PC.
- Ihe mmetụta mkpisi aka anaghị arụ ọrụ:
- Gbaa mbọ hụ na mkpịsị aka gị dị ọcha ma kpọọ nkụ.
- Re-register your fingerprint in Windows Hello settings.
- System Performance Issues:
- Ensure the Mini PC has adequate ventilation and is not placed in an enclosed space.
- Check for excessive background processes in Task Manager.
- Update drivers and Windows 11 Pro to the latest versions.
If problems persist, refer to the Support section for further assistance.
7. Nkọwapụta
Detailed technical specifications for the MINIX ER937-AI Mini PC.
| Njirimara | Nkọwapụta |
|---|---|
| Nlereanya | ER937-AI |
| Sistemụ nrụọrụ | Windows 11 Pro |
| Nhazi | AMD Ryzen AI 9 HX 370 (12C/24T, up to 5.1GHz) |
| Eserese | AMD Radeon 890M, Ryzen AI NPU (80 TOPS overall) |
| RAM | 32GB DDR5-5600 (2x SO-DIMM slots, expandable to 96GB) |
| Nchekwa | 1TB M.2 2280 PCIe 4.0x4 NVMe SSD (second slot expandable to 8TB) |
| Njikọ ikuku | Wi-Fi 7, Bluetooth 5.4 |
| Njikọ ikuku | Dual 2.5G RJ45 LAN |
| ọdụ ụgbọ mmiri USB | 2x USB-C 4.0 (PD 100W input, 15W output), 3x USB-A 3.2 Gen2 |
| Mmepụta vidiyo | HDMI 2.1, DisplayPort 2.0, 2x USB-C 4.0 (Quad 8K@60Hz support) |
| Audio | Audio Jack, Dual Hidden Microphones |
| Nchekwa | Fingerprint-enabled Power Button, Kensington Lock |
| Na-ajụ oyi | Dual Independent Fans (CPU & SSD) |
| Akụkụ (LxWxH) | 5.52 x 5.5 x 2.2 sentimita asatọ |
| Ibu | 2.06 pound |
8. Akwụkwọ ikike na nkwado
8.1 Ozi akwụkwọ ikike
For specific warranty terms and conditions, please refer to the documentation included with your product or visit the official MINIX webEbe a na-edebe akwụkwọ ikike. Mkpuchi akwụkwọ ikike na-agụnyekarị ntụpọ n'ihe na ọrụ aka mgbe ejiri ya mee ihe nkịtị.
8.2 Nkwado nka na ụzụ
If you require technical assistance or have questions not covered in this manual, please use the following resources:
- Nkwado n'ịntanetị: Visit your Amazon account, navigate to "Your Orders," and select "Ask Product Question" for the MINIX ER937-AI Mini PC.
- Ndị ọchịchị Websaịtị: For offline maintenance services and additional support resources, please visit the official MINIX websaịtị.


