Okwu mmalite
This manual provides comprehensive instructions for the KERUI 3K/5MP Lite 8-Channel 6-in-1 Digital Video Recorder (DVR). This DVR is designed for security camera systems, offering compatibility with various camera types including Analog, XVI, AHD, TVI, CVBS, CVI, and IP cameras. Please read this manual carefully before installation and operation to ensure proper use and optimal performance of your surveillance system.
Kedu ihe dị na Igbe ahụ
Chọpụta na akụrụngwa niile dị na ngwugwu:
- 1 x 8-Channel DVR Unit
- 1 x 2TB Surveillance Hard Drive (Pre-installed)
- 1 x DVR ike ọkọnọ
- 1 x USB òké
- 1 x Warning Stickers
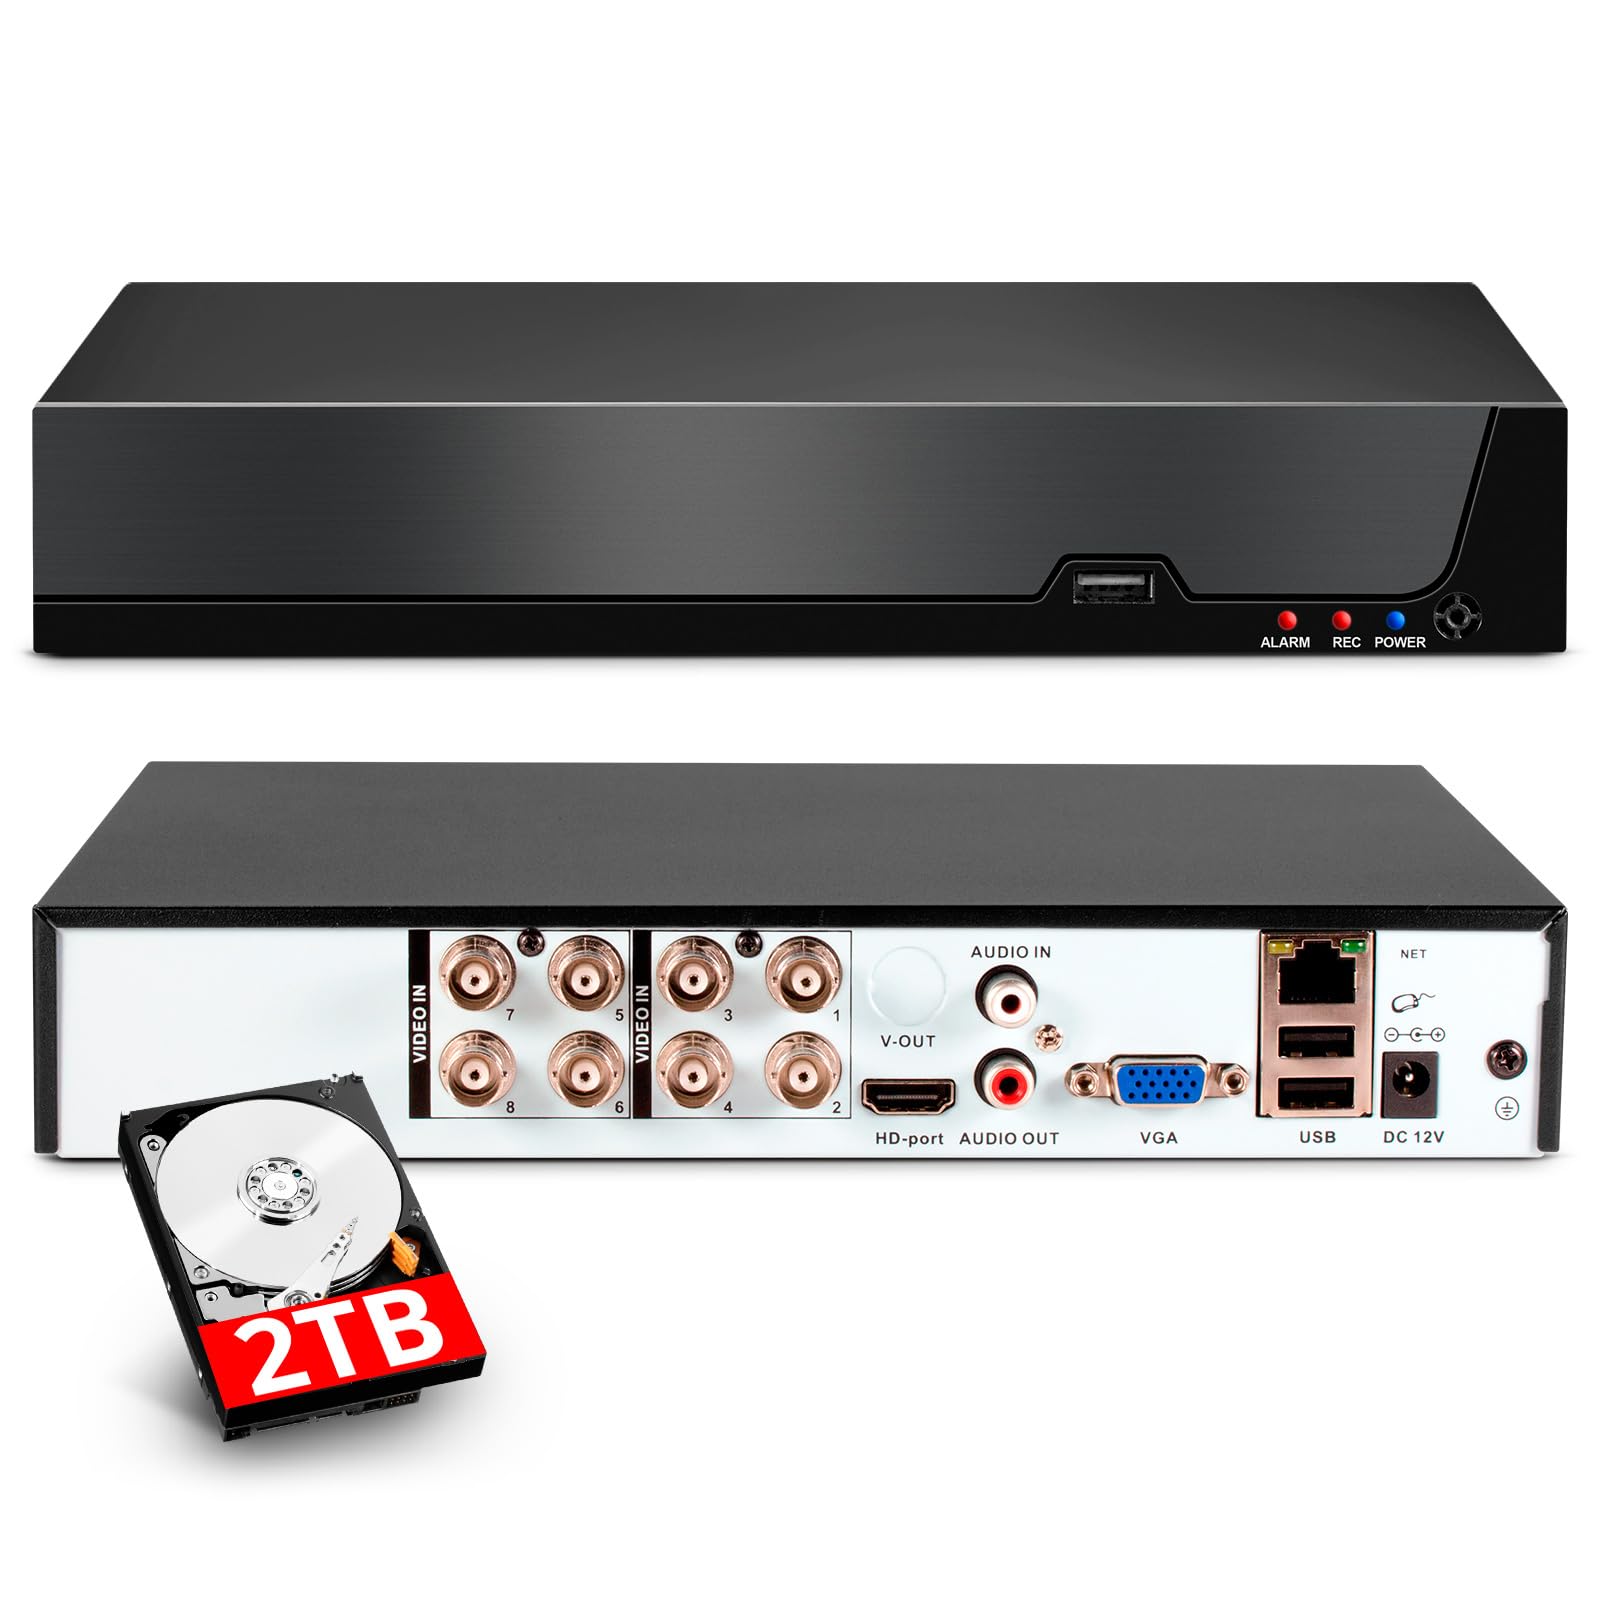
Image: Contents of the KERUI 8-Channel DVR box, showing the DVR unit with dimensions, a 1TB surveillance HDD, DVR power supply, USB mouse, and warning stickers.
Melite
1. Njikọ Mbụ
Before powering on the DVR, ensure all necessary connections are made.
- Jikọọ Igwefoto: Connect your security cameras to the appropriate video input ports (BNC connectors for Analog/AHD/TVI/CVI/XVI cameras, Ethernet for IP cameras). The DVR supports up to 8 channels for local cameras and additional IP channels depending on the configuration.
- Jikọọ Nyochaa: Use an HDMI or VGA cable to connect a monitor to the DVR's corresponding output port.
- Jikọọ òké: Plug the included USB mouse into one of the USB ports on the DVR.
- Njikọ netwọkụ (Nhọrọ): For remote access and network features, connect an Ethernet cable from the DVR's LAN port to your router or network switch.
- Njikọ ike: Connect the DVR power supply to the DC 12V input port on the DVR, then plug the power supply into an electrical outlet.

Image: Rear panel connections of the DVR, illustrating video inputs (AHD, CVI, XVI, CVBS, TVI, IP camera compatibility), HDMI output, audio input/output, VGA input, USB input, network input, and power input.
2. Mmalite Ike na Nhazi
Once all connections are secure, power on the DVR. The system will boot up and display the live view on the connected monitor. Follow the on-screen prompts for initial setup, which may include setting a password, date/time, and network settings.
Ntuziaka ọrụ
1. Video Compression (H.265+)
The DVR utilizes advanced H.265+ video compression technology. This standard significantly improves compression ratios compared to H.264, resulting in longer recording times and up to 80% storage savings. It also enhances image quality and provides a smoother viewahụmahụ.

Image: Visual comparison demonstrating the efficiency of H.265+ compression, showing reduced storage space and improved bandwidth compared to H.264.
2. Smart Motion Detection and Alerts
The DVR features intelligent motion detection and human/face detection capabilities. When abnormal activity is detected, the system can automatically trigger an alarm and send real-time notifications via email or mobile app. This allows you to monitor your property's security immediately, regardless of your location.

Foto: Ofeview of AI Human & Face Detection, showing real-time alerts via app push and email, with remote viewing options on mobile phones and computers.
3. Remote Access and Playback
The DVR supports remote access, allowing you to view live surveillance footage and play back recorded videos from anywhere with an internet connection. This can be done through mobile phones, computers, and other devices using the dedicated application (XMEye and Icsee) or PC software (VMS).

Image: Remote access and playback feature, showing live and recorded footage accessible via the internet, even without a constant internet connection for local recording.
4. Switching DVR Mode
The DVR supports various channel configurations to accommodate different camera types and quantities. You can switch the DVR mode through the system settings to match your camera setup.
Video: This video demonstrates how to switch the DVR mode to support different camera configurations (e.g., 8 XVI, AHD, TVI, CVI, CVBS, 4 1080P, or 16 5MP IP cameras).
5. Disabling Hard Disk Storage Reminder
If you wish to disable the hard disk storage reminder, follow the steps shown in the video below. This can be useful in specific scenarios where continuous reminders are not desired.
Video: This video illustrates the process of canceling the hard disk storage reminder on the DVR interface.
Nlekọta
To ensure the longevity and optimal performance of your KERUI DVR, consider the following maintenance tips:
- Nhicha mgbe niile: Keep the DVR unit free from dust and debris. Use a soft, dry cloth for cleaning. Ensure ventilation openings are not blocked.
- Mmelite femụwe: Lelee nke onye nrụpụta oge ụfọdụ website for firmware updates. Updates can improve performance, add features, and enhance security.
- Ndabere data: Na-echekwa ihe ndị dị mkpa e dekọrọ mgbe niiletage gaa na ngwaọrụ nchekwa mpụga iji gbochie mfu data.
- Ọnọdụ gburugburu: Operate the DVR within recommended temperature and humidity ranges to prevent damage.
Nchọpụta nsogbu
If you encounter issues with your DVR, refer to the following common troubleshooting steps:
- Enweghị mmepụta vidiyo: Check HDMI/VGA cable connections to the monitor and DVR. Ensure the monitor is set to the correct input source.
- Igwefoto anaghị egosi: Verify that cameras are properly connected and powered. Check camera compatibility with the DVR's current mode (refer to 'Switching DVR Mode' section).
- Enweghị ndekọ: Ensure the hard drive is correctly installed and initialized. Check recording schedules and settings.
- Okwu nnweta tere aka: Verify network cable connection and router settings. Ensure the mobile app or PC software is correctly configured and the DVR has internet access.
- Sistemụ oyi/anaghị anabata: Try restarting the DVR. If the issue persists, consider performing a factory reset (note: this will erase settings).
For more complex issues, contact customer support.
Nkọwapụta
| Njirimara | Nkọwapụta |
|---|---|
| Ụdị | KERUI |
| Nọmba nlereanya | A6208 |
| Akụkụ ngwaahịa | 19 x 4 x 19 cm; 1.1 n'arọ |
| Mkpebi ịse vidiyo | 1080p (supports up to 5MP Lite) |
| Ọnụọgụ nke ọwa | 8 |
| Ike Nchekwa ebe nchekwa | 2 TB (Integrated Hard Drive) |
| Teknụzụ Njikọta | HDMI, USB, VGA |
| Atụmatụ pụrụ iche | Two-way audio, High-efficiency video encoding (H.265+), App control, Video recording, Smart playback, Motion detection, Human detection |
| Ngwa dakọtara | Supports 4* 5M-N@20fps, 4* 4MN@30fps, 4* 1080P@25fps cameras. Compatible with XVI, AHD, TVI, CVI, CVBS, IP cameras. |
| Eji akwadoro | N'èzí, ime ụlọ |
Akwụkwọ ikike na nkwado
For warranty information, please refer to the product packaging or contact your retailer. For technical support, product inquiries, or further assistance, please visit the official KERUI websaịtị ma ọ bụ kpọtụrụ ngalaba ọrụ ndị ahịa ha. Debe akwụkwọ nnata ịzụrụ maka akwụkwọ ikike.


