1. Okwu mmalite
Thank you for choosing the GAOMON Full Size Bed Frame. This bed frame is designed for comfort and convenience, featuring an ergonomic upholstered headboard, an integrated charging station, and ample storage options. This manual provides essential information for safe assembly, operation, and maintenance of your new bed frame.
2. Ozi nchekwa
Biko gụọ ntuziaka niile nke ọma tupu mgbakọ na iji. Debe akwụkwọ ntuziaka a maka ntụnye aka n'ọdịnihu.
- Ịkpachara anya: This bed frame contains metal components with potentially sharp edges. Exercise care during assembly and handling to prevent injury.
- Ensure all bolts and screws are securely tightened before use. Periodically check and retighten as necessary.
- Ekwela ka ibu arọ gị gafere kilogram 1000 dịka akwadoro.
- Mee ka ụmụaka ghara ịnọ n'ebe mgbakọ ahụ. Obere akụkụ nwere ike ibute ihe egwu nkpagbu.
- Jiri naanị ngwaike enyere maka mgbakọ.
- Place the bed frame on a flat, level surface.
- For the integrated charging station, ensure it is connected to a properly grounded electrical outlet. Do not overload the outlets.
3. Ihe ngwugwu
Nyochaa na akụrụngwa niile dị tupu ịmalite mgbakọ. Ọ bụrụ na akụkụ ọ bụla na-efu ma ọ bụ mebie, kpọtụrụ nkwado ndị ahịa.
| Akụkụ | Nkọwa | Ọnụọgụ |
|---|---|---|
| A | Headboard Panel (Upholstered) | 1 |
| B | Headboard Frame (Left) | 1 |
| C | Headboard Frame (Right) | 1 |
| D | Boardkwụ | 1 |
| E | Ụgbọ okporo ígwè dị n'akụkụ | 2 |
| F | Ihe ndina | (iche) |
| G | Ụkwụ Nkwado Ebe etiti | (iche) |
| H | Ngalaba Ọdụ Nchaji | 1 |
| I | Ngwugwu ngwaike (Bọltị, skru, Allen Key) | 1 |
4. Ntọala na Mgbakọ Ntuziaka
Assembly typically requires one person and takes approximately 30 minutes. Follow the numbered steps and diagrams provided in your physical instruction manual. A single Allen key is included for most assembly steps.
Nzọụkwụ 1: Kwadebe Mpaghara
Unpack all components and lay them out on a clean, soft surface to prevent scratches. Identify all parts using the package contents list.

Foto: Ofeview of the GAOMON Full Size Bed Frame with key dimensions (75.2"L x 53.9"W x 43.3"H) and a recommended mattress thickness of 10"-12". The frame has a weight capacity of 1000 lbs.
Nzọụkwụ nke 2: chịkọta Isi oche ahụ
Attach the upholstered headboard panel (A) to the headboard frame components (B and C) using the designated bolts. Ensure the ergonomic angle is facing the correct direction for comfort.

Foto: nso nso view of the ergonomic headboard, showing its cushioned design and the integrated storage shelf behind it. The headboard is angled at 95 degrees for comfortable support.
Step 3: Install the Charging Station
Secure the charging station unit (H) into the designated slot on the headboard. Connect any internal wiring as instructed in the detailed manual.

Image: Detail of the built-in charging station located on the headboard, featuring 1 Type-C port (5V/2A), 1 USB port (5V/2A), and 2 AC outlets (120V/12A).
Step 4: Attach Side Rails and Footboard
Connect the side rails (E) to the assembled headboard and the footboard (D) using the provided hardware. Ensure all connections are firm.
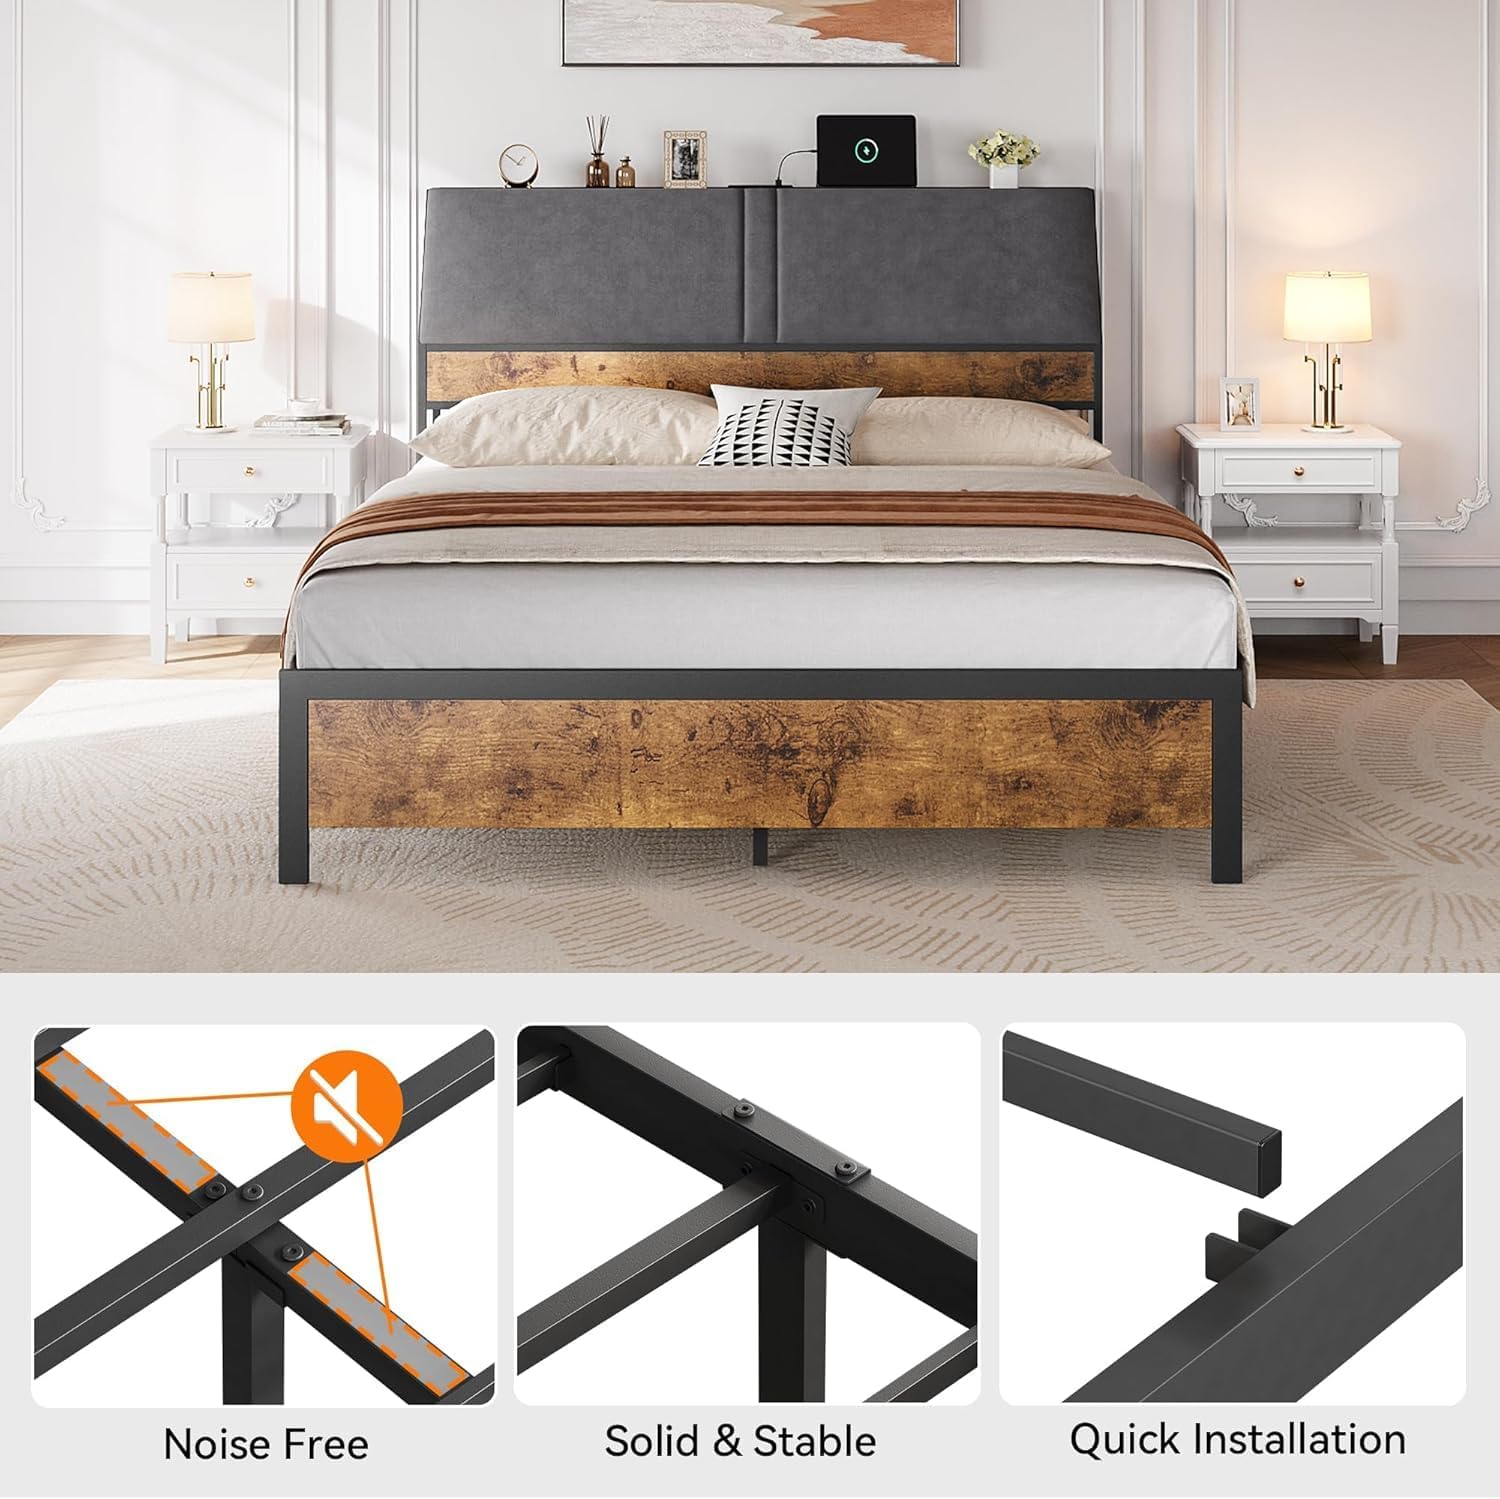
Image: Illustrates key features of the bed frame's construction, including noise-free design with stabilizers, solid and stable connections, and quick installation mechanism.
Step 5: Install Bed Slats and Support Legs
Place the bed slats (F) across the side rails and secure them according to the instructions. Attach the center support legs (G) to the frame for added stability.

Image: Close-up showing the quick installation mechanism where frame components slide and lock into place.

Image: Close-up illustrating the solid and stable connection points of the bed frame, secured with screws.
Nzọụkwụ 6: Nyocha ikpeazụ
Ensure all bolts are tightened and the frame is stable. Place your mattress on the slats. The bed frame provides 10.2 inches of under-bed clearance for storage.

Image: Shows the 10.2-inch under-bed clearance, suitable for storing items in bins or boxes.
5. Operating Instructions (Charging Station)
Ebe a na-etinye chaja na-enye ohere ike dị mfe maka ngwaọrụ eletrọniki gị.
- Njikọ ike: Plug the power cord from the charging station into a standard, grounded 120V AC wall outlet.
- USB/Type-C Charging: Use the 5V/2A USB and Type-C ports to charge compatible smartphones, tablets, and other USB-powered devices.
- Ụlọ ahịa AC: The two 120V/12A AC outlets can power small appliances or charge laptops. Do not exceed the maximum wattage for the outlets.
- Nchekwa: Avoid spilling liquids on the charging station. Disconnect from power when not in use or during electrical storms.
6. Nlekọta
- Nhicha: Jiri ihe dị nro hichaa elu ígwè, damp cloth. For the upholstered headboard, use a fabric cleaner suitable for the material, testing on an inconspicuous area first.
- Nyochaa ngwaike: Periodically (e.g., every 3-6 months) inspect all bolts and screws to ensure they remain tight. Retighten as needed to maintain stability and prevent squeaking.
- Ụlọ nchaji: Keep the charging ports free of dust and debris. Do not attempt to disassemble the charging unit.
7. Nchọpụta nsogbu
| Nsogbu | Ihe nwere ike ime | Ngwọta |
|---|---|---|
| Ihe ndina na-ama jijiji ma ọ bụ na-ama jijiji. | ngwaike rụrụ arụ. | Lelee ma sie ike na skru niile. Hụ na akwa ahụ dị n'elu larịị. |
| Ọdụ chaja anaghị arụ ọrụ. | A naghị etinye ya; ike gitage; ngwaọrụ nwere nsogbu. | Ensure the power cord is securely plugged into a working wall outlet. Test with a different device. Check household circuit breaker. |
| Akụkụ adịghị adaba n'oge mgbakọ. | Incorrect orientation; wrong parts. | Review the assembly diagrams carefully. Ensure parts are oriented correctly. Verify part numbers against the package contents. |
8. Nkọwapụta
- Nọmba nlereanya: ZMS0623ya87
- Nha: Juputara
- Akụkụ ngwaahịa: 75.2"L x 53.9"W x 43.3"H
- Ihe: Metal frame, Fabric-covered Headboard
- Agba: Rustic Brown
- Ike ibu: 1000 n'arọ
- Mwepu n'okpuru akwa: 10.2 sentimita asatọ
- Ụlọ nchaji: 1x USB (5V/2A), 1x Type-C (5V/2A), 2x AC Outlets (120V/12A)
- Mgbakọ achọrọ: Yes (One-tool assembly)
- Ibu ihe: 71.4 pound
9. Akwụkwọ ikike na nkwado
GAOMON provides a limited warranty for this product. For detailed warranty information, please refer to the warranty card included with your purchase or visit the official GAOMON website. For technical support, missing parts, or any other inquiries, please contact GAOMON customer service through the retailer where the product was purchased or via the contact information provided on the GAOMON websaịtị.
Nkwado ndị ahịa: Biko lee akwụkwọ ịzụrụ ihe gị maka nkọwa kọntaktị kpọmkwem.


