1. Okwu mmalite
This manual provides essential instructions for setting up, operating, and maintaining your CONSUMER CELLULAR Iris Connect smartphone. The Iris Connect is designed for reliable performance, featuring a 6.5-inch display, 32GB of storage, and running on Android 13. Please read this manual thoroughly to ensure proper use and to maximize your device's capabilities.
2. Kedu ihe dị na Igbe ahụ
Upon unboxing your CONSUMER CELLULAR Iris Connect, verify that all the following items are included:
- CONSUMER CELLULAR Iris Connect Smartphone
- eriri USB
- Ntuziaka mmalite ngwa ngwa
3. Ngwaọrụ gafereview
Familiarize yourself with the physical components of your Iris Connect smartphone.

Foto 3.1: Ihu na azụ view of the Iris Connect smartphone, highlighting its sleek design and camera placement.

Foto 3.2: N'ihu view of the Iris Connect, showcasing the 6.5-inch display and front-facing camera.
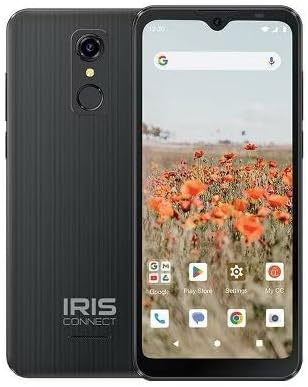
Foto 3.3: Azu view of the Iris Connect, showing the main camera, flash, and fingerprint sensor.
Isi ihe:
- Ngosipụta 6.5-inch: High Definition+ screen for clear visuals.
- Igwefoto n'ihu (8MP): Located at the top of the display for selfies and video calls.
- Main Camera (13MP): Located on the rear, for high-resolution photos and videos.
- Mkpisiaka nyocha: Integrated on the rear for secure unlocking.
- Bọtịnụ ike: Typically on the right side, used to turn the device on/off or wake/sleep the screen.
- Bọtịnụ olu: Adjacent to the power button, for adjusting audio levels.
- Ọdụ USB-C: N'okpuru, maka ịchaji na nnyefe data.
- Jack Audio: 3.5mm Maka ijikọ ekweisi.
4. Nhazi
4.1. Inserting SIM Card and MicroSD Card
- Chọta tray SIM dị n'akụkụ ngwaọrụ gị.
- Insert the SIM ejector tool (not included, use a thin paperclip) into the small hole next to the tray and press gently until the tray pops out.
- Place your Nano-SIM card(s) into the designated slots with the gold contacts facing down.
- If desired, insert a microSD card (up to 256GB) into its dedicated slot for expanded storage.
- Jiri nlezianya tinyegharịa traị ahụ n'ime ngwaọrụ ahụ ruo mgbe ọ pịrị na ya.
4.2. Ọkachamara Mmalite na Ntọlite
- Pịa ma jide bọtịnụ ike ruo mgbe ihuenyo na-enwu.
- Soro ntuziaka dị na ihuenyo iji họrọ asụsụ gị, jikọọ na netwọk Wi-Fi, ma hazie akaụntụ Google gị.
- You may be prompted to transfer data from an old device or set up security features like the fingerprint scanner.
4.3. Ịchaji ngwaọrụ
Before first use, it is recommended to fully charge your device. The Iris Connect features a 3500 mAh battery with an approximate charging time of 2.5 hours.
- Connect the USB cable to the USB-C port at the bottom of your phone.
- Connect the other end of the USB cable to a compatible power adapter (not included) and plug it into a wall outlet.
- Ihe ngosi nchaji ga-apụta na ihuenyo.
5. Ntuziaka ọrụ
5.1. Nsoro ụzọ
- Metụ: Kpatụ akara ka imepe ngwa ma ọ bụ họrọ otu ihe.
- Mịpụta: Dọrọ mkpịsị aka gị gafee ihuenyo ahụ iji pịgharịa ma ọ bụ gaa n'etiti ihuenyo.
- Tuo: Jiri mkpịsị aka abụọ bugharịa ma ọ bụ pụta na foto na web ibe.
- Ihuenyo ụlọ: Ebe etiti maka ngwa na wijetị gị.
- Drawer ngwa: Wepu site na ihuenyo ụlọ ka ị nweta ngwa niile arụnyere.
5.2. Ịkpọ oku
- Kpatụ ya Ekwentị akara ngosi na ihuenyo ụlọ gị ma ọ bụ drawer ngwa.
- Enter the phone number using the dial pad or select a contact from your address book.
- Kpatụ ya Kpọọ bọtịnụ ibido oku.
5.3. Izipu ozi
- Mepee Ozi ngwa.
- Kpatụ ya Malite nkata or Ozi ọhụrụ akara ngosi.
- Tinye nọmba onye nnata ma ọ bụ họrọ na kọntaktị, wee pịnye ozi gị.
- Kpatụ ya Ziga bọtịnụ.
5.4. Ijikọ na Wi-Fi
- Gaa na Ntọala > Netwọk & ịntanetị > Ịntanetị.
- Gbanwee Wi-Fi On.
- Họrọ netwọk Wi-Fi ịchọrọ site na ndepụta ahụ wee tinye paswọọdụ ma ọ bụrụ na ịchọrọ.
5.5. Njikọ Bluetooth
- Gaa na Ntọala > Ngwa ejikọrọ > Mmasị njikọ > Bluetooth.
- Gbanwee Bluetooth On.
- Họrọ Jikọta ngwaọrụ ọhụrụ and choose your desired device from the list. Follow any on-screen prompts to complete pairing.
5.6. Ojiji igwefoto
The Iris Connect features a 13MP main camera and an 8MP front-facing camera.
- Mepee Igwefoto ngwa.
- Kpatụ ya Ihe mkpuchi bọtịnụ ịse foto.
- Switch between photo and video modes, or front and rear cameras, using the on-screen icons.
5.7. Ihe nyocha mkpịsị aka mkpịsị aka
To set up the fingerprint scanner for secure unlocking:
- Gaa na Ntọala > Nchekwa & nzuzo > Kpọghe ngwaọrụ > Mkpịsị aka.
- Follow the on-screen instructions to register your fingerprint(s).
6. Nlekọta
6.1. Na-ehicha ngwaọrụ
To keep your device clean and functional:
- Jiri akwa dị nro na-enweghị lint hichapụ ihuenyo na ahụ.
- Zere iji kemịkalụ siri ike, ihe nchacha abrasive, ma ọ bụ aerosol sprays.
- Hụ na ọdụ ụgbọ mmiri enweghị uzuzu na ihe mkpofu.
6.2. Nlekọta batrị
To optimize your battery life (up to 26 hours of use):
- Zere oke okpomọkụ.
- Do not leave the device charging for extended periods after it's full.
- Adjust screen brightness and close unused apps to conserve power.
6.3. Mmelite ngwanrọ
Regularly check for software updates to ensure your device has the latest features and security patches:
- Gaa na Ntọala > Sistemu > Mmelite sistemụ.
- Soro ntuziaka ihuenyo ka ibudata ma wụnye mmelite ọ bụla dị.
7. Nchọpụta nsogbu
This section addresses common issues you might encounter with your Iris Connect smartphone.
- Ngwaọrụ anaghị agbanye: Gbaa mbọ hụ na agbagoro batrị. Jikọọ chaja wee chere nkeji ole na ole tupu ị nwaa ịgbanye ọzọ.
- Enweghị akara netwọk: Check if your SIM card is correctly inserted. Verify that Airplane Mode is off (swipe down from the top of the screen to check quick settings). Contact your service provider if the issue persists.
- Ngwa na-akụda ma ọ bụ na-ajụ oyi: Try restarting the app. If the issue continues, restart the phone. You may also clear the app's cache or data via Ntọala > Ngwa > [Aha ngwa] > Nchekwa & cache.
- Ịrụ ọrụ nwayọ: Close unused apps, clear cache, or consider uninstalling rarely used applications to free up storage.
- Unable to connect to Wi-Fi/Bluetooth: Ensure Wi-Fi/Bluetooth is enabled in settings. Try forgetting the network/device and reconnecting. Restart your phone and the router/Bluetooth device.
- Forgot screen lock password/pattern: If you have a Google account linked, you might be able to reset it. Otherwise, a factory reset may be necessary (this will erase all data).
For more complex issues, please refer to the official CONSUMER CELLULAR support resources or contact their customer service.
8. Nkọwapụta
Detailed technical specifications for the CONSUMER CELLULAR Iris Connect smartphone (Model: SH4650).
| Njirimara | Nkọwapụta |
|---|---|
| Aha Nlereanya | Njikọ Iris |
| Nọmba nlereanya | SH4650 |
| Sistemụ nrụọrụ | Android 13.0 |
| Ngosipụta nha | 6.5 sentimita asatọ |
| Ngosipụta mkpebi | 1440 x810 |
| Ụdị CPU | Snapdragon 710 |
| Ọsọ CPU | 2 GHz |
| Ogo etinyere ebe nchekwa RAM | 3 GB |
| Nchekwa nke ime | 32 GB |
| Nchekwa enwere ike ịgbasa | Ruo 256GB site na microSD |
| Igwefoto isi | 13 MP |
| Igwefoto ihu | 8 MP |
| Ike batrị | 3500 ndeamp Oge awa |
| Ogo ike batrị | 3600 (likely Wh or similar unit, as mAh is 3500) |
| Oge Nchaji | Awa 2.5 |
| Njikọta | 4G LTE, Bluetooth, Wi-Fi |
| Atụmatụ pụrụ iche | Dual Camera, Expandable Storage, Fingerprint Scanner, Long Battery Life |
| Jack ọdịyo | 3.5 millimita |
| Akụkụ | 8 x 6 x 3 sentimita asatọ |
| Ibu Ibu | 6.5 ounces |
9. Akwụkwọ ikike na nkwado
For information regarding your product's warranty, please refer to the warranty card included with your purchase or visit the official CONSUMER CELLULAR website. For technical assistance, troubleshooting beyond this manual, or customer service inquiries, please contact CONSUMER CELLULAR support directly.
CONSUMER CELLULAR Official Websaịtị: www.consumercellular.com


