Okwu mmalite
This manual provides instructions for the KICKER K-Series RCA 6.0 Meter Bundle, which includes both 2-channel and 4-channel RCA interconnects. These cables are designed to deliver high-quality audio signal transmission for various audio systems, including car stereos and home theater setups. Please read this manual thoroughly before installation and use to ensure proper performance and longevity of your cables.
Ngwaahịa gafereview
The KICKER K-Series RCA 6.0 Meter Bundle consists of two primary components:
- Kicker 46KI46 K-Series 4-Channel RCA Interconnect (6.0 Meter): This cable is designed for systems requiring four audio channels, typically for front and rear speaker connections or multi-channel ampNtinye lifier.
- Kicker 46KI26 K-Series 2-Channel RCA Interconnect (6.0 Meter): This cable is suitable for stereo audio connections, such as connecting a head unit to a 2-channel amplifier or a subwoofer ampna -emegharị ihe.
Both interconnects feature:
- Silver-Tinned OFC Wire: Oxygen-Free Copper (OFC) wire with silver-tinning ensures superior signal clarity and bass response.
- Split-Pin RCAs: These connectors provide a secure and reliable connection, minimizing signal loss.
- K-Grip Dual-Mold Connectors: Designed for slip-free installation and a firm grip.
- Ultra-Slim Union: Facilitates snag-free cable routing, especially in confined spaces.

Image: The KICKER K-Series RCA 6.0 Meter Bundle, featuring both the 2-channel and 4-channel interconnects coiled together, showcasing their blue and gray color scheme and K-Grip connectors.
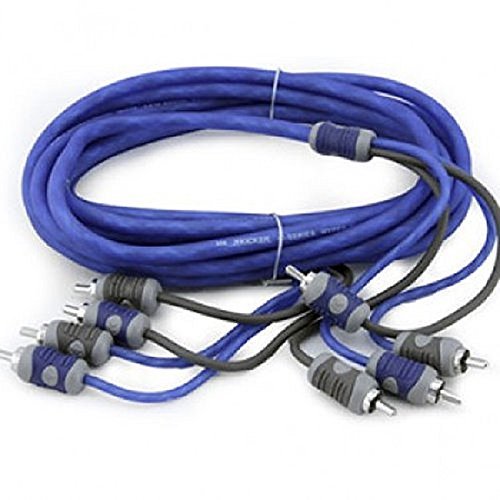
Foto: A nso nso view of the K-Grip dual-mold RCA connectors, highlighting their design for secure and easy handling.
Ntọala na nwụnye
Before beginning installation, ensure all audio components (head unit, amplifier, etc.) are powered off and disconnected from their power sources to prevent damage.
1. Nlebanya mbụ etinyere
- Verify the length of the cables (6.0 meters) is sufficient for your installation path.
- Identify the input and output RCA ports on your audio components. Typically, red connectors are for the right channel and white/black connectors are for the left channel.
- Plan your cable routing to avoid interference from power cables, which can introduce noise.
2. Connecting the 2-Channel RCA Interconnect (Kicker 46KI26)
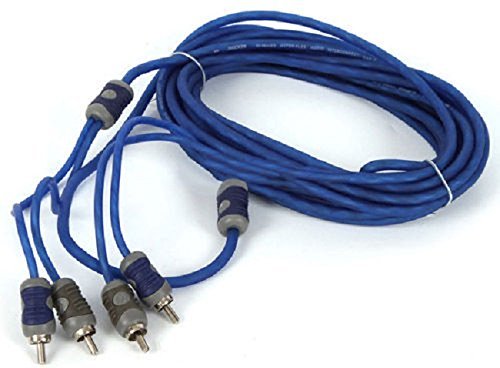
Image: The KICKER K-Series 2-Channel RCA Interconnect (model 46KI26) uncoiled, showing its two blue cables and K-Grip connectors.
- Connect one end of the 2-channel RCA cable to the audio output ports of your source unit (e.g., head unit, CD player). Ensure the red connector goes to the right channel output and the white/black connector goes to the left channel output.
- Route the cable carefully to your amplifier or next audio component, avoiding sharp bends or kinks.
- Connect the other end of the 2-channel RCA cable to the corresponding input ports on your amplifier or audio processor. Match the red and white/black connectors to the correct input channels.
3. Connecting the 4-Channel RCA Interconnect (Kicker 46KI46)
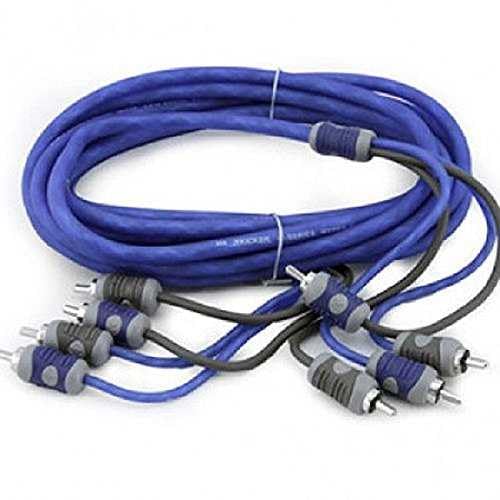
Image: The KICKER K-Series 4-Channel RCA Interconnect (model 46KI46) uncoiled, showing its four blue cables and K-Grip connectors.
- Connect one end of the 4-channel RCA cable to the audio output ports of your source unit (e.g., front and rear outputs of a head unit). Typically, two pairs for front left/right and rear left/right.
- Route the cable carefully to your multi-channel amplifier or audio processor.
- Connect the other end of the 4-channel RCA cable to the corresponding input ports on your amplifier. Ensure correct channel matching (e.g., front left output to front left input).
4. USB Routing
When routing cables, especially in vehicles, it is crucial to:
- Keep RCA cables separate from power cables to minimize induced noise.
- Secure cables using cable ties or clips to prevent them from moving or getting pinched.
- Avoid routing cables near hot components or sharp edges.
- Utilize the ultra-slim union feature of the K-Grip connectors for easier routing through tight spaces.
Ntuziaka ọrụ
Once the KICKER K-Series RCA cables are correctly installed, they function as passive signal carriers. Their operation is directly tied to the audio components they connect.
- Ike Na Usoro: Always power on your source unit (e.g., head unit) first, then your amplifier(s). When powering off, reverse the sequence: amplifier(s) off first, then source unit. This helps prevent "thump" noises.
- Njikwa olu: Adjust volume levels through your source unit. Ensure amplifier gain settings are properly matched to the source unit's output to prevent distortion.
- Iguzosi Ike n'Ezi Ihe Mgbaàmà: The K-Series cables are designed for optimal signal transfer. If you experience unexpected noise or signal loss, refer to the troubleshooting section.
Nlekọta
Proper maintenance ensures the longevity and performance of your KICKER K-Series RCA cables.
- Nhicha: Periodically inspect the connectors for dust or debris. If necessary, gently clean the metal pins with a soft, dry cloth. Avoid using liquid cleaners directly on the connectors.
- Lelee njikọ: Occasionally check that all RCA connections are secure. Loose connections can lead to signal degradation or intermittent audio.
- Nyocha USB: Visually inspect the cable jackets for any signs of wear, cuts, or damage. Damaged cables should be replaced to maintain audio quality and safety.
- Nchekwa: If disconnecting the cables for storage, coil them loosely to prevent kinking. Store them in a clean, dry environment away from extreme temperatures.
Nchọpụta nsogbu
If you encounter issues with your audio system, consider the following troubleshooting steps related to your RCA cables:
| Nsogbu | Ihe nwere ike ime | Ngwọta |
|---|---|---|
| Enweghị mmepụta ọdịyo |
|
|
| Poor Audio Quality (Noise, Static, Hum) |
|
|
| Audio anaghị adịte aka |
|
|
Nkọwapụta
| Njirimara | Nkọwa |
|---|---|
| Ụdị | AKKỌ |
| Aha Nlereanya | kickerbdl250323-03 |
| Ngwa gụnyere | Kicker 46KI46 K-Series 4-Channel RCA Interconnect (6.0 Meter), Kicker 46KI26 K-Series 2-Channel RCA Interconnect (6.0 Meter) |
| Ogologo eriri USB | 6.0 Meters (19 feet, 8 inches) for each interconnect |
| Ụdị njikọ | RCA (Male-to-Male) |
| Ụdị USB | RCA Audio Interconnect |
| Ngwa waya | Silver-Tinned Oxygen-Free Copper (OFC) |
| Atụmatụ pụrụ iche | K-Grip dual-mold connectors, Split-pin RCAs, Ultra-slim union |
| Ngwa dakọtara | Car Stereo, Home Theater System, Audio Receiver, Amplifier, CD Player, Turntable, Equalizer, Speaker, Headphone, Microphone |
| Ibu Ibu | 1.32 Pound (mkpokọta ngwugwu) |
| Ojiji ime ime/n'èzí | Ime ụlọ |
Akwụkwọ ikike na nkwado
Ozi akwụkwọ ikike
The KICKER K-Series RCA 6.0 Meter Bundle is covered by a Akwụkwọ ikike nke onye nrụpụta afọ 1. This warranty covers defects in materials and workmanship under normal use. For specific terms and conditions, please refer to the official KICKER warranty documentation or contact KICKER customer service.
Nkwado ndị ahịa
For technical assistance, warranty claims, or further inquiries regarding your KICKER K-Series RCA cables, please contact KICKER customer support through their official website or authorized dealers. When contacting support, please have your product model name (kickerbdl250323-03) and proof of purchase available.