1. Okwu mmalite
This manual provides essential information for setting up, operating, maintaining, and troubleshooting your NIMO 15.6-inch FHD Business Laptop. Please read this guide thoroughly to ensure optimal performance and longevity of your device. Keep this manual for future reference.
2. Kedu ihe dị na Igbe ahụ
Chọpụta na ihe niile dị na nkwakọ ngwaahịa:
- 1 x Nimo N154 Laptop
- 1 x Type-C 65W PD Fast Charger
- Akwụkwọ ntuziaka onye ọrụ 1 x (akwụkwọ a)
- Windows 11 Home (pre-installed)
3. Ngwaahịa gafereview
Familiarize yourself with the components and ports of your NIMO laptop.
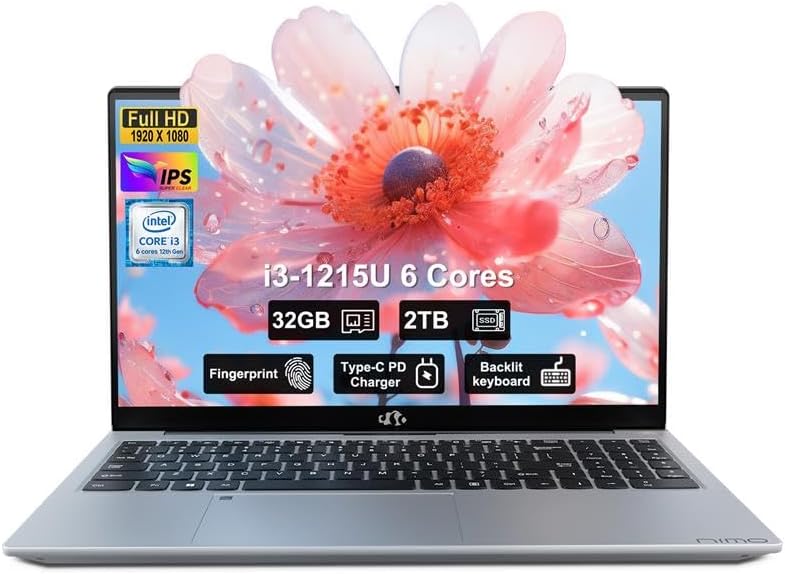
Foto: N'ihu view of the NIMO 15.6-inch FHD Business Laptop, showcasing ngosi na ahụigodo.
3.1. Ports na njikọ
The NIMO N154 laptop features a variety of ports for connecting peripherals and external devices.

Image: Diagram illustrating the various ports on the left and right sides of the NIMO laptop, including USB, HDMI, Type-C, and audio jack.
- Akụkụ akaekpe:
- Kensington Lock: For securing your laptop.
- Headphone Combo Jack: For audio output and microphone input.
- USB 3.0 Port (x2): For high-speed data transfer.
- USB 2.0 Port (x1): For connecting standard USB devices.
- Micro SD Card Reader: For expanding storage or transferring files site na kaadị ebe nchekwa.
- Akụkụ aka nri:
- Type-C Port (Charge Only): For connecting the 65W PD charger.
- USB 3.0 Port (x1): For high-speed data transfer.
- HDMI Port: For connecting to external displays.
- Type-C Port (Multifunction): Supports data transfer and display output.
- Charge LED Indicator: Shows charging status.
4. Nhazi
4.1. Agbanye na Nchaji mbụ
- Ịkwapu: Jiri nlezianya wepụ laptọọpụ na ngwa niile na nkwakọ ngwaahịa.
- Njikọ Ike: Plug the 65W Type-C PD Fast Charger into a power outlet and then connect the Type-C connector to the designated "Charge Only" Type-C port on the laptop.
- Nchaji batrị: Allow the laptop to charge for at least 30 minutes before initial use, or until the charge LED indicates a full charge.
- Ike Na: Open the laptop lid and press the power button, typically located on the top right of the keyboard or side.

Image: The 65W Type-C PD Fast Charger, illustrating its compact design and universal compatibility.
4.2. Windows 11 Setup
Follow the on-screen instructions to complete the Windows 11 initial setup:
- Họrọ mpaghara gị na nhazi ahụigodo gị.
- Jikọọ na netwọk Wi-Fi.
- Banye na akaụntụ Microsoft gị ma ọ bụ mepụta nke ọhụrụ.
- Tọọ PIN maka nbanye ngwa ngwa.
- Review and accept privacy settings.
5. Ntuziaka ọrụ
5.1. Onye Na-agụ Mkpisi Aka
The integrated fingerprint sensor allows for secure and quick login without passwords.
- Melite: Navigate to Windows Settings > Accounts > Sign-in options > Fingerprint recognition (Windows Hello).
- Enroll Fingerprint: Follow the on-screen prompts to register your fingerprint. You may need to scan your finger multiple times from different angles.
- Ojiji: To log in, simply place your registered finger on the fingerprint sensor when prompted.

Image: Close-up of the laptop's touchpad area showing the fingerprint reader, and a separate image of the webcam with a privacy shield.
5.2. Backlit Keyboard
The backlit keyboard enhances visibility in low-light conditions.
- Gbanwee ọkụ azụ: Use the dedicated function key (often Fn + Fx, where Fx is a key with a keyboard backlight icon) to cycle through backlight brightness levels or turn it off. Refer to your keyboard for the specific key combination.
5.3. Webcam Privacy Shield
The laptop includes a physical webcam privacy shield for enhanced security.
- Tinye/ gbanyụọ: Slide the physical switch located next to the webcam to cover or uncover the camera lens.
5.4. Connecting External Displays
You can extend your workspace by connecting an external monitor or projector.
- Jikọọ eriri: Use an HDMI cable to connect your external display to the laptop's HDMI port, or a compatible Type-C to DisplayPort/HDMI adapter for the multifunction Type-C port.
- Configure Display: Pịa Igodo Windows + P to open the Project menu. Select your preferred display mode (e.g., Duplicate, Extend, Second screen only).
6. Nlekọta
6.1. Na-ehicha laptọọpụ gị
- Ihuenyo: Jiri akwa dị nro na nke enweghị mmiri ọkụ dampjiri mmiri ma ọ bụ ihe nhicha ihuenyo kpuchie ya. Afesala mmiri mmiri ozugbo na ihuenyo.
- Ahụigodo na chassis: Jiri akwa dị nro ma kpọọ nkụ. Maka unyi isi ike, ntakịrị damp A pụrụ iji ákwà nwere ncha dị nro mee ihe, na-eme ka mmiri ghara ịbanye n'ime oghere.
- ọdụ ụgbọ mmiri: Jiri ikuku a na-eme ka ọ dị nro wepụ uzuzu n'ọdụ ụgbọ mmiri.
6.2. Nlekọta batrị
- Zere ịchaji batrị ugboro ugboro.
- Chekwaa laptọọpụ ahụ n'ebe dị jụụ ma kpọọ nkụ ma ọ bụrụ na ejighi ya ogologo oge.
- Ekwela ka laptọọpụ ahụ nọrọ n'ọnọdụ okpomọkụ dị oke njọ.
6.3. Mmelite ngwanrọ
- Regularly check for and install Windows updates to ensure system stability and security. Go to Settings > Windows Update.
- Keep device drivers updated for optimal performance.
7. Nchọpụta nsogbu
Akụkụ a na-ekwu maka nsogbu ndị ị nwere ike izute.
7.1. Laptọọpụ anaghị agba ọkụ
- Ensure the charger is securely connected to both the laptop and a working power outlet.
- Nyochaa na ntinye ọkụ na-arụ ọrụ site na nkwụnye na ngwaọrụ ọzọ.
- Allow the laptop to charge for at least 30 minutes if the battery is completely drained.
- Try a hard reset by holding the power button for 15-20 seconds.
7.2. Display Issues (No Image, Flickering)
- If an external monitor is connected, disconnect it to see if the laptop's screen works.
- Adjust screen brightness using the function keys (e.g., Fn + F5/F6).
- Malitegharịa ekwentị ahụ.
- If connected to an external display, ensure the cable is properly seated and try a different cable or port.
7.3. Wi-Fi Connectivity Problems
- Ensure Wi-Fi is enabled in Windows Settings > Network & Internet > Wi-Fi.
- Malitegharịa ekwentị gị na modem gị.
- Chezọ netwọk wee jikọọ ọzọ.
- Update your Wi-Fi drivers.
7.4. Ịrụ ngwa ngwa
- Mechie ngwa na-adịghị mkpa na-agba n'azụ.
- Lelee Task Manager (Ctrl+Shift+Esc) maka usoro ndị na-eri nnukwu CPU, RAM, ma ọ bụ ojiji diski.
- Hụ na ohere zuru oke na SSD gị.
- Run a disk cleanup and defragmentation (for HDD, though this is SSD).
- Nyochaa maka malware ma ọ bụ nje virus.
8. Nkọwapụta
Detailed technical specifications for the NIMO N154 Laptop.

Image: Diagram illustrating the Intel Core i3-1215U processor with details on cores, threads, power consumption, and Turbo Boost frequency.

Image: Visual representation of 32GB DDR4 RAM and 2TB PCIe 4.0 SSD, highlighting dual RAM channel capability.
| Njirimara | Nkọwapụta |
|---|---|
| Aha Nlereanya | NIMO N154 |
| Nha ihuenyo | 15.6 sentimita asatọ |
| Mkpebi ihuenyo | 1920 x 1080 Pixels (FHD IPS) |
| Nhazi | Intel Core i3-1215U (6-core, 8-thread, up to 4.4GHz) |
| RAM | 32 GB DDR4 (3200 MHz) |
| Nchekwa | 2 TB PCIe SSD |
| Ihe eserese eserese | Ihe eserese Intel agbakwunyere |
| Sistemụ nrụọrụ | Windows 11 Ụlọ |
| Ụdị ikuku | 802.11a/b/g/n/ac (Wi-Fi 6) |
| ọdụ ụgbọ mmiri USB | 2x USB 3.0, 1x USB 2.0, 2x Type-C (1x Charge Only, 1x Multifunction) |
| HDMI Port | 1 x HDMI 2.1 |
| Atụmatụ pụrụ iche | Backlit Keyboard, Fingerprint Reader, HD Audio, Memory Card Slot, Numeric Keypad, Webcam Privacy Shield |
| Ndụ batrị (Ọkara) | Awa 5 |
| Ibu Ibu | 3.8 pound |
| Akụkụ ngwaahịa (LxWxH) | 14.07 x 8.98 x 0.76 sentimita asatọ |
| Agba | Ọlaọcha |
9. Akwụkwọ ikike na nkwado
Nimo Direct Inc. is committed to customer satisfaction.
- Akwụkwọ ikike nke onye nrụpụta: Your NIMO laptop is covered by a comprehensive 2-Year Manufacturer's Warranty. This warranty covers defects in materials and workmanship under normal use.
- Iwu nloghachi: We offer 90-Day Hassle-Free Returns. If you are not satisfied with your purchase, you may return it within 90 days of receipt.
- Nkwado ndị ahịa: Our dedicated US support team is available to provide swift issue resolution or immediate replacements. For assistance, please refer to the contact information provided on the NIMO official websaịtị ma ọ bụ akwụkwọ ịzụrụ ihe.

Image: Illustration of NIMO's after-sales support, including partial US assembly, 90-day free returns, 2-year after-sales support, and 24/7 customer service.


