Ntuziaka Onye Ọrụ nke Nhazi Uzo OG 15 n'ime 1 nke Vega OG
Model: VHTH-37
Okwu mmalite
Welcome to the user manual for your new Vega OG 15 in 1 All Rounder Grooming Set. This comprehensive guide provides detailed instructions on how to set up, operate, maintain, and troubleshoot your grooming device. Please read this manual carefully before first use to ensure safe and optimal performance of your product. Keep this manual for future reference.
Ozi nchekwa
WARNING: To reduce the risk of electric shock, injury, or damage to the appliance, always follow these basic safety precautions.
- Debe ebe ụmụaka na-apụghị iru.
- Eminyela ngwa ahụ n'ime mmiri.
- Ensure the appliance is fully charged before first use.
- Jiri naanị eriri USB Type-C enyere maka ịchaji.
- Ejila ngwa ahụ ma ọ bụrụ na ọ mebiri ma ọ bụ na-adịghị arụ ọrụ.
- Avoid inserting the nose trimmer more than 6mm into your nostril or ear.
- Always turn off the appliance before cleaning or attaching/detaching accessories.
Ngwaahịa gafereview
Ngwa na atụmatụ
The Vega OG 15 in 1 All Rounder Grooming Set is designed for versatile grooming needs, featuring a robust set of attachments and advanced functionalities.
- Skin-Friendly & Washable Blades: Ceramic blade and unique curved stainless-steel blade for comfortable trimming. All blades are washable for hygiene.
- Ideal for All Hair Lengths: Dual-sided body shaver blades effectively trim hair of all lengths and textures.
- 7 Blade Attachments and 8 Combs: A wide range of attachments for various grooming needs, including facial hair, nose, body, and intimate parts.
- Ntọala Ogologo Ọtụtụ: Rotary knob for 40 length settings (0.5mm-20mm) and a dial comb for 6 length settings.
- 180 Mins Runtime & Type-C Charging: Offers 180 minutes of cordless operation with 180 minutes of charging time via Type-C USB.
- Mkpọchi njem: Na-egbochi ịgbalite na mberede n'oge njem.

Figure 1: The Vega OG 15 in 1 All Rounder Grooming Set, showcasing the main trimmer unit and its comprehensive array of 7 blade attachments and 8 comb guides for various grooming applications.

Figure 2: Detailed diagram illustrating the various face and body grooming attachments, including precision trimmer for moustache, face shaver, nose & ear hair trimmer, body groomer, ball trimmer, U blade, T blade, and their corresponding comb guides.

Ọgụgụ 3: Visual examples demonstrating the application of different blade attachments for beard trimming, mustache trimming, ear trimming, ball trimming, body trimming, and nose trimming.

Ọgụgụ 4: nso nso view of the rotary knob, highlighting the 40 precise length settings available for customized grooming.
Melite
Nchaji mbụ
Before using your Vega OG Grooming Set for the first time, ensure it is fully charged. Connect the provided Type-C USB cable to the trimmer and a suitable power source. The charging time is approximately 180 minutes for a full charge, providing up to 180 minutes of runtime.

Figure 5: Illustration showing the 180 minutes runtime and 180 minutes charging time of the long-lasting Li-ion battery.
Attaching Blades and Combs
To attach a blade or comb, align it with the trimmer head and gently press until it clicks into place. To remove, gently pull the attachment away from the trimmer head. Ensure the trimmer is switched off before changing attachments.
Ntuziaka ọrụ
Ọrụ izugbe
To turn the trimmer ON or OFF, press the power button located on the front of the device. The trimmer also features a travel lock to prevent accidental activation. Consult the device for specific travel lock activation/deactivation methods.
Trimming Beard/Moustache
- Gbaa mbọ hụ na agbachara trimmer ahụ nke ọma.
- Rotate the knob to set the desired comb height (0.5mm-20mm).
- Press the switch ON.
- Place the flat top of the trimmer comb against the skin and move it against the direction of hair growth.
- For defined beard/moustache lines, hold the personal groomer with the precision trimmer blade facing you. Start at the edge of the beard or moustache line and gently lower the trimmer blade onto your skin.
Using the Body Shaver Blade
- Attach the body shaver head onto the trimmer.
- Shave comfortably below the neck. The unique skin protector system guards sensitive body areas, allowing for a closeness of 0.5mm.
- Ndụmọdụ: Use one hand to stretch the skin while the other operates the shaver. This facilitates easier hair trimming.
Using Nose/Ear Hair Trimmer
- Attach the nose trimmer attachment.
- Gently insert the groomer into the nostril or ear.
- Ndụmọdụ: Avoid inserting the unit more than 6mm into your nostril or ear. Gently move the groomer around the nostril or ear to trim hair.
Using the Face Shaver Blade
- Attach the face shaver attachment onto the trimmer.
- Shave comfortably on the face. The skin protector system guards sensitive facial areas, allowing for a closeness of 0.5mm.
Using the Ball Trimmer Blade
- Attach the ball trimmer attachment onto the trimmer.
- This trimmer features ceramic & stainless-steel blades with 1 adjustable comb (1mm, 2mm, 3mm, 4mm, 5mm, 6mm) for trimming intimate parts.
Ndụmọdụ mbelata
- Ọ bụrụ na ị na-akpachasị oge mbụ, jiri mbo ahụ mee ogologo nhazi ogologo oge iji gbochie mkpụcha ezighi ezi.
- Since hair does not grow in the same direction, try different trimming positions (upwards, downwards, or across) for optimum results.
- Be very careful when trimming without a comb.
- Use the trimmer without a comb for a fine trim look.
- Use the 1mm-10mm comb for a 3-day stubble look.
- Use the 11mm-20mm comb for a medium/long beard.
Nlekọta
Na-ehicha agụba
All blades of the Vega OG Grooming Set are washable. After each use, detach the blade head and rinse it under running water to remove hair and debris. Ensure the trimmer unit itself does not get wet unless specified as waterproof. Allow the blades to air dry completely before reattaching or storing.
Akara mmanu
To maintain optimal performance and extend blade life, it is recommended to periodically apply a small drop of lubricating oil (not included, typically light machine oil) to the blades after cleaning and drying. Turn the trimmer on for a few seconds to distribute the oil evenly.
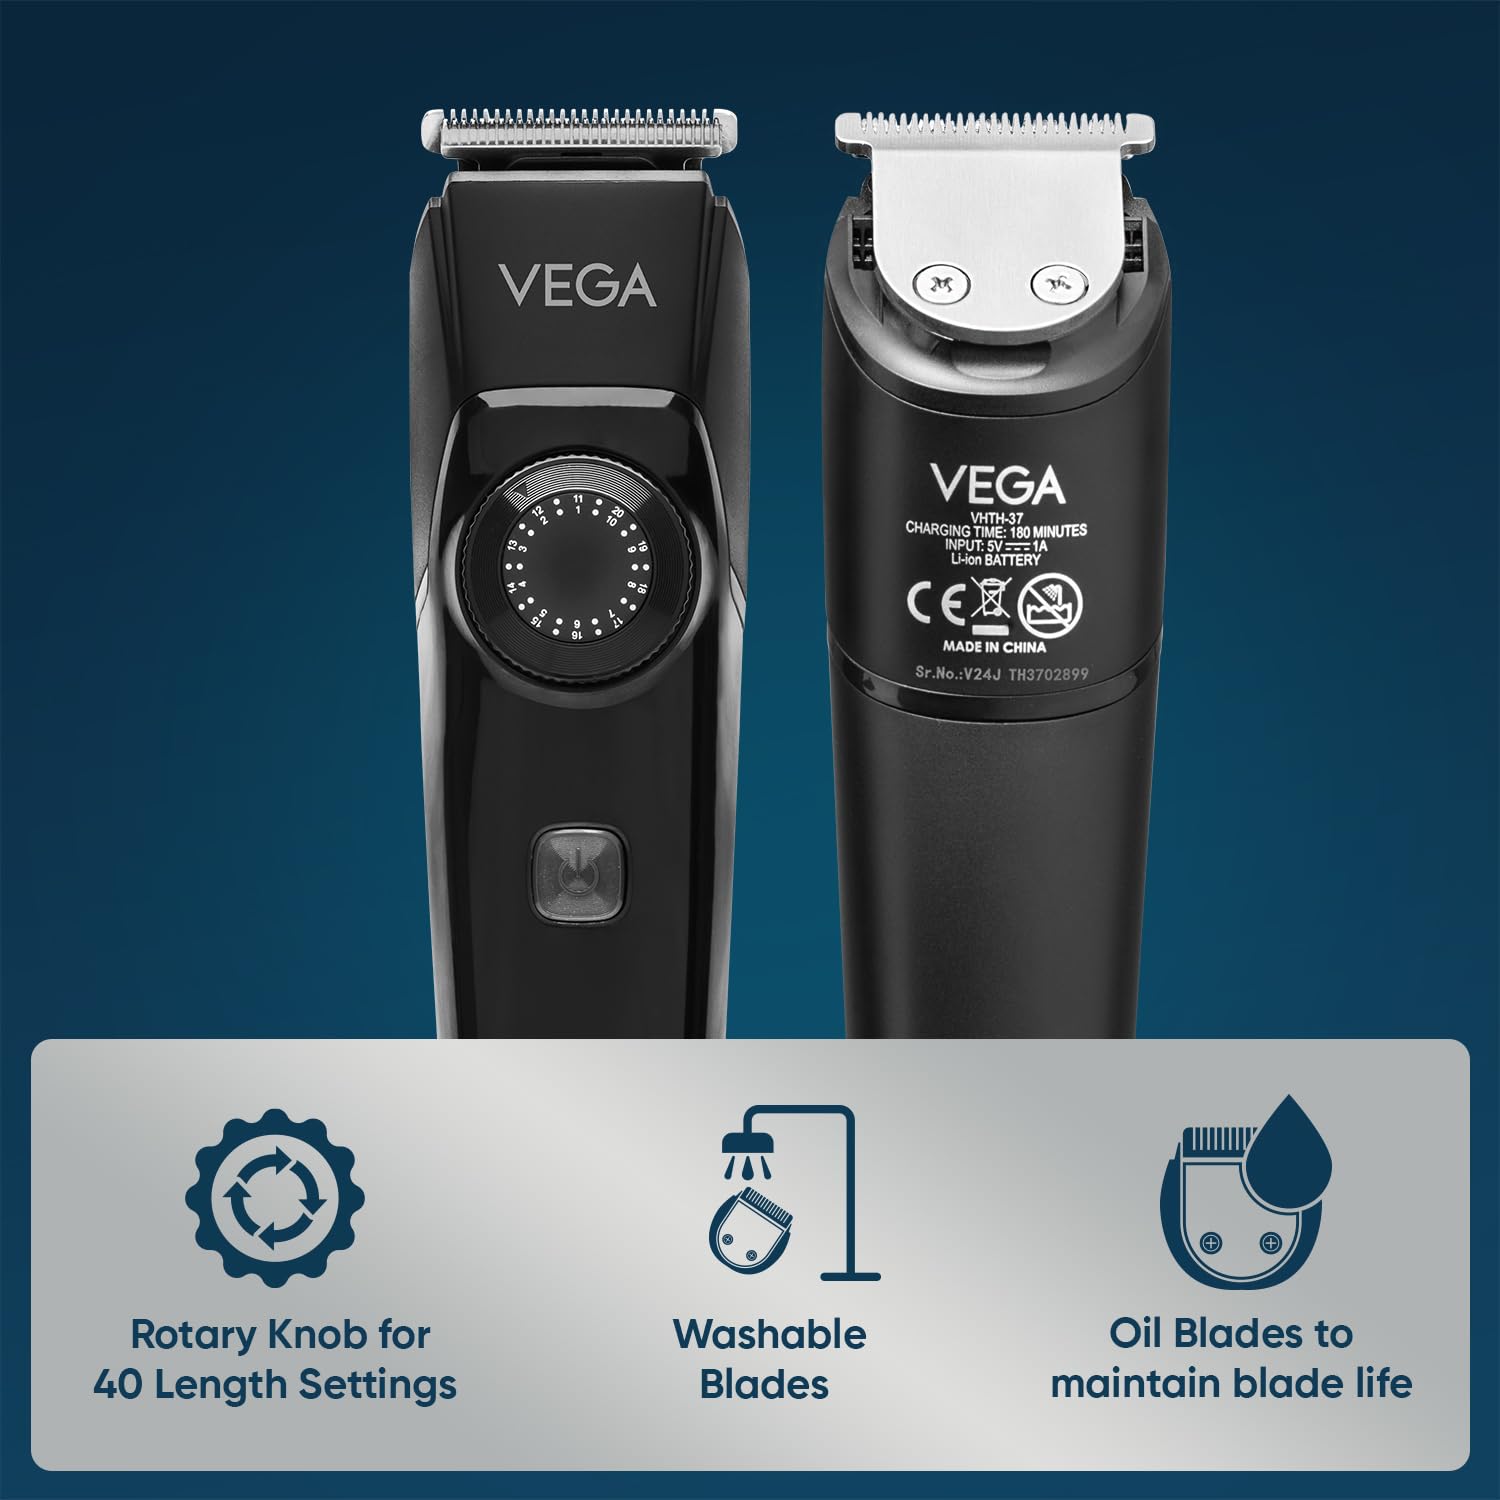
Figure 6: Illustration highlighting washable blades and the importance of oiling blades to maintain blade life.
Nchekwa
Store the grooming set and all its attachments in a cool, dry place, away from direct sunlight and moisture. Keep all components together to prevent loss.
Nchọpụta nsogbu
If you encounter any issues with your Vega OG Grooming Set, please refer to the following common problems and their solutions:
| Nsogbu | Ihe nwere ike ime | Ngwọta |
|---|---|---|
| Trimmer anaghị agbanye. | Battery is low or depleted. Travel lock is activated. | Charge the trimmer fully. Deactivate the travel lock. |
| Trimmer na-adọkpụ ntutu isi ma ọ bụ na-akpụ akpụ n'ụzọ na-adịghị mma. | Blades are dull or dirty. Attachment is not properly secured. Hair is too long. | Clean and oil the blades. Ensure the attachment is securely clicked into place. Trim longer hair with a higher comb setting first. |
| Charging indicator light is not working. | Charging cable or adapter issue. | Ensure the Type-C USB cable is properly connected to both the trimmer and the power source. Try a different compatible adapter. |
| Oke mkpọtụ n'oge arụ ọrụ. | Blades require lubrication. Debris caught in the blade mechanism. | Clean and oil the blades. Remove any trapped hair or debris. |
Nkọwapụta
| Njirimara | Nkọwa |
|---|---|
| Nọmba nlereanya | VHTH-37 |
| Isi Iyi Ike | Battery Powered (Li-ion) |
| Oge ịgba ọsọ | 180 nkeji |
| Oge Nchaji | 180 nkeji |
| Ihe agụba | Ceramic and Stainless Steel |
| Ntọala ogologo | 40 (Rotary Knob) + 6 (Dial Comb) |
| Akụkụ (L x W x H) | 16.6 x 4.2 x 4.2 cm |
| Ibu Ibu | 179 g |
| Mba onye si | China |
| Atụmatụ pụrụ iche | Detachable, Self-Cleaning, Travel Size, Charge Indicator Light, Multigroomer |
Akwụkwọ ikike na nkwado
Your Vega OG 15 in 1 All Rounder Grooming Set comes with a 2-afọ akwụkwọ ikike from the date of purchase, covering manufacturing defects. Please retain your purchase receipt as proof of warranty.
For any product-related queries, technical support, or warranty claims, please contact Vega Customer Care:
- Nlekọta ndị ahịa: +91 08069496949
- Onye mbubata: IMPORTED BY VEGA INDUSTRIES PRIVATE LIMITED, PLOT NO. 31, SECTOR-155, NOIDA-201310, U.P. (INDIA)
For more information, you may also visit the official VEGA store online.


