1. Okwu mmalite
This manual provides essential instructions for the safe and effective operation, setup, and maintenance of your YESWELDER MIG-185D PRO 185A Multi-Process Welder. This versatile 5-in-1 welding machine supports Flux Core MIG, Gas MIG, Spool Gun MIG, Lift TIG, and Stick (MMA) welding processes. Please read this manual thoroughly before use to ensure proper functionality and safety.
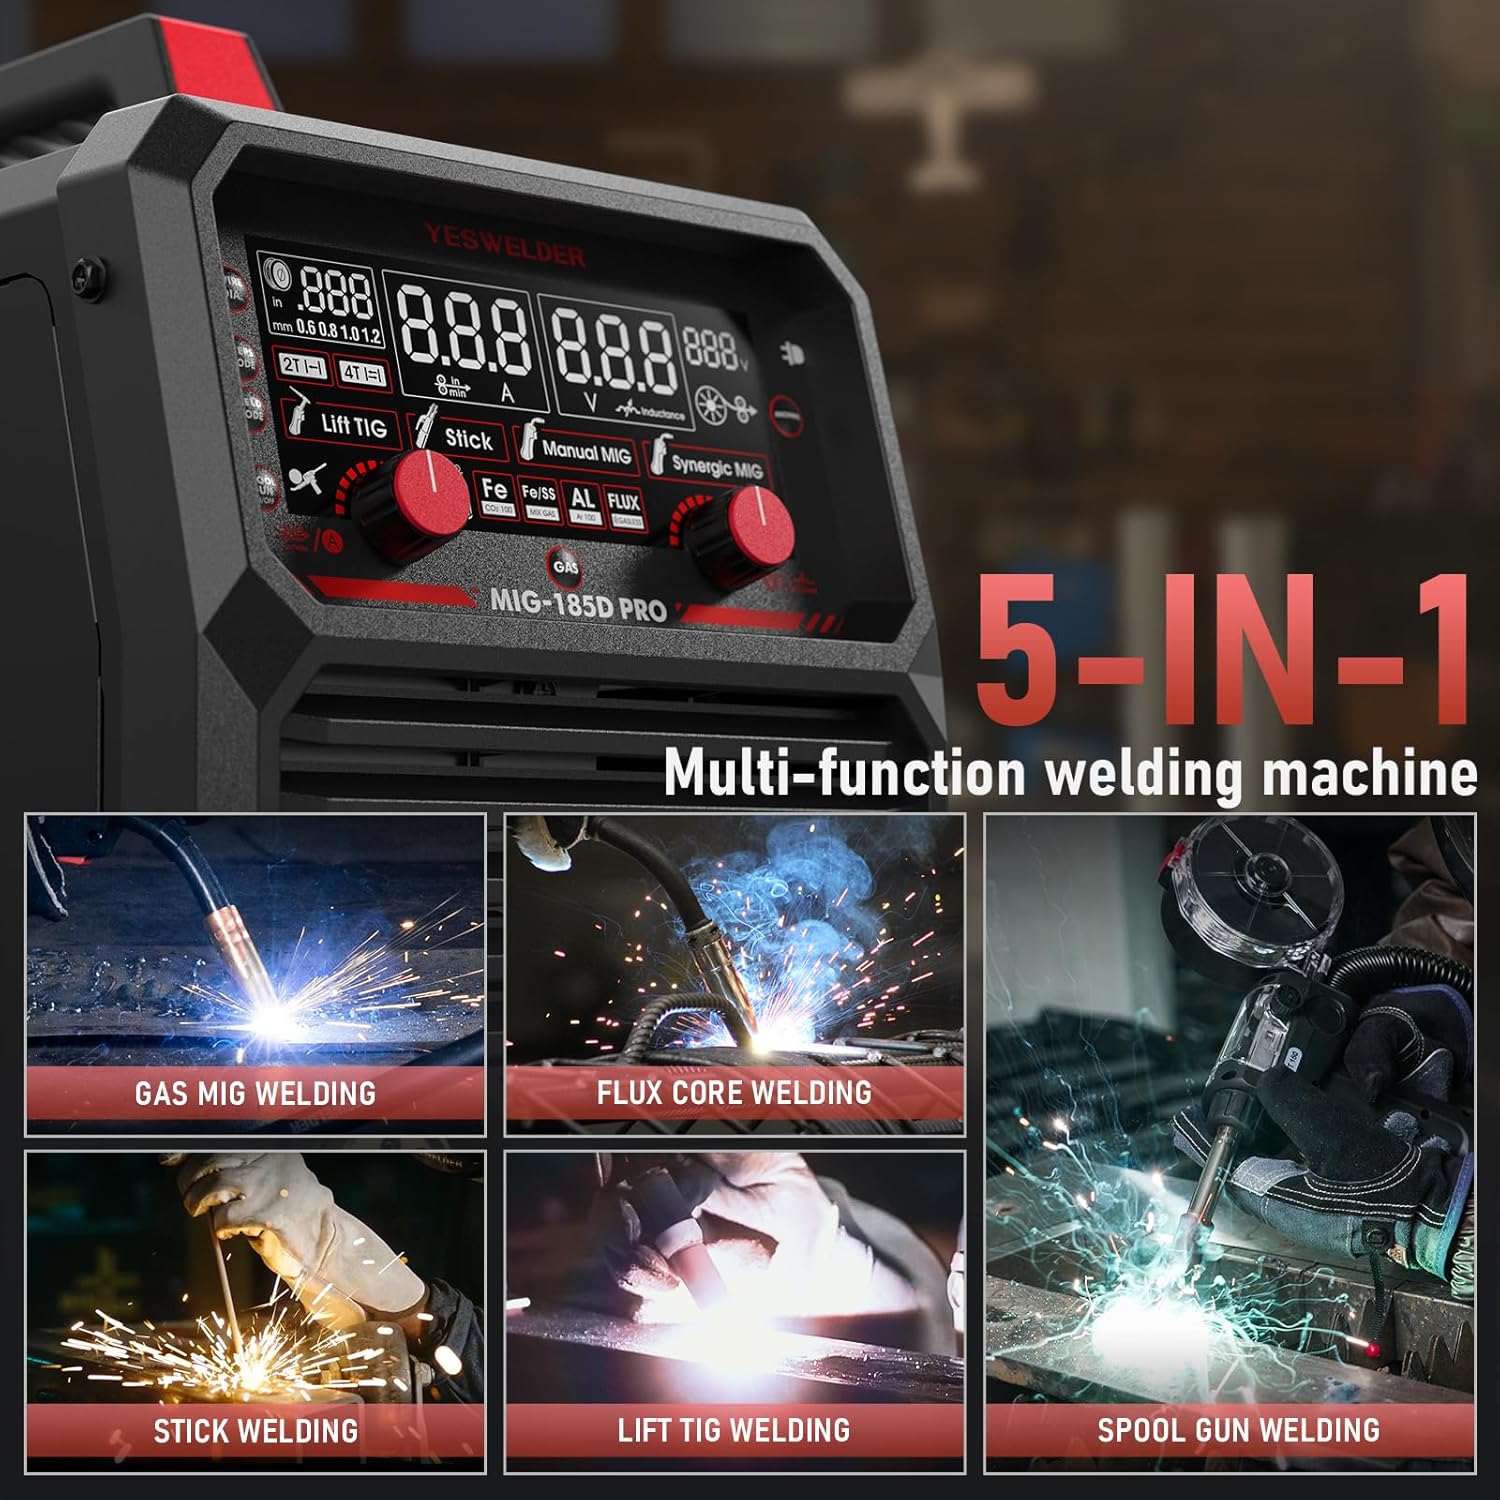
Image 1.1: The YESWELDER MIG-185D PRO is a versatile 5-in-1 multi-process welding machine.
2. Ozi nchekwa
Welding can be hazardous. Always follow safety precautions to prevent injury or damage. Keep this manual for future reference.
- Always wear appropriate personal protective equipment (PPE), including a welding helmet, gloves, and protective clothing.
- Hụ na ikuku na-eku ume nke ọma iji zere iku ume ọkụ ọkụ.
- Chebe ndị na-ekiri ihe na-emenụ site na ụzarị ọkụ na ọkụ eletrik.
- Gbanyụọ ike tupu ị rụzie ma ọ bụ gbanwee ihe ndị ọzọ.
- Do not operate the welder in damp ma ọ bụ ọnọdụ mmiri.
- Ensure the work area is free from flammable materials.
3. Ngwaahịa gafereview
3.1 Atụmatụ
- 5-in-1 Multi-Process Welding: Supports Flux Core MIG, Gas MIG, Spool Gun MIG, MMA (Stick), and Lift TIG welding.
- Aluminum MIG Welding Capability: Can perform aluminum welds, requiring an additional aluminum spool gun (sold separately).
- 185A Robust Power: Provides reliable and stable welding performance.
- Ndakọrịta waya: Works with 2LB/10LB welding wires of 0.6/0.8/1.0/1.2 mm.
- Synergic MIG Control: Automatically calibrates voltage to a recommended value when wire feed speed is adjusted, ideal for beginners.
- Manual MIG Control: Allows manual adjustment of wire feed speed and voltage for experienced users.
- Advanced Arc Welding Functions: Adjustable Hot Start, Arc Force, and Anti-Stick features.
- Digital Display & Portability: Advanced digital display for clear operation and a compact, 8.9 kg design with a carrying handle for easy transport.
- Nchekwa nchekwa emelitere: Includes automatic voltage fluctuation compensation, overcurrent, overload, and overheating protection. Features gas pre and post-flow control and 2T/4T switching mode.
3.2 Control Panel and Components
Familiarize yourself with the welder's control panel and included accessories.

Foto 3.1: Ofeview of the MIG-185D PRO control panel with numbered functions.

Image 3.2: Standard accessories included with the MIG-185D PRO welder.
4. Nhazi
4.1 Njikọ ike
Connect the welder to a suitable 230V power supply. Ensure the power source meets the welder's requirements as specified in the technical specifications.
4.2 Nwụnye waya
Install the appropriate welding wire (0.6/0.8/1.0/1.2 mm, 2LB or 10LB spool) for your chosen welding process. Ensure the wire is fed smoothly through the drive roller and liner to the torch.

Image 4.1: The welder is compatible with both 2LB and 10LB welding wire spools.
4.3 Gas Connection (for Gas MIG/Lift TIG)
For Gas MIG or Lift TIG welding, connect the gas hose from your shielding gas cylinder to the welder's gas inlet. Ensure all connections are secure and leak-free.
4.4 Spool Gun Setup (for Aluminum MIG)
To perform aluminum MIG welding, an additional aluminum spool gun is required (sold separately). Connect the spool gun according to its specific instructions and the welder's manual.

Image 4.2: The MIG-185D PRO is compatible with a spool gun for aluminum welding.
4.5 General Setup Diagrams

Image 4.3: Connection diagrams for various welding modes.
5. Ntuziaka ọrụ
5.1 Ngosipụta dijitalụ na njikwa
The MIG-185D PRO features an advanced digital display for clear parameter monitoring and adjustment.

Image 5.1: The intelligent digital screen display provides clear welding parameter feedback.
5.2 Selecting Welding Modes
Use the control panel to select your desired welding mode:
- Flux Core MIG: For gasless welding, suitable for outdoor use or when gas cylinders are impractical.
- MIG gas: For welding with shielding gas, providing cleaner welds and better penetration.
- Spool Gun MIG: Specifically for welding softer wires like aluminum, preventing wire feeding issues.
- ebuli TIG: For precise welding of thin materials, requires a separate Lift TIG torch.
- Stick (MMA): For welding with coated electrodes, suitable for various metals and conditions.

Image 5.2: The welder supports multiple welding processes.
5.3 Synergic vs. Manual MIG
The MIG-185D PRO offers both Synergic and Manual MIG control:
- MIG mmekọrịta: Adjusting the wire feed speed automatically sets the recommended voltage, simplifying setup for beginners.
- Manual MIG: Allows independent adjustment of wire feed speed and voltage, providing greater control for experienced welders.

Image 5.3: Manual MIG and Synergic MIG modes cater to different skill levels.
5.4 Advanced Arc Welding Functions
For Stick (MMA) welding, the following adjustable functions enhance performance:
- Mmalite dị ọkụ: Provides an initial boost of current to easily strike the arc.
- Arc Force: Prevents the electrode from sticking by increasing current when the arc length shortens.
- Anti-Stick: Reduces the current if the electrode sticks, allowing for easier removal.

Image 5.4: Advanced features like Hot Start, Arc Force, and Anti-Stick improve arc welding performance.
5.5 Welding Parameter Guide
Refer to the following table for recommended welding parameters based on material, wire type, and plate thickness.

Image 5.5: Comprehensive guide for setting welding parameters.
6. Nlekọta
Ndozi mgbe niile na-eme ka onye na-agbado ọkụ gị dị ogologo ndụ ma nwee ike ịrụ ọrụ nke ọma.
- Nhicha: Periodically clean the welder's exterior and internal components (with compressed air) to remove dust and debris. Ensure power is disconnected.
- Nyocha USB: Regularly inspect all cables, connections, and torches for wear, damage, or loose connections. Replace damaged parts immediately.
- Roller ụgbọala: Check the drive roller for wear and ensure it is clean and free of wire residue.
- Nozzle and Contact Tip: Clean or replace the MIG torch nozzle and contact tip as needed to maintain good arc performance.
7. Nchọpụta nsogbu
Ọ bụrụ na ị zutere nsogbu, rụtụ aka na usoro nchọpụta nsogbu ndị a na-emekarị:
- Enweghị ike: Check power cord connection, circuit breaker, and ensure the welder's power switch is on.
- No Arc: Verify work clamp connection, electrode/wire installation, and correct welding parameters. Ensure the torch trigger is functioning.
- Poor Weld Quality: Adjust wire feed speed, voltage, gas flow (if applicable), and ensure proper technique. Check for contaminated base metal or incorrect wire/electrode type.
- Nsogbu Nri Waya: Check drive roller tension, ensure the wire spool is installed correctly, and inspect the liner for blockages or kinks.
- Nchekwa oke ọkụ: If the welder stops due to overheating, allow it to cool down. Ensure adequate ventilation and avoid exceeding the duty cycle.
For persistent issues, contact YESWELDER customer support.
8. Nkọwapụta
Technical specifications for the YESWELDER MIG-185D PRO welder:
| Nkọwapụta | Uru |
|---|---|
| Onye nrụpụta | YESWELDER |
| Nọmba nlereanya | MIG-185D PRO |
| Akụkụ (Ngwugwu) | 46.5 x 38.5 x 34 cm |
| Ibu (Ngwugwu) | 14.63 n'arọ |
| Ụdị Ike | DC/AC |
| Ntinye Voltage | 230V |
| Mmepụta Max Ugbu A | 185A |
| Ọnọdụ jụrụ oyi | Fan jụrụ oyi |
| Ọkwa mkpuchi | F |
| Klas nchekwa | IP21S |
| Mba onye si | China |
9. Akwụkwọ ikike na nkwado
For warranty information, technical support, or spare parts inquiries, please refer to the official YESWELDER websaịtị ma ọ bụ kpọtụrụ ndị ahịa ha ozugbo. Debe nnata nzụta gị dị ka ihe akaebe nke ịzụrụ maka nkwupụta ikike.


