1. Okwu mmalite
This manual provides essential information for the safe and effective operation, maintenance, and troubleshooting of your HYCO PH65 Corded Electric Demolition Hammer. Please read this manual thoroughly before using the tool to ensure proper handling and to prevent injury or damage.
The HYCO PH65 is a heavy-duty demolition hammer designed for breaking concrete, masonry, and rubble. It features a powerful 2000W motor, a 25.07 mm chuck for quick bit changes, and a shock absorber for enhanced user comfort.
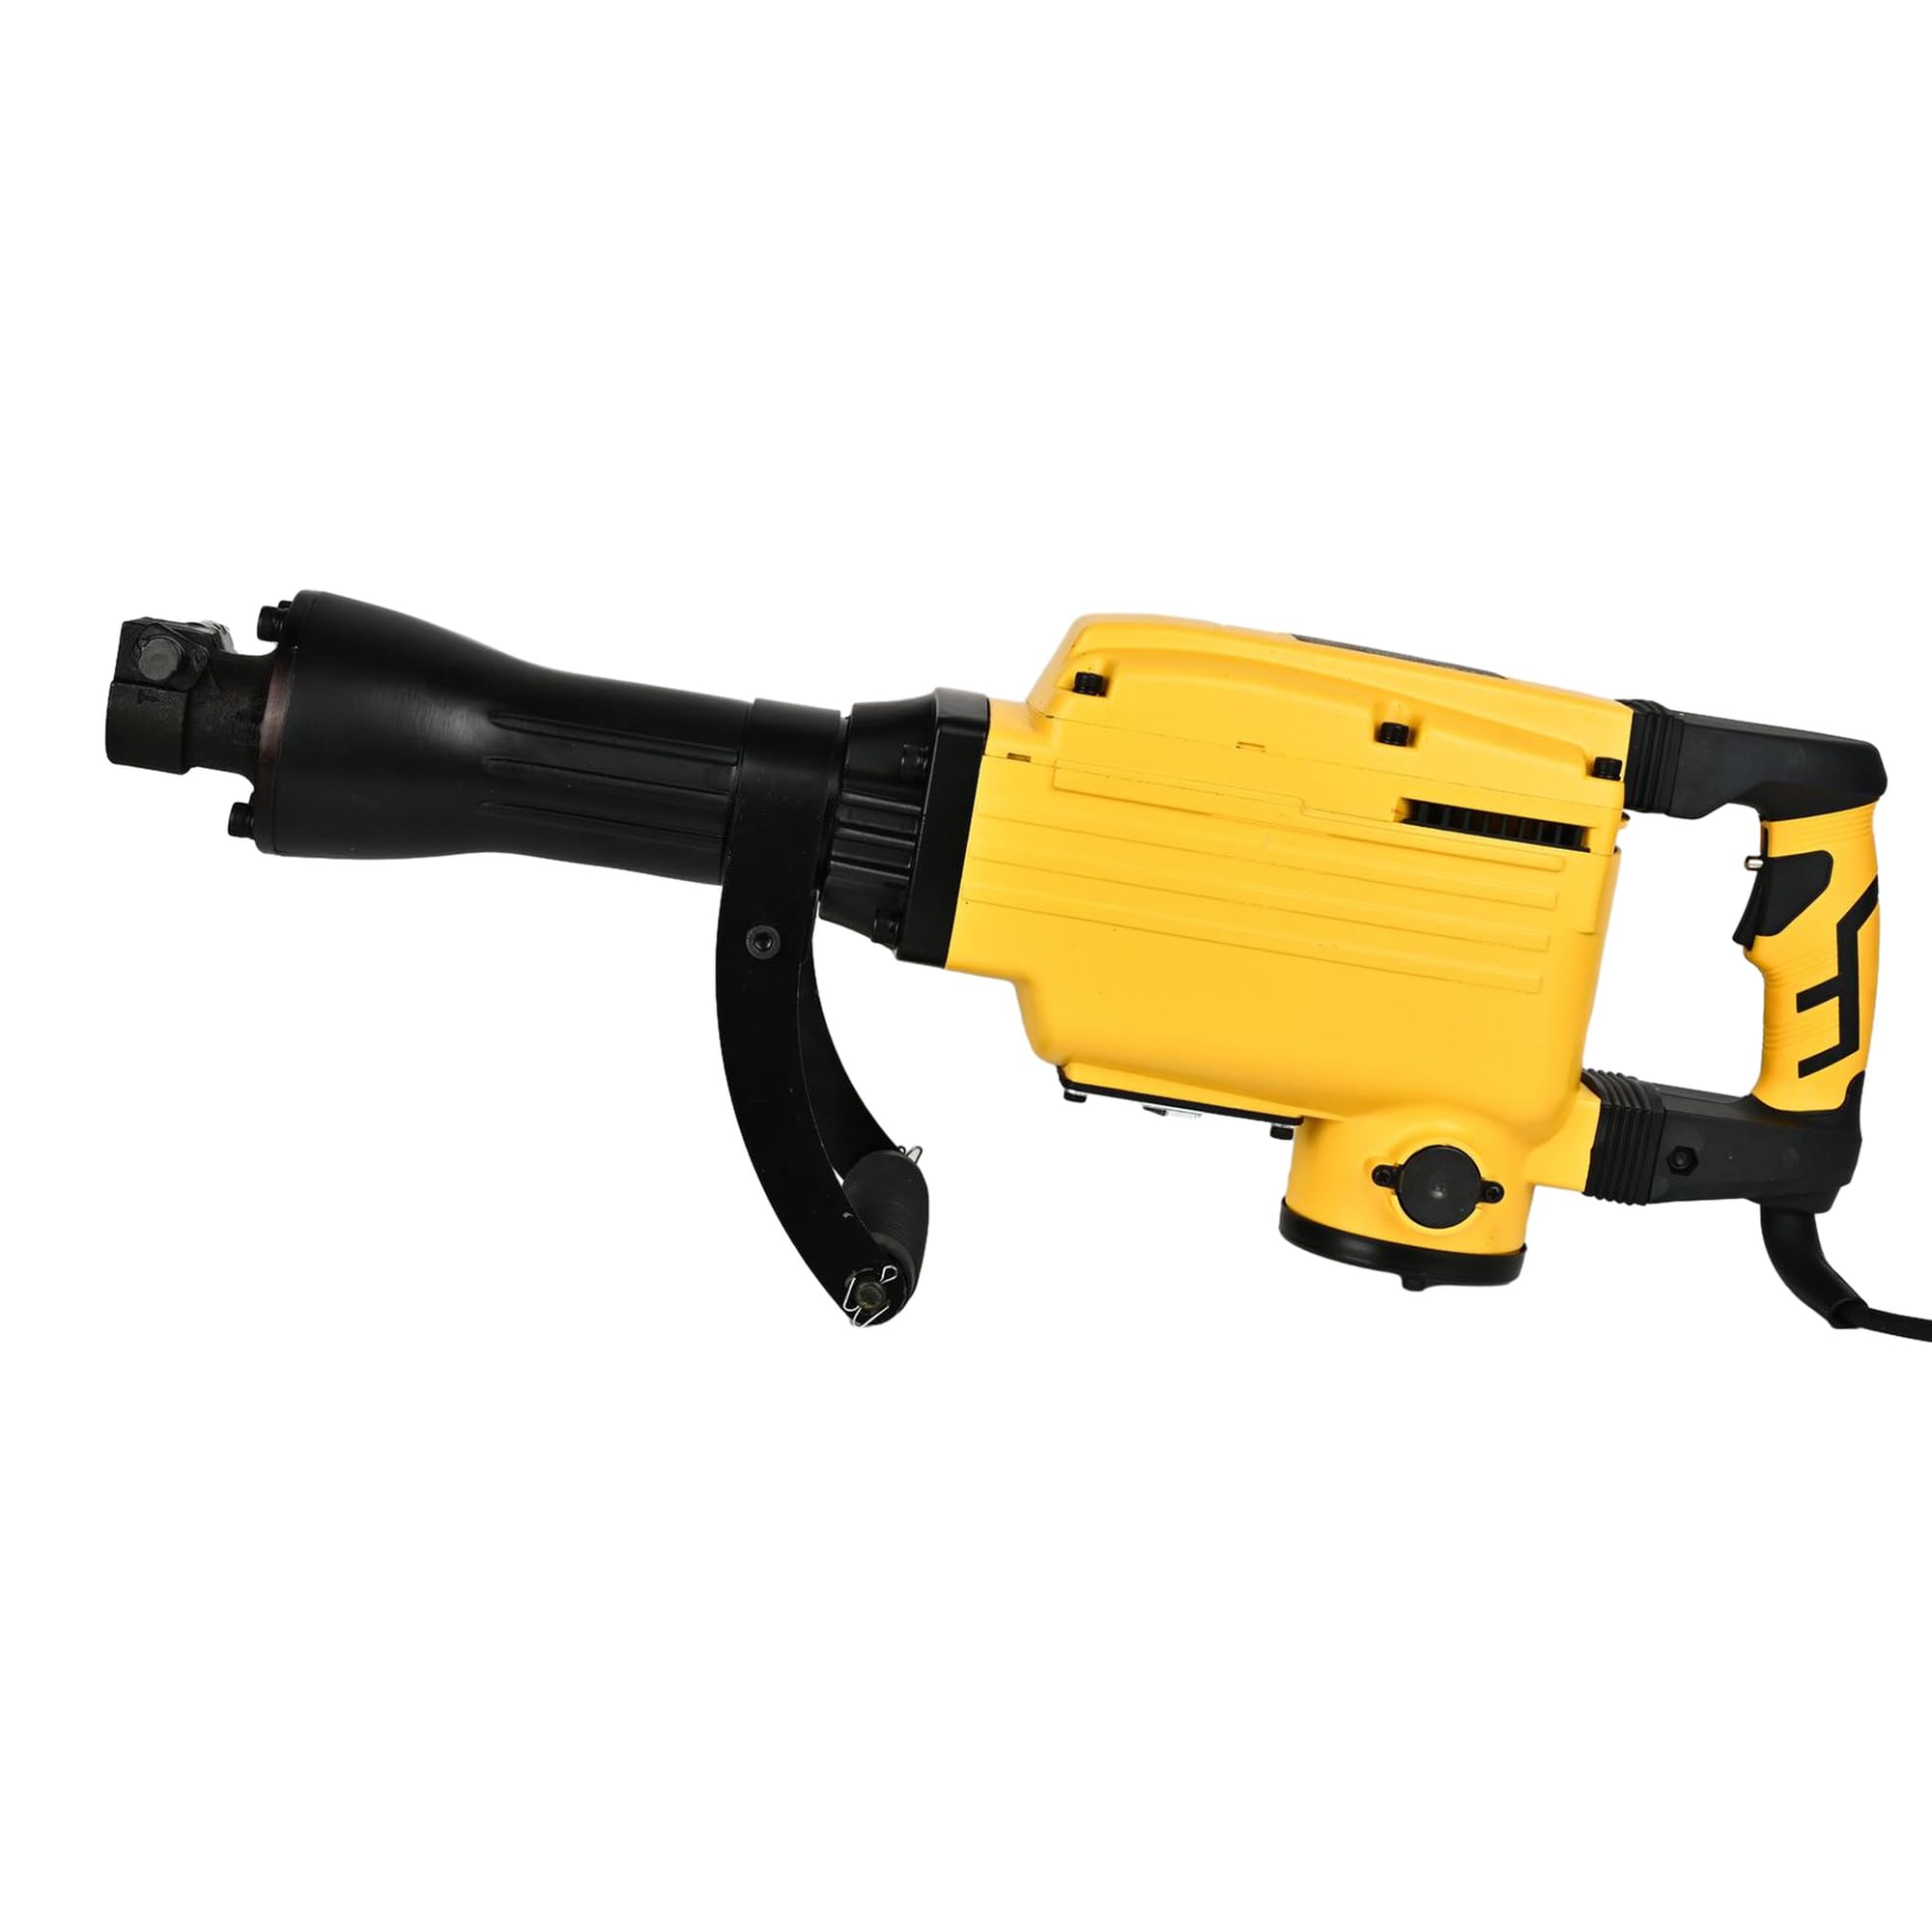
Foto 1: Izugbe view of the HYCO PH65 Demolition Hammer.
2. Ntuziaka nchekwa
Always follow basic safety precautions to reduce the risk of fire, electric shock, and personal injury when operating power tools.
- Nchekwa mpaghara ọrụ: Debe ebe a na-arụ ọrụ ọcha na ọkụ nke ọma. Ebe mgbagwoju anya ma ọ bụ ọchịchịrị na-akpọ ihe mberede. Ejila ngwaọrụ ike rụọ ọrụ n'ime ikuku mgbawa, dị ka n'ihu mmiri ọkụ, gas, ma ọ bụ uzuzu.
- Nchekwa Eletriki: Plọg ngwá ọrụ ike ga-adakọrịrịrịrị. Agbanwela plọg ahụ n'ụzọ ọ bụla. Zenarị mmetụ ahụ n'elu ala ala ma ọ bụ n'ala dị ka ọkpọkọ, radiators, ranges, na friji.
- Nchekwa nkeonwe: Always wear eye protection. Use hearing protection when operating the tool. Wear a dust mask if working in dusty conditions. Dress properly; avoid loose clothing or jewelry.
- Iji na Nlekọta Ngwa: Amanyela ngwá ọrụ ike. Jiri ngwa ike ziri ezi maka ngwa gị. Kwụpụ plọg na isi iyi ọkụ tupu ime mgbanwe ọ bụla, ịgbanwe ngwa ma ọ bụ ichekwa ngwa ike.
- Safety Lock-on Button: The tool incorporates a safety lock-on button to prevent unintentional start-up. Ensure you understand its operation before use.
- Vibration Dampmmechi: The tool is designed with vibration dampening for operator comfort. However, prolonged use can still cause discomfort. Take regular breaks.
3. Ngwaahịa gafereview
Familiarize yourself with the components of your HYCO PH65 Demolition Hammer.

Figure 2: Main handle and trigger assembly.

Foto 3: Akụkụ view showing the auxiliary handle for better control.

Foto nke 4: Akara ngwaahịa nwere nkọwapụta ihe nlereanya na eletriki.
4. Nkọwapụta
| Nkọwapụta | Uru |
|---|---|
| Ụdị | Hyco |
| Nlereanya | PH65 |
| Isi Iyi Ike | Igwe ọkụ eletrik |
| Voltage | 220 volts |
| Ike kacha | 2000 Watt |
| Oke Chuck kacha | 25.07 millimeters |
| Ibu Ibu | 16 kilogram |
| Akụkụ ngwaahịa | 78L x 42W x 22H centimita |
| Ụdị egwu egwu | Hammer malite ịgba |
| Ngwa gụnyere | Comes as a Combo Set |
5. Nhazi
5.1 Na-agbakwunye Aka Enyemaka
The auxiliary handle provides additional control and stability during operation. Securely attach it to the tool body in a comfortable position for your working posture.
5.2 Installing/Changing Chisels or Bits
- Gbaa mbọ hụ na akpọpụla ngwaọrụ ahụ na isi iyi ike.
- Locate the chuck mechanism. The 25.07 mm chuck is designed for quick bit changes.
- Insert the chisel or bit firmly into the chuck until it locks into place. Pull on the bit to ensure it is securely seated.
- To remove, follow the chuck's release mechanism (refer to specific chuck design if different from standard push-and-twist).
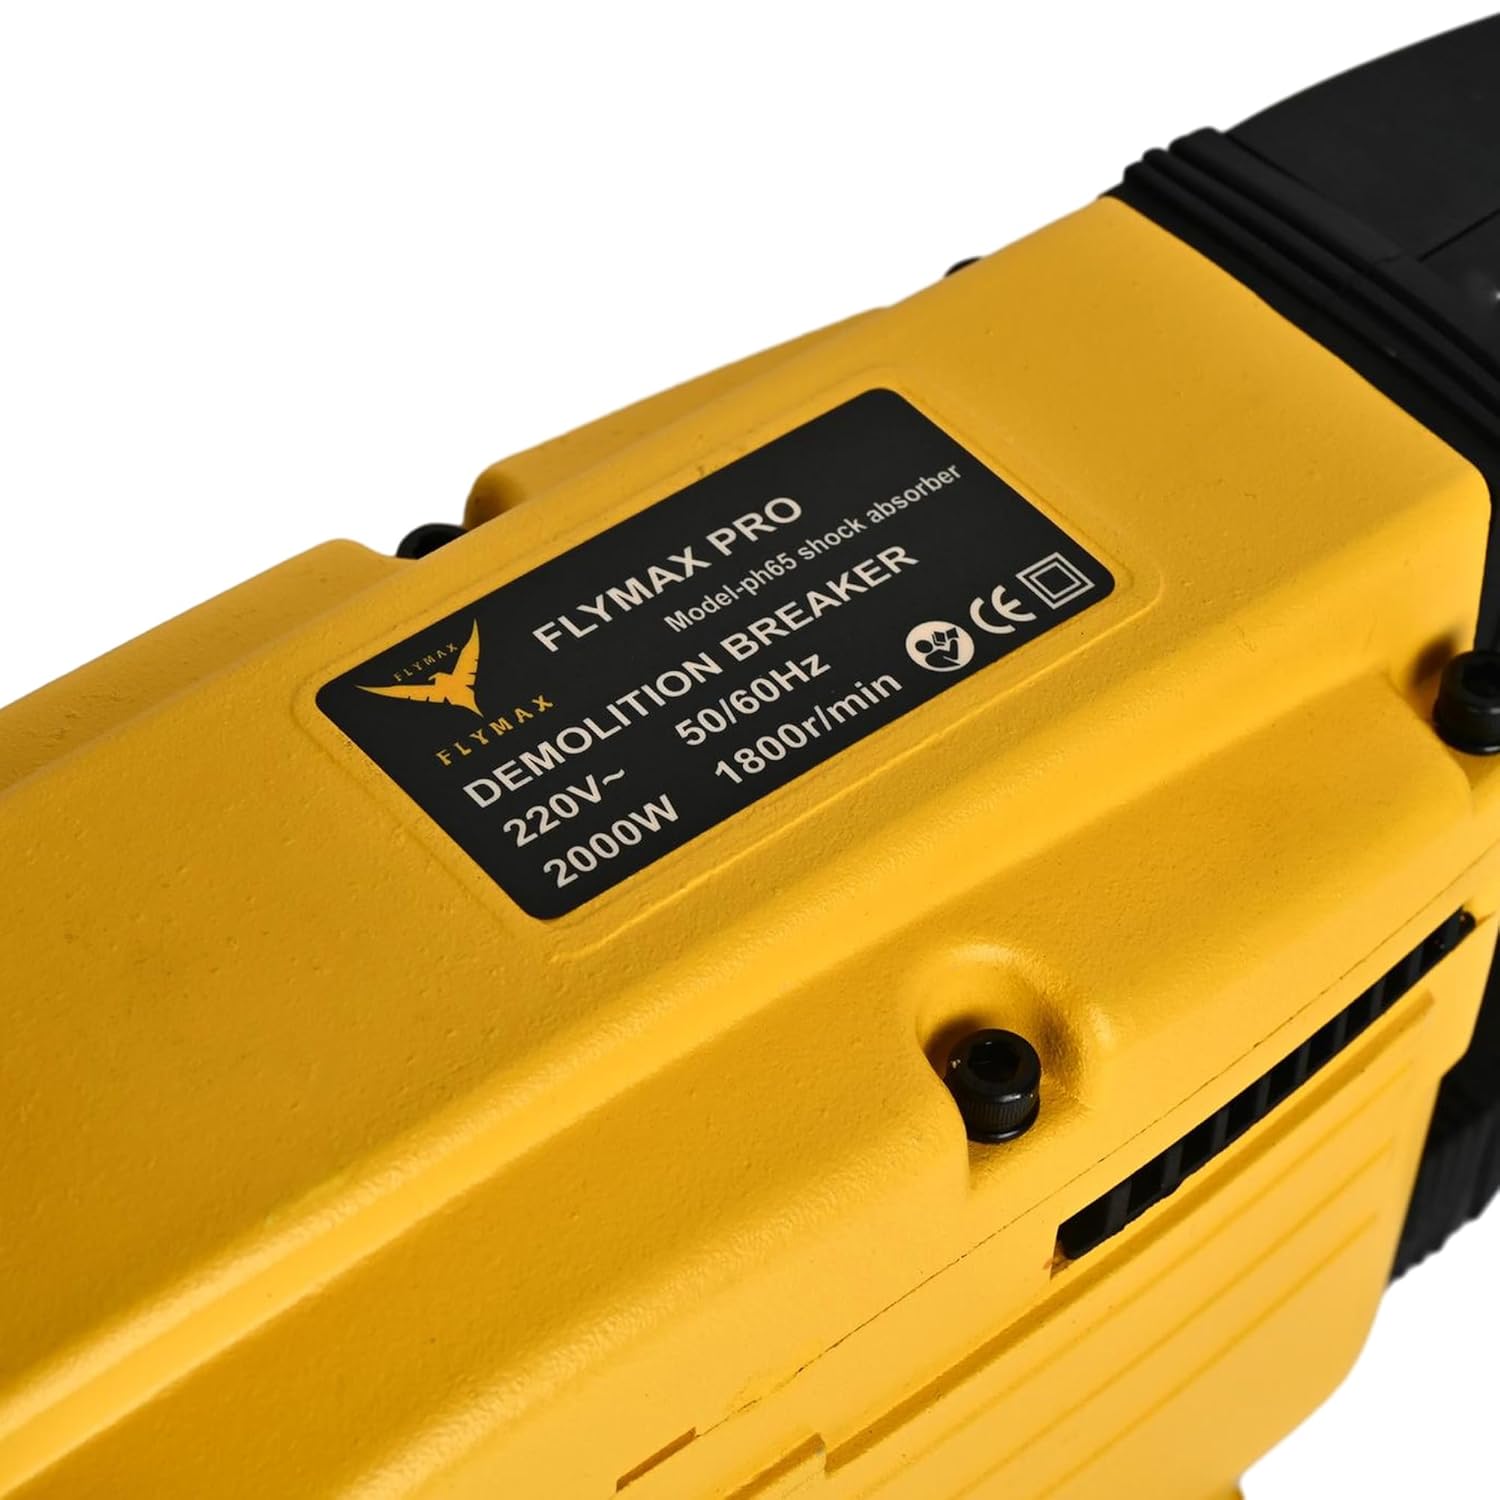
Figure 5: Chuck mechanism for bit insertion.
6. Ntuziaka ọrụ
6.1 Njikọ ike
Connect the power cord to a suitable 220V electrical outlet. Ensure the power source is stable and capable of handling the tool's 2000W power consumption.
6.2 Ịmalite Ngwá Ọrụ
Press the trigger to start the demolition hammer. If equipped, release the safety lock-on button before pressing the trigger. The tool is designed for heavy-duty demolition, chiseling, and concrete breaking jobs.
6.3 Demolition Technique
- Hold the tool firmly with both hands, utilizing the main and auxiliary handles.
- Position the chisel or bit against the material to be broken.
- Apply steady, firm pressure. Allow the tool's impact energy to do the work. Do not apply excessive force, as this can reduce efficiency and increase wear.
- Work systematically, breaking material into manageable pieces.
6.4 Continuous Operation
For extended use, the tool's corded electric power ensures continuous operation without battery recharging. However, take regular breaks to prevent fatigue and ensure safe handling.
7. Nlekọta
Regular maintenance ensures the longevity and optimal performance of your demolition hammer.
7.1 Nhicha
- After each use, clean the tool to remove dust, debris, and concrete residue.
- Use a dry cloth or soft brush. Do not use solvents or abrasive cleaners.
- Gbaa mbọ hụ na oghere ventilashị doro anya ka ọ ghara ikpo oke ọkụ.
7.2 mmanu mmanu
Periodically lubricate the internal mechanisms as indicated by the lubrication port. Refer to the tool's specific lubrication requirements and recommended lubricants.

Figure 6: Lubrication port.
7.3 Nyocha
- Regularly inspect the power cord for damage. Replace immediately if frayed or cut.
- Check the chuck for wear and ensure bits are held securely.
- Inspect the housing for cracks or damage. The robust all-steel housing is designed for durability, but severe impacts can cause damage.
8. Nchọpụta nsogbu
If you encounter issues with your HYCO PH65 Demolition Hammer, refer to the following common problems and solutions.
| Nsogbu | Ihe nwere ike ime | Ngwọta |
|---|---|---|
| Ngwá ọrụ anaghị ebido | Enweghị ọkụ ọkụ; Ụdọ mebiri emebi; Mgbanwe na-ezighi ezi | Check power outlet and circuit breaker; Inspect power cord for damage; Contact service center if switch is faulty. |
| Ike mmetụta belatara | Worn chisel/bit; Insufficient lubrication; Internal wear | Replace worn chisel/bit; Check and replenish lubrication; Contact service center for internal inspection. |
| Oke ịma jijiji ma ọ bụ mkpọtụ | Loose components; Internal damage; Worn parts | Tighten any loose screws; Discontinue use and contact service center for inspection. |
For problems not listed or if solutions do not resolve the issue, contact HYCO customer support.
9. Akwụkwọ ikike na nkwado
For warranty information, service, or technical support, please refer to the warranty card included with your product or visit the official HYCO websaịtị. Debe nnata nzụta gị dị ka ihe akaebe nke ịzụrụ maka nkwupụta ikike.


