1. Okwu mmalite
This user manual provides comprehensive instructions for the setup, operation, maintenance, and troubleshooting of your Thomson 27-inch QHD Gaming Monitor (Model: M27QG5Y14). This monitor is designed to deliver a superior visual experience with its QHD resolution, 180Hz refresh rate, and IPS panel technology, making it ideal for gaming and multimedia applications.

Foto 1.1: N'ihu view of the Thomson 27-inch QHD Gaming Monitor, showcasinnhazi mara mma ya na ebe ngosi ya.
2. Ozi nchekwa
Please read all safety instructions carefully before using the monitor. Keep this manual for future reference.
- Isi mmalite ike: Use only the power adapter supplied with the monitor. Ensure the power outlet is properly grounded.
- Igwe ikuku: Do not block ventilation openings. Allow adequate space around the monitor for proper airflow to prevent overheating.
- Mmiri na mmiri: Debe ihe nlele ahụ ka ọ ghara iru mmiri, mmiri ozuzo, ma ọ bụ oke mmiri. Etinyela ihe ndị jupụtara na mmiri n'elu ihe nlele ahụ.
- Nhicha: Disconnect the power cable before cleaning. Use a soft, dry cloth. Do not use liquid cleaners or aerosol cleaners.
- Nkwanye: Debe ihe nlele ahụ n'elu ebe kwụsiri ike ma dị larịị. Zere itinye ya n'ebe anwụ na-acha kpọmkwem ma ọ bụ n'ebe okpomọkụ dị nso.
- Ijikwa: Jiri nlezianya jide ihe nlele ahụ. Zere ịda ma ọ bụ mee ka ọ daa ma ọ bụ mee ka ọ daa n'ọnọdụ siri ike.
- Ije ozi: Anwala ịrụzi ihe nlele ahụ n'onwe gị. Nye ndị ọrụ ọrụ ruru eru ọrụ niile.
3. Ihe ngwugwu
Verify that all items are present in the package. If any items are missing or damaged, contact your retailer.
- Thomson 27-inch QHD Gaming Monitor
- Nyochaa Stand (Base and Olu)
- Ihe nkwụnye ike na eriri ike
- HDMI USB
- DisplayPort (DP) Cable (may vary by region)
- USB-B gaa na USB-A (maka ọrụ ebe nchekwa USB)
- Akwụkwọ ntuziaka (akwụkwọ a)
- Ihe nkedo maka mgbakọ nkwudo
4. Nhazi
4.1. Ịchịkọta ihe nguzozi ihe nlele ahụ
- Carefully remove the monitor from its packaging and place it face down on a soft, clean surface to prevent scratches.
- Attach the stand neck to the monitor panel using the provided screws.
- Attach the stand base to the stand neck and secure it with the designated screw.
- Once assembled, carefully lift the monitor and place it on a stable desk or table.

Image 4.1: Monitor dimensions and stand assembly overview. The monitor measures approximately 61 cm wide, 54 cm high (with stand), and 24 cm deep (with stand).
4.2. Ijikọ Monitor
Connect the necessary cables to the monitor's input ports. Refer to the image below for port locations.
- Njikọ ike: Connect the power adapter to the "DC IN" port on the monitor, then plug the power cable into a power outlet.
- Ntinye vidiyo:
- Connect an HDMI cable from your computer's graphics card to an "HDMI 2.1" port on the monitor.
- Alternatively, connect a DisplayPort (DP) cable from your computer's graphics card to a "DP 1.2" port on the monitor.
- Igwe USB: To enable the monitor's USB 3.0 ports, connect a USB-B cable from the "USB 3.0 B" port on the monitor to a USB-A port on your computer.
- Mmepụta ọdịyo: Connect headphones or external speakers to the "Earphone Plug" (3.5mm audio jack) for audio output.

Image 4.2: Rear panel of the monitor displaying the various input and output ports for connectivity.
4.3. Mgbanwe Ergonomic
Ihe nguzo ihuenyo na-enye ohere maka mgbanwe dị iche iche iji mee ka ọrụ gị ka mma. viewnkasi obi:
- Gbaa: Adjust the screen's vertical angle (up or down).
- Swivel: Rotate the screen horizontally (left or right).
- Pivot: Tụgharịa ihuenyo 90 degrees maka ọnọdụ eserese viewing.
- Ndozi elu: Welie ma ọ bụ wedata ihe nleba anya n'ọkwa anya kacha amasị gị.
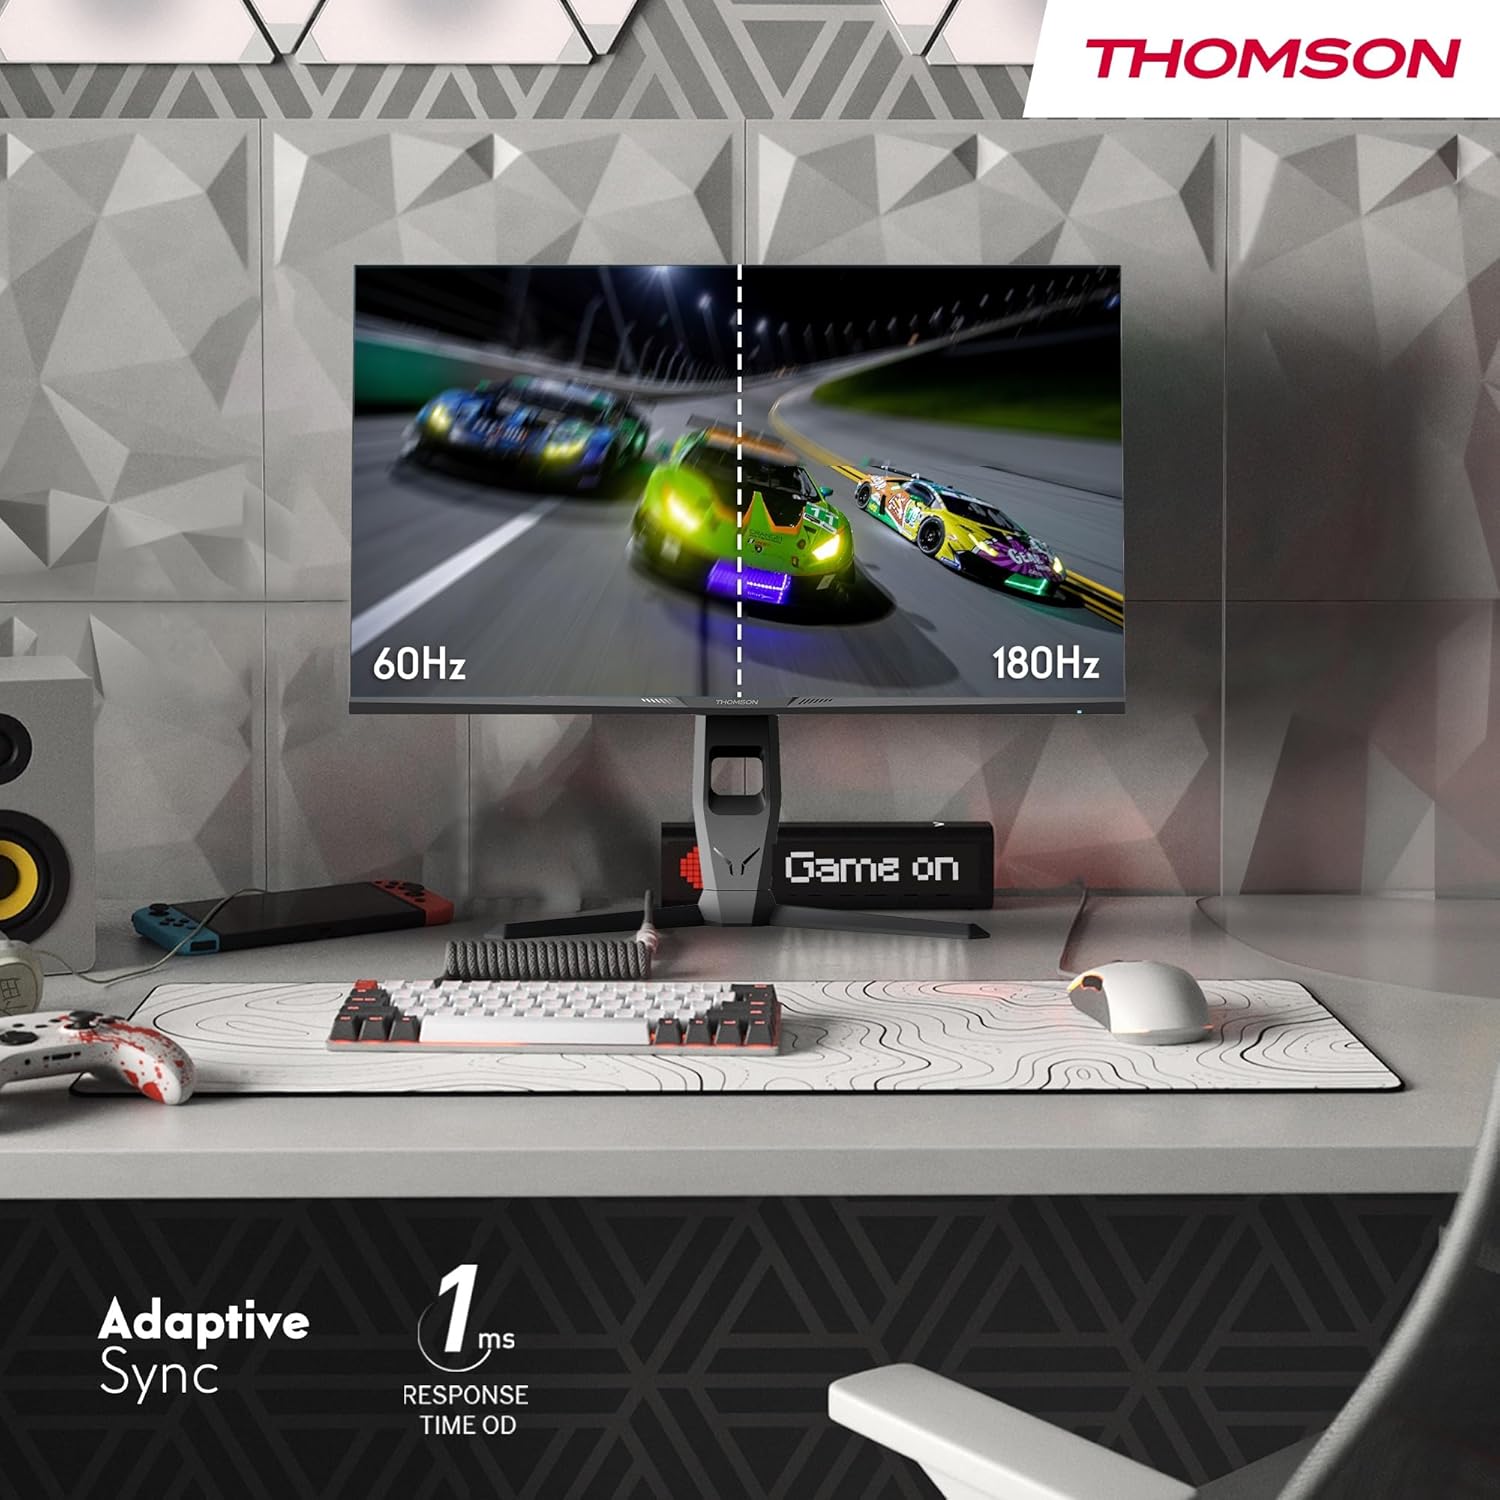
Image 4.3: Demonstrations of the monitor's ergonomic capabilities, including tilt, swivel, and pivot for optimal viewakụkụ .
4.4. Ọnụ ego nke VESA
The monitor is compatible with VESA 100x100mm mounting standards. To mount the monitor on a wall or an alternative stand, remove the original stand and attach the VESA-compatible mount (sold separately) using appropriate screws.
5. Ntuziaka ọrụ
5.1. Gbanyụọ / gbanyụọ
Press the power button, usually located on the back or bottom of the monitor, to turn it on or off. The power indicator light will illuminate when the monitor is on.
5.2. Ngosipụta ihuenyo (OSD) NchNhr
The OSD menu allows you to adjust various monitor settings. Use the joystick or buttons (location may vary) on the monitor to navigate the menu.
- Ntọala foto: Hazie nchapụta, ọdịiche, nkọ, okpomọkụ agba, na gamma.
- Ntọala agba: Fine-tune RGB levels, saturation, and hue.
- Họrọ ntinye: Jiri aka gbanwee n'etiti ntinye HDMI na DisplayPort.
- Audio: Adjust volume for built-in speakers or headphone output.
- Ntọala OSD: Gbanwee asụsụ OSD, nghọta, na njedebe oge.
- Gaming Settings: Access features like Adaptive Sync, response time (OD), and crosshair overlays.
5.3. Njirimara egwuregwu
- 180Hz ume ọhụrụ ume: Provides smoother motion and reduced input lag, especially beneficial for fast-paced games. Ensure your graphics card and cable support this refresh rate.
- 1ms Response Time (OD): Minimizes motion blur and ghosting for clear, crisp images during rapid movements.
- Mmekọrịta na-agbanwe agbanwe: Synchronizes the monitor's refresh rate with your graphics card's frame rate, eliminating screen tearing and stuttering. Enable this feature in the OSD menu and your graphics card control panel.

Image 5.1: Visual comparison illustrating the difference between 60Hz and 180Hz refresh rates, highlighting the smoother motion provided by the higher refresh rate, alongside the Adaptive Sync feature.
5.4. Atụmatụ Nlekọta Anya
- Nkà na ụzụ mgbochi Flicker: Reduces screen flickering, which can cause eye strain during prolonged use.
- Ụdị ọkụ na-acha anụnụ anụnụ dị ala: Filters out harmful blue light emissions to protect your eyes and reduce fatigue. This mode can be activated through the OSD menu.
- Anti-Glare Screen: The matte screen surface minimizes reflections from ambient light, providing clear visuals without distraction.

Image 5.2: Depiction of the monitor's eye comfort features, including an anti-glare screen and technologies like Anti-Flicker and Low Blue Light for reduced eye strain.
5.5. RGB Ambient Lighting
The monitor features integrated RGB ambient lighting on the rear. This lighting can be customized via the OSD menu to enhance your gaming environment or match your setup's aesthetics.
6. Nlekọta
6.1. Na-ehicha ihe nlekota
- Ihuenyo: Jiri nwayọ hichaa ihuenyo ahụ site na iji akwa dị nro na-enweghị lint. Maka akara ndị isi ike, dị obere dampen the cloth with water or a specialized screen cleaner (ensure it's safe for LCD/IPS panels) and wipe gently. Never spray liquid directly onto the screen.
- Casing: Jiri ákwà dị nro ma kpọrọ nkụ hichaa ihe nlele ahụasing. Zere iji ihe nhicha ma ọ bụ ihe mgbaze.
- Kwụpụ eriri ọkụ eletrik mgbe niile tupu ị hichaa ya.
6.2. Nchekwa
Ọ bụrụ na ị na-echekwa ihe nlele ahụ ruo ogologo oge, wepụ eriri niile, tinye ya na ngwugwu mbụ ya (ọ bụrụ na ọ dị), ma debe ya n'ebe dị jụụ ma kpọọ nkụ, ebe anwụ na-anaghị apụta kpọmkwem na oke okpomọkụ.
7. Nchọpụta nsogbu
Nkebi a na-eleba anya na nsogbu ndị ị na-enwekarị. Ọ bụrụ na nsogbu ahụ anọgide, kpọtụrụ ndị ọrụ nkwado ndị ahịa.
| Nsogbu | Ihe nwere ike ime | Ngwọta |
|---|---|---|
| Enweghị ike | Power cable not connected; Power outlet faulty; Monitor off. | Ensure power cable is securely connected. Test the power outlet. Press the monitor's power button. |
| Enweghị mgbaama / Ihuenyo efu | Video cable not connected; Incorrect input selected; Computer not outputting signal. | Check HDMI/DP cable connections. Select the correct input source via OSD. Ensure computer is on and outputting video. |
| Distorted image / Flickering | Incorrect resolution/refresh rate; Faulty cable; Graphics driver issue. | Set display resolution to 2560x1440 and refresh rate to 180Hz. Try a different video cable. Update graphics drivers. |
| No audio from speakers/headphones | Volume too low; Audio cable not connected; Incorrect audio output selected on PC. | Increase monitor volume via OSD. Ensure headphones/speakers are connected. Select monitor as audio output device in PC settings. |
8. Nkọwapụta
Detailed technical specifications for the Thomson M27QG5Y14 monitor.
| Njirimara | Nkọwapụta |
|---|---|
| Ụdị | Thomson |
| Nlereanya | M27QG5Y14 |
| Nha ihuenyo | 27 sentimita asatọ |
| Ụdị panel | IPS |
| Mkpebi | 2560 x 1440 (QHD) |
| Ọnụego ume ọhụrụ | 180 Hz |
| Oge nzaghachi | 1 Millisecond (OD) / 5 Milliseconds (GtG) |
| Icha ọkụ | Nits 350 |
| Ọnụọgụ ọdịiche | 1200:1 |
| Viewna n'akuku | 178 Degrees (Horizontal/Vertical) |
| Agba Gamut | 120% sRGB |
| Nkwado HDR | HDR10 (10-bit) |
| Mmekọrịta na-agbanwe agbanwe | Ee |
| Njikọta | 2x HDMI 2.1, 1x DisplayPort 1.2, 1x USB 3.0 Type-B (upstream), 3x USB 3.0 Type-A (downstream), 1x Earphone Plug (3.5mm) |
| Ndị na-ekwu okwu arụrụ arụ | Yes (2x2W) |
| VESA Ugwu ndakọrịta | 100x100mm |
| Akụkụ ngwaahịa (ya na nkwụnye) | 61 x 54 x 24 cm (W x H x D) |
| Ibu (ya na nkwụnye) | 7.3 n'arọ |
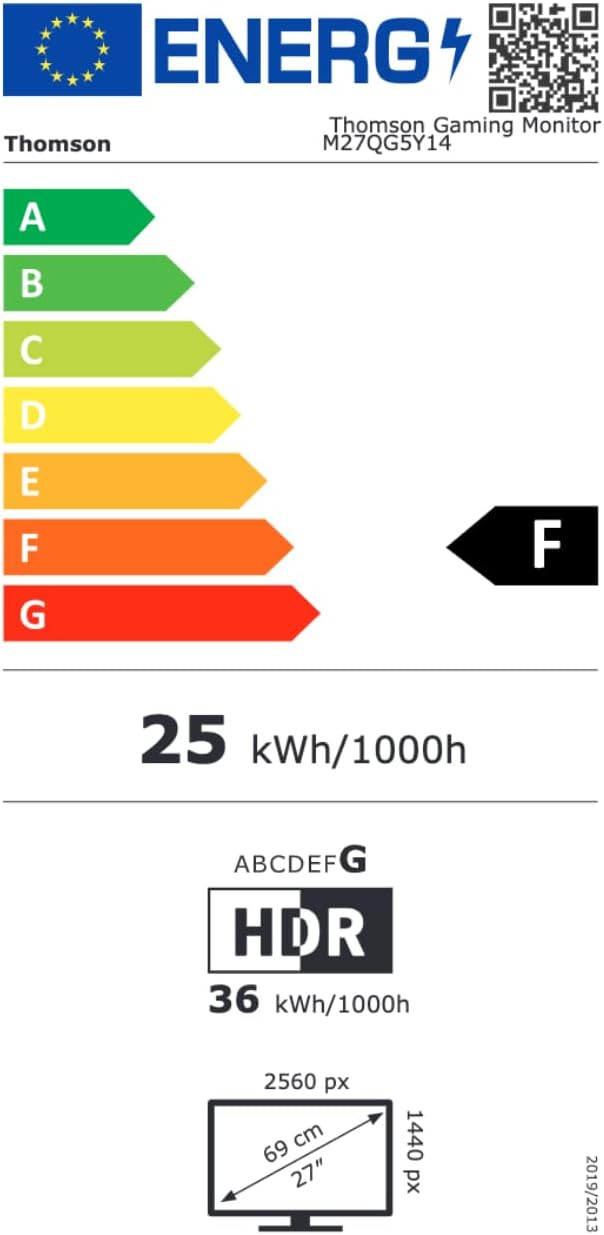
Image 8.1: EU Energy Label for the Thomson M27QG5Y14 monitor. For more details, visit the Ebe nchekwa data EPREL.
9. Akwụkwọ ikike na nkwado
Thomson products are designed for reliability and performance. This monitor typically comes with a 3-afọ akwụkwọ ikike site na ụbọchị ịzụrụ, na-ekpuchi ntụpọ nrụpụta. Biko dowe ihe akaebe nke ịzụrụ ihe maka akwụkwọ ikike.
For technical assistance, troubleshooting beyond this manual, or warranty inquiries, please contact Thomson customer support or your local retailer. Refer to the official Thomson website or your product packaging for specific contact details.
You can also visit the official Thomson store on Amazon for more information: Thomson Store.


