1. Okwu mmalite
The Hello Kitty Sunrise Alarm Clock is designed to provide a gentle and natural waking experience with its sunrise simulation feature. This digital alarm clock includes multicolor lights, an LED display showing time, date, and temperature, a USB charging port, and a convenient snooze function. Its charming Cinnamoroll design adds a whimsical touch to any room.

Image 1: Hello Kitty Cinnamoroll Sunrise Alarm Clock with multicolor lighting.
2. Ozi nchekwa
- Ewepụla ngwaọrụ ahụ na oke okpomọkụ, ìhè anyanwụ kpọmkwem, ma ọ bụ oke iru mmiri.
- Jiri naanị eriri ike USB enyere maọbụ nke e nyere asambodo.
- Debe ngwaọrụ ahụ na mmiri ma ọ bụ mmiri mmiri ndị ọzọ.
- Anwala ịkwasa ma ọ bụ rụkwaa ngwaọrụ n'onwe gị. Kpọtụrụ ndị ọrụ ruru eru.
- Gbaa mbọ hụ na etinyere ngwaọrụ ahụ n'elu ala kwụsiri ike, dịkwa larịị.
3. Ihe ngwugwu
Biko lelee ngwungwu maka ihe ndị a:
- Hello Kitty Sunrise Alarm Clock (Cinnamoroll design)
- USB Power USB
- Akwụkwọ ntuziaka (akwụkwọ a)
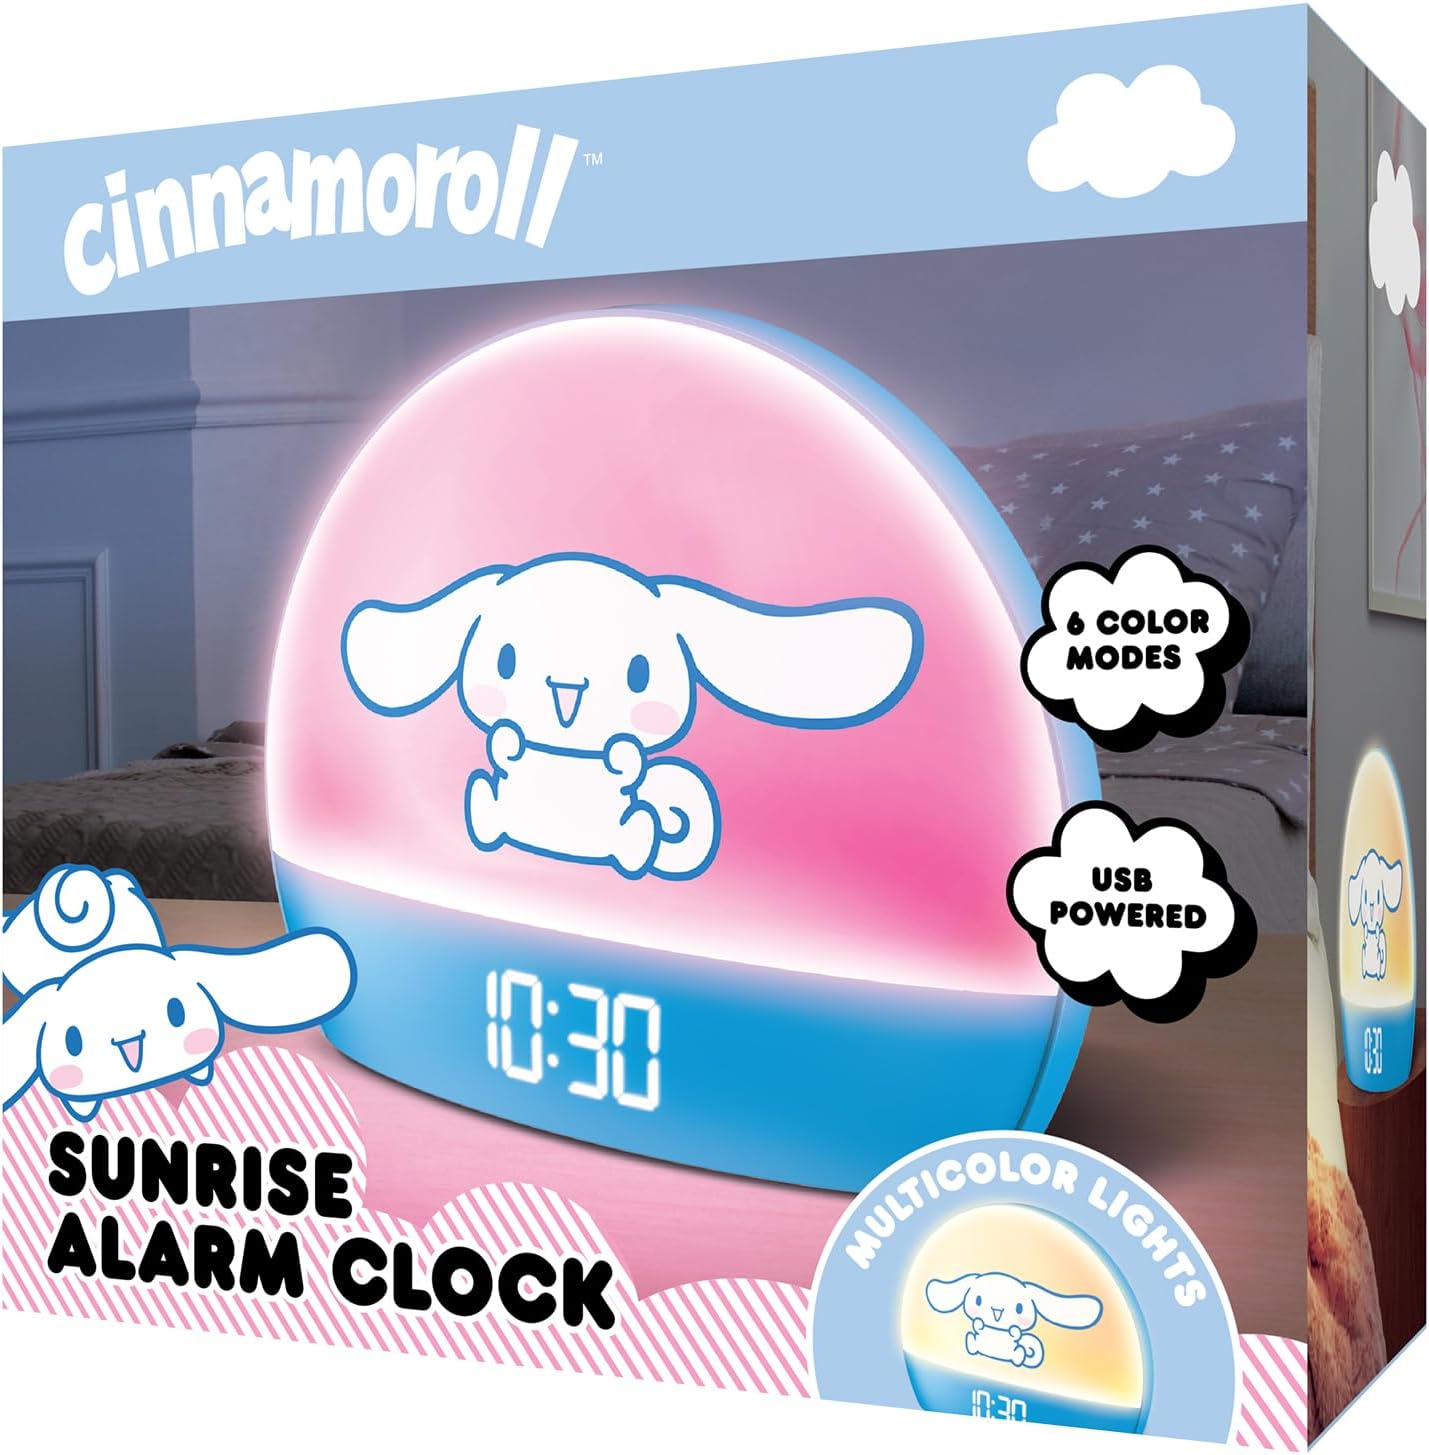
Image 2: Front packaging of the Hello Kitty Cinnamoroll Sunrise Alarm Clock.
4. Ngwaahịa gafereview
Familiarize yourself with the main components of your alarm clock.
- Ikanam Display: Na-egosi oge, ụbọchị, na okpomọkụ.
- Ogwe ọkụ: Emits multicolor and sunrise simulation lights.
- bọtịnụ njikwa: Located on the back or bottom for setting time, alarm, and light functions.
- USB Nchaji Port: For powering the device and charging external devices.
- Bọtịnụ snooze: Typically a prominent button on the top or front.

Image 3: Hello Kitty Cinnamoroll Sunrise Alarm Clock in a bedroom setting.
5. Nhazi
5.1 Njikọ ike
- Connect the provided USB power cable to the USB port on the back of the alarm clock.
- Plug the other end of the USB cable into a compatible USB power adapter (not included) or a powered USB port.
- The LED display will light up, indicating the device is powered on.
5.2 Ịtọ oge na ụbọchị
Specific button names are not provided, so general instructions are given. Refer to the physical device for exact button labels.
- Press the "SET" or "TIME" button to enter time setting mode.
- Use the "UP" and "DOWN" buttons to adjust the hour. Press "SET" again to confirm.
- Adjust the minute using "UP" and "DOWN" buttons. Press "SET" to confirm.
- Continue this process to set the year, month, and day.
- The clock may offer 12-hour or 24-hour format selection. Follow on-screen prompts or consult the device's specific button functions.
6. Ntuziaka ọrụ
6.1 Ịtọ ntọala mkpu
- Press the "ALARM" button to enter alarm setting mode.
- Use "UP" and "DOWN" buttons to set the desired alarm hour. Press "ALARM" to confirm.
- Adjust the alarm minute. Press "ALARM" to confirm.
- Some models may allow setting alarm volume or sound. Follow prompts if available.
- To activate/deactivate the alarm, look for an "ALARM ON/OFF" button or a toggle within the alarm setting menu.
6.2 Ntụle Mbilite n'Ọwụwa Anyanwụ
The sunrise simulation feature gradually increases light intensity before your set alarm time, mimicking a natural sunrise.
- This feature is typically linked to the alarm function. When the alarm is active, the light will begin to brighten a set period (e.g., 30 minutes) before the alarm sounds.
- Consult the device's specific controls for adjusting the duration or intensity of the sunrise simulation, if applicable.
6.3 Multicolor ọkụ
The clock offers various color modes for ambient lighting.
- Press the "LIGHT" or "COLOR" button to cycle through different color options or activate a color-changing mode.
- Press and hold the "LIGHT" button to turn off the ambient light.
- Brightness of the display and ambient light can often be adjusted using dedicated buttons or by holding the "LIGHT" button.
6.4 Ọrụ snooze
When the alarm sounds, press the large "SNOOZE" button (usually on top) to temporarily pause the alarm. The alarm will sound again after a short interval (e.g., 5-10 minutes).
6.5 USB Nchaji Port
The integrated USB port can be used to charge small electronic devices like smartphones or tablets. Simply connect your device's charging cable to the USB port on the alarm clock.
6.6 Ngosipụta okpomọkụ
The LED display shows the current room temperature. No specific action is usually required to view this, as it cycles with time and date or is displayed continuously.
7. Nlekọta
- Jiri ákwà dị nro ma kpọọ nkụ hichaa elekere ahụ. Ejila ihe nhicha ma ọ bụ ihe mgbaze.
- Hụ na ọdụ ụgbọ USB ahụ enweghị uzuzu na ihe mkpofu.
- Store the clock in a cool, dry place when not in use for extended periods.
8. Nchọpụta nsogbu
| Nsogbu | Ihe nwere ike ime | Ngwọta |
|---|---|---|
| Clock does not power on. | USB cable not connected properly or power source issue. | Check USB cable connection. Try a different USB power adapter or port. Ensure the cable is securely inserted. |
| Time is incorrect or drifts. | Time not set correctly or internal clock issue. | Re-set the time following Section 5.2. If the issue persists, try disconnecting and reconnecting power. |
| Oti mkpu anaghị ada ụda. | Agbaghị mkpu ma ọ bụ ahazighị ya nke ọma. | Verify the alarm is set and activated (check for an alarm icon on the display). Ensure the volume is not set to zero if adjustable. |
| Bọtịnụ anaghị anabata ya. | Temporary software glitch or physical button issue. | Disconnect power for a few seconds and reconnect to reset the device. If buttons remain unresponsive, contact support. |
| USB charging port not working. | Cable issue, device not fully powered, or port malfunction. | Ensure the clock is properly powered. Try a different USB charging cable. Check if the port is clean and free of debris. |
9. Nkọwapụta
| Ụdị | hello Kitty |
| Nọmba nlereanya | HKCLK01CR-MFN |
| Agba | Cinnamoroll |
| Ụdị ngosi | Dijitalụ |
| Atụmatụ pụrụ iche | Adjustable Brightness, Alarm, Charging Port, LED Display, Temperature Display, Sunrise Simulation, Multicolor Lights |
| Akụkụ ngwaahịa | 7"W x 6"H |
| Isi Iyi Ike | Igwe ọkụ eletrik (USB) |
| Ihe onwunwe | Plastic |
| Ibu Ibu | 0.4 Kilogram (14 ounces) |
| Teknụzụ Njikọta | USB |
| Onye nrụpụta | Southern Telecom |
10. Akwụkwọ ikike na nkwado
For warranty information or technical support, please refer to the contact details provided on the product packaging or visit the official Hello Kitty product support websaịtị. Debe akwụkwọ nnata ịzụrụ maka akwụkwọ ikike.


