1. Okwu mmalite
Thank you for choosing the Eyoyo 12-inch TFT LCD Monitor. This portable mini HD color screen display offers versatile connectivity with AV, HDMI, BNC, and VGA inputs, making it suitable for various applications including PC, CCTV security systems, and more. It also features a built-in TVI/CVI/AHD to HDMI converter adapter for enhanced compatibility. This manual provides detailed instructions for setup, operation, and maintenance to ensure optimal performance and longevity of your device.
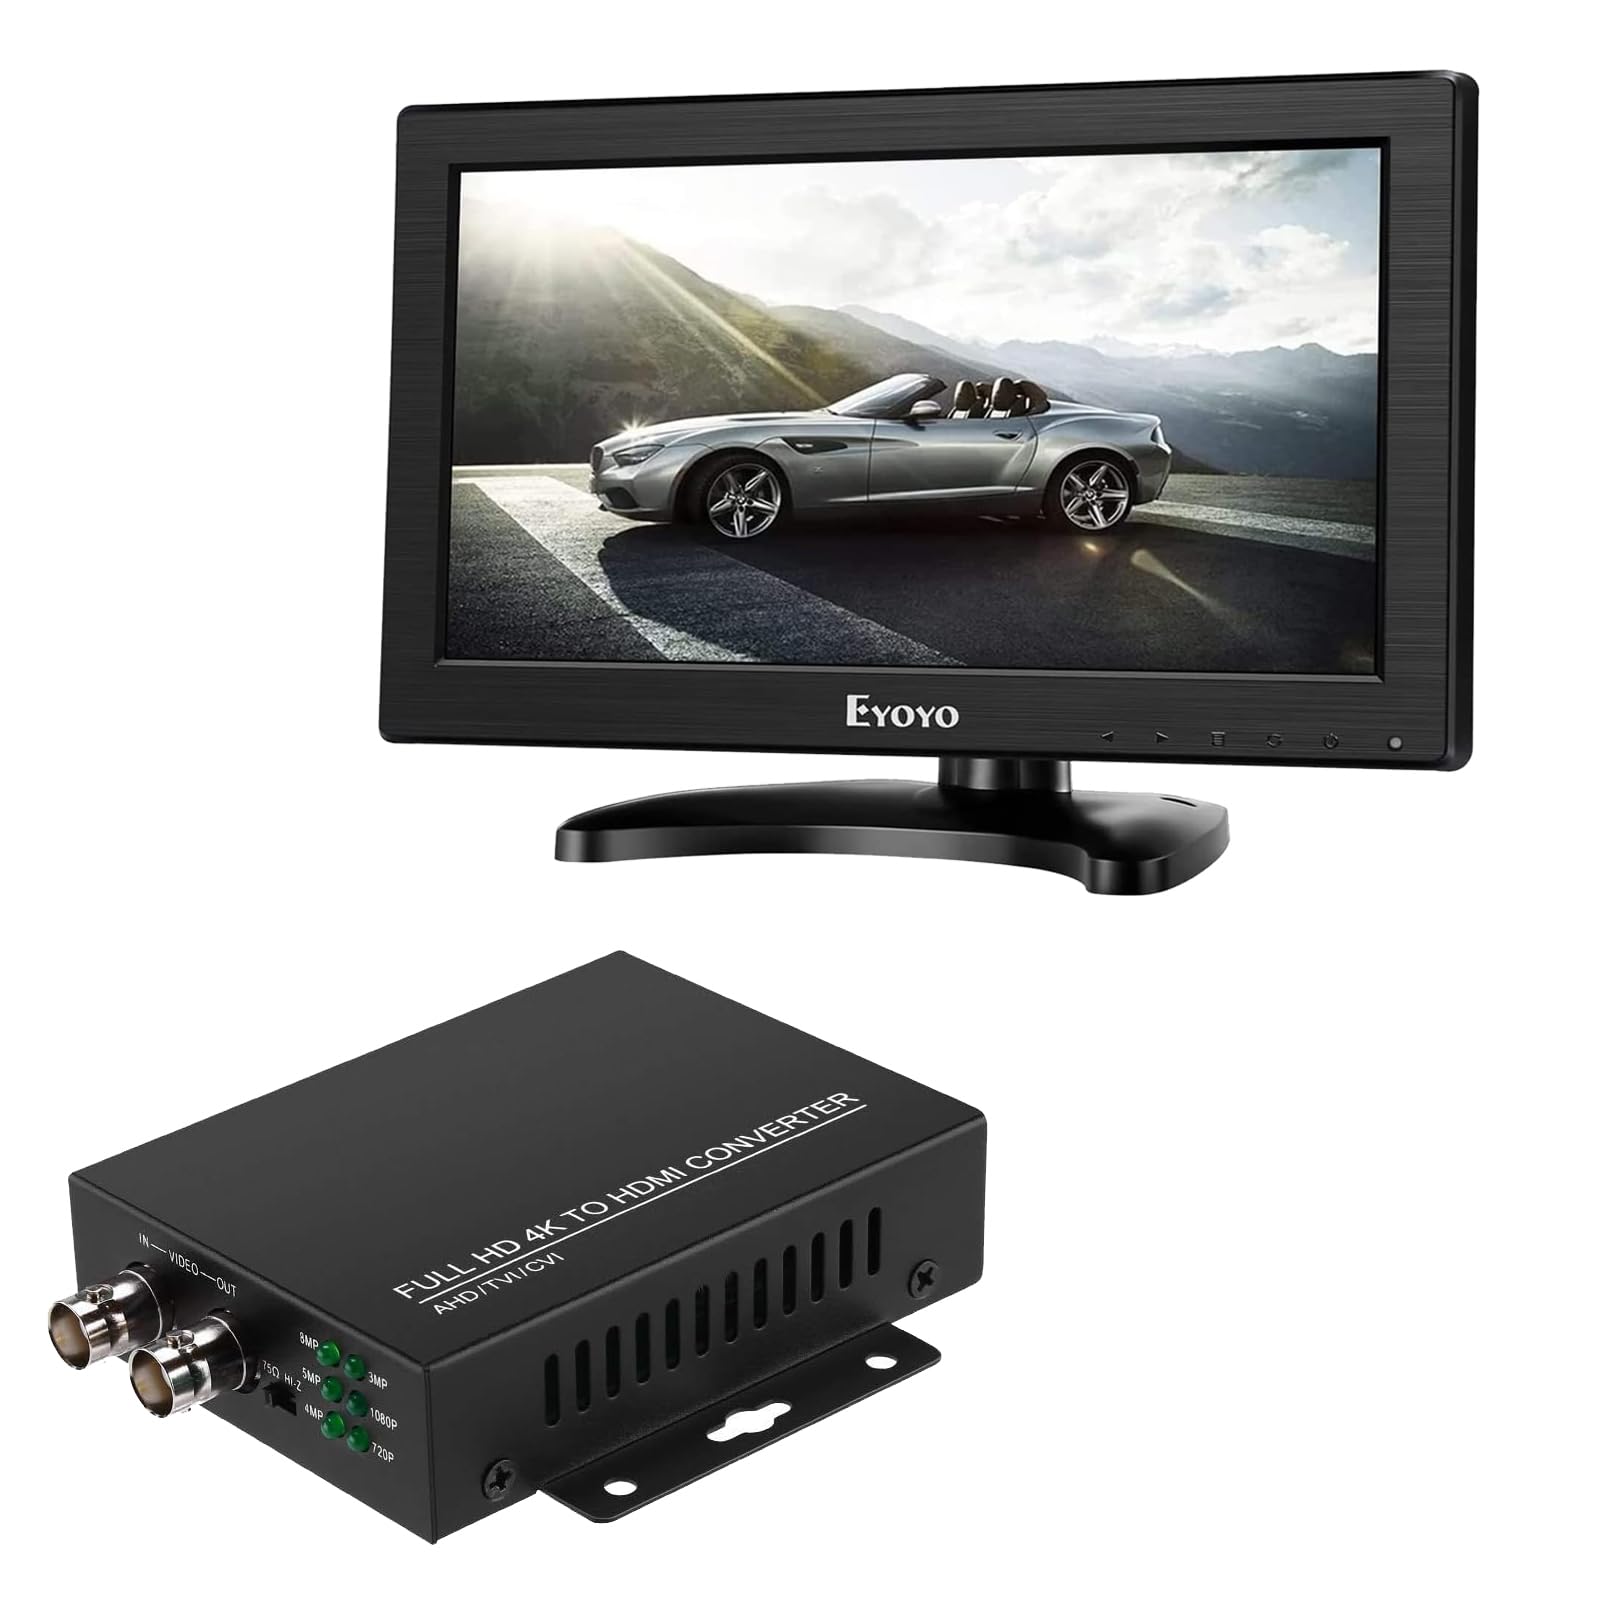
Foto 1: N'ihu view of the Eyoyo 12-inch TFT LCD Monitor.
2. Ozi nchekwa
- Read all instructions carefully before using the monitor.
- Keep the monitor away from water, moisture, and high humidity environments.
- Do not expose the monitor to direct sunlight or extreme temperatures.
- Gbaa mbọ hụ na ikuku ikuku kwesịrị ekwesị; egbochila oghere ikuku.
- Jiri naanị ihe nkwụnye ọkụ nke onye nrụpụta nyere.
- Zere itinye ihe ndị dị arọ na eriri ike.
- Do not attempt to open or repair the monitor yourself. Refer all servicing to qualified personnel.
- Clean the monitor with a soft, dry cloth. Avoid liquid cleaners.
3. Ihe ngwugwu
Biko lelee ihe dị n'ime ngwugwu ahụ mgbe ị na-ewepụ ihe ndị ahụ. Ọ bụrụ na ihe ọ bụla efuola ma ọ bụ mebie, kpọtụrụ onye na-ere ahịa gị.
- Eyoyo 12-inch TFT LCD Monitor
- Ihe nkwụnye ọkụ
- Nyochaa Guzosie
- HDMI Cable (may vary by package)
- VGA Cable (may vary by package)
- Akwụkwọ ntuziaka onye ọrụ
4. Ngwaahịa gafereview
4.1 Nyochaa akụkụ

Figure 2: Monitor dimensions. The screen measures approximately 11.6 inches diagonally, with a width of 10.2 inches and a height of 5.8 inches. The monitor itself is 11.6 inches wide, 7.4 inches high, and 1.3 inches deep. The stand allows for 180-degree tilt and 360-degree swivel.
4.2 Rear Panel and Interfaces
The rear panel of the monitor features various input and output ports for connecting different devices.

Figure 3: Rear panel interfaces. From left to right: DC power input, VGA input, HDMI input, AV input (RCA), Mic input, Earphone output, USB port, BNC input.
- Ntinye DC: Maka ijikọ nkwụnye ọkụ.
- Ntinye VGA: Maka ijikọ na kọmputa ma ọ bụ ngwaọrụ ndị ọzọ nwere mmepụta VGA.
- Ntinye HDMI: For connecting to devices with HDMI output, supporting up to 1080P resolution.
- Ntinye AV: For connecting to devices with composite video (RCA) output.
- Mic ọsọ ọsọ: Maka njikọ igwe okwu.
- Ear Output: Maka ijikọ ekweisi ma ọ bụ igwe okwu mpụga.
- Ọdụ ụgbọ mmiri USB: Supports USB 2.0 for media playback. Ensure audio, video, visuals, and files are in the initial folder for recognition.
- BNC Input: For connecting to security cameras (CVBS signal only). For AHD/TVI/CVI cameras, an external converter is required.
5. Nhazi
5.1 Na-agbakwunye nkwụnye ahụ
- Jiri nlezianya tinye ihu ihe nlele ahụ n'elu ebe dị nro ma dị ọcha iji gbochie ọwa.
- Align the stand base with the mounting holes on the back of the monitor.
- Chekwaa nkwudo ahụ site na iji kposara enyere.
5.2 Ijikọ ike
- Connect the power adapter to the DC input port on the rear of the monitor.
- Tinye ihe nkwụnye ọkụ n'ime oghere eletrik ọkọlọtọ.
5.3 Jikọọ Isi mmalite vidiyo
Choose the appropriate cable for your device and connect it to the corresponding input port on the monitor.
- HDMI: Connect an HDMI cable from your device (e.g., PC, Raspberry Pi, TV-Box) to the monitor's HDMI input.
- VGA: Connect a VGA cable from your PC or laptop to the monitor's VGA input.
- Nke: Connect RCA cables from your DVD player or TV-Box to the monitor's AV input.
- BNC (CVBS): Connect a BNC cable from your CVBS security camera to the monitor's BNC input.
- TVI/CVI/AHD Cameras: For these camera types, an external converter is required. Connect your TVI/CVI/AHD camera to the converter's input, and then connect the converter's HDMI output to the monitor's HDMI input.

Figure 4: Connection diagram for TVI/CVI/AHD/CVBS cameras using an external HDMI converter. The converter takes input from various camera types and outputs a 1080P HDMI signal to the monitor.
6. Ntuziaka ọrụ
6.1 Gbanyụọ ma ọ bụ gbanyụọ
Pịa bọtịnụ ike dị n'ihu ma ọ bụ n'akụkụ ihe ngosi ahụ iji gbanye ya ma ọ bụ gbanyụọ ya. Ọkụ ihe ngosi ike ahụ ga-enwu mgbe ihe ngosi ahụ gbanyere.
6.2 Nhọrọ Isi mmalite ntinye
Use the "Input" or "Source" button on the monitor to cycle through available input sources (HDMI, VGA, AV, BNC, USB). Select the input corresponding to your connected device.
6.3 Menu Navigation and Image Settings
Use the menu buttons (Menu, Up, Down, Enter) to navigate the On-Screen Display (OSD) menu. Adjust settings such as:
- Icha ọkụ: Gbanwee ìhè zuru oke nke ihuenyo ahụ.
- Ntughari: Adjust the difference between light and dark areas.
- Okpomọkụ agba: Select preset color temperatures (e.g., Warm, Cool, User) or adjust RGB values manually.
- Akụkụ akụkụ: Choose between 16:9, 4:3, or other available options.
6.4 Mirror Flip Function
The monitor supports horizontal and vertical image flipping, which is useful for various mounting configurations, such as teleprompter use or ceiling mounts.

Figure 5: Demonstration of the mirror flip function. The image shows the display in normal, horizontally flipped, vertically flipped, and both horizontally and vertically flipped orientations.
6.5 CCTV Monitor Usage
When used as a CCTV monitor, connect your CVBS security camera directly to the BNC input. For AHD/TVI/CVI cameras, use an external converter as described in Section 5.3.

Figure 6: The monitor displaying footage from a CCTV camera. Note that the BNC input supports CVBS signals only. For AHD/TVI/CVI cameras, an external converter is necessary.
6.6 Simultaneous BNC + HDMI Output (with Converter)
When using the external 4K HD to HDMI converter (for AHD/TVI/CVI cameras), it is possible to output the video signal simultaneously to two displays: one via BNC and one via HDMI. This requires a converter that supports dual output.

Figure 7: Connection diagram for simultaneous BNC and HDMI output. A single camera input is fed into a converter, which then provides both a BNC output to a tester monitor and an HDMI output to the Eyoyo monitor.
7. Nlekọta
7.1 Na-ehicha ihe nleba anya
- Wepụ ihe nleba anya mgbe niile na oghere ọkụ tupu ihicha ya.
- Use a soft, lint-free cloth to gently wipe the screen and exterior surfaces.
- Maka akara isi ike, ntakịrị dampen akwa na mmiri ma ọ bụ dị nwayọọ, na-adịghị abrasive ihuenyo Cleaner. Afesala mmiri mmiri ozugbo na ihuenyo.
- Avoid using alcohol, ammonia, or abrasive cleaners, as they can damage the screen or casing.
7.2 Nchekwa
When not in use for extended periods, store the monitor in a cool, dry place, away from direct sunlight and extreme temperatures. It is recommended to keep the original packaging for safe storage and transport.
8. Nchọpụta nsogbu
| Nsogbu | Ihe nwere ike ime | Ngwọta |
|---|---|---|
| Enweghị ike | Power cable not connected; Power adapter faulty; Power outlet not working. | Ensure power cable is securely connected. Test power adapter with another device. Try a different power outlet. |
| Enweghị mgbaama / Ihuenyo efu | Incorrect input source selected; Video cable loose or faulty; Source device not powered on or outputting signal. | Select the correct input source (HDMI, VGA, AV, BNC). Check video cable connections. Ensure source device is on and configured to output video. |
| Image distorted / Poor quality | Incorrect resolution; Faulty cable; Monitor settings incorrect. | Adjust source device resolution to 1366x768 or a compatible resolution. Try a different video cable. Reset monitor settings to default. |
| Mgbasa ozi USB anaghị egwu | USB format not supported; Files not in initial folder; USB 3.0 device. | Ensure USB is 2.0 compatible. Place media files directly in the root directory of the USB drive. Check supported file formats in the manual (if specified, otherwise general advice). |
| Enweghị ọdịyo | Volume too low; Audio cable not connected; Source device audio settings. | Increase monitor volume. Ensure audio cables (if using AV) are connected. Check audio output settings on the source device. |
9. Nkọwapụta
| Ụdị | Eyoyo |
| Nọmba nlereanya | 48c83d7f-f4ae-48f4-8cf8-7aaf6f4ef751 |
| Nha ihuenyo | 12.5 sentimita asatọ |
| Ụdị ngosi | TFT LCD |
| Mkpebi | 1366 x768 |
| Akụkụ akụkụ | 16:9 |
| Ntinye ọdụ ụgbọ mmiri | HDMI, VGA, AV, BNC, USB 2.0 |
| Ọdụ ụgbọ mmiri mmepụta | Igwe ntị |
| Ihu Ihuenyo | kenkowaputa |
| TVI/CVI/AHD Converter | Integrated (converts to HDMI output) |
10. Akwụkwọ ikike na nkwado
Eyoyo products are designed and manufactured to the highest quality standards. This product is covered by a limited warranty from the date of purchase. For specific warranty terms and conditions, please refer to the warranty card included with your product or contact Eyoyo customer support.
For technical support, troubleshooting assistance, or service inquiries, please visit the official Eyoyo website or contact their customer service department. Please have your product model number and purchase information ready when contacting support.
Eyoyo USA
(Seller information from Amazon buybox)


