1. Okwu mmalite
Thank you for choosing the Mecer 23.8 Inch Full HD LED Monitor. This manual provides essential information for setting up, operating, and maintaining your monitor. Please read it thoroughly before use to ensure proper functionality and longevity of your device.
This monitor features a 23.8-inch Full HD (1920 x 1080) display, offering crisp and clear visuals. It incorporates TFT LED panel technology for energy efficiency and vibrant colors, with a 16:9 aspect ratio suitable for widescreen viewing. Connectivity options include VGA and HDMI, making it compatible with various devices. Built-in speakers provide basic audio, and wide 178° viewing angles ensure comfortable use. With a 2ms response time, it is suitable for general computing and multimedia consumption.
2. Ozi nchekwa
- Isi mmalite ike: Use only the power adapter supplied with the monitor. Ensure the power outlet is properly grounded.
- Igwe ikuku: Do not block ventilation openings. Allow adequate space around the monitor for proper airflow to prevent overheating.
- Nkwanye: Place the monitor on a stable, flat surface. Avoid placing it in direct sunlight, near heat sources, or in environments with excessive dust or humidity.
- Nhicha: Disconnect the power cord before cleaning. Use a soft, dry cloth for the screen and a slightly damp cloth for the casing. Zere iji ihe nhicha ma ọ bụ ihe mgbaze.
- Mkpughe mmiri mmiri: Keep liquids away from the monitor. If liquid enters the monitor, disconnect power immediately and contact qualified service personnel.
- Mbupu: Do not attempt to disassemble or repair the monitor yourself. Refer all servicing to qualified service personnel.
3. Ihe ngwugwu
Biko lelee ọdịnaya nke ngwugwu ahụ ka ị hụ na ihe niile dị:
- Mecer 23.8 Inch LED Monitor
- Nyochaa Stand (Base and Olu)
- Ihe nkwụnye ọkụ na eriri
- HDMI USB
- USB VGA
- Akwụkwọ ntuziaka (akwụkwọ a)
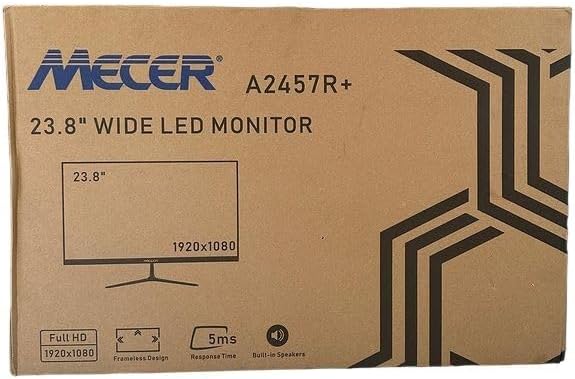
Foto nke 3.1: The monitor packaging box, indicating the model A2457R+ and key features like 23.8" display, Full HD 1920x1080 resolution, frameless design, 5ms response time, and built-in speakers.
4. Nhazi
4.1. Ịchịkọta ihe nguzozi ihe nlele ahụ
- Jiri nlezianya wepụ ihe nleba anya ma guzobe ihe ndị dị na nkwakọ ngwaahịa ahụ.
- Attach the stand neck to the monitor panel by aligning the tabs and pushing firmly until it clicks into place.
- Attach the stand base to the stand neck, securing it with the provided screw (usually hand-tightened).
- Debe ihe nleba anya gbakọtara n'elu kwụsiri ike ma dịkwa larịị.

Foto nke 4.1: N'ihu view of the Mecer 23.8 Inch LED Monitor with its stand assembled, ready for connection.
4.2. Ijikọ na Kọmputa
The monitor supports both HDMI and VGA connections. Choose the appropriate cable for your computer.
- Njikọ HDMI: Connect one end of the HDMI cable to the HDMI port on your computer's graphics card and the other end to the HDMI port on the monitor. HDMI transmits both video and audio signals.
- Njikọ VGA: Connect one end of the VGA cable to the VGA port on your computer's graphics card and the other end to the VGA port on the monitor. VGA transmits only video signals.

Foto nke 4.2: N'azụ view of the Mecer 23.8 Inch LED Monitor, showing the input ports including HDMI and VGA, as well as the power input.
4.3. Njikọ ike
- Connect the power adapter cable to the DC IN port on the back of the monitor.
- Tinye nkwụnye ọkụ n'ime oghere mgbidi.
5. Ntuziaka ọrụ
5.1. Ịgbanye / gbanyụọ
Press the power button, typically located on the bottom right side or rear of the monitor, to turn the monitor on or off. The power indicator light will illuminate when the monitor is on.
5.2. Nhọrọ Isi mmalite ntinye
If you have multiple devices connected, you may need to manually select the input source. Use the monitor's control buttons (usually located near the power button) to navigate to the input selection menu and choose between HDMI or VGA.
5.3. Ngosipụta ihuenyo (OSD) NchNhr
The OSD menu allows you to adjust various display settings. Use the monitor's control buttons to:
- Nweta menu OSD.
- Navigate through menu options (e.g., Brightness, Contrast, Color Settings, Input Source).
- Adjust values or select options.
- Wepụ menu OSD.
Common adjustable settings include:
- Icha ọkụ/ọdịiche: Gbanwee ìhè na ọdịiche dị n'etiti ebe ìhè na ebe gbara ọchịchịrị.
- Ntọala agba: Adjust color temperature, RGB values, or select preset color modes.
- Akụkụ akụkụ: Change between 16:9, 4:3, or other available options.
- Audio: Adjust volume for the built-in speakers.
5.4. Ndị na-ekwu okwu n'ime ya
The monitor includes built-in speakers for basic audio output. If using an HDMI connection, audio will be transmitted automatically. For VGA connections, ensure your computer's audio output is configured correctly. Adjust the volume through the OSD menu or your computer's operating system.
6. Nlekọta
6.1. Na-ehicha ihe nlekota
- Wepụ ihe nleba anya mgbe niile na oghere ọkụ tupu ihicha ya.
- Ihuenyo: Jiri nwayọ hichaa ihuenyo ahụ site na iji akwa dị nro na-enweghị lint. Maka akara ndị isi ike, dị obere dampen the cloth with water or a specialized screen cleaner (ensure it's alcohol-free and ammonia-free) and wipe carefully. Do not spray liquid directly onto the screen.
- Casing: Jiri ákwà dị nro ma kpọrọ nkụ hichaa ihe nlele ahụasing. If necessary, a slightly damp enwere ike iji akwa mee ihe, na-esote akwa akọrọ.
6.2. Nchekwa
Ọ bụrụ na ị na-echekwa ihe nlele ahụ ruo ogologo oge, wepụ eriri niile, tinye ya na ngwugwu mbụ ya (ọ bụrụ na ọ dị), ma debe ya n'ebe dị jụụ ma kpọọ nkụ, ebe anwụ na-anaghị apụta kpọmkwem na oke okpomọkụ.
7. Nchọpụta nsogbu
Ọ bụrụ na ịnwee nsogbu na ihe nleba anya gị, rụtụ aka na nsogbu na azịza ndị a na-ahụkarị:
- Enweghị ike:
- Hụ na eriri ọkụ eletrik ahụ jikọtara nke ọma na ihe nlele na oghere mgbidi.
- Nyochaa na ntinye ọkụ na-arụ ọrụ site na nkwụnye na ngwaọrụ ọzọ.
- Lelee ma ihe nkwụnye ọkụ ahụ na-arụ ọrụ nke ọma.
- Enweghị akara:
- Ensure the video cable (HDMI or VGA) is securely connected to both the monitor and the computer.
- Verify that the correct input source is selected on the monitor (via the OSD menu).
- Check if your computer is powered on and outputting a video signal.
- Try a different video cable if available.
- Foto ahụ adịghị mma ma ọ bụ gbagọrọ agbagọ:
- Ensure the monitor's resolution is set to its native resolution (1920 x 1080) in your computer's display settings.
- Adjust the monitor's OSD settings for brightness, contrast, and sharpness.
- For VGA connections, use the 'Auto Adjust' function in the OSD menu if available.
- No Audio from Built-in Speakers:
- Ensure the monitor's volume is not muted or set too low in the OSD menu.
- Check your computer's audio output settings to ensure the monitor is selected as the playback device.
- If using VGA, ensure your computer's audio is routed to an external speaker system, as VGA does not carry audio.
8. Nkọwapụta
| Njirimara | Nkọwapụta |
|---|---|
| Ụdị | Mecer |
| Nọmba nlereanya | A2457R+ |
| Ngosipụta nha | 23.8 sentimita asatọ |
| Mkpebi | 1920 x 1080 pikselụ (HD zuru ezu) |
| Ụdị ngosi | LED (TFT LED Panel) |
| Akụkụ akụkụ | 16:9 |
| Oge nzaghachi | 2 nkeji |
| Ọnụego ume ọhụrụ | 75 Hz |
| Viewna akụkụ | 178° kwụ ọtọ / 178° kwụ ọtọ |
| Njikọta | 1 x HDMI, 1 x VGA |
| Ndị na-ekwu okwu arụrụ arụ | Ee |
| Agba | Nwa |
| Akụkụ ngwaahịa (D x W x H) | 560D x 42W x 410H millimetres |
| Atụmatụ pụrụ iche | High performance intelligent multi-frequency scanning, Micro Computer digital technology control, no radiation, no glare, Comply with VESA DPMS international power saving regulation, Support DDC 1/2B and Windows PNP Plug and Play |
9. Akwụkwọ ikike na nkwado
This Mecer monitor comes with a Akwụkwọ ikike dị afọ 1 site na ụbọchị ịzụrụ. Biko dowe ihe akaebe nke ịzụrụ ihe maka akwụkwọ ikike.
For technical support, service, or warranty inquiries, please contact your retailer or the authorized Mecer service center in your region. Do not attempt to repair the product yourself, as this may void your warranty.