Okwu mmalite
This manual provides detailed instructions for the assembly, operation, and maintenance of your Tribesigns 59-Inch Computer Desk with 3 Drawers. Please read all instructions carefully before beginning assembly and retain this manual for future reference.
Akụkụ ndị bụ isi:
- Adaptable & Reversible Drawers: The drawer section can be installed on either the left or right side to suit personal preferences.
- Large Desktop for Work: Generous dimensions of 59.05" W x 19.68" D x 29.52" H provide an extensive work surface.
- Three Capacious Drawers: Includes one specifically customized for file nchekwa.
- Versatile Design: Blends a robust black metal frame with a rustic brown wooden tabletop for an industrial aesthetic.
- Prioritized Safety: Features smooth edges to prevent accidental injuries or scratches.
- Adjustable Foot Pads: Ensures stability on uneven surfaces.
Ozi nchekwa
To ensure safe use of your computer desk, please observe the following:
- The desk incorporates smooth edges to prevent accidental injuries or scratches during routine activities.
- Ensure all screws and fasteners are securely tightened during assembly and periodically check for tightness.
- Do not overload the desk or drawers beyond their intended capacity.
- Debe obere akụkụ n'ebe ụmụaka nọ n'oge mgbakọ iji gbochie ihe ize ndụ ịkpagbu.
- Assemble the desk on a soft, clean surface to avoid scratching the product.
Ihe ngwugwu
Before assembly, verify that all components listed below are present. If any parts are missing or damaged, please contact customer service.
Hardware and Parts List:
- Ntuziaka Mgbakọ
- Hardware (screws, bolts, adjustable foot pads, drawer slides, handles)
- Desk components (desktop panels, metal frame parts, drawer panels)
Refer to the assembly video for a visual breakdown of all included parts and hardware.
Ntuziaka Mgbakọ
Assembly is recommended for two people. Please follow these steps carefully. An assembly video is provided for visual guidance.
Vidiyo Mgbakọ:
Official Tribesigns 59-Inch Computer Desk Assembly Video. This video provides a step-by-step visual guide for assembling the desk, including all components and hardware.
Ntuziaka nzọụkwụ site na nzọụkwụ:
Kwụpụ 1: Tinye ihe mgbochi ụkwụ na-agbanwe agbanwe
Attach the adjustable foot pads (K) to the bottom of the metal frame parts (14, 15, 16). Ensure they are securely fastened to provide stability.

Image shows a person attaching adjustable foot pads to the base of the metal frame components.
Nzọụkwụ 2: Wụnye Drawer Slides
Separate the drawer slides (J) into two parts (J-1 and J-2). Attach the J-1 parts to the inner sides of the drawer cabinet frames (15, 16) using the provided screws (M3.5*14, 4 pcs). Ensure they are aligned correctly for smooth drawer operation.

Image illustrates the process of screwing the drawer slide components onto the side panels of the drawer unit.
Step 3: Assemble the Desk Frame (Left Side)
Connect the curved metal leg (18) to the horizontal support bar (19) using screws (C, M6*12, 2 pcs). Then, attach this assembly to the left drawer cabinet frame (15) using screws (B, M6*40, 4 pcs). Repeat for the other side of the left frame.

Image shows a person connecting the curved leg to the horizontal bar and then to the drawer cabinet frame.
Step 4: Attach Crossbars to Desk Frame
Secure the crossbars (17, 20) to the assembled desk frame using screws (C, M6*12, 4 pcs) and (B, M6*40, 2 pcs). These provide additional stability to the structure.

Image shows the attachment of the crossbars to the metal frame for structural support.
Step 5: Secure Desktop Panels
Place the desktop panels (1 and 2) onto the assembled metal frame. Align the pre-drilled holes and secure them using screws (A, M5*50, 10 pcs). Ensure both panels are flush and tightly fastened.

Image shows the desktop panels being placed and screwed onto the metal frame.
Step 6: Assemble Drawers (Box Drawers)
For the box drawers, connect the front (4), back (7), and side panels (5, 6) to the bottom panel (8) using screws (F, 4 pcs) and wooden dowels (G, 4 pcs). Ensure the back panel (7) slides into the groove of the side panels. Secure the drawer handle (H) to the front panel (4) using screws (M3.5*14, 2 pcs).

Image shows the assembly of a drawer box, including attaching panels and the handle.
Nzọụkwụ 7: Gbakọta File Drawer
Maka file drawer, connect the front (9), back (12), and side panels (10, 11) to the bottom panel (13) using screws (F, 4 pcs) and wooden dowels (G, 4 pcs). Insert the metal file bars (21) into the designated slots on the side panels. Attach the J-2 parts of the drawer slides to the sides of the assembled drawer using screws (M3.5*14, 4 pcs). Secure the drawer handle (H) to the front panel (9) using screws (M3.5*14, 2 pcs).

Image shows the assembly of a file drawer, including the file bars and drawer slides.
Step 8: Insert Drawers into Cabinet
Carefully align the drawer slides (J-2) on the assembled drawers with the corresponding slides (J-1) on the drawer cabinet frame. Gently push the drawers into place until they click and slide smoothly. Ensure all three drawers are installed correctly.

Image shows a person inserting a completed drawer into the desk's drawer cabinet.
Ntuziaka ọrụ
Reversible Drawer Configuration:
The Tribesigns Computer Desk features a reversible design, allowing the drawer section to be installed on either the left or right side of the main desk. This flexibility enables you to customize your workspace layout according to your preference and room configuration. The assembly steps provided above demonstrate the installation process, which is adaptable for both left and right-side placement.
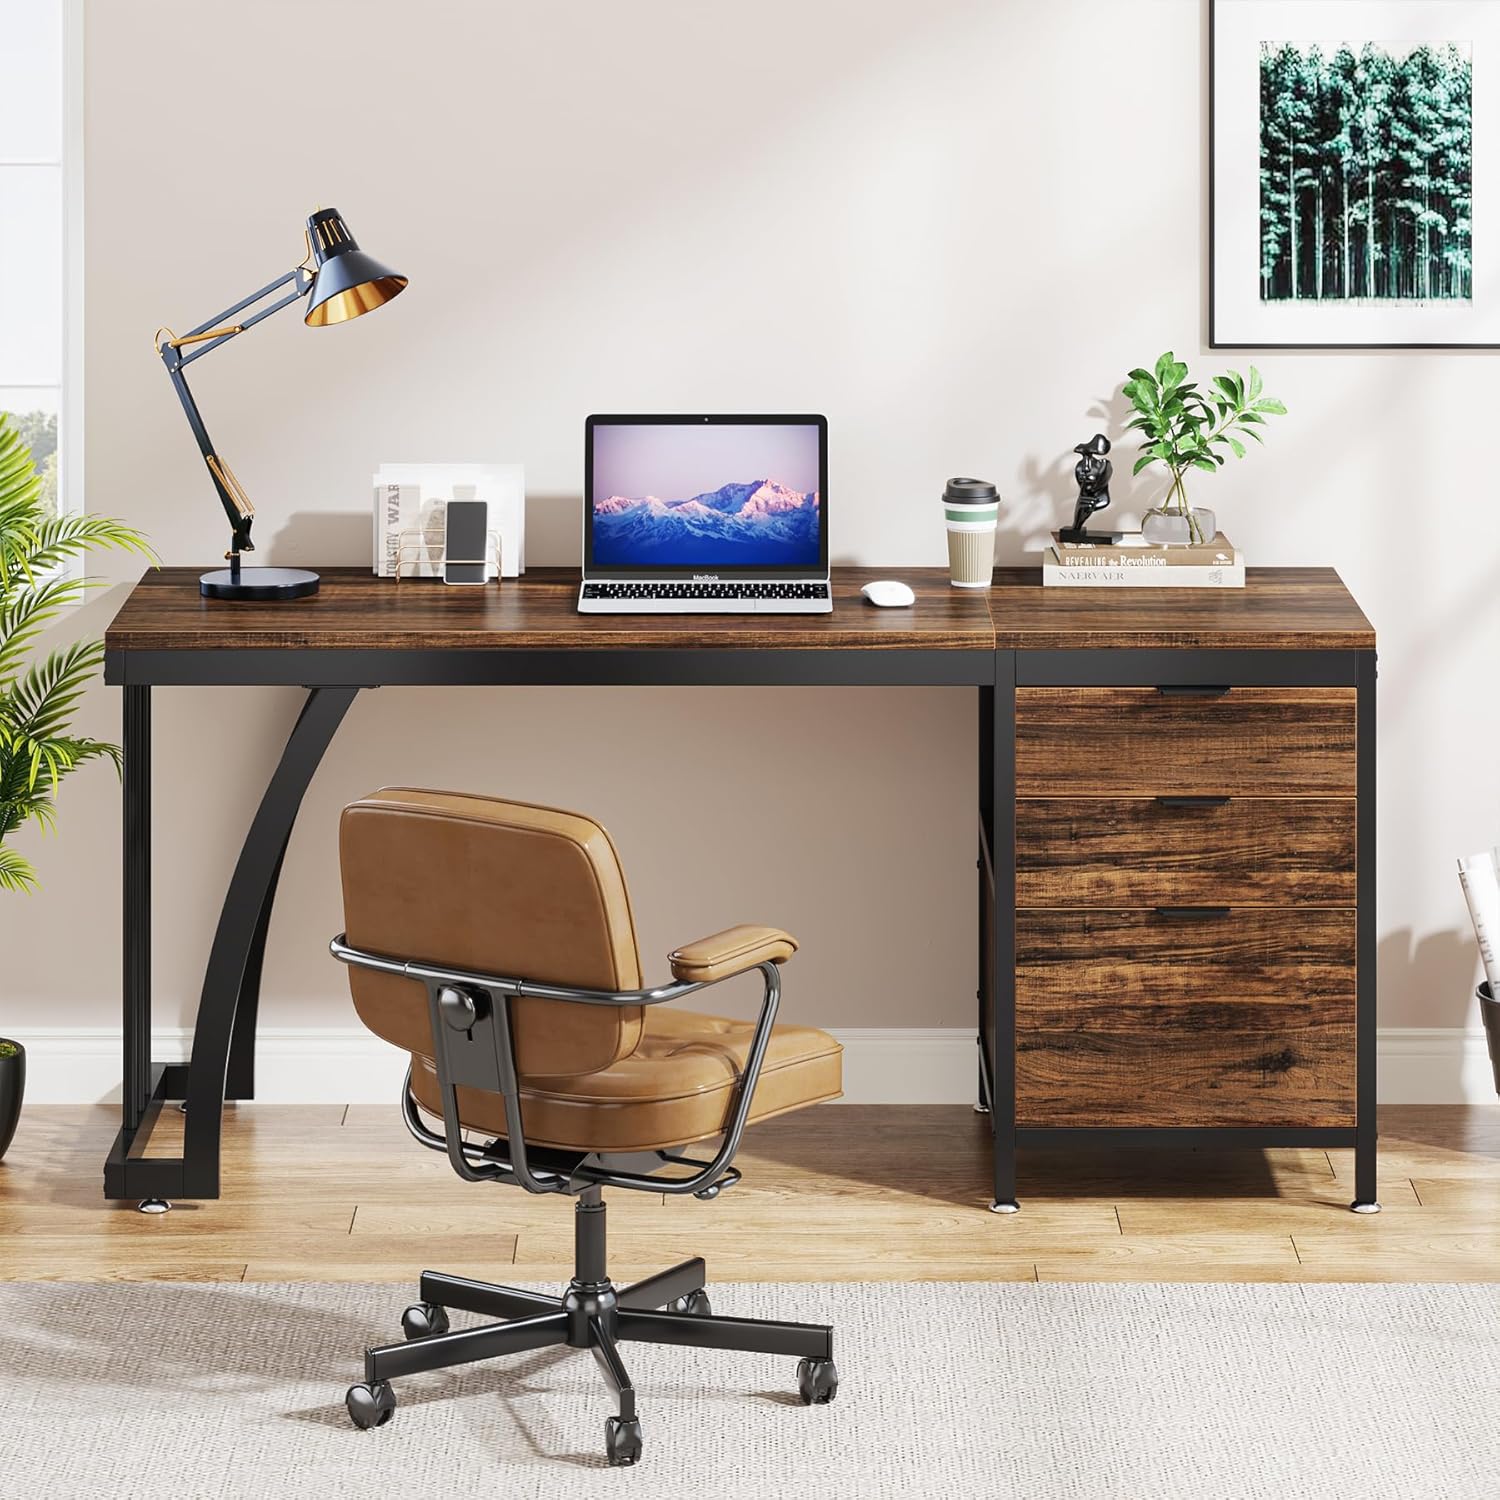
Image showing the desk configured with the drawer unit on the right side.

Image showing the desk configured with the drawer unit on the left side.
Ojiji drawer:
- The desk includes two standard box drawers and one file drawer.
- Nke file drawer is designed to accommodate standard hanging file nchekwa.
- To open a drawer, gently pull the handle. To close, push the drawer firmly until it is fully seated.
- Avoid forcing drawers open or closed to prevent damage to the slides.
Mpempe ụkwụ na-edozigharị:
The desk is equipped with adjustable foot pads to ensure stability on uneven floors. To adjust, simply rotate the foot pads clockwise to raise the desk corner or counter-clockwise to lower it until the desk is level and stable.
Nlekọta
Proper care will extend the life of your Tribesigns Computer Desk.
- Nhicha: Jiri mgbasa ozi hichapụ elu tebụlamp akwa . Zere kemịkalụ siri ike ma ọ bụ ihe nhicha nke nwere ike imebi njedebe.
- Akụkụ igwe: Periodically check metal parts for any signs of rust or wear. Clean and dry immediately if moisture is present.
- Ihe nkwụnye: Regularly inspect all screws and bolts to ensure they remain tight. Re-tighten as necessary to maintain structural integrity.
- Ihe nkiri drawer: If drawers become stiff, apply a small amount of silicone-based lubricant to the drawer slides.
- Zere ìhè anyanwụ kpọmkwem: Ikpughe ya ruo ogologo oge n'anwụ nwere ike ime ka ọ ghara ịpụta ìhè ma ọ bụ mebie ihe e ji osisi rụọ.
Nchọpụta nsogbu
Ọ bụrụ na ị hụ nsogbu ọ bụla na desktọpụ gị, lee ihe ngwọta ndị a na-ahụkarị:
- Desktọpụ mkpara: Check if the adjustable foot pads are properly leveled. Adjust each foot pad until the desk is stable. Ensure all frame connections are securely tightened.
- Drawers Stick or Don't Close Smoothly: Verify that the drawer slides are correctly installed and aligned. Ensure no objects are obstructing the drawer's path. Lubricate slides if necessary. Check that the drawer box itself is assembled squarely.
- Akụkụ Ndị Na-efu ma ọ bụ Ihe Ndị Mebiri Emebi: If you discover any missing parts or damaged components upon opening the package, please contact Tribesigns customer service immediately for assistance.
- Ihe isi ike n'oge Mgbakọ: Review the assembly video and step-by-step instructions carefully. Ensure you are using the correct hardware for each step. If issues persist, contact customer support.
Nkọwapụta
| Ụdị | Agbụrụ |
| Nọmba nlereanya | YA06-J5031WQQ |
| Akụkụ ngwaahịa | 19.7"D x 59"W x 29.5"H |
| Ibu Ibu | 30 kilogram |
| Agba | Rustic Brown |
| Ụdị | Ụlọ ọrụ mmepụta ihe |
| Ụdị ihe kacha elu | Wood (Engineered Wood) |
| Isi ihe | Ọla |
| Onu ogugu | 3 (2 Box Drawers, 1 File drawer) |
| Njirimara Pụrụ Iche | Reversible Drawer Configuration |
| Mgbakọ achọrọ | Ee |
| Ọnụọgụ ndị mmadụ akwadoro maka Mgbakọ | 2 |
| Ntuziaka nlekọta ngwaahịa | Dị ọcha na damp cloth, check for rust or wear on metal parts |
Akwụkwọ ikike na nkwado
Tribesigns offers a limited warranty for this product. For specific warranty details, please refer to the documentation included with your purchase or contact Tribesigns customer service.
For any questions, assistance with assembly, or to report missing/damaged parts, please contact our customer service team. Your satisfaction is our priority.
- Ndị ọrụ nlekọta ndị ahịa: Refer to your purchase documentation for contact information.
- Atụmatụ nchebe: Extended protection plans may be available for purchase. Check with your retailer for options.


