1. Okwu mmalite
Daalụ maka ịzụrụasing the Modway Chaucer 18-inch Bathroom Vanity Cabinet. This manual provides detailed instructions for the safe assembly, installation, operation, and maintenance of your new vanity cabinet. Please read all instructions carefully before beginning assembly and retain this manual for future reference.
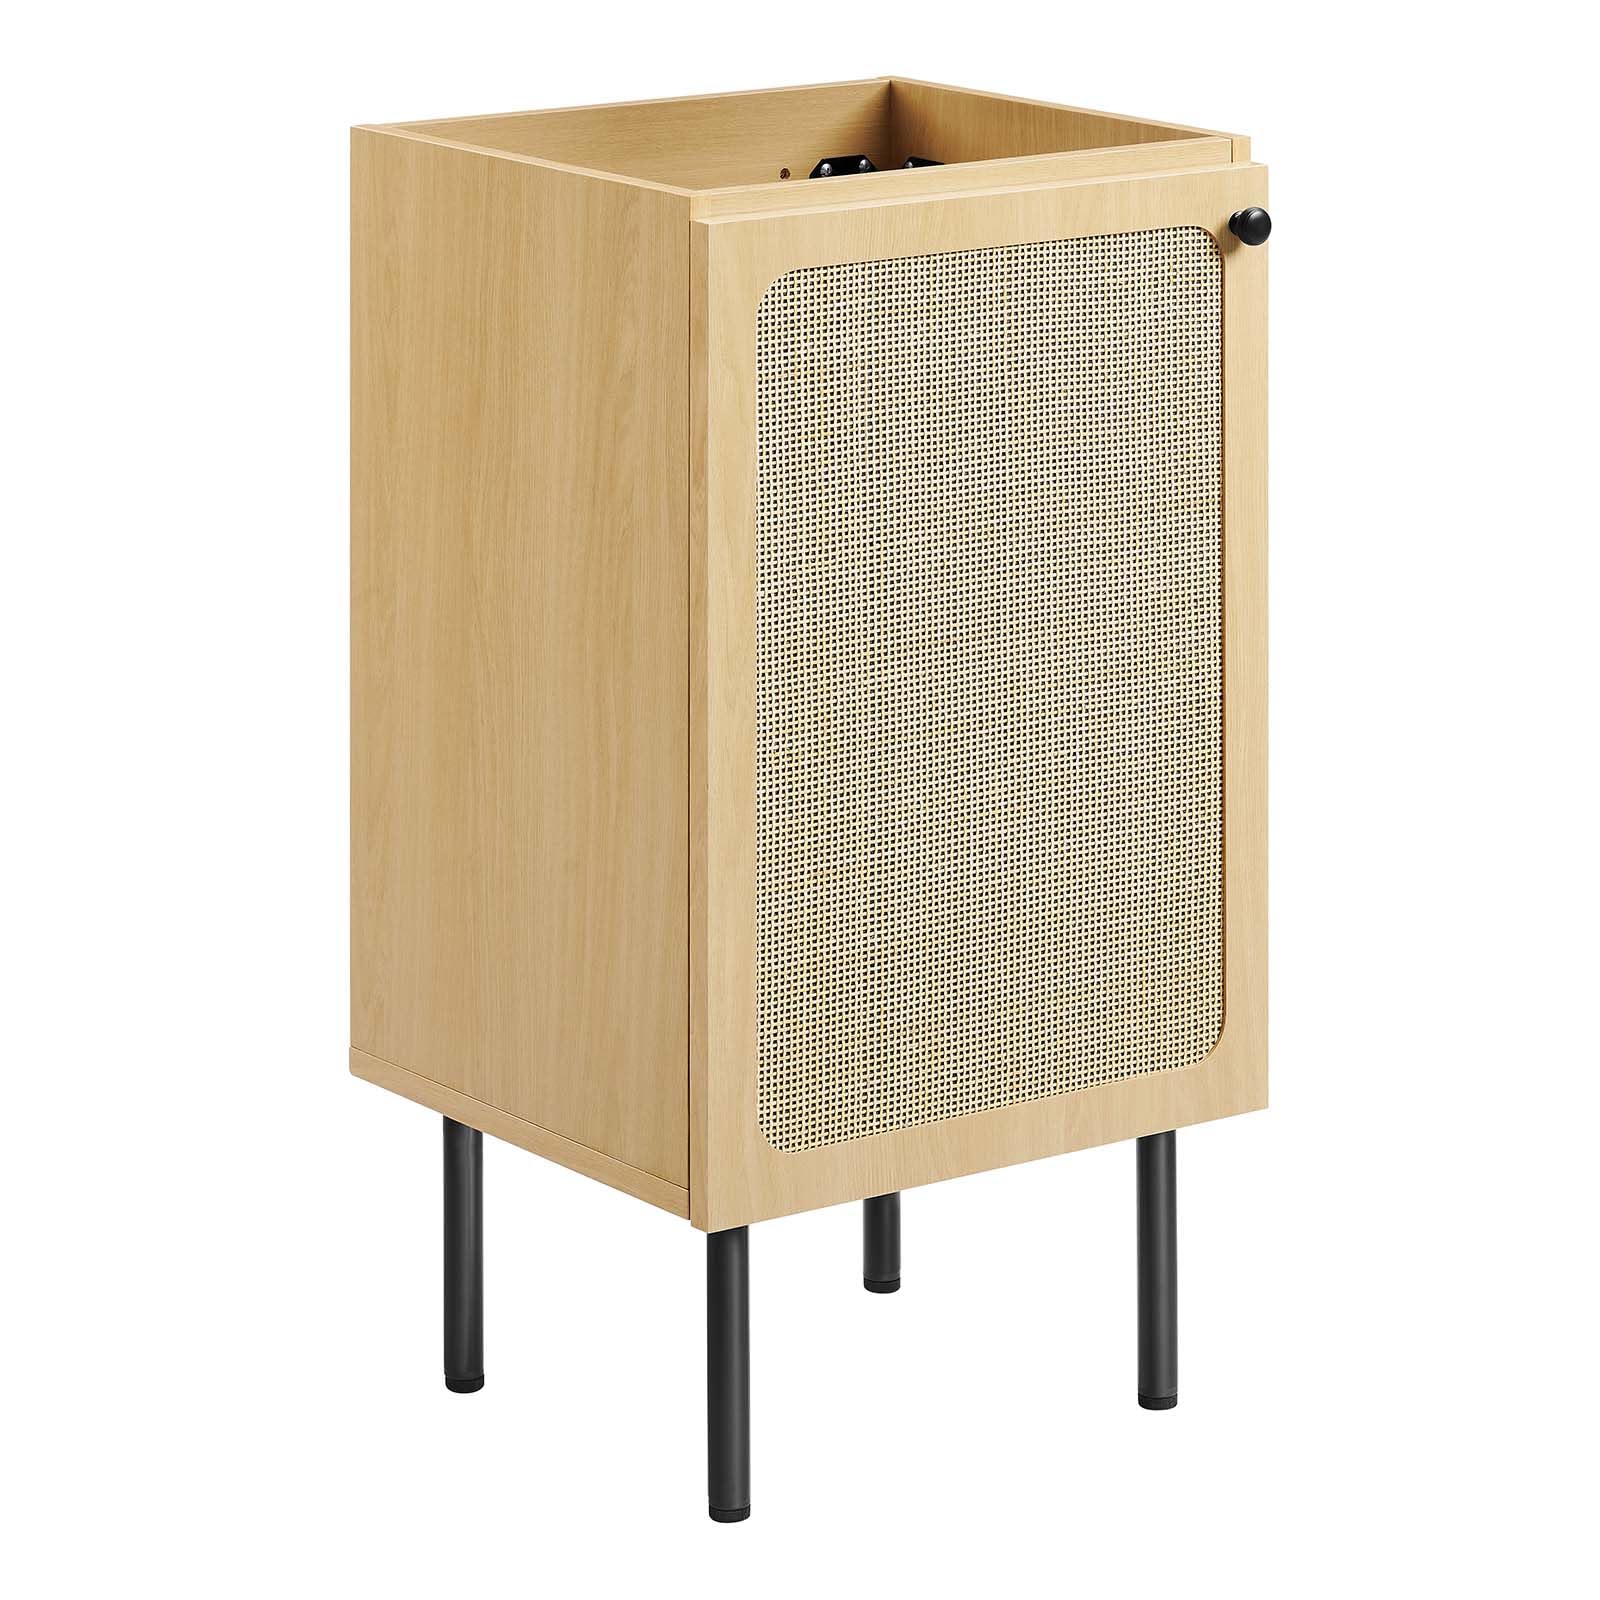
Image 1: The Modway Chaucer 18-inch Bathroom Vanity Cabinet in Oak. Note: Sink basin and fixtures are not included.
Vidiyo nke 1: Mwepuview of the Modway Chaucer Bathroom Vanity Cabinet collection, showcasing various sizes and colors. This video highlights key design elements and features.
2. Ozi nchekwa
Please observe the following safety precautions during assembly, installation, and use of this product:
- Read all instructions before assembly. Failure to follow instructions may result in injury or product damage.
- Debe ngwaike niile na obere akụkụ ka ụmụaka ghara iru.
- Assemble the unit on a soft, non-abrasive surface (e.g., carpet or cardboard) to prevent scratching.
- Ensure all connections are secure before use. Periodically check and tighten fasteners as needed.
- Ejila ihe karịrị akarị n'ihe ndị dị na shelf. Kesaa ibu ahụ n'otu ebe.
- Ezubere ngwaahịa a maka naanị ime ụlọ.
- Atụmatụ ịdọ aka ná ntị 65: Ngwaahịa a nwere ike ịnwe kemịkal mara Steeti California iji bute ọrịa kansa na ntụpọ ọmụmụ ma ọ bụ mmerụ ahụ ndị ọzọ.
3. Ihe ngwugwu
Verify that all components are present before beginning assembly. If any parts are missing or damaged, do not proceed with assembly. Contact customer support for assistance.
- Vanity Cabinet Panels (sides, top, bottom, back)
- Cabinet Door with Rattan Weave
- Shelf nwere ike idozi
- Metal Cabinet Knob
- Legs with Adjustable Feet (4x)
- Assembly Hardware (screws, hinges, shelf pins, etc.)
- Akwụkwọ ntuziaka
4. Ntuziaka Mgbakọ
Assembly is required for this vanity cabinet. It is recommended to have two people for assembly. Tools required (not included): Phillips head screwdriver, hammer.
- Kwadebe oghere ọrụ: Clear a spacious area and lay out all components on a soft, clean surface to prevent damage. Identify all parts and hardware.
- Gbakọta etiti kabinet ahụ: Attach the side panels to the bottom panel using the provided screws. Ensure the pre-drilled holes align correctly. Secure the back panel to complete the basic frame.
- Install the Legs: Attach the four legs to the bottom of the cabinet using the designated hardware. Adjust the feet to ensure stability on uneven surfaces.
- Install the Adjustable Shelf: Insert the shelf pins into the desired height holes inside the cabinet. Place the adjustable shelf onto the pins.
- Attach the Cabinet Door: Secure the hinges to the cabinet door and then attach the door to the cabinet frame. Adjust hinges as necessary for proper alignment and smooth operation.
- Install the Cabinet Knob: Attach the metal cabinet knob to the door.
- Nyocha ikpeazụ: Verify all screws are tightened and the cabinet is stable.

Foto 2: N'azụ view of the vanity cabinet, illustrating the open back design for plumbing installation.

Foto 3: Ime view of the cabinet, highlighting the adjustable shelf for customizable storage.
5. Operating and Care
This vanity cabinet is designed to provide storage in your bathroom. The adjustable shelf allows for flexible organization of toiletries, towels, and other essentials. The rattan weave door offers ventilation and a unique aesthetic.
- Ensure the cabinet is placed on a level surface. Use the adjustable feet to stabilize if needed.
- Zere itinye ihe ndị dị oke arọ n'elu shelf iji gbochie mmebi.
- Close the cabinet door gently to prevent wear on hinges and the door itself.

Image 4: Key features of the Chaucer vanity cabinet, including the wood grain laminate finish, rattan weave door, and adjustable shelf.
6. Nlekọta
Proper care and maintenance will extend the life and appearance of your vanity cabinet.
- Nhicha: Jiri nwayọ hichaa elu ala, damp cloth. Avoid abrasive cleaners, harsh chemicals, or solvents, as these can damage the finish.
- Mwụfu: Immediately wipe up any spills to prevent water damage or staining, especially on the wood grain laminate.
- Akụrụngwa: Periodically check all screws and fasteners to ensure they are tight. Tighten if necessary.
- Rattan Weave: Gently dust the rattan weave with a soft brush or cloth. Avoid excessive moisture.
7. Nchọpụta nsogbu
Rụtụ aka na tebụl dị n'okpuru maka okwu nkịtị na azịza ha.
| Nsogbu | Ihe nwere ike ime | Ngwọta |
|---|---|---|
| Cabinet is wobbly | Uneven floor or loose legs | Adjust the leveling feet on the bottom of the legs. Ensure all leg fasteners are tight. |
| Ọnụ ụzọ anaghị emechi nke ọma | Misaligned hinges or obstruction | Adjust the hinge screws to realign the door. Check for any obstructions inside the cabinet. |
| Shelf is not stable | Shelf pins not fully inserted | Ensure shelf pins are fully seated in the pre-drilled holes. |
8. Nkọwapụta
Detailed specifications for the Modway Chaucer 18-inch Bathroom Vanity Cabinet:
| Njirimara | Nkọwa |
|---|---|
| Ụdị | Modway |
| Aha Nlereanya | Chaucer |
| Nọmba nlereanya | EEI-6600-OAK |
| Agba | Oak |
| Akụkụ ngwaahịa | 15"D x 17"W x 32.5"H |
| Ibu Ibu | 28 pound |
| Ihe onwunwe | MDF, Particleboard, Rattan |
| Ụdị mmecha | Rattan |
| Ụdị nkwụnye | Ntighari |
| Ọnụọgụ nke shelf | 1 (nwere ike idozi) |
| Mgbakọ chọrọ | Ee |
| GTIN / UPC | 889654281979 |

Image 5: Dimensional drawing of the vanity cabinet (17"W x 15"D x 32.5"H).
9. Akwụkwọ ikike na nkwado
Modway products are manufactured with quality and care. For specific warranty information regarding your Chaucer 18-inch Bathroom Vanity Cabinet, please refer to the warranty card included with your purchase or visit the official Modway websaịtị.
If you have any questions, require assistance with assembly, or need to report missing/damaged parts, please contact Modway customer support. Contact details can typically be found on the Modway websaịtị ma ọ bụ na akwụkwọ ịzụrụ ihe gị.


