MOUNTUP MU2005 Gas Spring Single Monitor Wall Mount
Akwụkwọ ntuziaka
1. Okwu mmalite
This manual provides instructions for the installation, operation, and maintenance of your MOUNTUP MU2005 Gas Spring Single Monitor Wall Mount. This mount is designed to securely hold computer screens and televisions, offering adjustable positioning for an ergonomic viewing experience. Please read these instructions carefully before installation to ensure safe and correct usage.
2. Ozi nchekwa
Ịdọ aka ná ntị: Improper installation may result in serious personal injury and property damage. If you do not understand these instructions or have doubts about the safety of the installation, please contact a qualified installer.
- Do not install on drywall alone. This mount is designed for installation on wood studs, solid concrete walls, or brick walls.
- Gbaa mbọ hụ na elu elu nwere ike ịkwado ịdị arọ jikọtara ọnụ nke ugwu na ngosipụta.
- Agafela ikike ịdị arọ kacha nke 26.5 lbs (12 n'arọ).
- Use only the provided hardware. If any parts are missing or defective, contact MOUNTUP customer service.
- Debe ụmụaka na anụ ụlọ n'oge echichi.
- Na-elele mgbe niile ma ọ bụrụ na ihe mkpuchi ahụ dị nchebe ma ihe njide niile siri ike.
3. Ihe ngwugwu
Nyochaa na akụrụngwa niile dị na emebighị ya tupu ịga n'ihu na ntinye.
- Monitor Wall Mount Arm (MU2005)
- VESA Efere
- VESA Extension Kit (for larger VESA patterns)
- Ngwa mgbakwunye (skru, arịlịka, washers)
- Hex Keys for Adjustment
- Akwụkwọ ntuziaka

Image: Main components of the MOUNTUP MU2005 monitor wall mount, including the gas spring arm, VESA mounting plate, and VESA extension brackets.
4. Nkọwapụta
| Njirimara | Nkọwapụta |
|---|---|
| Nọmba nlereanya | MGBE 2005 |
| Ndakọrịta nha nha ihuenyo | 22-35 sentimita asatọ |
| Ike ibu | 4.4 - 26.5 lbs (2 - 12 kg) |
| Ndakọrịta VESA | 75x75mm, 100x100mm, 100x200mm, 200x100mm, 200x200mm |
| Ụdị nkwụnye | Wall Mount (Wood Stud, Concrete Wall, Brick Wall) |
| Ụdị mmegharị | Tilt, Rotate, Swivel, Height Adjust, Full Motion |
| Tilt Angle | Up 90° / Down 45° |
| Akụkụ Swivel | 180° (at wall plate), 360° (at arm joint), 180° (at VESA plate) |
| Ntughari | 360° (Portrait/Landscape) |
| Ndozi elu | Ruo 11 sentimita asatọ |
| Ogologo kacha nta na mgbidi | 3.9 sentimita (9.9 cm) |
| Maximum Extension from Wall | 20.5 sentimita asatọ |
| Ihe onwunwe | Aluminom, metal |

Image: Detailed diagram illustrating the mount's dimensions, VESA compatibility (75x75, 100x100, 100x200, 200x100, 200x200), weight capacity (4.4-26.5 lbs), and supported screen sizes (22-35 inches).
5. Ntọala na nwụnye
Before beginning, ensure you have all necessary tools and that your wall type is compatible. This mount is suitable for wood studs, concrete walls, and brick walls. It is NOT for drywall alone.
5.1 Nyocha ndakọrịta
Confirm your monitor meets the following criteria:
- Nha nleba anya: 22-35 sentimita asatọ
- Nyochaa arọ: 4.4-26.5 lbs
- Ụkpụrụ VESA: 75x75mm, 100x100mm, 100x200mm, 200x100mm, 200x200mm
- Ụdị Mgbidi: Wood Stud, Brick Wall, or Concrete Wall

Image: A visual guide to checking monitor compatibility with the mount, covering screen size, weight, VESA pattern, and suitable wall types.
5.2 Nzọụkwụ nwụnye
- Install the Arm to the Wall: Securely attach the wall plate of the monitor arm to a wood stud, concrete wall, or brick wall using the appropriate hardware. Ensure it is level and firmly anchored.
- Attach VESA Plate to Monitor Back: Fasten the VESA plate to the back of your monitor using the screws that fit your monitor's VESA holes. Use the VESA extension kit if your monitor requires a larger VESA pattern.
- Attach Monitor onto the Arm: Carefully slide the monitor (with the attached VESA plate) onto the arm's mounting head. Ensure it clicks into place securely.
- Adjust Gas Spring to Proper Tension: This is crucial for the arm to hold your monitor at the desired height. Refer to the 'Operating' section for detailed adjustment instructions.

Image: Illustration of mounting the arm's wall plate to the wall.

Image: Illustration of attaching the VESA plate to the monitor's rear.
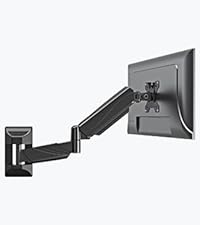
Image: Illustration of sliding the monitor onto the arm's VESA head.

Image: Illustration of adjusting the gas spring tension on the arm.
5.3 Njikwa eriri
Route your cables through the integrated cable management channels on the arm to maintain a clean and organized workspace.
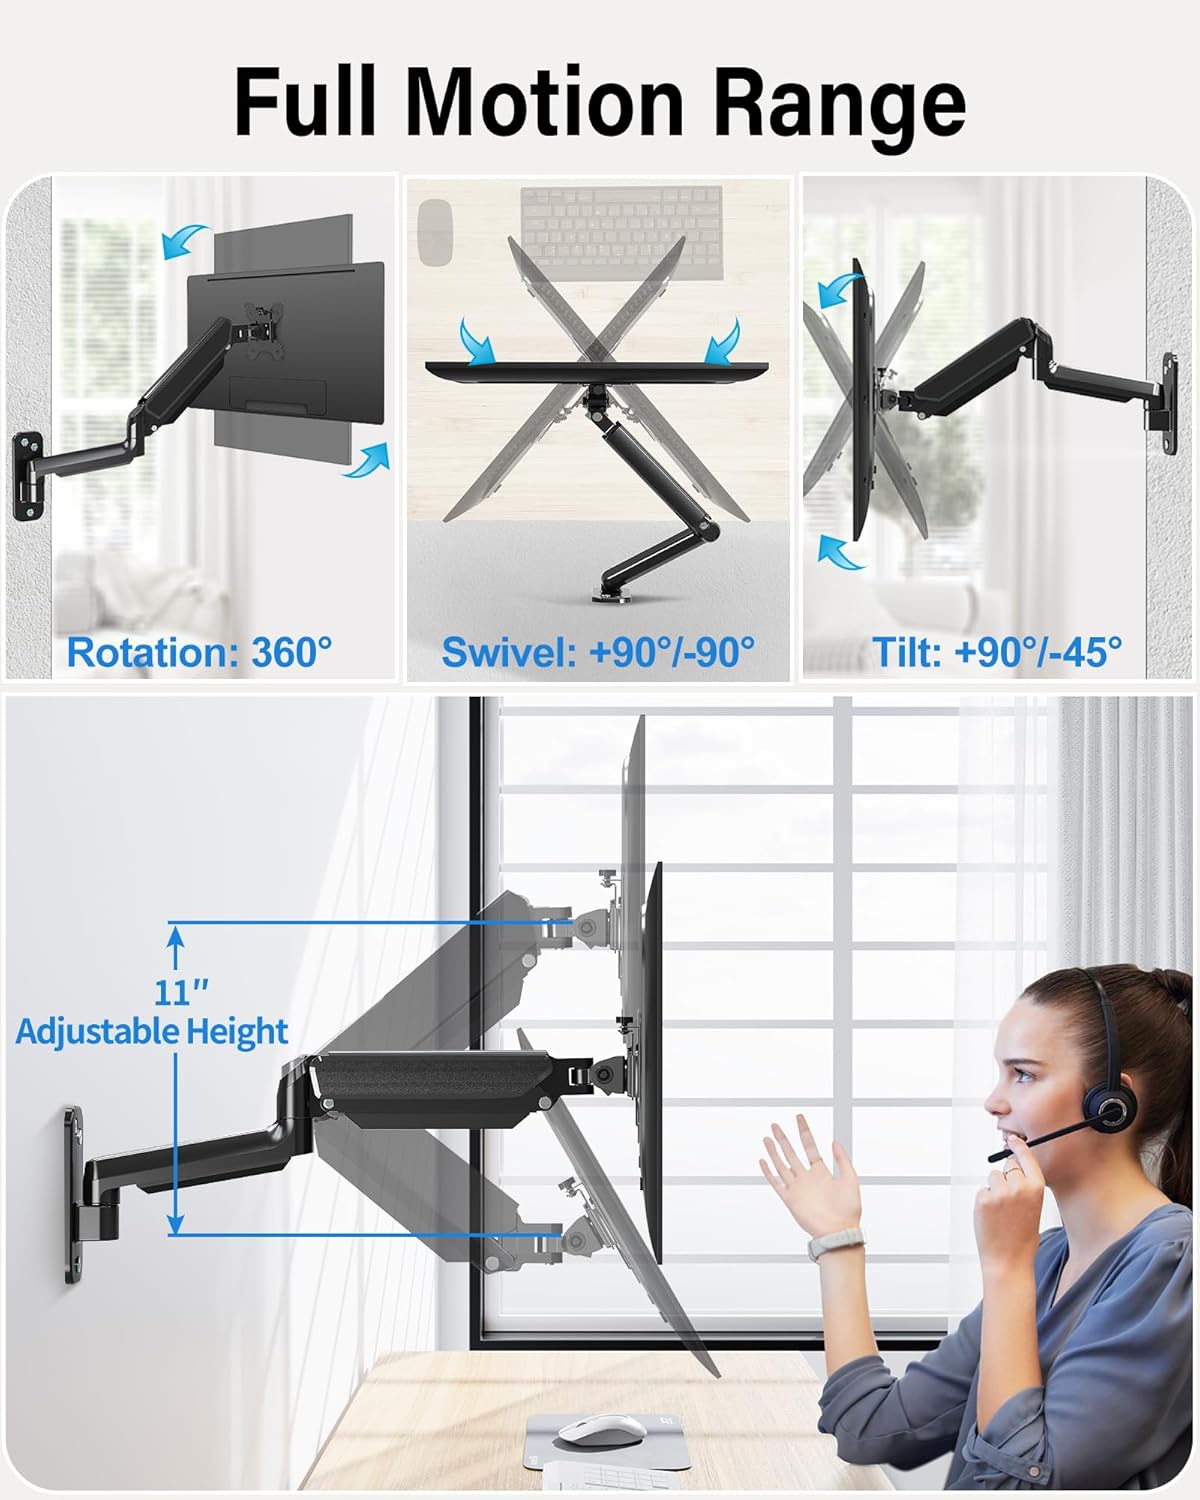
Image: The monitor arm demonstrating its full range of motion, including 360° rotation, 90°/-90° swivel, 90°/-45° tilt, and 11 inches of adjustable height.
6. Na-arụ ọrụ Monitor Arm
The MOUNTUP MU2005 offers extensive adjustability to achieve optimal viewing angle na ergonomic n'ọnọdu.
6.1 Gas Spring Adjustment (Monitor Height)
The gas spring allows for effortless height adjustment. If your monitor does not stay at the desired height, adjust the tension:
- Monitor raises up (too light): Turn the screw clockwise ("-" direction) to reduce tension.
- Monitor drops down (too heavy): Turn the screw counter-clockwise ("+" direction) to increase tension.
Mara: Hold the arm in a horizontal position during adjustment. Refer to the table below for approximate turns based on monitor weight.
| Nyochaa ịdị arọ | Okirikiri (makakarịa) |
|---|---|
| 4.4 lbs (2 n'arọ) | Min |
| 6.6 lbs (3 n'arọ) | 2 |
| 11 lbs (5 n'arọ) | 6 |
| 17.6 lbs (8 n'arọ) | 10 |
| 19.8 lbs (9 n'arọ) | 11 |
| 22 lbs (10 n'arọ) | 12 |
| 26.4 lbs (12 n'arọ) | Oke |

Image: Comprehensive guide for adjusting gas spring tension and tilt angle, including a table correlating monitor weight with the number of turns for adjustment.
6.2 Tilt Angle Adjustment
If your monitor faces down or up unintentionally, adjust the tilt tension:
- Loosen the tilting bolt (Turn to "-" direction).
- Adjust the monitor to your desired angle.
- Retighten the tilting bolt (Turn to "+" direction).

Image: Visual instructions for adjusting the gas spring tension and the monitor's tilt angle using a hex key.
6.3 Swivel and Rotation
- The arm can swivel 180° at the wall plate and 360° at the arm joint.
- The VESA plate allows for 180° swivel and 360° rotation, enabling easy switching between portrait and landscape orientations.
Image: The monitor arm demonstrating its full range of motion, including 360° rotation, 90°/-90° swivel, 90°/-45° tilt, and 11 inches of adjustable height.
Video: This video demonstrates the various movements and space-saving capabilities of the MOUNTUP Ultrawide Single Monitor Wall Mount, showcasing its full motion range and how it can optimize your workspace.
7. Nlekọta
Regular maintenance ensures the longevity and safe operation of your monitor mount.
- Nhicha: Jiri ihe dị nro hichaa ugwu ahụ, damp akwa . Zere ndị na-ehicha ihe na-ekpo ọkụ.
- Lelee njikọ: Periodically inspect all screws and bolts to ensure they are tight. Retighten if necessary.
- Gas Spring Function: If the gas spring's performance changes over time, re-adjust the tension as described in the 'Operating' section.
8. Nchọpụta nsogbu
If you encounter issues with your MOUNTUP monitor arm, refer to the following common problems and solutions:
8.1 Arm Does Not Stay at Desired Height
- Nsogbu: Monitor arm falls down.
- Ngwọta: The gas spring tension is too low for the monitor's weight. Increase tension by turning the adjustment screw counter-clockwise ("+" direction).
- Nsogbu: Monitor arm rises up.
- Ngwọta: The gas spring tension is too high for the monitor's weight. Decrease tension by turning the adjustment screw clockwise ("-" direction).
Refer to the 'Gas Spring Adjustment' section for detailed instructions and the weight-to-turns table.
8.2 Monitor Tilts Down Unintentionally
- Nsogbu: The monitor head cannot maintain its tilt angle.
- Ngwọta: The tilting bolt is loose. Loosen the tilting bolt, adjust the monitor to the desired angle, and then retighten the tilting bolt firmly.
Video: This video provides troubleshooting steps for common issues with MOUNTUP monitor wall mounts, such as adjusting the gas spring tension if the arm falls or rises, and tightening the tilt mechanism if the monitor sags.
9. Akwụkwọ ikike na nkwado
MOUNTUP provides a 3-year support for this product. If you have any questions regarding pre-purchase compatibility, installation, or require assistance with any issues, please do not hesitate to contact MOUNTUP customer service. Our team is available to provide friendly and helpful support.


