1. Okwu mmalite
Thank you for choosing the LTC MOB20RED Senior Phone. This device is designed with ease of use in mind, featuring large keys, a loud voice readout, and essential functions tailored for seniors. It includes a dedicated SOS button for emergencies, a built-in flashlight, and a long-lasting battery. This manual provides detailed instructions for setting up, operating, and maintaining your phone to ensure optimal performance and safety.
2. Ozi nchekwa
- Nchekwa batrị: Use only the original battery and charger provided. Do not short-circuit, puncture, or expose the battery to extreme temperatures or fire. Dispose of batteries properly according to local regulations.
- Ịchaji: Charge the phone in a well-ventilated area. Do not charge near flammable materials.
- Nguzogide mmiri: Ekwentị a anaghị anabata mmiri. Zere ka ọ ghara ịbanye n'ime mmiri.
- Nhicha: Use a soft, dry cloth to clean the phone. Do not use harsh chemicals or abrasive cleaners.
- Nchedo Ntị: Zere ige ntị ogologo oge n'ogo dị elu iji gbochie mmebi ntị.
- Ngwa ahụike: Maintain a safe distance between the phone and medical devices like pacemakers. Consult your physician and the medical device manufacturer for specific guidelines.
- Nchekwa ịnya ụgbọ ala: Do not use the phone while driving. Always prioritize road safety.
3. Ihe ngwugwu
Biko lelee ọdịnaya nke ngwugwu mgbe ị na-ebupụ igbe:
- LTC MOB20RED Senior Phone
- Batrị Li-Ion (900 mAh)
- Ada Ada AC
- Akwụkwọ ntuziaka (akwụkwọ a)
4. Ngwaahịa gafereview
Familiarize yourself with the key components of your LTC MOB20RED phone.
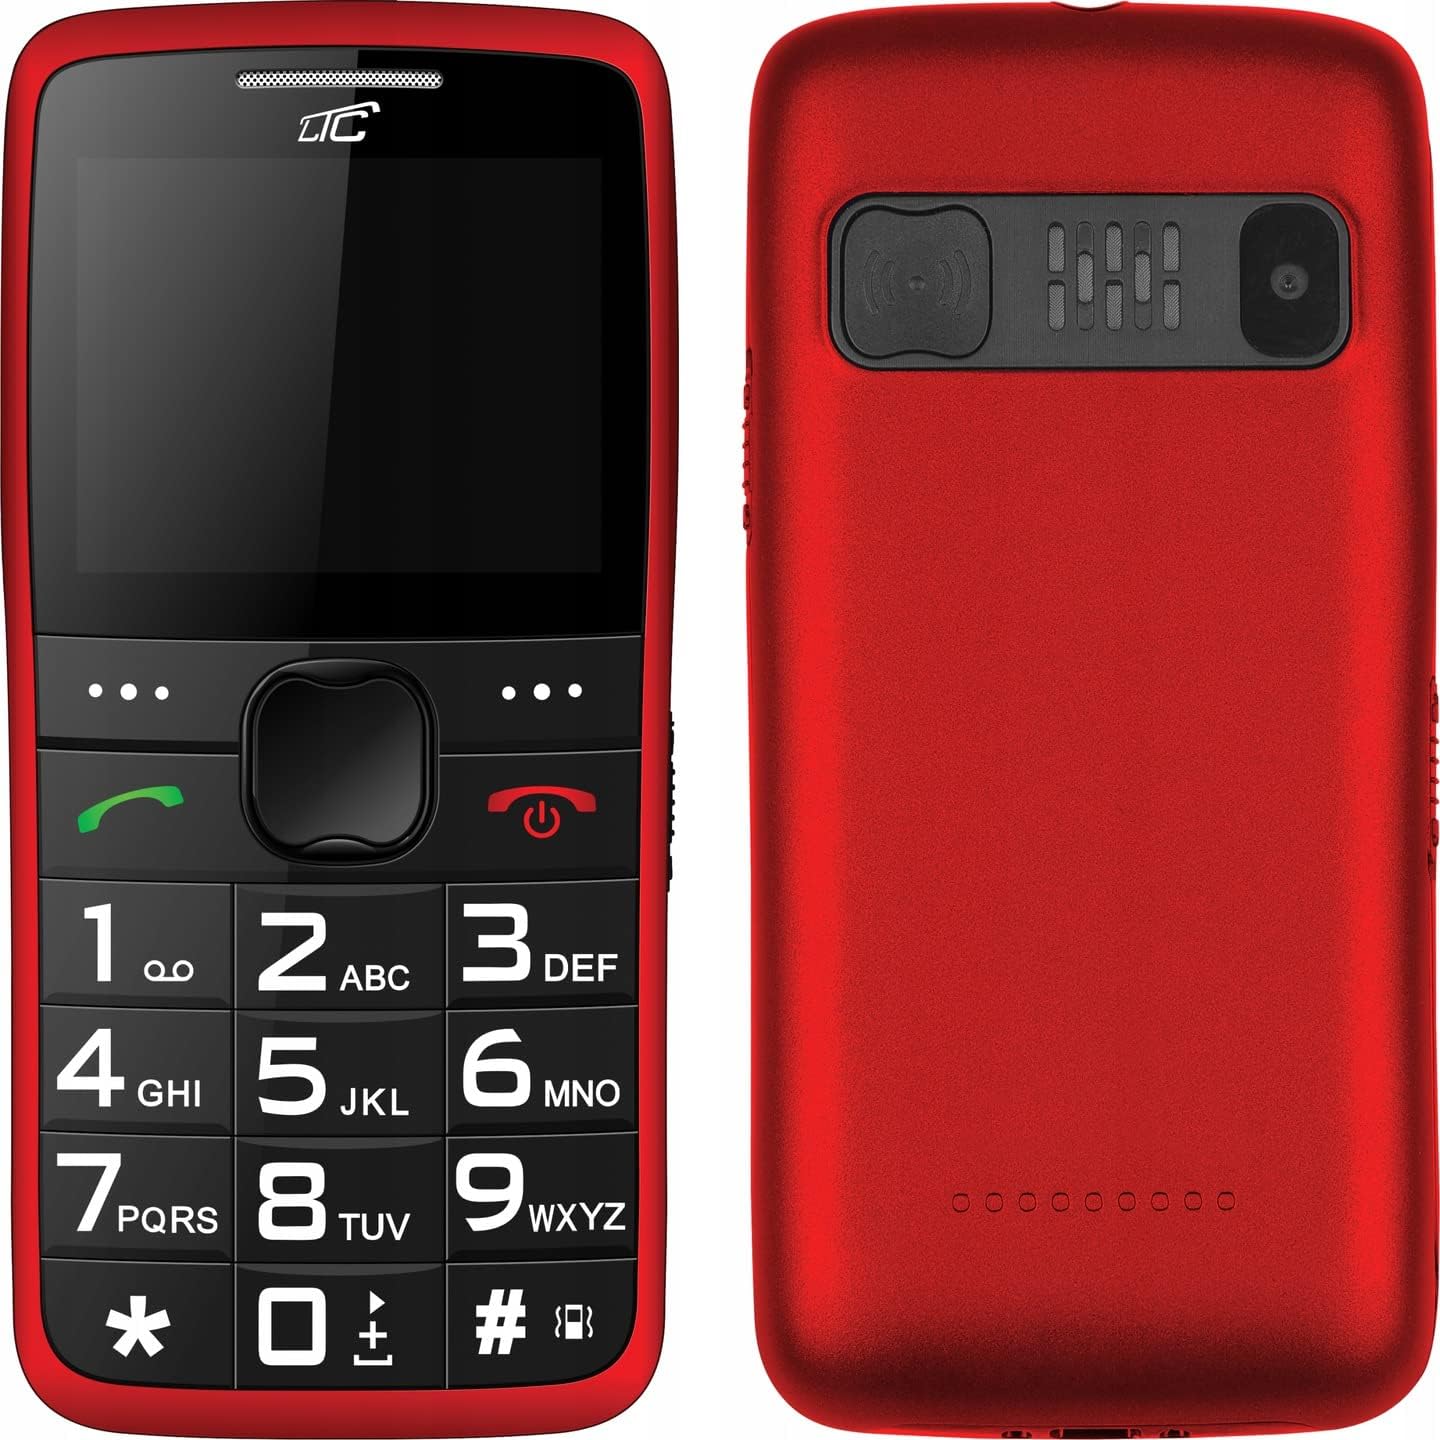
Foto 4.1: Ihu na azụ View of the Phone. This image displays both the front with its large keypad and screen, and the back with the SOS button and camera module.
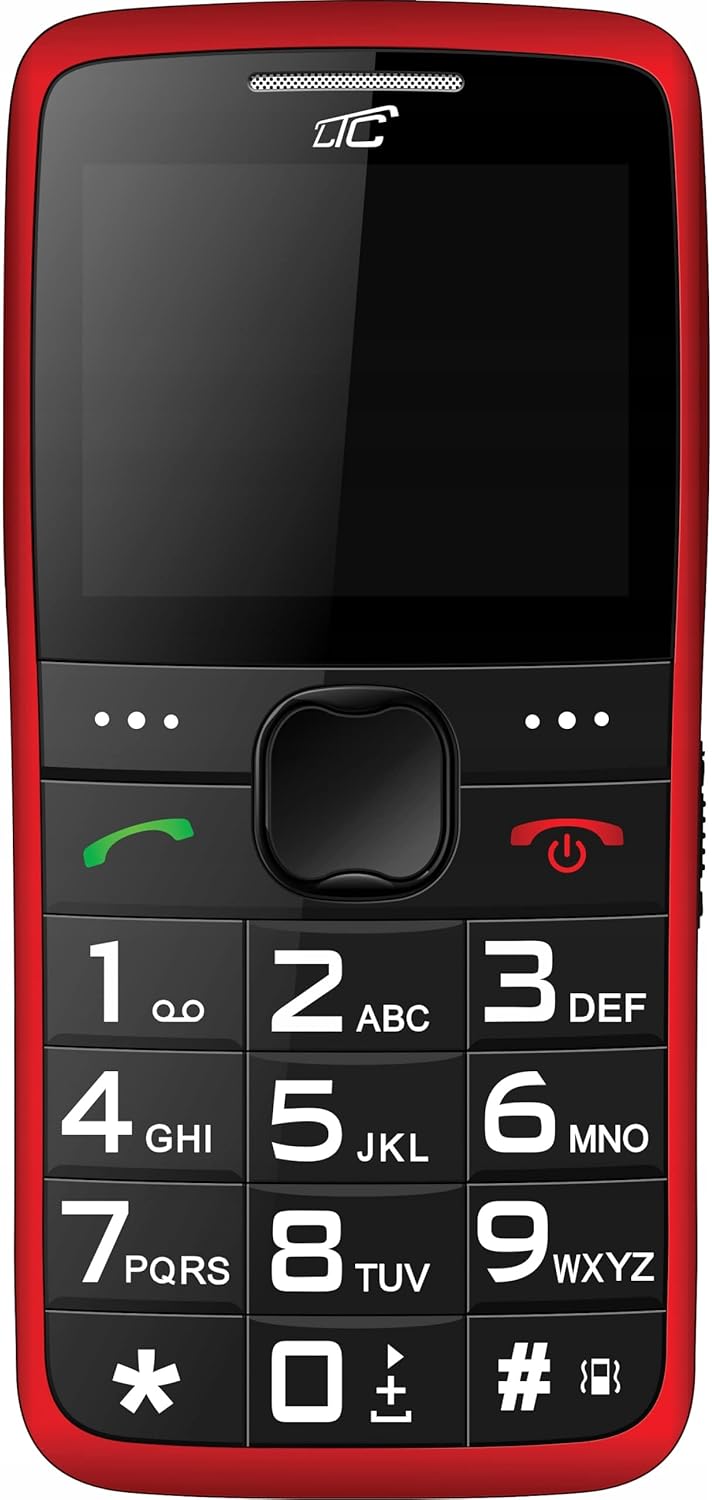
Foto 4.2: N'ihu View. A clear view of the phone's front, highlighting the spacious keypad with large, easy-to-read numbers and letters, and the color display.
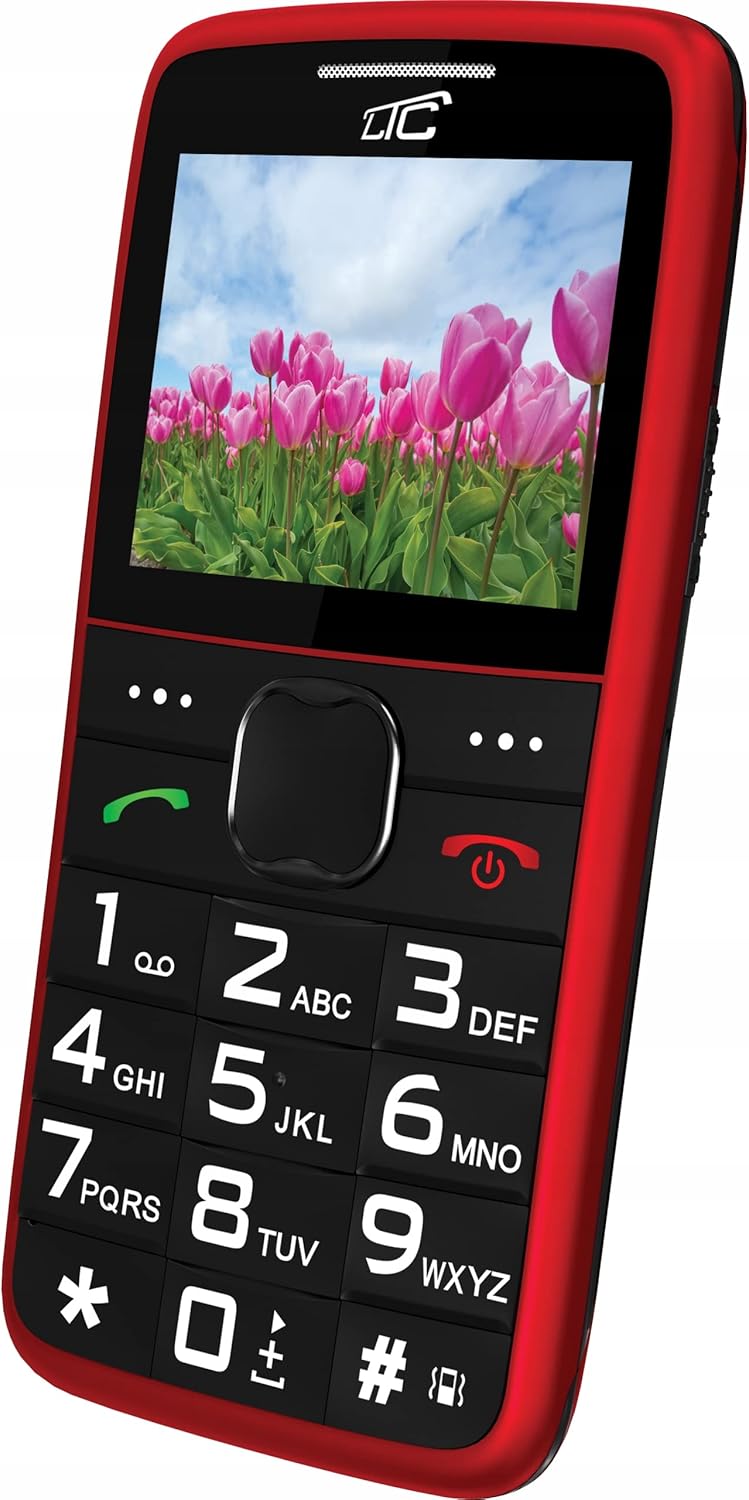
Foto 4.3: Ihu Angled View with Display On. This image shows the phone from an angle, with the screen displaying a vibrant image, demonstrating its color capabilities.
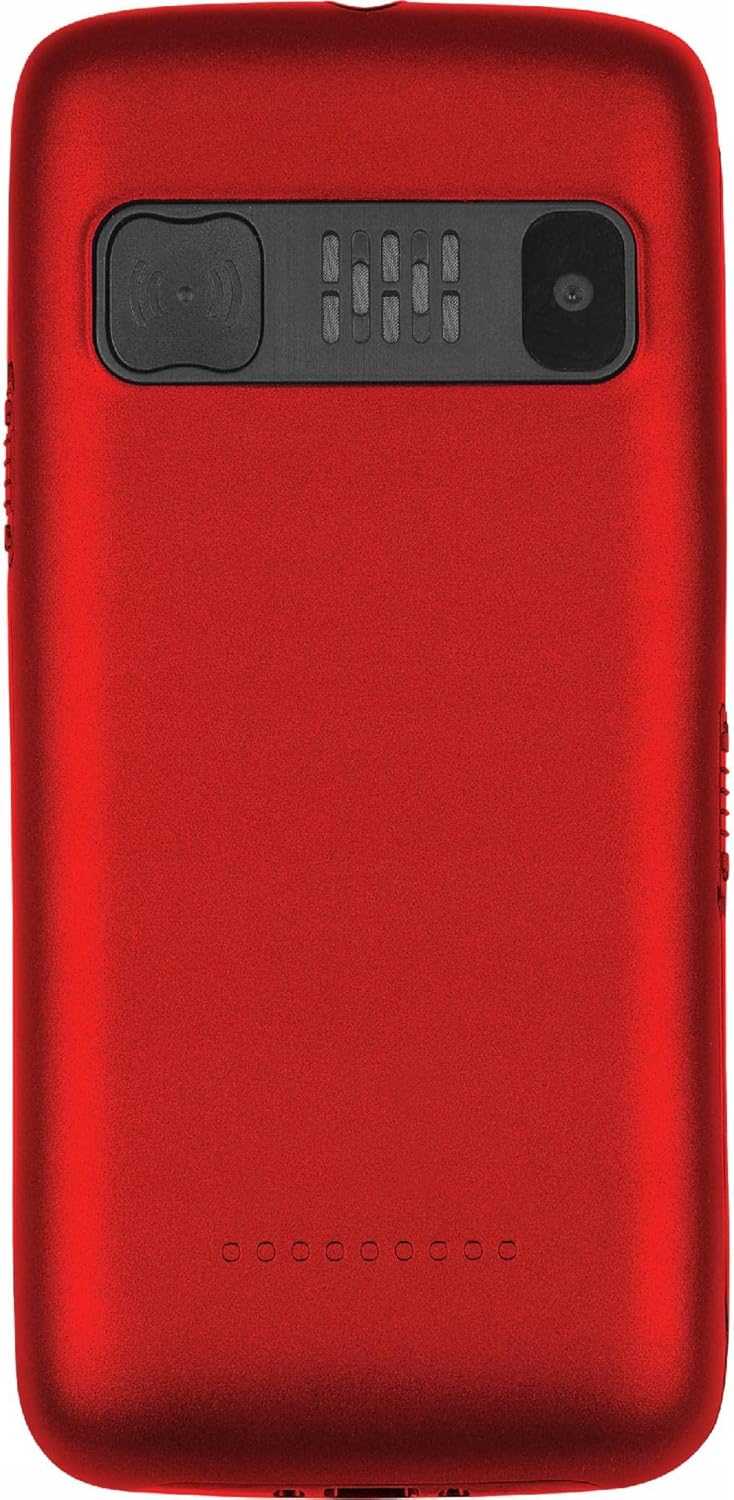
Foto 4.4: Azu View. The rear of the phone is shown, featuring the prominent SOS button, the camera lens, and the speaker grille.
Akụkụ ndị bụ isi:
- Igodo buru ibu: Easy to press and read, designed for comfortable dialing and texting.
- Nnukwu ngosi: 2.2-inch color LCD with clear, large font for easy viewing.
- Bọtịnụ SOS: Located on the back, allows quick access to emergency contacts.
- Loud Voice Readout: Announces pressed keys (numbers, asterisk, hash) for confirmation. This feature can be toggled on/off in settings.
- Batrị ike dị elu: 900 mAh Li-Ion battery provides up to 7-10 days of standby time.
- Igwe ọkụ: Built-in for convenience.
- Nkwado SIM abụọ: Allows use of two SIM cards simultaneously.
- Oghere Kaadị MicroSD: Supports up to 32 GB for expanded storage.
- Multimedia: Includes FM Radio, Audio/Video Player, Alarm Clock, Calendar, Calculator, and Voice Recorder.
- Bluetooth: Maka njikọ ikuku.
5. Nhazi
5.1 Inserting SIM Card(s) and MicroSD Card
- Remove the back cover of the phone by gently prying it open from the notch.
- Ọ bụrụ na arụnyere batrị, wepụ ya.
- Locate the SIM card slot(s) and the microSD card slot.
- Insert your SIM card(s) into the designated slot(s) with the gold contacts facing down, ensuring it clicks into place.
- If desired, insert a microSD card (up to 32 GB) into its slot.
5.2 Ịtinye batrị
- Align the battery's gold contacts with the contacts in the phone's battery compartment.
- Gently press the battery down until it is securely seated.
- Replace the back cover, pressing firmly until it snaps into place.
5.3 Ịchaji ekwentị
- Connect the small end of the charging cable to the charging port on the phone.
- Plug the other end of the charger into a standard wall outlet.
- The battery indicator on the screen will show the charging status.
- Once fully charged, disconnect the charger. A full charge typically takes a few hours.
6. Ntuziaka ọrụ
6.1 Gbanyụọ ma ọ bụ gbanyụọ
- Iji gbanye: Pịa ma jide uhie Oku ike/ Ọgwụgwụ bọtịnụ ruo mgbe ihuenyo ọkụ.
- Iji gbanyụọ: Pịa ma jide uhie Oku ike/ Ọgwụgwụ bọtịnụ ruo mgbe nhọrọ gbanyụọ ọkụ pụtara, wee họrọ "Gbanyụọ ọkụ".
6.2 Ịkpọ na ịnata oku
- Ka ịkpọ oku: Dial the number using the large keypad. The phone will audibly read out each digit you press (if voice readout is enabled). Press the green Kpọọ bọtịnụ ibido oku.
- Iji nweta oku: When the phone rings, press the green Kpọọ bọtịnụ ịza.
- Iji kwụsị oku: Pịa uhie Oku ike/ Ọgwụgwụ bọtịnụ.
6.3 Speedkpọ oku ọsọ
You can assign frequently called numbers to keys 0-9 for quick dialing.
- Gaa na Ntọala > Ịkpọ oku ọsọ.
- Select a key (0-9) and assign a contact from your phonebook or enter a new number.
- To use speed dial, press and hold the assigned key until the call is initiated.
6.4 Ọrụ SOS
The SOS button is a critical safety feature. When pressed, it will automatically call and/or send an SMS to pre-set emergency contacts.
- Ịtọlite ndị kọntaktị SOS: Gaa na Ntọala > Ntọala SOS.
- Add up to 5 emergency contact numbers. You can also enable/disable SMS sending and customize the SOS message.
- Using the SOS Function: Na ihe mberede, pịa ma jide bọtịnụ SOS on the back of the phone for a few seconds. The phone will then sequentially call the pre-set numbers until one answers, and/or send the emergency SMS.
6.5 Igwe ọkụ
To turn the flashlight on or off, locate the dedicated flashlight button (usually on the side of the phone) and slide or press it. Refer to the phone's physical layout for exact location.
6.6 Ọrụ ndị ọzọ
- Igwe Redio: Access from the main menu. You may need to connect headphones (not included) to act as an antenna.
- Audio/Video Player: Use to play media files stored on your microSD card.
- Elekere mkpu: Set multiple alarms with customizable tones.
- Kalenda: View dates and add reminders.
- Mgbako: Perform basic arithmetic operations.
- Ihe ndekọ olu: Dekọọ ndetu ọdịyo.
- Bluetooth: Enable Bluetooth in settings to pair with compatible devices like headsets.
7. Nlekọta
- Nhicha: Wipe the phone regularly with a soft, lint-free cloth. Do not use liquid cleaners or aerosols.
- Nlekọta batrị: To prolong battery life, avoid fully discharging the battery frequently. Charge the phone before the battery level drops too low. Do not leave the phone connected to the charger for excessively long periods after it's fully charged.
- Nchekwa: Chekwaa ekwentị ahụ n'ebe dị jụụ, kpọrọ nkụ na-adịghị na ìhè anyanwụ kpọmkwem na oke okpomọkụ.
- Mmelite ngwanrọ: While this phone typically does not receive frequent software updates, ensure you are using the latest available firmware if prompted.
8. Nchọpụta nsogbu
| Nsogbu | Ihe nwere ike ime | Ngwọta |
|---|---|---|
| Ekwentị anaghị agbanwuo. | Akwụsịla batrị ma ọ bụ tinyeghị ya nke ọma. | Chajịa batrị. Gbaa mbọ hụ na etinyere batrị nke ọma. |
| Enweghị ike ịkpọ ma ọ bụ nata oku. | No network signal, SIM card not inserted, or SIM card issue. | Check network signal strength. Reinsert SIM card. Contact your service provider. |
| Voice readout not working. | Feature is disabled in settings. | Gaa na Ntọala and enable voice readout for keys. |
| SOS button not working. | SOS contacts not set up or battery is too low. | Ensure SOS contacts are configured in Ntọala SOS. Charge the phone. |
| Batrị na-agbapụ ngwa ngwa. | Heavy usage, poor network signal, or aging battery. | Reduce usage. Move to an area with better signal. Consider replacing the battery if it's old. |
9. Nkọwapụta
| Njirimara | Nkọwa |
|---|---|
| Nlereanya | MOB20RED |
| Ugboro netwọk | 850 / 900 / 1800 / 1900 MHz (2G) |
| Ngosipụta | 2.2-inch LCD, 160 x 128 pixels (effective 240 x 320) |
| Igwefoto | 0.3 MP |
| Ebe nchekwa | 32 + 32 MB (RAM: 32 MB, Flash: 32 MB) |
| Ebe nchekwa enwere ike ịgbasa | Ruo 32 GB (microSD) |
| Ike batrị | 900 mAh Li-ion |
| Oge Njikere kacha | 7 - 10 days |
| Bluetooth | Ee |
| Igwe ọkụ | Wuru n'ime |
| Ọrụ SOS | Yes (Quick button) |
| Akụkụ (L x W x H) | 113.3 x 54 x 12.8 mm |
| Ibu | 91 g |
| Sistemụ nrụọrụ | Symbian 9.1 |
| Ụdị ọdịyo | MP3 |
10. Akwụkwọ ikike na nkwado
The LTC MOB20RED Senior Phone comes with a standard manufacturer's warranty. Please refer to the warranty card included in your product packaging or contact your point of purchase for specific warranty terms and conditions.
For technical support, troubleshooting assistance, or service inquiries, please contact the retailer or manufacturer directly. Keep your purchase receipt as proof of purchase for warranty claims.
Onye nrụpụta: LAMEX
Akara: LTC


