1. Okwu mmalite
This manual provides essential information for the safe and efficient use of your AOC U34V5C/BK 34-inch WQHD LED Monitor. Please read this manual thoroughly before operating the device and retain it for future reference. The AOC U34V5C/BK is designed to deliver a high-quality visual experience with its 3440 x 1440 WQHD resolution and 21:9 aspect ratio, suitable for various applications from professional work to entertainment.
2. Ozi nchekwa
Lee ihe ndị a iji gbochie mmebi na ihe nlele ahụ ma hụ na nchekwa onwe onye dị:
- Etinyela ihe nlele ahụ n'ime mmiri ozuzo ma ọ bụ mmiri iji zere ọkụ ma ọ bụ ihe egwu mberede.
- Emeghela ihe nlele ahụ casing. Enweghị akụkụ ọrụ ọ bụla dị n'ime ya. Nye ndị ọrụ ruru eru ọrụ niile.
- Debe ihe nlele ahụ n'elu ebe kwụsiri ike ma dị larịị iji gbochie ya ịda.
- Hụ na ikuku dị mma gburugburu ihe nlele ahụ. Ekpuchila oghere ikuku.
- Jiri naanị eriri ike na ihe nkwụnye ọkụ enyere na ihe nlele ahụ.
- Kwụpụ ihe nlele ahụ na ebe ọkụ eletrik dị n'oge oké ifufe ma ọ bụ mgbe ejiri ya ruo ogologo oge.
3. Ihe ngwugwu
Chọpụta na ihe niile dị na ngwugwu:
- AOC U34V5C/BK Monitor
- Nyochaa Stand (Base and Olu)
- Igwe ọkụ ọkụ
- HDMI USB
- USB DisplayPort
- USB-C USB
- Akwụkwọ ntuziaka (akwụkwọ a)
4. Ngwaahịa gafereview
The AOC U34V5C/BK monitor features a 34-inch VA panel with WQHD resolution, USB-C connectivity with 65W Power Delivery, and a 100Hz refresh rate with AMD FreeSync support.
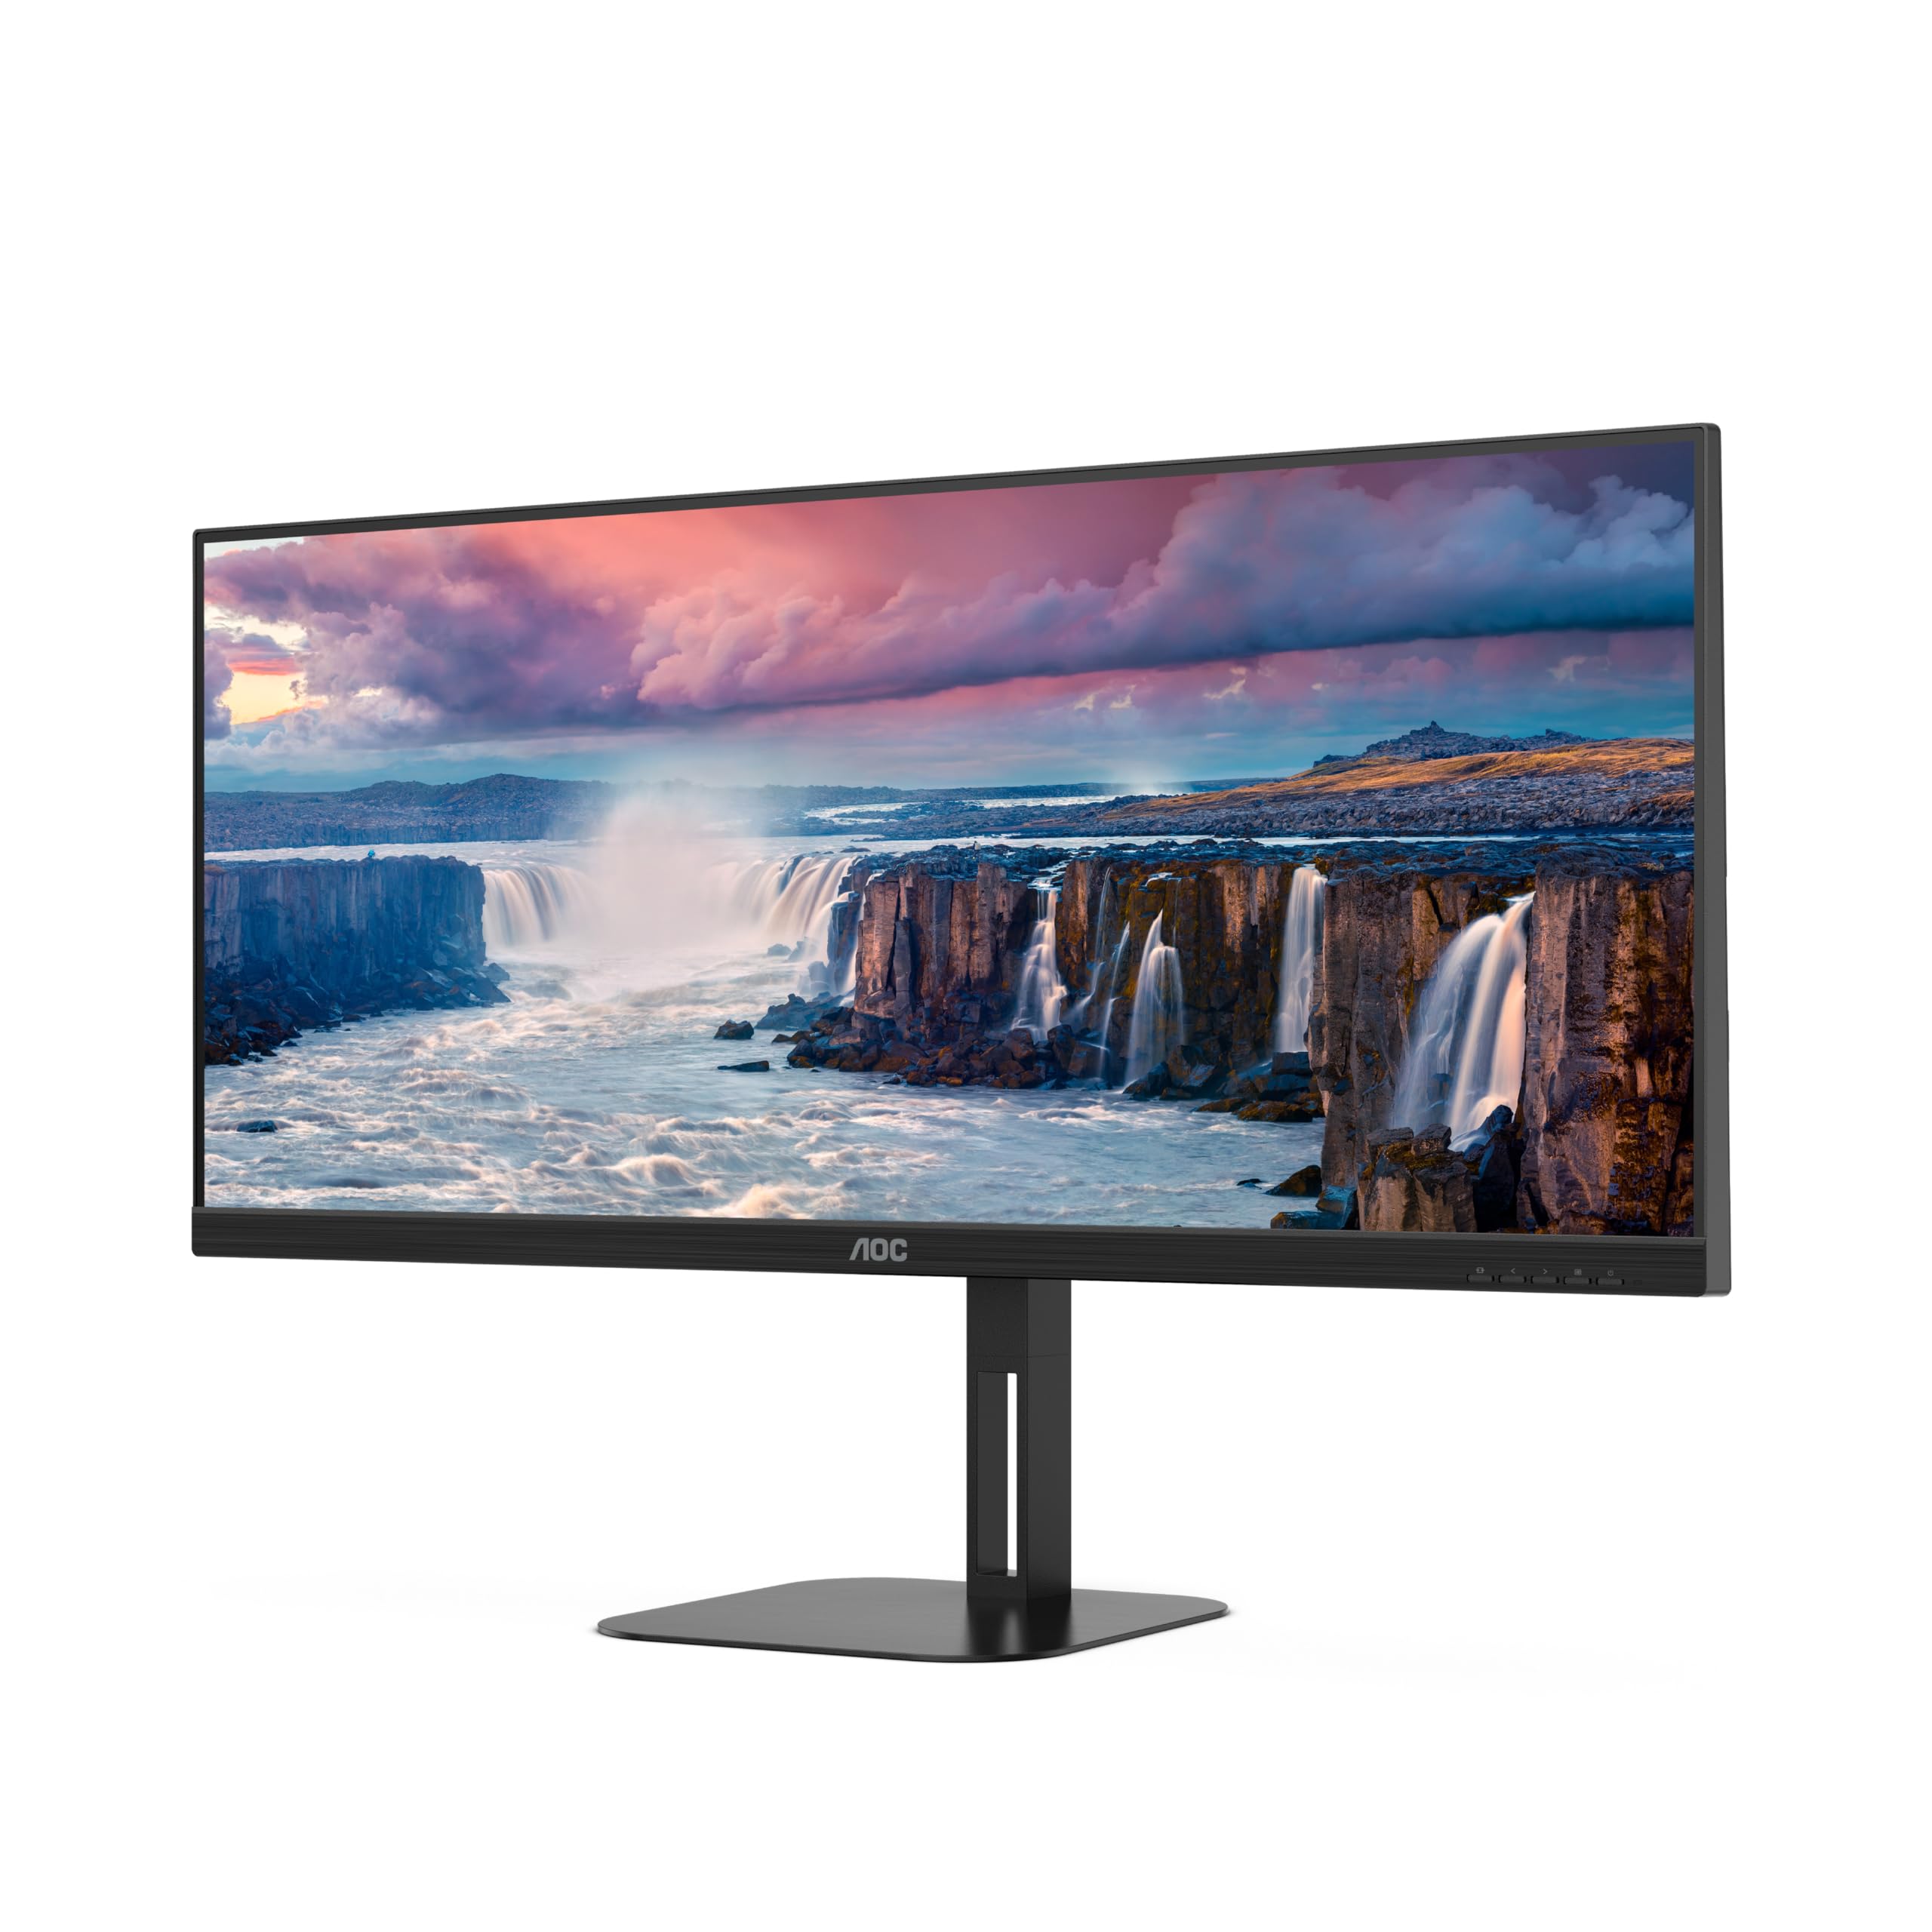
Foto 4.1: N'ihu view of the AOC U34V5C/BK monitor highlighting its 34-inch VA panel, USB-C port with 65W Power Delivery, 100Hz refresh rate, and AMD FreeSync technology.
4.1 Monitor Components
Familiarize yourself with the various parts of your monitor:
- Ogwe ihu: Display screen, OSD control buttons (usually located on the bottom right bezel).
- Ngbanwe azụ: Power input, video input ports (HDMI, DisplayPort, USB-C), USB hub ports, security lock slot.
- Guzo: Provides stable support and allows for height, tilt, and swivel adjustments.

Ọgụgụ 4.2: N'azụ view of the AOC U34V5C/BK monitor, showing the VESA mount compatibility and the stand attachment point.

Onyonyo 4.3: N'okpuru view of the AOC U34V5C/BK monitor, detailing the power input, DisplayPort, HDMI, USB-C, and USB-A hub ports.
5. Nhazi
5.1 Ịchịkọta Stand
- Jiri nlezianya tinye ihe nlele ahụ n'elu ákwà dị nro ma dị ọcha iji gbochie ọwa.
- Attach the stand neck to the back of the monitor until it clicks into place or is secured with screws (if applicable).
- Attach the stand base to the stand neck and tighten the captive screw at the bottom of the base.
- Carefully lift the monitor and place it on a stable desk.
5.2 Ijikọ Monitor
Ensure your computer and monitor are powered off before making any connections.
- Njikọ ike: Jikọọ eriri ọkụ eletrik ahụ na ntinye ike nke ihe nlele ahụ wee jikọọ ya na oghere ọkụ eletrik nke ala.
- Njikọ vidiyo: Họrọ otu n'ime nhọrọ ndị a:
- HDMI: Connect one end of the HDMI cable to your computer's HDMI output and the other end to an HDMI input on the monitor.
- DisplayPort: Connect one end of the DisplayPort cable to your computer's DisplayPort output and the other end to the DisplayPort input on the monitor.
- USB-C: Connect one end of the USB-C cable to your computer's USB-C port (which supports video output) and the other end to the USB-C input on the monitor. This connection can also provide power delivery and USB data transfer.
- Njikọ USB Hub (Nhọrọ): If using the monitor's USB hub, connect a USB upstream cable (USB-C to USB-A or USB-C to USB-C, depending on your computer) from your computer to the monitor's USB upstream port. This enables the monitor's USB-A ports for peripherals.
6. Na-arụ ọrụ nlekota oru
6.1 Gbanyụọ ma ọ bụ gbanyụọ
Press the power button, usually located on the bottom right bezel, to turn the monitor on or off. The power indicator light will illuminate when the monitor is on.
6.2 Ngosipụta Ngosipụta (OSD) NchNhr
The OSD menu allows you to adjust various monitor settings. Use the control buttons (joystick or individual buttons) on the monitor's bezel to navigate the menu.
- Press the Menu button (or push the joystick) to open the OSD menu.
- Use the navigation buttons (or joystick) to move through the menu options.
- Press the Select button (or push the joystick) to enter a sub-menu or confirm a selection.
- Use the Exit button (or move the joystick left) to go back to the previous menu or exit the OSD.
6.3 Common OSD Settings
- Ọkụ: Adjust brightness, contrast, and gamma.
- Nhazi onyonyo: Fine-tune image quality, sharpness, and pixel clock.
- Color Setup: Select color temperature, sRGB mode, or user-defined color settings.
- Picture Boost: Enhance specific areas of the screen.
- OSD Mbido: Adjust OSD language, position, and transparency.
- Ntọala egwuregwu: Enable/disable FreeSync, adjust overdrive, and game modes.
- Mgbakwunye: Select input source, reset settings, view ozi.
7. Nlekọta
7.1 Na-ehicha ihe nleba anya
- Kwụpụ ihe nleba anya mgbe niile tupu ihicha ya.
- Jiri akwa dị nro na nke enweghị mmiri ọkụ dampejiri mmiri mee ya ma ọ bụ ihe dị nro, ihe nhicha ihuenyo anaghị emebi emebi.
- Do not use alcohol, ammonia, or abrasive cleaners, as they may damage the screen or casing.
- Wipe the screen gently. Do not apply excessive pressure.
7.2 Nlekọta n'ozuzu
- Zere itinye ihe ndị dị arọ na igwe nleba anya ma ọ bụ eriri ya.
- Debe ihe nlele ahụ ka ọ ghara ịpụ n'anyanwụ kpọmkwem, ebe okpomọkụ na-esi apụta, na oke okpomọkụ.
- Do not expose the monitor to strong vibrations or impacts.
8. Nchọpụta nsogbu
Ọ bụrụ na ịnwee nsogbu na ihe nleba anya gị, rụtụ aka na nsogbu na azịza ndị a na-ahụkarị:
| Nsogbu | Ihe nwere ike ime | Ngwọta |
|---|---|---|
| Enweghị onyonyo na ihuenyo | Monitor not powered on; Incorrect input source; Loose video cable | Press power button; Select correct input via OSD; Reconnect video cable securely |
| Onyonyo oke ọchịchịrị/egbuke egbuke | Brightness/Contrast settings incorrect | Adjust Brightness and Contrast in OSD menu |
| Onyonyo na-egbuke egbuke | Incorrect refresh rate; Faulty cable | Set refresh rate to 100Hz in display settings; Try a different video cable |
| Ọdụ ụgbọ mmiri USB anaghị arụ ọrụ | USB upstream cable not connected | Connect the USB-C upstream cable from the monitor to your computer |
If the problem persists after trying these solutions, contact AOC customer support.
9. Nkọwapụta
Below are the technical specifications for the AOC U34V5C/BK monitor:

Figure 9.1: Product Information Sheet for AOC U34V5C/BK, detailing energy efficiency and technical parameters.
| Oke | Uru |
|---|---|
| Ụdị | AOC |
| Nlereanya | U34V5C/BK |
| Nha ihuenyo | 34 sentimita (86.4 cm) |
| Mkpebi | 3440 x 1440 WQHD |
| Akụkụ akụkụ | 21:9 |
| Oge nzaghachi | 4 nkeji |
| Ọnụego ume ọhụrụ | 100 Hz (default 60 Hz) |
| Teknụzụ Panel | VA Panel, LED LCD |
| Viewna n'akuku | 178 Degrees (Horizontal/Vertical) |
| Ngwaọrụ Akụrụngwa | DisplayPort, HDMI, USB-C |
| Mgbakọta ọdụ ụgbọ mmiri USB | 4 (USB Hub) |
| Nnyefe ike (USB-C) | 65W |
| Voltage | 5 Volts (Internal Power Supply) |
| Akụkụ ngwaahịa | 50 x 25 x 40 cm; 7 n'arọ |
| Klas arụmọrụ ike (SDR) | G |
| Oriri Ike (SDR) | 34.0 W |
| Klas arụmọrụ ike (HDR) | G |
| Oriri Ike (HDR) | 35.0 W |
| Ike njikere | 0.5 W |
| Minimum guaranteed software/firmware updates | Afọ 8 |
| Minimum guaranteed spare parts availability | Afọ 7 |
| Nkwado ngwaahịa kacha nta ekwe nkwa | Afọ 8 |
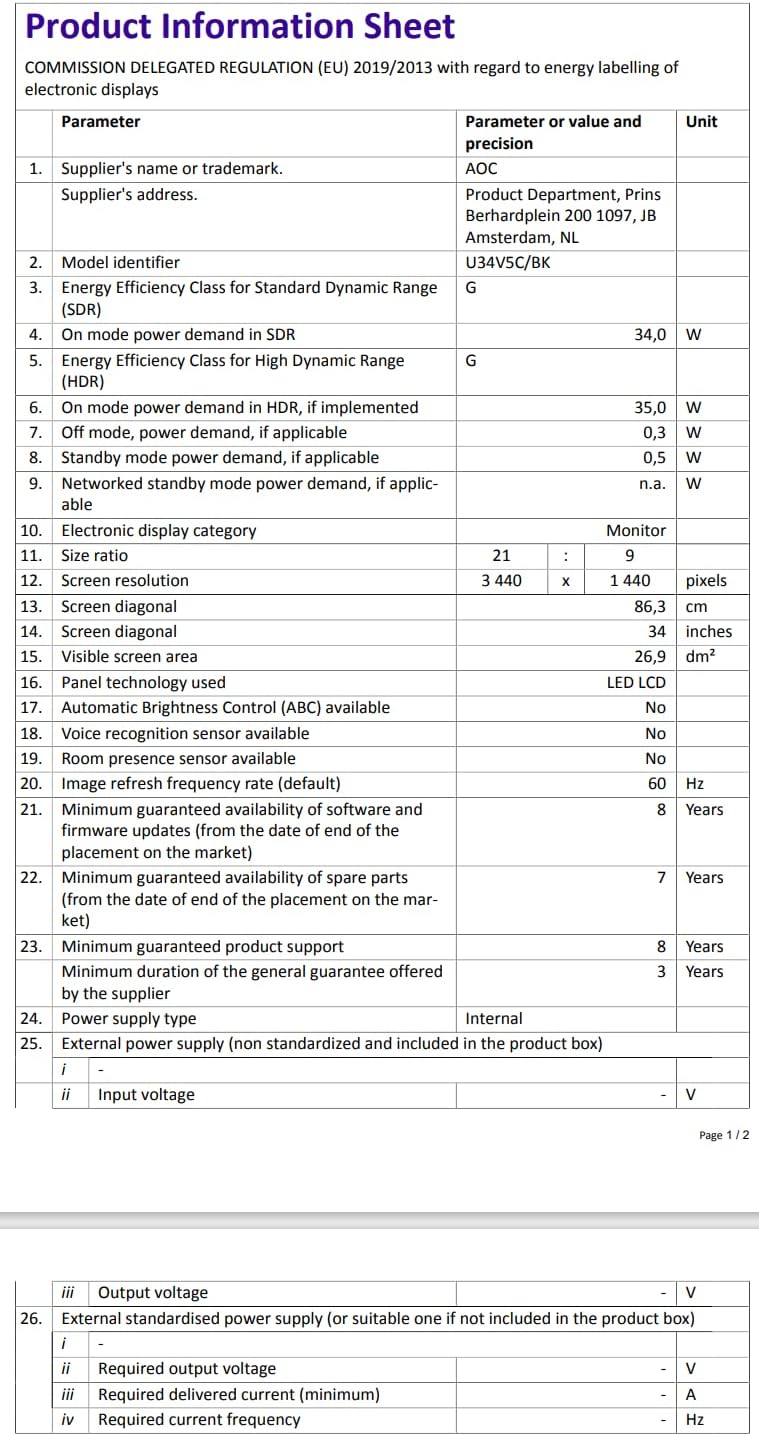
Figure 9.2: Energy Label for AOC U34V5C/BK. For more details, visit the Ebe nchekwa data EPREL.
10. Akwụkwọ ikike na nkwado
The AOC U34V5C/BK monitor comes with a minimum guaranteed general warranty of afọ 3 nke onye na-ebubata ya nyere.
For technical support, warranty claims, or service inquiries, please visit the official AOC website or contact your local AOC customer service center. Ensure you have your monitor's model number (U34V5C/BK) and serial number ready when contacting support.


