Okwu mmalite
This manual provides comprehensive instructions for the setup, operation, and maintenance of your Tesla Smart Pet Feeder (Model TSL-PC-BL4). Please read this manual thoroughly before using the device to ensure proper functionality and safety for your pet.
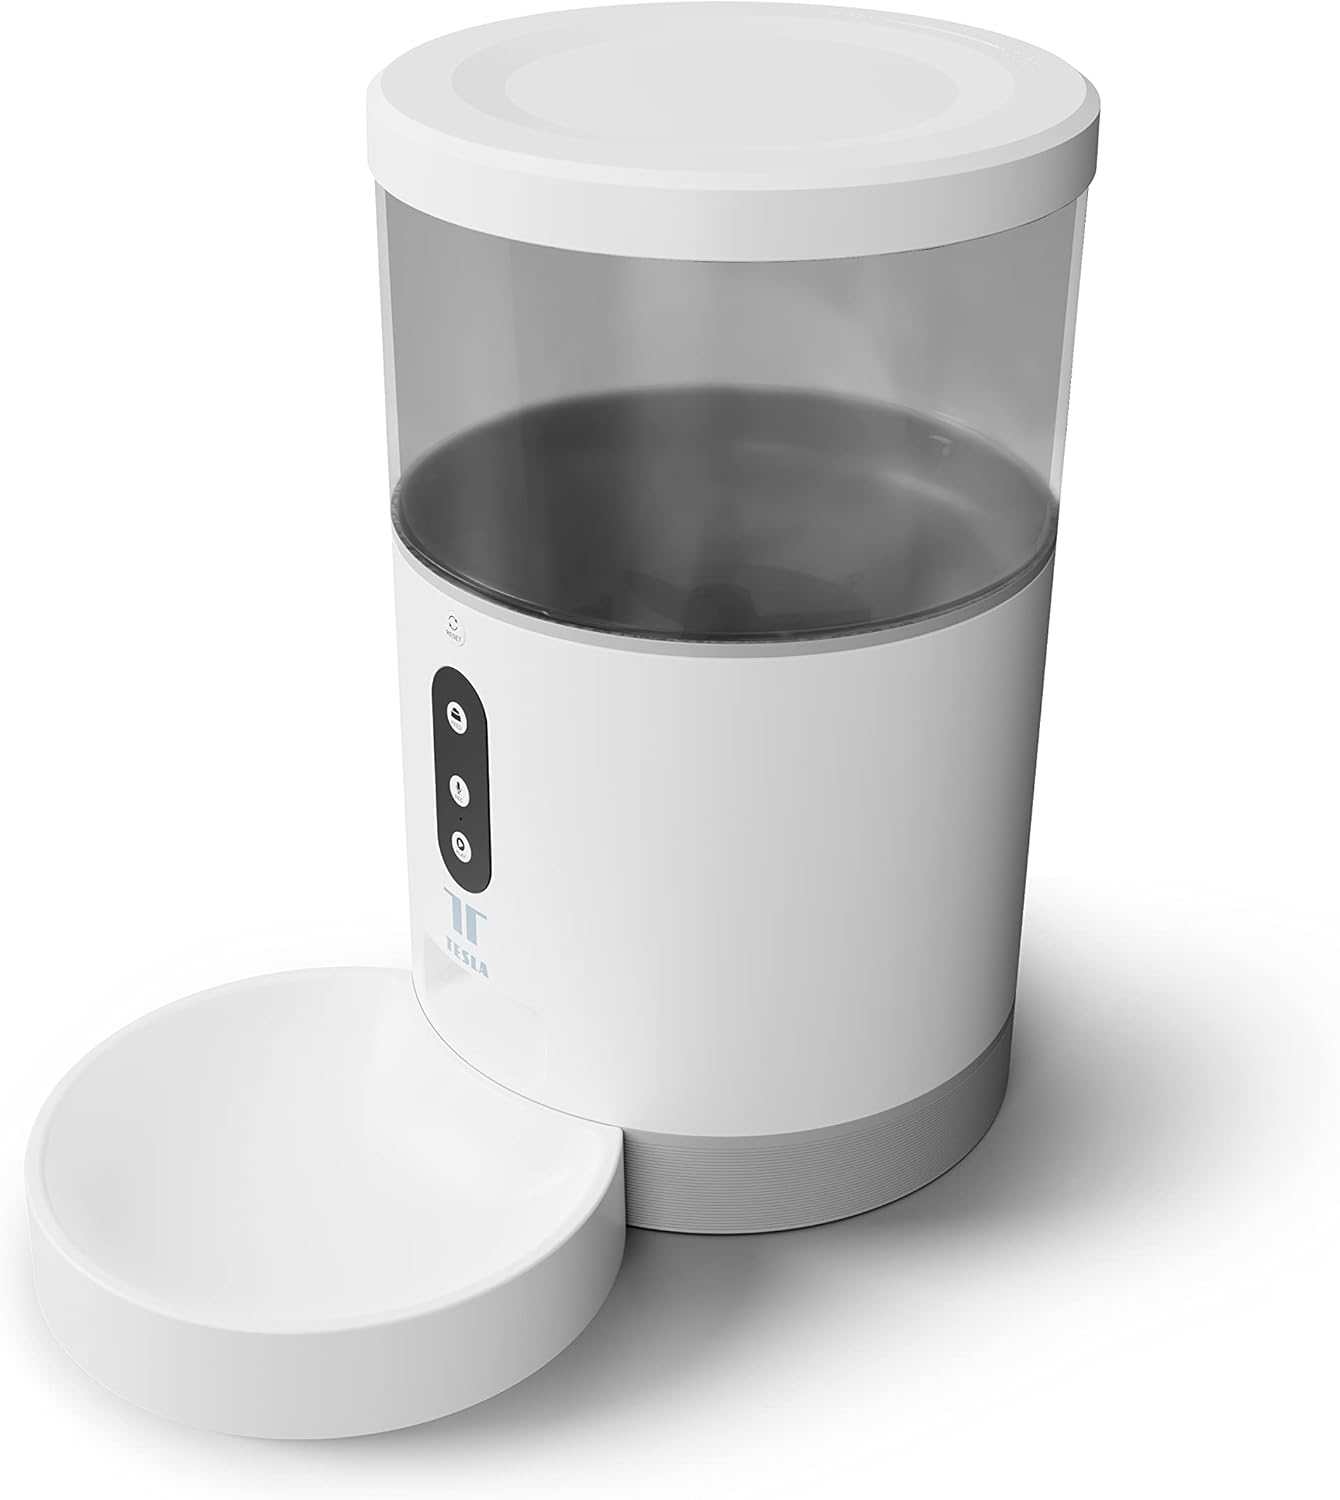
Foto: N'ihu view of the Tesla Smart Pet Feeder, showing the main unit with a transparent food reservoir, control buttons, and an attached white food bowl.
Ozi nchekwa dị mkpa
Biko lezie anya n'ihe ndị a iji gbochie mmerụ ahụ ma ọ bụ mmebi na ngwaọrụ ahụ:
- Ejila akụkụ bụ isi na mmiri ma ọ bụ mmiri mmiri ndị ọzọ.
- Gbaa mbọ hụ na etinyere onye na-enye nri n'elu ebe kwụsiri ike, dịkwa larịị.
- Keep out of reach of small children and pets when not in use or during assembly.
- Use only dry pet food with a kibble size up to 10 mm.
- Anwala ịkwasa ma ọ bụ rụkwaa ngwaọrụ n'onwe gị. Kpọtụrụ nkwado ndị ahịa maka enyemaka.
- Kwapụ ihe e ji enye nri ahụ mgbe niile tupu ị sachaa ya.
Ihe ngwugwu
Chọpụta na akụrụngwa niile dị na ngwugwu:
- Tesla Smart Pet Feeder Main Unit
- Igbe nri
- Ihe nkwụnye ọkụ
- Akwụkwọ ntuziaka (akwụkwọ a)
Ntuziaka nhazi
1. Mgbakọ
- Debe isi ihe na-enye nri n'elu larịị ma kwụsie ike.
- Attach the food bowl to the designated slot at the base of the main unit. Ensure it clicks securely into place.

Foto: N'ihu view of the feeder highlighting the control panel with feed, record, and play buttons.
2. Ịkwanye ngwaọrụ
- Ike AC: Connect the power adapter to the feeder's power input port and plug it into a standard wall outlet.
- Ndabere Batrị (Nhọrọ): For uninterrupted operation during power outages, insert three LR20 (D-cell) batteries into the battery compartment located at the bottom of the unit. Agụnyeghị batrị ma a ga-azụrịrị ya iche.

Foto: N'azụ view of the Tesla Smart Pet Feeder, showing the power input and battery compartment location.
3. Filling the Food Container
- Remove the lid from the top of the feeder.
- Pour dry pet food into the transparent container. The feeder has a capacity of 4 liters. Ensure kibble size does not exceed 10 mm to prevent jamming.
- Dochie mkpuchi ahụ nke ọma.

Foto: A nso nso view of dry pet food kibble in the feeder's bowl, demonstrating the type of food suitable for the device.
4. App Download and Wi-Fi Connection
- Download the Tesla Smart app from the App Store (iOS) or Google Play Store (Android).
- Open the app and follow the on-screen instructions to create an account and add your Tesla Smart Pet Feeder.
- Ensure your Wi-Fi network is 2.4 GHz for successful connection.
Ntuziaka ọrụ
1. Scheduling Feeds via App
The primary method for controlling the feeder is through the Tesla Smart app. The app allows you to:
- Set feeding schedules: Define specific times for food dispensing.
- Adjust portion sizes: Control the amount of food dispensed per feeding. The feeder can dispense up to 10 portions per feeding.
- View feeding history.

Image: An orange cat resting beside the Tesla Smart Pet Feeder, illustrating the feeder in a home environment.
2. Nri akwụkwọ ntuziaka
To dispense food manually, press the "Feed" button on the feeder's control panel. Each press will dispense one portion of food.
3. Voice Recording and Playback
The feeder includes a built-in microphone and speaker, allowing you to record a short message to call your pet at feeding times.
- Ndekọ: Press and hold the "Record" button (microphone icon) on the control panel. Speak your message. Release the button to save.
- Gwuo: Press the "Play" button (speaker icon) to play your recorded message. The message will also play automatically at scheduled feeding times.
4. Smart Home Integration
The Tesla Smart Pet Feeder is compatible with Google Assistant and Amazon Alexa. You can control the feeder using voice commands after linking it through the respective smart home applications.
Nlekọta na nhicha
Nhicha mgbe niile na-achọpụta ogologo ndụ yana ọrụ ịdị ọcha nke onye na-azụ anụ ụlọ gị.
- Food Bowl: The food bowl can be detached and washed by hand with mild soap and water. Rinse thoroughly and dry completely before reattaching.
- Food Container: The transparent food container can be wiped clean with a damp akwa . Gbaa mbọ hụ na ọ kpọrọ nkụ kpamkpam tupu ejupụta nri.
- Isi ngalaba: Wipe the exterior of the main unit with a soft, dry cloth. Do not use abrasive cleaners or immerse the main unit in water.
- Ebe nri: Periodically check the food outlet for any blockages or food residue and clear as necessary.
Important: Always unplug the feeder from the power source before cleaning.
Nchọpụta nsogbu
| Nsogbu | Ihe nwere ike ime | Ngwọta |
|---|---|---|
| Feeder not powering on. | No power from outlet; batteries depleted or incorrectly installed. | Check power adapter connection and wall outlet. Replace or install D-cell batteries correctly. |
| Food not dispensing. | Food jammed; container empty; incorrect kibble size; feeder offline. | Check for food blockages in the outlet. Refill container. Ensure kibble is max 10mm. Check Wi-Fi connection and app status. |
| Enweghị ike ijikọ na Wi-Fi. | Incorrect Wi-Fi password; 5GHz network; feeder too far from router. | Verify Wi-Fi password. Ensure you are connecting to a 2.4 GHz network. Move feeder closer to router. Restart feeder and router. |
| Voice recording not working. | Microphone issue; recording procedure incorrect. | Ensure you are pressing and holding the record button correctly. Try restarting the feeder. |
Nkọwapụta
| Njirimara | Nkọwa |
|---|---|
| Nọmba nlereanya | TSL-PC-BL4 |
| Akụkụ (L x W x H) | 30 x 30 x 20 cm |
| Ibu | 1.92 kilogram |
| Ihe onwunwe | Plastic |
| Agba | Ọcha |
| Ike | 4 lita |
| Nha Kibble | Ruo 10 mm |
| Isi Iyi Ike | AC Adapter, 3x LR20 (D-cell) batteries (not included) |
| Njikọta | Wi-Fi (2.4GHz) |
| Atụmatụ pụrụ iche | Wi-Fi and App Control, Voice Recording, Google Assistant/Amazon Alexa Compatible |
Akwụkwọ ikike na nkwado
For warranty information, technical support, or service inquiries, please refer to the official Tesla Smart websaịtị ma ọ bụ kpọtụrụ ngalaba ọrụ ndị ahịa ha. Debe nnata nzụta gị ka ihe akaebe nke ịzụrụ.
For the most up-to-date information and support resources, visit: www.teslasmart.com


