Okwu mmalite
This manual provides essential information for the safe and effective use of your Vividia CT-6010 LCD/WiFi Flexible Two-Way Articulating Inspection Camera Borescope Videoscope. Please read these instructions carefully before operating the device and retain them for future reference.

Figure 1: Vividia CT-6010 Borescope main unit with flexible probe.
Melite
1. Mwepu na njirimara akụrụngwa
Carefully unpack all items from the packaging. Ensure all components are present and undamaged. The package typically includes:
- Vividia CT-6010 Main Unit with LCD Display
- Flexible Articulating Probe (6mm diameter, 1.0m length)
- Ihe nkwụnye ọkụ/Chaja
- eriri USB
- Akpa na-ebu
- Ubu eriri

Figure 2: Contents of the Vividia CT-6010 package.
2. Ịchaji ngwaọrụ
Before first use, fully charge the device. Connect the power adapter to the DC n'ime port on the main unit and plug it into a power outlet. The charging indicator will show the charging status.

Figure 3: DC In port for charging, along with SD and USB ports.
3. Itinye kaadị SD
To save photos and videos, insert a compatible Micro SD card (not included) into the SD card slot on the side of the main unit. Ensure the card is inserted correctly until it clicks into place.
4. Ịgbanye / gbanyụọ
Pịa ma jide Ike button located on the control panel to turn the device on or off. The LCD screen will illuminate upon startup.
5. WiFi Connection (Optional)
The CT-6010 features built-in WiFi for connecting to iPhone, iPad, or Android devices. Follow these steps:
- Turn on the CT-6010 device.
- Enable WiFi on your mobile device.
- Chọọ maka the CT-6010's WiFi network (usually named 'Vividia_XXXX').
- Connect to the network using the provided password (refer to the device screen or a sticker on the unit).
- Open the dedicated Vividia app on your mobile device to view the live feed and control functions.

Ọgụgụ 4: Ọpụample of WiFi connection to a mobile device.
Ntuziaka ọrụ
1. Njikwa ntọala
The main unit features several buttons for operation:
- Bọtịnụ ike: Gbanyụọ/ gbanyụọ ngwaọrụ.
- OK bọtịnụ: Confirms selections in the menu or captures media.
- Bọtịnụ menu: Nweta ntọala ngwaọrụ.
- Bọtịnụ ọkụ (*): Adjusts the brightness of the LED lights on the probe tip.
- Photo/Video Capture Button: A dedicated button on the handle for quick photo or video recording.

Figure 5: Location of the Photo/Video Capture button.
2. Probe Articulation
The CT-6010 features a two-way articulating probe. Use the articulation knob on the handle to precisely control the bending direction of the probe tip. The probe can bend more than 180 degrees in two directions, allowing for comprehensive inspection of hard-to-reach areas.
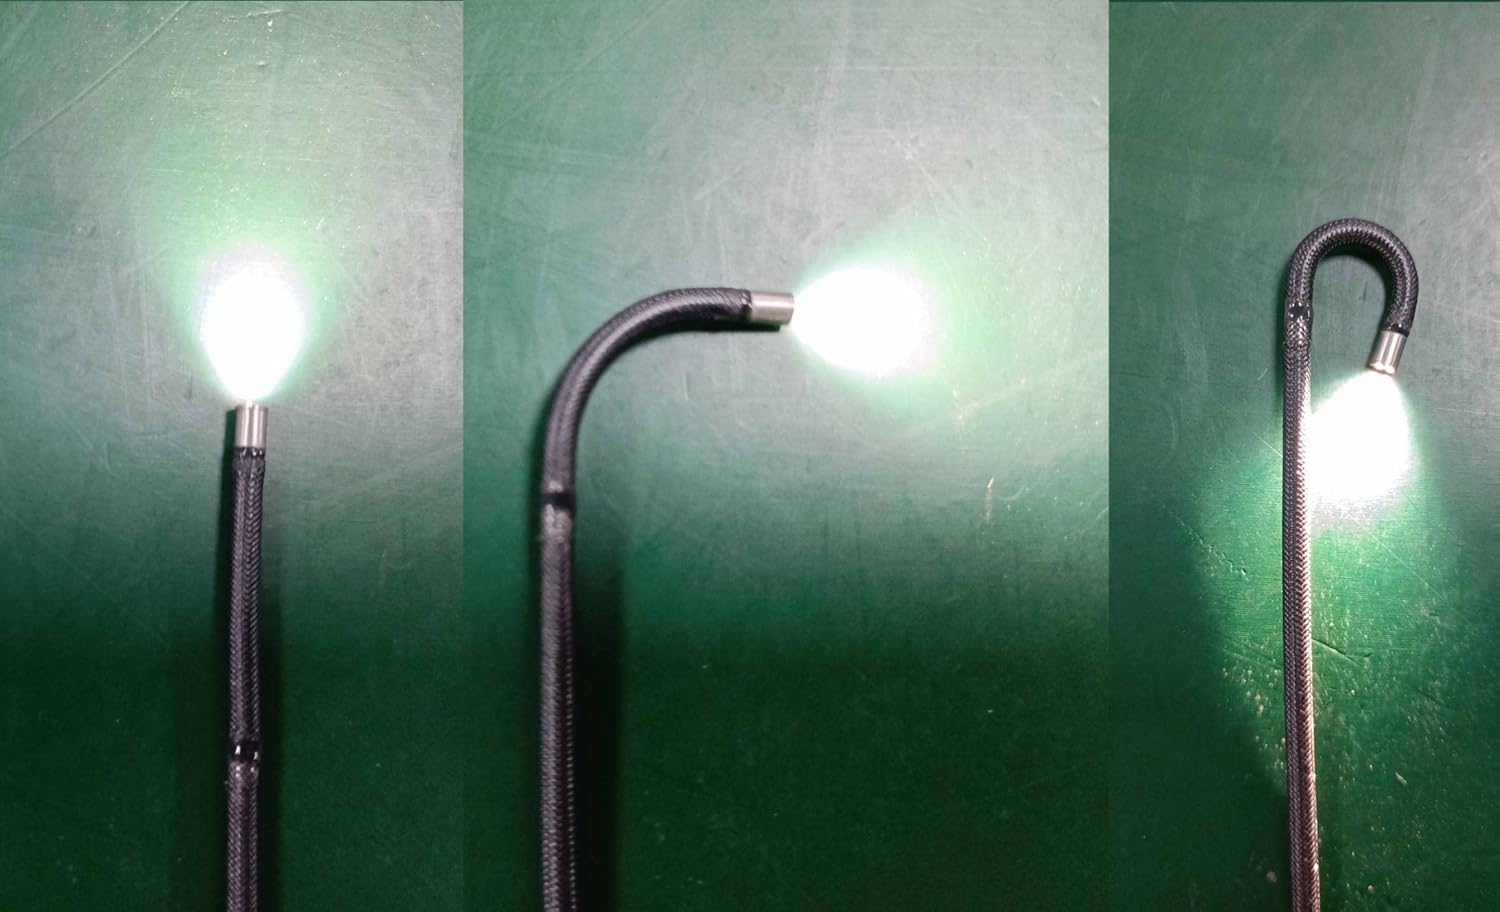
Ọgụgụ 6: Ọpụamples of probe articulation.

Figure 7: Close-up of the articulating probe tip.
3. Adjusting Illumination
Pịa * (Light) button to cycle through different brightness levels for the LED lights at the probe tip. Adjust the illumination to achieve optimal visibility in various inspection environments.
4. Na-ese foto na vidiyo
Mgbe viewing the live feed, press the Bọtịnụ ijide foto/Video on the handle to take a still image. To record a video, press and hold the button briefly to start recording, and press it again to stop. Captured media is saved to the inserted SD card.
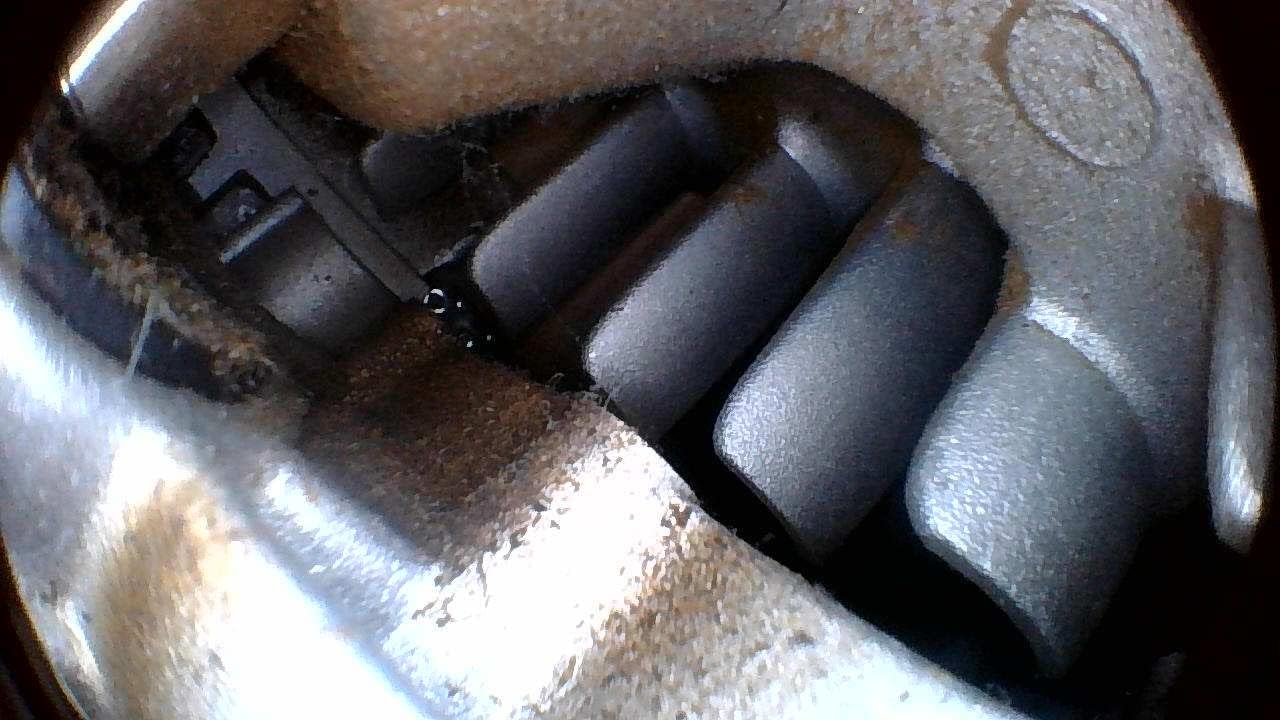
Ọgụgụ 8: Ọpụample of an inspection view.
5. Ntugharị menu na Ntọala
Pịa NchNhr button to access device settings. Use the directional buttons (often integrated with OK/Light buttons) to navigate through options such as resolution, date/time, language, and playback. Press OK iji kwado nhọrọ na NchNhr ọzọ ịpụ.
Nlekọta
1. Nhicha
- Nyocha: After each use, gently wipe the probe and camera lens with a soft, damp cloth. For stubborn dirt, use a mild cleaning solution. Ensure no liquid enters the main unit.
- Isi ngalaba: Wipe the main unit with a dry, soft cloth. Avoid using abrasive cleaners or solvents.
2. Nlekọta batrị
Ka ịgbatị ndụ batrị:
- Charge the device fully before long periods of storage.
- Zere idobe ngwaọrụ ahụ n'ebe dị oke ọkụ ma ọ bụ oyi.
- If not used for an extended period, charge the battery every 3-6 months.
3. Nchekwa
Store the CT-6010 in its carrying case in a cool, dry place, away from direct sunlight and extreme temperatures. Ensure the probe is coiled loosely and not sharply bent to prevent damage.
4. Mmiri Nguzogide
The flexible probe is rated IP67 waterproof, meaning it can withstand immersion in water up to 1 meter for 30 minutes. The main unit is NOT waterproof. Do not immerse the main unit in water or expose it to heavy rain.
Nchọpụta nsogbu
| Nsogbu | Ihe nwere ike ime | Ngwọta |
|---|---|---|
| Ngwaọrụ anaghị agbanwu ọkụ. | Batrị dị ala; Apịghị bọtịnụ ike nke ọma. | Charge the device fully; Press and hold the Power button for a few seconds. |
| Enweghị onyonyo na ihuenyo. | Probe not connected properly; Camera lens obstructed/dirty. | Ensure the probe is securely connected; Clean the camera lens. |
| WiFi connection fails. | Incorrect password; App not installed; Device out of range. | Verify WiFi password; Install the correct Vividia app; Move closer to the device. |
| Probe articulation is stiff or stuck. | Obstruction; Mechanical issue. | Do not force the articulation. Gently retract the probe and check for obstructions. If the issue persists, contact support. |
| Imagedị mma adịghị mma. | Insufficient lighting; Dirty lens; Incorrect focus (if adjustable). | Adjust LED brightness; Clean the camera lens; Ensure proper distance from object. |
Nkọwapụta
| Njirimara | Nkọwa |
|---|---|
| Dayameta nyocha | 6mm (0.236 sentimita) |
| Ogologo nyocha | mita 1.0 (3.3 ụkwụ) |
| Mkpebi igwefoto | HD 1280x720 |
| Nkọwapụta | 2-way, max. bending angle >180 degrees |
| Njikọta | Built-in WiFi (for iPhone, iPad, Android) |
| Ngosi nke enweghị mmiri | IP67 (naanị nyocha) |
| Ngosipụta | Integrated LCD |
| Mkpebi ịse vidiyo | 720p |
| Flash igwefoto | Igwe ọkụ arụnyere n'ime ya |
| Onye nrụpụta | Akụkọ ihe mere eme nke Vividia Technologies |
| Ụbọchị mbụ dị | Jenụwarị 12, 2022 |

Figure 9: Probe diameter measurement.

Figure 10: Probe length illustration.
Akwụkwọ ikike na nkwado
Ozi akwụkwọ ikike
The Vividia CT-6010 is covered by a manufacturer's warranty. Please refer to the warranty card included with your product or visit the official Vividia Technologies websaịtị maka nkọwa na usoro akwụkwọ ikike.
Nkwado ndị ahịa
For technical assistance, troubleshooting beyond this manual, or warranty claims, please contact Vividia Technologies customer support. Contact information can typically be found on the manufacturer's websaịtị ma ọ bụ n'ime akwụkwọ ngwaahịa gị.


