1. Okwu mmalite
This manual provides detailed instructions for the safe and efficient operation of your InFocus P120 INL412 Multimedia Projector (Model INL4128). Please read this manual thoroughly before using the projector and keep it for future reference. This projector is designed for high-quality image projection, suitable for various applications including presentations, home entertainment, and gaming.
2. Ozi nchekwa
Lee ihe ndị a iji gbochie mmebi na ihe ngosi ahụ ma hụ na onye ọrụ ahụ nwere nchekwa:
- Igwe ikuku: Ensure adequate ventilation around the projector. Do not block ventilation openings. Maintain a minimum distance of 30 cm (12 inches) from walls or other objects.
- Isi mmalite ike: Jiri naanị ike ọkọnọ na voltage. Connect the power cord securely.
- Okpomọkụ: The projector generates heat during operation. Do not touch the projector's vents or exhaust areas directly after use.
- Mmepụta ọkụ: Elela anya ozugbo na oghere projector mgbe lamp na-agba, n'ihi na ìhè dị ike nwere ike imebi anya.
- Nkwanye: Place the projector on a stable, level surface. Avoid placing it in direct sunlight, near heat sources, or in areas with high humidity or dust.
- Nhicha: Gbanyụọ eriri ọkụ eletrik tupu ị sachaa ya. Jiri ákwà dị nro ma kpọọ nkụ. Ejila ihe nhicha mmiri ma ọ bụ ihe nhicha aerosol.
- Ije ozi: Do not attempt to service the projector yourself. Refer all servicing to qualified service personnel.
3. Ngwaahịa gafereview
3.1 Top Panel and Lens Area
The top panel features the control buttons for basic operation and the lens area with focus and zoom adjustments.

Foto 3.1: Top view of the InFocus P120 INL412 projector, highlighting the control panel on the right and the lens adjustment area on the left. The InFocus logo is visible on the top surface.
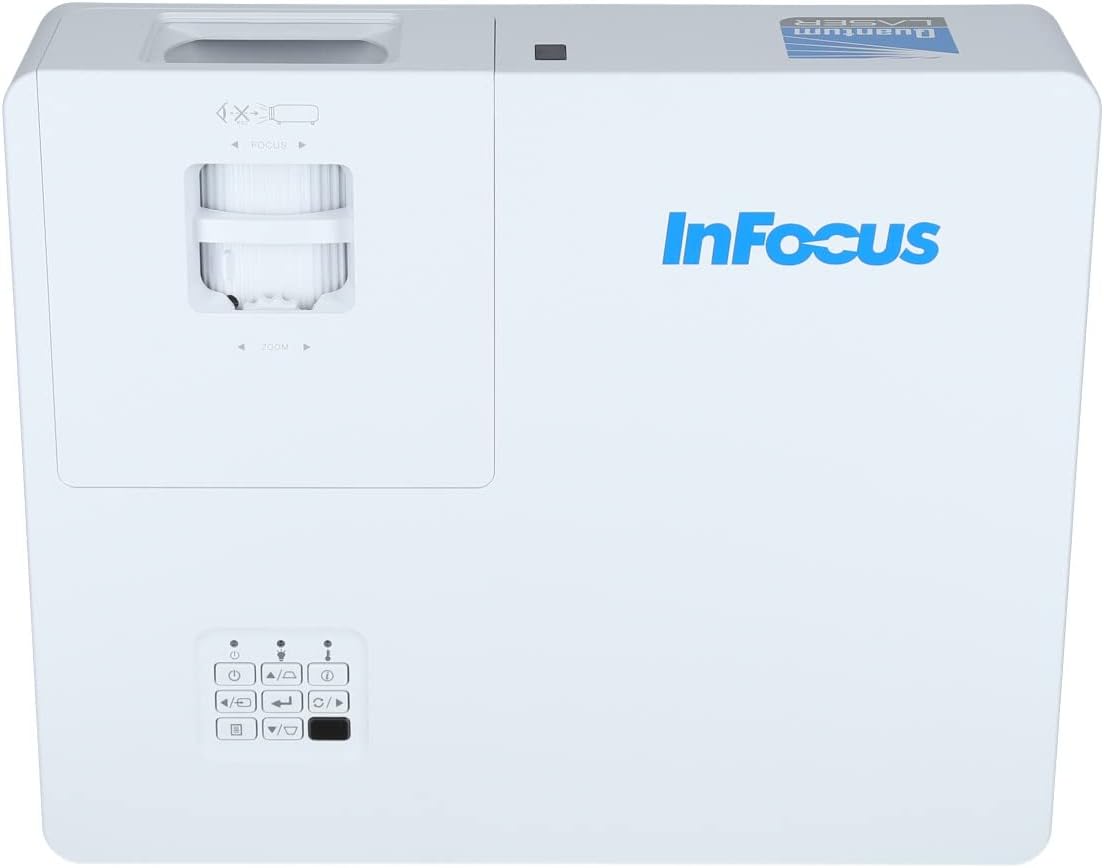
Ọgụgụ 3.2: A nso view of the projector's top panel, showing the focus and zoom rings near the lens opening and the array of control buttons for power, menu, source selection, and navigation.
3.2 Njikọ azụ azụ
The rear panel provides various input and output ports for connecting external devices.

Figure 3.3: Rear panel of the InFocus P120 INL412 projector, displaying a comprehensive array of connectivity options including HDMI (x2), USB, S-Video, Ethernet (LAN), VGA In (x2), VGA Out, RS232, and Audio In/Out ports. The power input is located on the bottom left.
Key ports include:
- HDMI 1 & 2: For connecting high-definition digital video and audio sources.
- USB: For connecting USB devices, potentially for media playback or firmware updates.
- S-Video: For connecting older video sources.
- VGA IN 1 & 2: For connecting computers or other devices with VGA output.
- VGA pụta: For connecting to an external monitor.
- Ethernet (LAN): For network connectivity and control.
- Audio IN 1 & 2 / Audio OUT: For analog audio connections.
- NXU 232: Maka njikwa usoro.
- Ntinye ike: Maka ijikọ eriri ọkụ AC.
3.3 Front and Side Panels
The front panel houses the projection lens and front ventilation, while the side panels feature additional ventilation grilles.

Foto 3.4: N'ihu view of the InFocus P120 INL412 projector, displaying the main projection lens on the right and the extensive front ventilation grille on the left, crucial for heat dissipation.

Foto 3.5: Akụkụ view of the InFocus P120 INL412 projector, illustrating the side ventilation grilles that contribute to maintaining optimal operating temperature.
4. Nhazi
4.1 Ndobe ihe nrụpụta
Position the projector on a stable, flat surface or mount it securely. Ensure the projector is within the optimal projection distance for your screen size. Maintain clear space around the projector for proper ventilation.
4.2 Ngwa jikọọ
Before connecting any cables, ensure the projector and all source devices are powered off.
- Njikọ HDMI: Connect an HDMI cable from your source device (e.g., laptop, Blu-ray player, gaming console) to either the HDMI 1 or HDMI 2 port on the projector.
- Njikọ VGA: Connect a VGA cable from your computer to either VGA IN 1 or VGA IN 2. For audio, connect a separate audio cable from your computer's audio output to the corresponding Audio IN port on the projector.
- Njikọ USB: Insert a USB drive into the USB port for media playback (if supported by firmware) or service functions.
- Njikọ Ethernet (LAN): Connect an Ethernet cable to the LAN port for network control or updates.
- Mmepụta ọdịyo: If using external speakers, connect an audio cable from the Audio OUT port on the projector to your audio system.
4.3 Njikọ ike
Connect the power cord to the projector's power input and then plug the other end into a grounded electrical outlet.
5. Ntuziaka ọrụ
5.1 Gbanyụọ/ gbanyụọ
- Ike Na: Pịa Ike button on the projector's control panel or the remote control. The power indicator light will change.
- Gbanyụọ: Pịa Ike button again. A confirmation message may appear. Press the button a second time to confirm shutdown. Allow the projector to cool down before unplugging it.
5.2 Adjusting Focus and Zoom
Rotate the focus ring around the lens until the image appears sharp and clear. Use the zoom ring to adjust the image size to fit your screen.
5.3 Ịhọrọ Isi Iyi Ntinye
Pịa Isi mmalite button on the control panel or remote control to cycle through available input sources (HDMI 1, HDMI 2, VGA 1, VGA 2, S-Video, USB). Select the input corresponding to your connected device.
5.4 Nsorouzọ NchNhr
Jiri ihe NchNhr button to access the on-screen display (OSD) menu. Use the arrow buttons to navigate through menu options and the Banye button to select. Press NchNhr ọzọ ịpụ.
6. Nlekọta
6.1 Ihicha oghere
Gently wipe the lens with a soft, lint-free cloth specifically designed for optical surfaces. Do not use abrasive cleaners or excessive force, as this can scratch the lens.
6.2 Cleaning the Projector Exterior
Jiri ákwà dị nro ma kpọọ nkụ hichaa ihe e ji egosi ihe onyonyo ahụ.asing. For stubborn dirt, dampen the cloth slightly with water, then wipe dry immediately. Avoid getting liquids into the projector's openings.
6.3 Nlekọta ikuku
Regularly check the projector's ventilation grilles for dust accumulation. Use a soft brush or a vacuum cleaner with a brush attachment to gently remove dust from the vents to ensure proper airflow and prevent overheating.
7. Nchọpụta nsogbu
7.1 Enweghị onyonyo egosiri
- Hụ na e tinyere ihe ngosi ahụ n'ọrụ, nakwa na ọkụ ihe ngosi ike siri ike.
- Verify that the video cable (HDMI, VGA, etc.) is securely connected to both the projector and the source device.
- Lelee ma a họpụtara isi mmalite ntinye ziri ezi na ihe ngosi ahụ.
- Confirm that the source device (laptop, player) is powered on and outputting a signal.
7.2 Image is Blurry or Out of Focus
- Hazie mgbanaka lekwasịrị anya na lenzi ihe onyonyo ruo mgbe onyonyo ahụ dị nkọ.
- Ensure the projector is at the correct distance from the screen.
- Hichaa lensi ihe ngosi ahụ ma ọ bụrụ na ọ dị ka ihe ruru unyi.
7.3 Enweghị ụda
- If using HDMI, ensure the source device's audio output is set to HDMI.
- If using VGA, ensure a separate audio cable is connected from the source to the projector's Audio IN port.
- Lelee ntọala olu na ma ihe ngosi ahụ ma ngwaọrụ isi mmalite ya.
- If using external speakers, ensure they are properly connected to the Audio OUT port and powered on.
8. Nkọwapụta
| Njirimara | Nkọwa |
|---|---|
| Ụdị | Infocus |
| Onye nrụpụta | Na mgbado anya |
| Aha Nlereanya | P120 INL412 |
| Nọmba nlereanya | INL4128 |
| Afọ | 2023 |
| Ngwaọrụ Akụrụngwa | Ethernet, HDMI, S-Video, USB |
| Ọnụọgụ nke ihe | 1 |
| Akụkụ akụkụ | 16:9 |
| Wattage | 341 watt |
| Batrị gụnyere | Mba |
| Batrị achọrọ | Mba |
| Ụdị Ihe | Desktọpụ |
| Ụdị nkwụnye | Ugwu okpokoro |
| Ejikwa njikwa anya gụnyere | Ee |
| Akụkụ ngwaahịa | 56.13 x 46.48 x 25.15 cm |
| Ibu Ibu | 5.5 n'arọ |
| Ogo onyonyo kacha | 308.28 sentimita asatọ |
| Ogo onyonyo kacha nta | 910.63 millimeters |
| Ụbọchị mbụ dị | Jenụwarị 5, 2022 |
9. Akwụkwọ ikike na nkwado
For warranty information and technical support, please refer to the documentation included with your purchase or visit the official InFocus websaịtị. Debe ihe akaebe nke ịzụrụ maka akwụkwọ ikike.


