1. Okwu mmalite
This manual provides detailed instructions for the installation, operation, and maintenance of your Edge Audio Xtreme Series EDX5000.1FD-E0 Monoblock Amplifier. The EDX5000.1FD-E0 is a high-performance Class D full-bridge amplifier designed for powerful audio output. Please read this manual thoroughly before attempting installation or operation to ensure proper use and to prevent damage.
1.1 Nchekwa nchekwa
- Always disconnect the vehicle's battery negative terminal before making any electrical connections.
- Gbaa mbọ hụ na agbajichara wiwi niile nke ọma ma chekwaa ya ka ọ gbochie mmebi ma ọ bụ sekit dị mkpụmkpụ.
- Use appropriate gauge wiring for power and ground connections as specified in this manual.
- Zere ịkwanye ihe amplifier in locations exposed to moisture or excessive heat.
- Gakwuru ọkachamara nwụnye ya ma ọ bụrụ na ị maghị akụkụ ọ bụla nke usoro nrụnye ahụ.
2. Ihe ngwugwu
Nyochaa na ihe niile dị na ngwugwu tupu ịga n'ihu na ntinye.
- Edge Audio EDX5000.1FD-E0 Monoblock Ampna -emegharị ihe
- Remote Bass Control Unit
- Wiring for Remote Bass Control
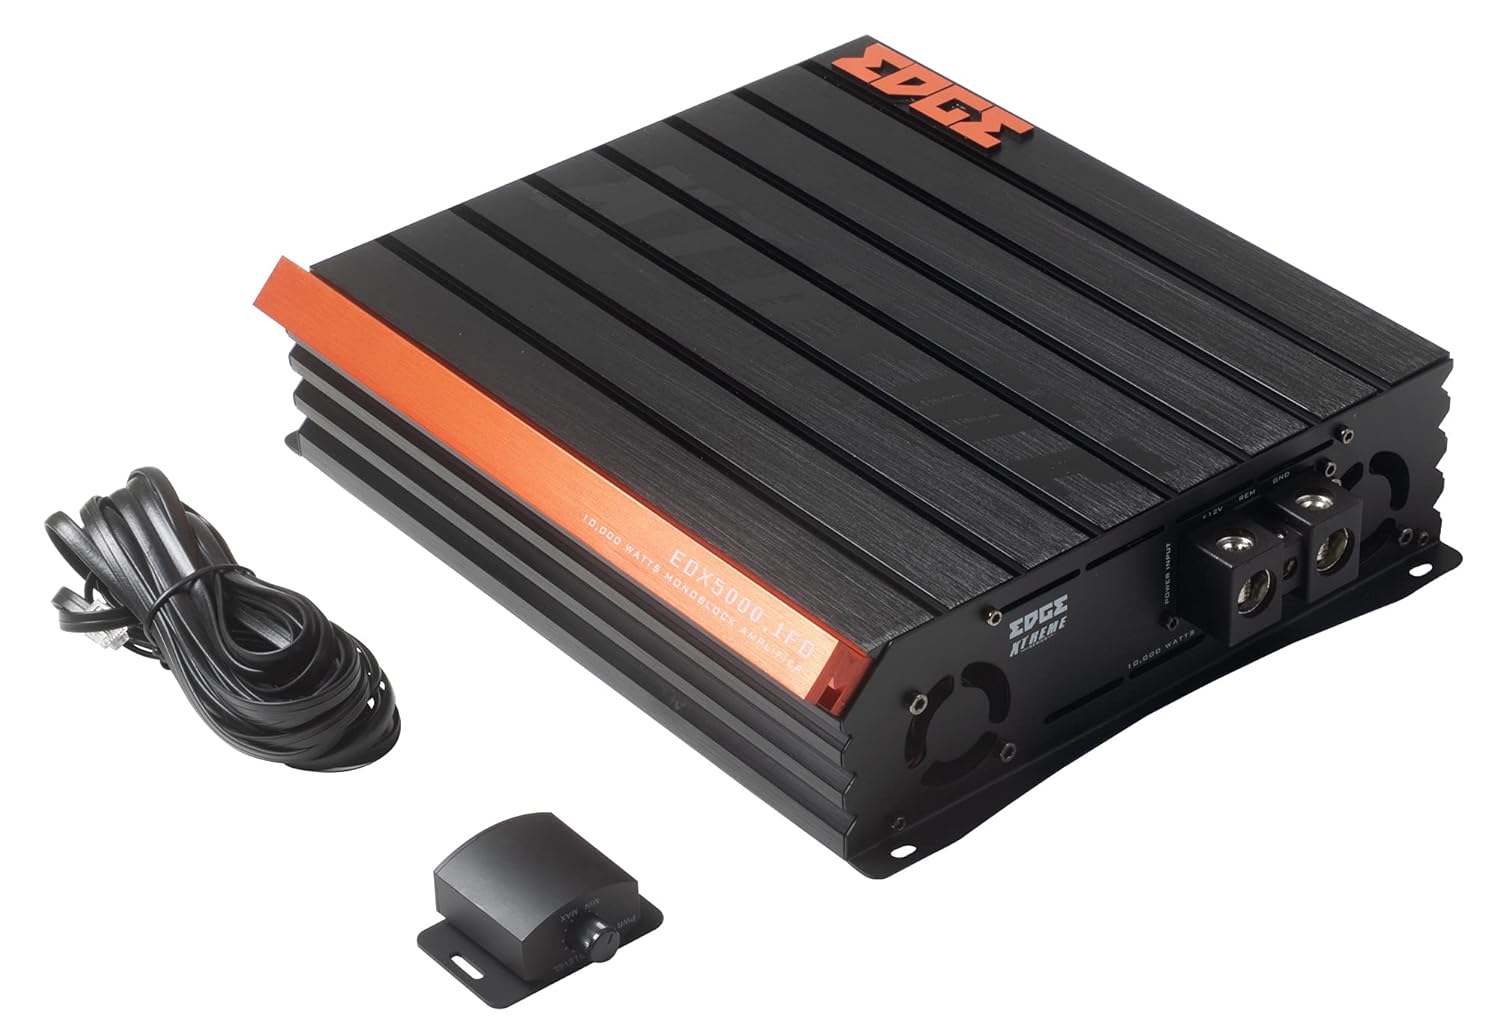
Image 2.1: Contents of the EDX5000.1FD-E0 package, including the amplifier, remote bass control, and connecting cable.

Image 2.2: The retail packaging for the Edge Audio EDX5000.1FD-E0 Monoblock Ampna -emegharị ihe.
3. Atụmatụ
The Edge Audio Xtreme Series EDX5000.1FD-E0 amplifier incorporates advanced features for optimal audio performance:
- Monoblock power amplifier design for dedicated subwoofer applications.
- Max Power: 10,000 watts.
- Built-in active crossovers (High-Pass Filter and Low-Pass Filter) for precise sound shaping.
- Adjustable Bass Boost circuit for enhanced low-frequency response.
- Ultra-efficient Class D topology for high power output with minimal heat generation.
- Wideband frequency response up to 20kHz.
- Full bridge technology for efficient power delivery.
- Compact footprint for versatile installation options.
- Dimensions (H x W x D): 2.5 x 10.4 x 9.1 inches (64 x 264 x 230mm).

Foto 3.1: Elu view of the EDX5000.1FD-E0 ampihe ngosi, ihe ngosiasing its compact design and heatsink fins.
4. Ntọala na nwụnye
Nrụnye kwesịrị ekwesị dị oke mkpa maka ịrụ ọrụ na ogologo ndụ nke gị amplifier. Follow these guidelines carefully.
4.1 Ebe nrịgo
Ugwu ahụ amplifier in a dry, well-ventilated area, away from direct sunlight or heat sources. Ensure sufficient airflow around the amplifier's heatsink. The ampA na-eme lifia maka itinye elu.
4.2 Njikọ njikọ
All wiring should be securely connected and insulated to prevent short circuits. Use high-quality, appropriate gauge wiring.
4.2.1 Njikọ ike
Jikọọ amplifier to the vehicle's electrical system as follows:
- +12V (Ike): Connect a heavy-gauge power cable (e.g., 4 AWG or larger for 10,000W max power) directly from the positive terminal of the vehicle's battery to the +12V terminal on the amplifier. Install an appropriate fuse (not supplied) within 18 inches of the battery.
- GND (Ala): Connect a heavy-gauge ground cable of the same size as the power cable from the GND terminal on the amplifier to a clean, unpainted metal surface of the vehicle chassis. Ensure a solid electrical connection.
- REM (Remote Turn-On): Connect a smaller gauge wire (e.g., 18 AWG) from the REM terminal on the amplifier to the remote turn-on output of your head unit. This wire turns the amplifier on and off with your audio system.

Image 4.1: Power input terminals (+12V, REM, GND) on the EDX5000.1FD-E0 ampna -emegharị ihe.
4.2.2 Njikọ ntinye ọdịyo
Connect your head unit's RCA outputs to the 'LOW INPUT' RCA jacks on the ampna -emegharị ihe.
4.2.3 Njikọ Mmepụta Ọkà Okwu
Connect your subwoofer(s) to the speaker output terminals on the amplifier. Ensure correct polarity (+ to + and - to -) for optimal performance. Refer to your subwoofer's specifications for impedance matching.

Image 4.2: Rear panel of the EDX5000.1FD-E0 amplifier, showing low-level inputs, crossover controls, gain, bass boost, and speaker output terminals.
5. Ntuziaka ọrụ
Once installed, adjust the amplifier settings for optimal sound quality.
5.1 Ogwe njikwa gafereview
Refer to Image 4.2 for the location of the following controls:
- HPF (nyocha dị elu): Adjusts the high-pass crossover frequency. For subwoofer applications, this should typically be set to its minimum or off, as a low-pass filter is usually preferred.
- LPF (Nyocha dị ala-Pass): Adjusts the low-pass crossover frequency (15Hz - 200Hz). This filters out frequencies above the set point, sending only low frequencies to the subwoofer. Set this according to your subwoofer and system requirements, typically between 60Hz and 100Hz.
- Nweta: Dakọtara na amplifier's input sensitivity to the output level of your head unit. Start with the gain at minimum, then slowly increase it until you hear distortion, then back off slightly. Do not use the gain control as a volume knob.
- AKWỤKWỌ BASS: Adjusts the level of bass enhancement (0dB - 12dB). Use sparingly to avoid distortion.
- Ugboro Ugboro (Ugboro Mgbalite Bass): Selects the center frequency for the bass boost (35Hz - 70Hz).
- Wepu: Port for connecting the wired remote bass control unit.
5.2 Remote Bass Control
The included remote bass control allows for convenient adjustment of the subwoofer output level from the driver's seat. Connect it to the 'REMOTE' port on the ampna -emegharị ihe.
6. Nlekọta
Regular maintenance helps ensure the longevity and performance of your ampna -emegharị ihe.
- Nhicha: Na-ehicha ihe mgbe ụfọdụ amplifier's exterior with a soft, dry cloth. Do not use harsh chemicals or abrasive cleaners. Ensure ventilation fins are free of dust and debris.
- Lelee njikọ: Annually inspect all power, ground, remote, and speaker connections for tightness and corrosion. Loose connections can cause performance issues or damage.
- gburugburu: Gbaa mbọ hụ na amplifier remains in a dry, stable environment, protected from extreme temperatures.
7. Nchọpụta nsogbu
Ọ bụrụ na ị nwere nsogbu na ndụ gị amplifier, refer to the following common problems and solutions before contacting support.
- Enweghị ike:
- Check the in-line fuse near the battery.
- Verify +12V, GND, and REM connections are secure and receiving power.
- Ensure the remote turn-on wire is connected to a switched 12V source.
- Enweghị ụda:
- Check all RCA input and speaker output connections.
- Verify head unit is powered on and outputting audio.
- Adjust the GAIN control.
- Ụda agbagọ:
- Reduce the GAIN setting.
- Check speaker wiring for shorts or incorrect polarity.
- Gbaa mbọ hụ na ndakọrịta impedance ọkà okwu ampnkọwa nkọwa.
- Reduce BASS BOOST if active.
- Amplifa Ịkpo oke ọkụ:
- Gbaa mbọ hụ na ikuku ikuku zuru oke gburugburu ampna -emegharị ihe.
- Check speaker impedance; running too low an impedance can cause overheating.
- Verify power and ground wire gauge is sufficient.
8. Nkọwapụta
Technical specifications for the Edge Audio Xtreme Series EDX5000.1FD-E0 Monoblock Ampntughari:
| Njirimara | Nkọwapụta |
|---|---|
| Nọmba nlereanya | EDX5000.1FD-E0 |
| Ụdị | EDGE |
| AmpỤdị lifier | Monoblock, Class D, Full Bridge |
| Ike kachasị | 10,000 Watt |
| Nzaghachi ugboro ugboro | Ruo 20kHz |
| Built-in Crossovers | Active (HPF, LPF) |
| Bass Boost | Adjustable (0-12dB) |
| Frequency Boost Bass | Adjustable (35Hz-70Hz) |
| Voltage | 230 Volts (Operating Voltage Range typically 12-14.4V DC for car audio) |
| Ụdị nkwụnye | Ugwu elu |
| Akụkụ ngwaahịa (H x W x D) | 2.5 x 10.4 x 9.1 sentimita (64 x 264 x 230mm) |
| Ibu ngwaahịa | 6.61 pound |
9. Akwụkwọ ikike na nkwado
For warranty information or technical support, please refer to the documentation provided at the time of purchase or contact your authorized Edge Audio dealer. Keep your proof of purchase for warranty claims.


