1. Okwu mmalite
This manual provides instructions for the setup, operation, and maintenance of your Crosley C6B-DB Belt-Drive Bluetooth Turntable. The C6B-DB is a fully manual two-speed turntable designed to deliver an authentic analog listening experience. It features a durable MDF plinth, a heavy steel platter, and a low-vibration synchronous motor. The adjustable tonearm with a pre-installed moving magnet cartridge allows for precise tracking. Connectivity options include RCA outputs for wired speakers and built-in Bluetooth for wireless streaming to external speakers. Please read this manual thoroughly before using your turntable.
2. Ozi nchekwa
Please observe the following safety precautions to prevent damage to the unit and ensure safe operation:
- Ewepụla unit ahụ na mmiri ozuzo ma ọ bụ mmiri.
- Do not expose the unit to direct sunlight, heat sources, or extreme temperatures.
- Gbaa mbọ hụ na ikuku ikuku dị na gburugburu unit ahụ.
- Jiri naanị ihe nkwụnye ọkụ ewepụtara na unit ahụ.
- Anwala ịkwasa ma ọ bụ gbanwee unit ahụ. Kpọtụrụ ndị ọrụ ruru eru ọrụ niile.
- Debe unit ahụ pụọ na mpaghara magnetik siri ike.
- Handle the stylus with care to avoid damage and injury.
3. Kedu ihe dị na Igbe ahụ
Nyochaa na etinyere ihe niile edepụtara n'okpuru na ngwugwu gị:
- Crosley C6B-DB Turntable Unit
- Ihe nkwụnye ọkụ
- Akwụkwọ ntuziaka onye ọrụ
- Ihe mkpuchi uzuzu
- Ebute
- Eriri echebe
- Enwere m mmetụta
- Ibu ibu
- Ibu mgbochi skate
4. Ngwaahịa gafereview
Familiarize yourself with the components of your Crosley C6B-DB turntable.

Foto 1: Crosley C6B-DB Turntable with its clear dust cover in place. This image shows the overall design of the turntable, including the plinth, platter, tonearm, and the protective dust cover.
4.1 kacha View Ngwa
- Mkpuchi uzuzu: Protects the turntable from dust when not in use.
- Platter: The surface on which records are placed. Made of heavy steel for stability.
- Ute a na-akpọ Felt: Provides a soft surface for records and helps reduce static.
- Spindle: Na-ejide ihe ndekọ ahụ n'elu efere ahụ.
- Ụda olu: Holds the cartridge and stylus, guiding it across the record grooves.
- Katrij: Converts groove vibrations into electrical signals. The C6B-DB comes with a pre-installed moving magnet cartridge.
- Stịlọs (agịga): The tip of the cartridge that reads the record grooves.
- Ibu ibu: Adjusts the tracking force of the tonearm.
- Anti-skate Dial: Compensates for the inward force on the tonearm, ensuring even tracking.
- Ihe eji eme ihe: Raises and lowers the tonearm gently.
- Nhọrọ ọsọ ọsọ: Switch between 33 1/3 RPM and 45 RPM.
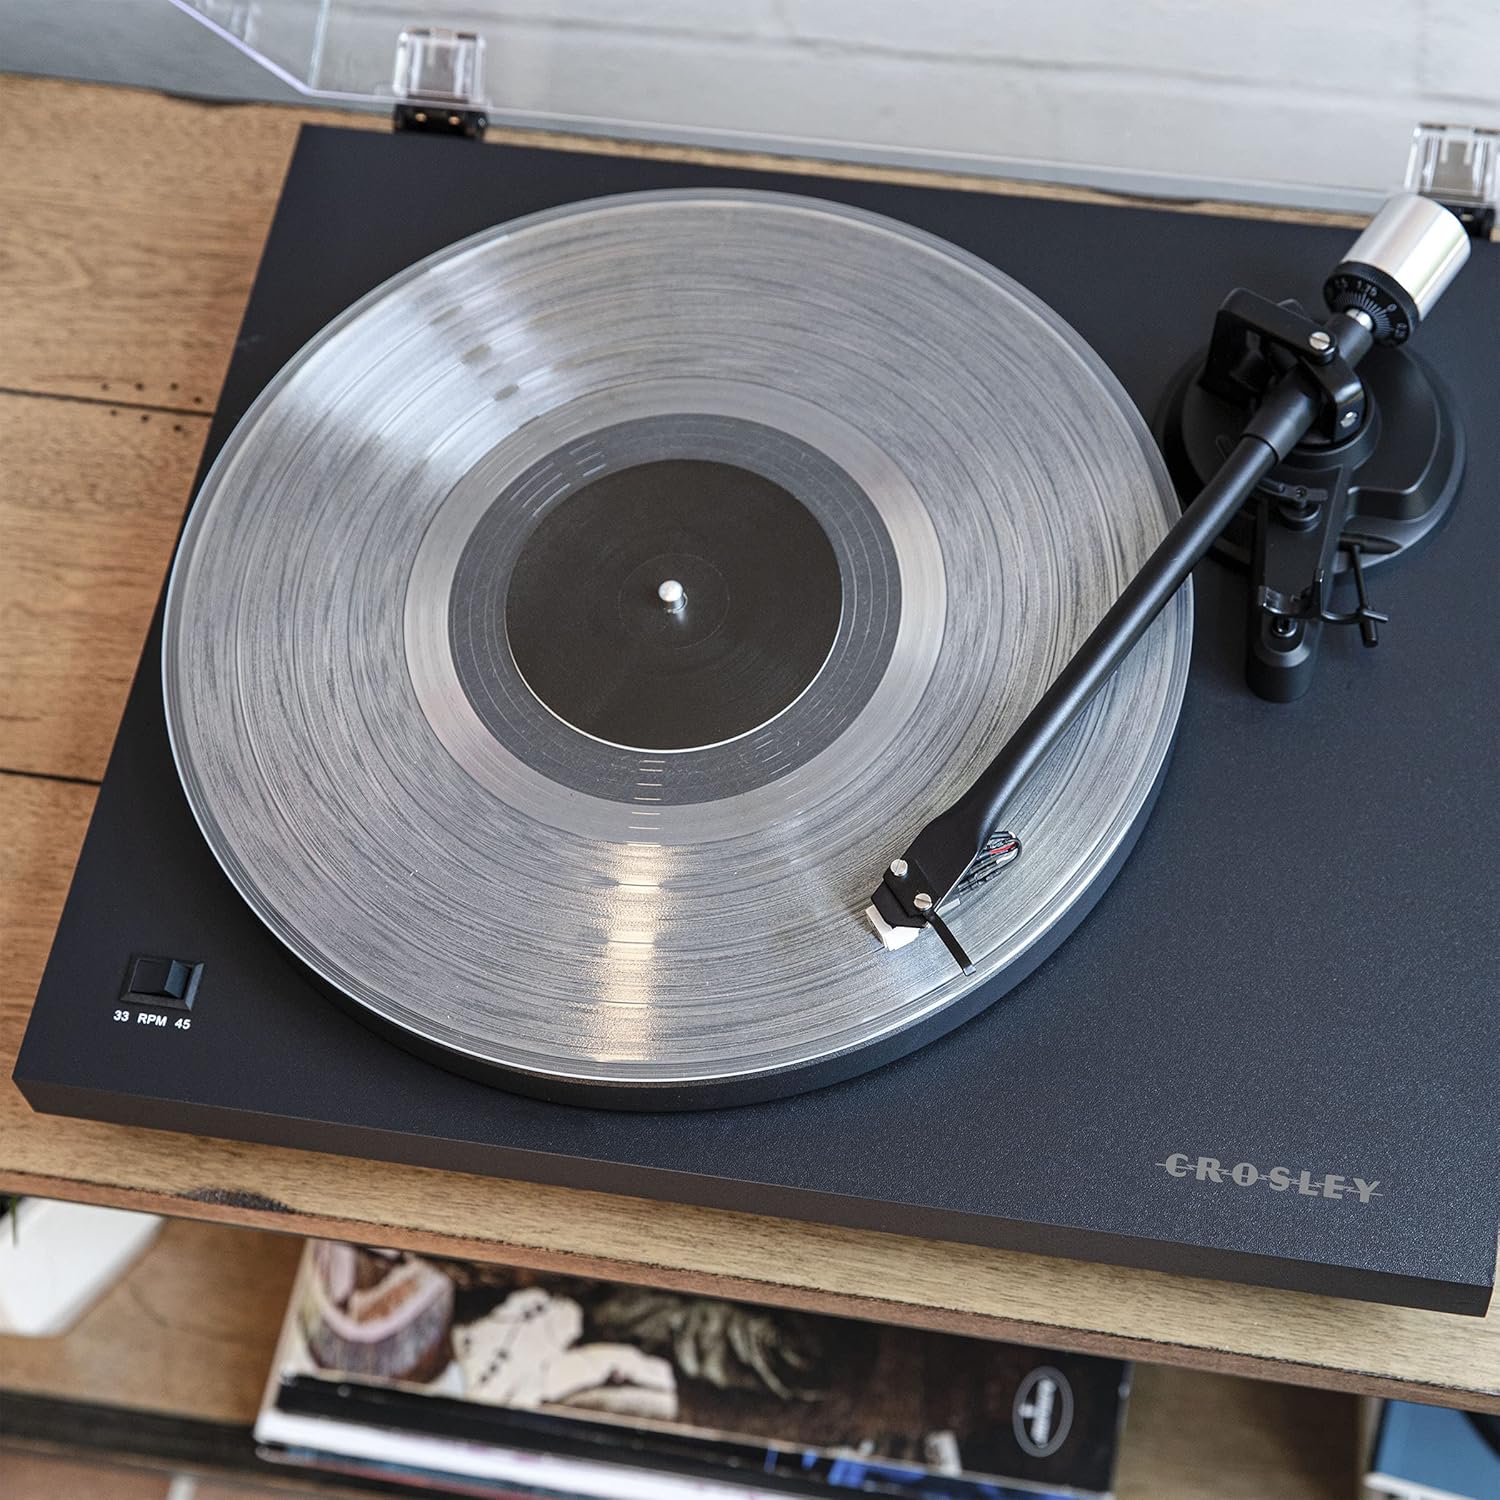
Foto 2: A elu-ala view of the turntable, highlighting the platter, felt mat, spindle, and the tonearm assembly. The speed selector switch is visible on the left side of the plinth.

Foto 3: A detailed close-up of the pre-installed moving magnet cartridge and stylus on the tonearm. This component is crucial for converting the physical grooves of a record into an audio signal.
4.2 Njikọ azụ azụ
- Ọdụ ụgbọ ala: For connecting a ground wire from an amplifier/receiver to reduce hum.
- RCA Output (L/R): Jikọọ na a ampigwe okwu ma ọ bụ ike okwu.
- Mgbanwe ekwentị/Akara: Selects between the built-in preamplifier (Line) or an external phono preamplifier (Phono).
- DC na 12V: Ntinye ike maka ihe nkwụnye enyere.
- Ihe ngosi Bluetooth: LED light indicating Bluetooth pairing status.
- Ike mgba ọkụ: Turns the turntable on or off.

Foto 4: The rear panel of the turntable, showing the ground terminal, RCA L/R outputs, Phono/Line switch, DC 12V power input, Bluetooth indicator, and the main power switch.
5. Nhazi
Follow these steps to set up your turntable for first use.
5.1 Mwepu na ntinye
- Jiri nlezianya wepụ ihe niile dị na nkwakọ ngwaahịa.
- Place the turntable on a stable, level surface away from direct sunlight, heat, and vibrations.
- Ensure there is enough space around the turntable for proper ventilation and operation.
5.2 Nwụnye efere na eriri
- Place the platter onto the turntable spindle.
- Locate the drive belt. Gently stretch the belt around the inner rim of the platter and then around the motor pulley. Ensure the belt is not twisted.
- Debe ute ahụ nwere mmetụta n'elu efere ahụ.
5.3 Tonearm Balance and Tracking Force Adjustment
Proper tonearm adjustment is crucial for optimal sound quality and to prevent damage to your records and stylus.
- Wepu ihe nchekwa stylus.
- Place the counterweight onto the rear of the tonearm. Rotate it clockwise until it is approximately halfway on.
- With the cueing lever in the down position, carefully balance the tonearm by rotating the counterweight until the tonearm floats horizontally. Do not let the stylus touch the platter or record.
- Once balanced, hold the counterweight steady and rotate the numbered ring on the front of the counterweight until "0" aligns with the line on the tonearm.
- Rotate the entire counterweight (both parts) counter-clockwise to the recommended tracking force. For the pre-installed cartridge, a tracking force of 2.0 grams is typically recommended. Refer to your cartridge manufacturer's specifications for precise values.
5.4 Anti-skate Adjustment
The anti-skate mechanism prevents the tonearm from being pulled inward excessively.
- Attach the small loop of the anti-skate weight's thread to the anti-skate post on the tonearm.
- Pass the thread through the wire support.
- Set the anti-skate dial to the same value as your tracking force (e.g., 2.0 for 2.0 grams tracking force).
5.5 Njikọ ọdịyo
Connect your turntable to an audio system.
- Using Built-in Preamplifier (Line Out): Connect the RCA cables from the turntable's RCA outputs to a Line-level input (AUX, CD, Tuner) on your amplifier or powered speakers. Set the Phono/Line switch on the turntable's rear panel to "Line".
- Using External Preamplifier (Phono Out): Ọ bụrụ na gị amplifier has a dedicated Phono input, connect the RCA cables from the turntable's RCA outputs to the Phono input on your amplifier. Set the Phono/Line switch on the turntable's rear panel to "Phono". Connect the ground wire from the turntable to the ground terminal on your ampna -emegharị ihe.
5.6 Njikọ ike
Connect the power adapter to the DC IN 12V port on the turntable and then plug it into a wall outlet.
6. Ọrụ
Instructions for playing records and using Bluetooth connectivity.
6.1 Ịkpọ egwu ndekọ
- Ensure the turntable is powered on using the switch on the rear panel.
- Select the correct speed (33 1/3 or 45 RPM) using the speed selector switch on the plinth.
- Place a record on the felt mat.
- Jiri ihe na-eme ka olu ahụ dị elu.
- Manually position the tonearm over the desired starting groove of the record.
- Gently lower the tonearm using the cueing lever. The stylus will begin playing the record.
- To stop playback, lift the tonearm using the cueing lever and return it to the tonearm rest.
6.2 Bluetooth Out Function
The C6B-DB can stream audio wirelessly to external Bluetooth speakers.
- Ensure your external Bluetooth speaker is in pairing mode.
- Turn on the turntable. The Bluetooth indicator light on the rear panel will flash, indicating it is searching for a device.
- Ozugbo ejikọtara ya, ọkụ ihe ngosi Bluetooth ga-agbanwe agba anụnụ anụnụ.
- You can now play records, and the audio will stream to your paired Bluetooth speaker.
- To disconnect, turn off the Bluetooth speaker or the turntable.
Vidio 1: This video demonstrates the features and operation of the Crosley C6B Turntable, including playing records, speed selection, and Bluetooth connectivity. It highlights the adjustable tonearm, pre-mounted cartridge, steel platter, and belt-driven motor.
7. Nlekọta
Regular maintenance helps prolong the life of your turntable and records.
7.1 Nhicha nke Turntable
- Wipe the dust cover and plinth with a soft, dry cloth. Do not use abrasive cleaners or solvents.
- For the stylus, use a soft brush designed for stylus cleaning, brushing gently from back to front.
7.2 Ndochi Stylus
The stylus is a consumable part and should be replaced after approximately 300-500 hours of playback, or if you notice a degradation in sound quality. The C6B-DB is compatible with NP5 replacement needles.
- Gently pull the old stylus assembly downwards and forwards to remove it from the cartridge.
- Align the new stylus assembly with the cartridge body and push it upwards until it clicks into place.
8. Nchọpụta nsogbu
If you experience issues with your turntable, refer to the following common problems and solutions.
| Nsogbu | Ihe nwere ike ime | Ngwọta |
|---|---|---|
| Enweghị ike | Power adapter not connected; Power outlet not active. | Ensure power adapter is securely connected to the turntable and a working outlet. Check the power switch on the rear panel. |
| Enweghị ụda ma ọ bụ olu dị ala | Incorrect Phono/Line switch setting; RCA cables not connected; Amplifier/speakers off or volume low; Stylus damaged. | Set Phono/Line switch correctly (Line for line input, Phono for phono input). Check RCA cable connections. Ensure amplifier/speakers are on and volume is up. Inspect stylus for damage and replace if necessary. |
| Sound distorted or skipping | Tracking force incorrect; Anti-skate incorrect; Stylus dirty or damaged; Record dirty or damaged; Turntable not level. | Re-adjust tracking force and anti-skate. Clean stylus. Clean record. Ensure turntable is on a level surface. Replace stylus if damaged. |
| Record speed incorrect | Incorrect speed selected; Drive belt dislodged or worn. | Select the correct speed (33 1/3 or 45 RPM). Check if the drive belt is properly seated around the platter and motor pulley. Replace belt if worn. |
| Bluetooth anaghị ejikọta | External speaker not in pairing mode; Too far from speaker. | Ensure external Bluetooth speaker is in pairing mode. Move turntable closer to the speaker. |
9. Nkọwapụta
| Njirimara | Nkọwa |
|---|---|
| Nọmba nlereanya | C6B-DB |
| Akụkụ ngwaahịa | 16.38 x 14.25 x 5.25 sentimita asatọ |
| Ibu Ibu | 12.13 pound |
| Ọsọ ọsọ | 33 1/3, 45 RPM |
| Ụdị moto | AC Motor, Belt-Drive |
| Ridgedị Cartridge | Moving Magnet (NP5 replacement needle compatible) |
| Njikọta | RCA Output (Phono/Line switchable), Bluetooth Out |
| Ihe onwunwe | Osisi injinia, Plastic |
| Isi Iyi Ike | Ọkụ eletriki ejiri eriri (DC 12V) |
10. Akwụkwọ ikike na nkwado
Crosley products are manufactured to high-quality standards. For detailed warranty information, please refer to the warranty card included with your product or visit the official Crosley website. If you encounter any issues or require technical assistance, please contact Crosley customer support.
Crosley Support: www.crosleyradio.com/support