1. Okwu mmalite
This manual provides comprehensive instructions for the installation, operation, and maintenance of your PANOEAGLE DS-7608NI-I2/8P 8-Channel 4K Network Video Recorder (NVR). Please read this manual thoroughly before using the product to ensure proper setup and functionality. Retain this manual for future reference.
The PANOEAGLE DS-7608NI-I2/8P is an embedded Plug and Play 4K NVR designed for robust 24/7 surveillance recording. It supports up to 8 cameras simultaneously, offering high-resolution recording up to 12MP and utilizing H.264+/H.264/H.265 video compression for efficient storage. Its Power over Ethernet (PoE) capability simplifies camera installation by providing both power and data through a single cable.
2. Ngwaahịa gafereview
Familiarize yourself with the components and interfaces of your NVR.
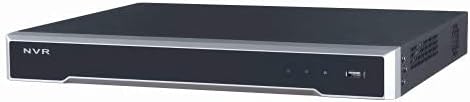
Onyonyo 2.1: Ogwe ihu View
This image displays the front panel of the NVR, featuring the 'NVR' branding, status indicators, and a USB port for peripheral connections.

Ọgụgụ 2.2: Ogwe azụ View
This image shows the rear panel of the NVR, highlighting the power input, cooling fan, 8 PoE ports, network port, USB ports, audio input/output, VGA, and HDMI video outputs, and alarm/control terminals.

Figure 2.3: Angled Rear View
An angled perspective of the NVR's rear panel, providing a clearer view of the various connectivity options and ventilation.
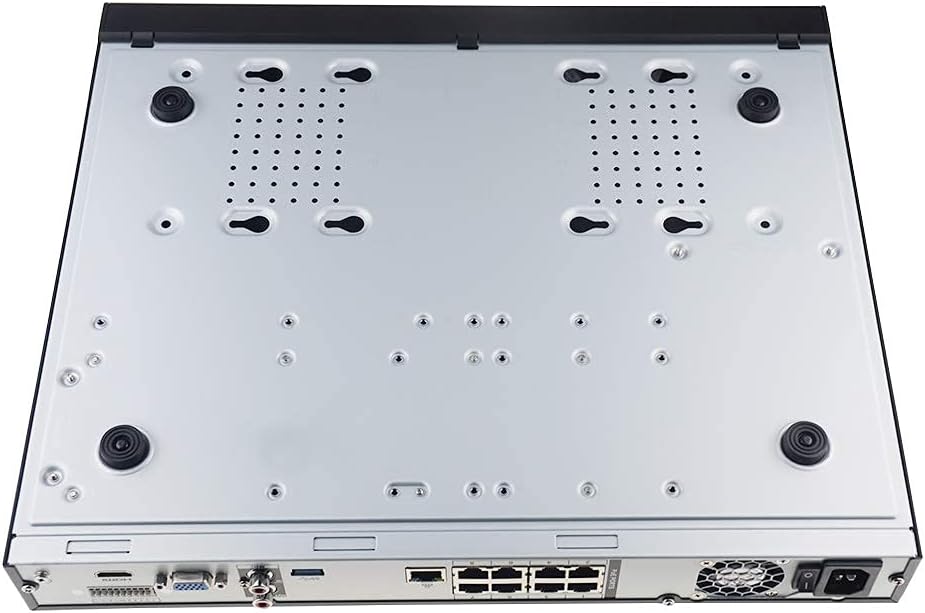
Figure 2.4: Bottom Panel View
This image displays the bottom of the NVR, showing mounting points and ventilation holes, along with rubber feet for stable placement.
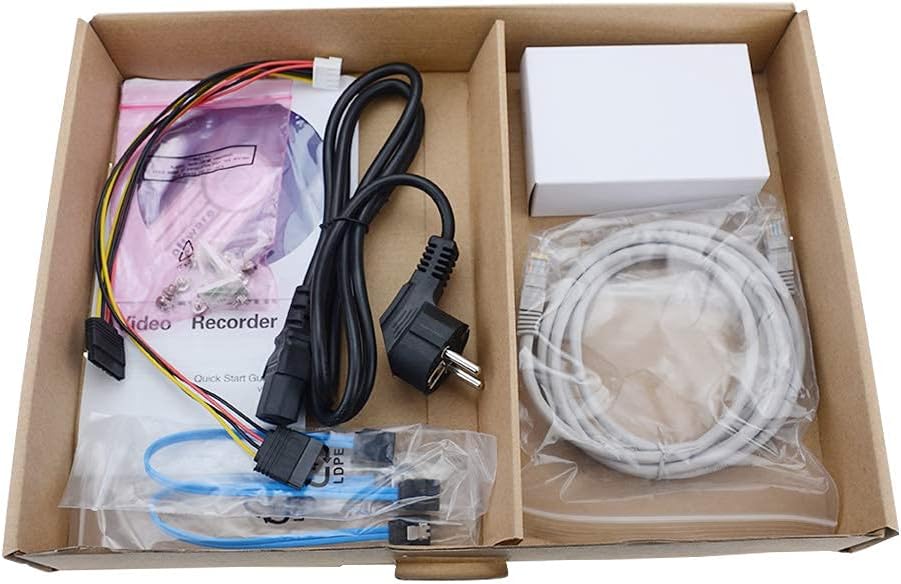
Ọgụgụ 2.5: Ihe ngwugwu
A view of the accessories included with the NVR, typically comprising a power cable, network cable, USB mouse, SATA cables for hard drive installation, and a quick start guide.
3. Atụmatụ igodo
- 8-Channel Recording: Supports simultaneous recording from up to 8 IP cameras.
- Nkwado mkpebi mkpebi 4K: Capable of recording and displaying video resolutions up to 12MP.
- PoE Easy Setup: Integrated Power over Ethernet (PoE) ports for direct connection and power supply to IP cameras via a single Ethernet cable.
- Mgbakọ vidiyo dị elu: Utilizes H.264+/H.264/H.265 codecs for efficient storage and bandwidth usage.
- Ndekọ 24/7: Designed for continuous, reliable surveillance monitoring.
- Ihe mmepụta HDMI: High-definition video output for connecting to monitors or TVs.
- Nkwado SATA: Features 2 SATA interfaces for internal hard drive installation (HDDs not included).
4. Ntuziaka Nhazi
4.1. Hard Drive Installation (Optional)
If your NVR did not come with a pre-installed hard drive, follow these steps:
- Gbanyụọ NVR wee kwụpụ eriri niile.
- Wepụ ihe mkpuchi elu nke chassis NVR ahụ ma wepụ ya.
- Connect the SATA data cable and power cable from the NVR to the hard drive.
- Jiri skru ndị enyere kechie draịvụ ike ahụ na chassis NVR.
- Dochie mkpuchi elu ma jiri skru kpuchie ya.
4.2. Njikọ Mbụ
- Connect a Monitor: Jikọọ ihe nlele na ọdụ ụgbọ mmiri HDMI ma ọ bụ VGA nke NVR.
- Connect a Mouse: Plug the USB mouse into one of the NVR's USB ports.
- Jikọọ na netwọk: Connect the NVR's LAN port to your router or network switch using an Ethernet cable.
- Jikọọ igwefoto IP: Connect your PoE IP cameras to the NVR's PoE ports using Ethernet cables. The NVR will provide power and data to the cameras.
- Ike Na: Connect the power adapter to the NVR and then plug it into a power outlet. The NVR will power on automatically.
4.3. Nhazi mmalite
Ozugbo ịmalitere ya, NVR ga-eduzi gị site na ọkachamara ntọala mbụ. Nke a na-agụnyekarị:
- Setting up an administrator password.
- Configuring network settings (DHCP is usually default).
- Initializing the hard drive (if newly installed).
- Searching for and adding connected IP cameras.
- Ịtọ ụbọchị na oge.
Soro mkpali na ihuenyo iji mezue ntọlite .
5. Ntuziaka ọrụ
5.1. Ndụ View
After logging in, the NVR will typically display the live view of all connected cameras. You can switch between single-camera view, multi-camera grid view, and customize display layouts.
5.2. Ndekọ
- Ndekọ na-aga n'ihu: Records 24/7. Configure schedules in the NVR's menu.
- Ndekọ nchọpụta ngagharị: Records only when motion is detected. Sensitivity and detection zones can be adjusted.
- Ndekọ ahaziri: Tọọ oge akọwapụtara maka ndekọ.
Access recording settings via the NVR's main menu, usually under "Record" or "Storage" settings.
5.3. n'ụdị
Maka review edekọ footage:
- Site na isi menu, họrọ "Playback".
- Choose the camera(s) and date/time range you wish to review.
- Use the timeline to navigate through recorded events. Options for fast-forward, rewind, and pause are available.
5.4. Nweta anya
The NVR supports remote viewing via a mobile app or web browser. Refer to the NVR's network settings for details on enabling P2P (peer-to-peer) or port forwarding for remote access. Download the official PANOEAGLE mobile application from your device's app store.
6. Nlekọta
- Nhicha mgbe niile: Keep the NVR free from dust. Use a soft, dry cloth for exterior cleaning. Ensure ventilation openings are clear.
- Mmelite femụwe: Periodically check the PANOEAGLE official website for firmware updates. Updates can improve performance, add features, and enhance security. Follow update instructions carefully.
- Hard Drive Health: Monitor the health of your hard drive(s) through the NVR's system information. Replace failing drives promptly to avoid data loss.
- Nchekwa okwuntughe: Regularly change your administrator password and use strong, unique passwords.
7. Nchọpụta nsogbu
| Nsogbu | Ihe nwere ike ime | Ngwọta |
|---|---|---|
| Enweghị vidiyo na ihe nlele. | Loose cable connection, incorrect input source on monitor, NVR not powered on. | Check HDMI/VGA cable connections. Ensure monitor is set to correct input. Verify NVR power. |
| Cameras not displaying in live view. | Camera not powered, network issue, camera not added to NVR, incorrect IP address. | Check camera power and Ethernet cables. Ensure cameras are connected to PoE ports. Use NVR's camera management to search and add cameras. Verify camera IP addresses. |
| No recording or missing footage. | Hard drive not installed/initialized, recording schedule not configured, hard drive full, hard drive failure. | Install and initialize HDD. Configure recording schedules. Check HDD status and capacity. Replace faulty HDD. |
| Enweghị ike ịnweta NVR site na ebe dị anya. | Network configuration issues, P2P disabled, incorrect app settings, firewall blocking. | Ensure NVR has internet access. Enable P2P service. Verify app settings and NVR's network configuration. Check router firewall settings. |
8. Nkọwapụta
| Njirimara | Nkọwa |
|---|---|
| Nlereanya | DS-7608NI-I2/8P |
| Ụdị | PANOEAGLE (Compatible with Hi-k USA systems) |
| Ọnụọgụ nke ọwa | 8 |
| Mkpebi Max | Ihe ruru 12MP |
| Mkpakọ vidiyo | H.264+/H.264/H.265 |
| Mmepụta vidiyo | hdmi, vga |
| Ntinye ọdịyo | RCA |
| SATA Interfaces | 2 (for HDD) |
| Teknụzụ Njikọta | HDMI, Ethernet (PoE) |
| Ụbọchị mbụ dị | Julaị 28, 2021 |
9. Akwụkwọ ikike na nkwado
For warranty information, please refer to the warranty card included with your product or visit the official PANOEAGLE website. Technical support may be available through the manufacturer's websaịtị ma ọ bụ site na ịkpọtụrụ ngalaba ọrụ ndị ahịa ha.
Always ensure you are using official channels for support and firmware downloads to maintain product integrity and security.


