Ntuziaka Onye Ọrụ Sistemụ Nyocha Ntị Nady PEM-01 UHF 16-Channel Wireless Professional In-Ear
This manual provides detailed instructions for the setup, operation, and maintenance of your Nady PEM-01 Wireless Personal In-Ear Monitor System.
1. Ngwaahịa gafereview
The Nady PEM-01 Wireless Personal In-Ear Monitor System is an all-in-one wireless audio monitor solution designed for direct, uncompromised high-quality audio referencing. It offers clear audio transmission up to 300 feet line-of-sight, extended battery life, and supports virtually endless expansion of receivers, making it suitable for demanding musical and audio applications.
The system includes a PEM-01 Wireless Transmitter, a PEM Wireless Receiver, and EB-6 behind-the-ear monitor earbuds. It features 16 available UHF frequencies and is rackmount-able.
Akụkụ ndị bụ isi:
- Reliable long-range operation up to 300 feet (line-of-sight).
- 16 selectable UHF frequencies for optimal signal clarity.
- Receiver includes a 3.5mm (1/8") headphone jack for use with included EB-6 Earbuds or other compatible headphones.
- Receiver features a 3.5mm (1/8") line out jack for optional recording device connection.
- Extended battery life of up to 11 hours for continuous use.
- Rackmount-able design for professional setups.

2. Ntuziaka Nhazi
2.1 Mwepu na nyocha izizi
Carefully remove all components from the packaging. Verify that all items listed in the 'What's in the Box' section are present and undamaged. If any items are missing or damaged, contact Nady customer support immediately.

2.2 Ịchaji onye nnata
The PEM Wireless Receiver is powered by an internal rechargeable battery. Before first use, fully charge the receiver using the provided USB-C cable and power adapter. The charging indicator light will show the charging status.
- Connect the USB-C cable to the receiver's charging port.
- Connect the other end of the USB-C cable to the power adapter, then plug the adapter into a power outlet.
- Allow approximately 2-3 hours for a full charge. The battery life is up to 11 hours on a full charge.
2.3 Connecting the Transmitter
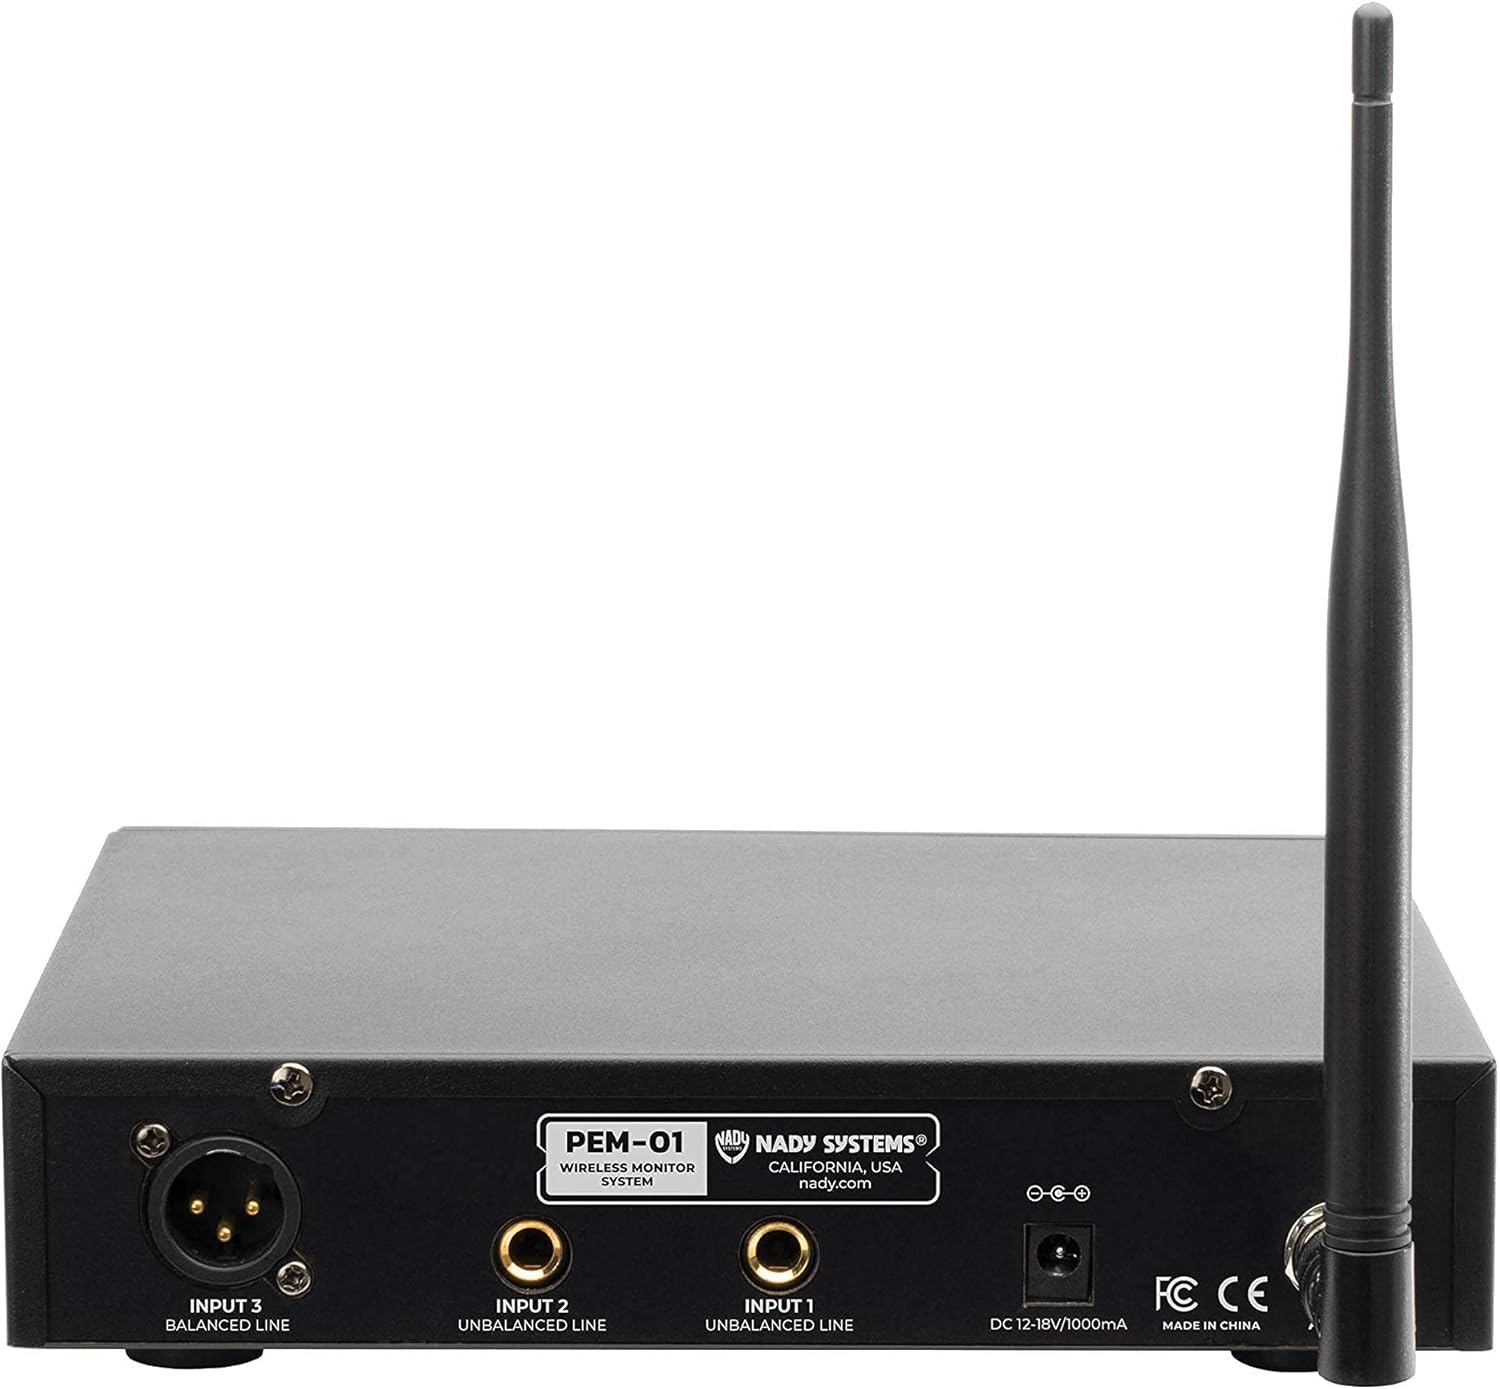
The PEM-01 Wireless Transmitter is a rackmount unit. Connect it to your audio source (e.g., mixing console) using appropriate cables.
- Connect the included power adapter to the transmitter's DC input and plug it into a power outlet.
- Attach the antenna to the designated port on the transmitter.
- Connect your audio source (e.g., mixer's AUX send or main output) to the transmitter's input jacks (Input 1, Input 2, Input 3 Balanced Line). Use XLR or 1/4" cables as needed.
3. Ntuziaka ọrụ
3.1 Powering On and Channel Selection
- Turn on the PEM-01 Transmitter using its power switch. The display will illuminate, showing the current channel.
- Turn on the PEM Wireless Receiver. It will automatically attempt to connect to the transmitter.
- If necessary, use the 'UP' and 'DOWN' buttons on the transmitter to select one of the 16 available UHF channels. Ensure the receiver is set to the same channel as the transmitter for proper operation. The receiver typically has a channel scan function to find available channels.


3.2 Connecting Earbuds and Adjusting Volume
Connect the EB-6 Earbud Headphones (or your preferred 3.5mm headphones) to the headphone jack on the PEM Wireless Receiver.

Use the volume control dial on the receiver to adjust the monitoring level to a comfortable listening volume. Avoid excessively high volumes to prevent hearing damage.

3.3 Multiple Receivers
The PEM-01 system supports multiple receivers operating from a single transmitter. Each additional receiver should be tuned to the same channel as the transmitter to receive the audio feed.
4. Nlekọta
- Keep the transmitter and receiver clean by wiping them with a soft, dry cloth. Avoid using harsh chemicals or abrasive cleaners.
- Debe sistemụ ahụ n'ebe dị jụụ ma kpọọ nkụ, ebe anwụ na-anaghị anwụ kpọmkwem na oke okpomọkụ dị oke njọ.
- Ensure the receiver is fully charged before each use to maximize performance and battery life.
- Jiri nlezianya jikwaa eriri na njikọ iji gbochie mmebi.
5. Nchọpụta nsogbu
- Enweghị ọdịyo:
- Hụ na e tinyere ma transmitter na receiver n'ọrụ.
- Verify that the transmitter and receiver are set to the same channel.
- Check all cable connections from the audio source to the transmitter.
- Increase the volume on the receiver.
- Ensure headphones are properly connected to the receiver.
- Interference/Poor Signal:
- Try switching to a different channel on both the transmitter and receiver.
- Ensure the transmitter and receiver are within the specified operating range (up to 300 feet line-of-sight).
- Minimize obstructions (walls, large metal objects) between the transmitter and receiver.
- Check for other wireless devices operating on similar frequencies that might cause interference.
- Ndụ obere batrị:
- Ensure the receiver is fully charged before use.
- Battery performance can degrade over time; consider replacing the internal battery if significantly reduced.
6. Nkọwapụta
| Njirimara | Nkọwa |
|---|---|
| Aha Nlereanya | PEM-01 |
| Ụdị | Nady |
| Teknụzụ Njikọta | Ikuku |
| Teknụzụ nzikọrịta ozi ikuku | RF (UHF) |
| Ọnụọgụ nke ọwa | 16 |
| Oke arụ ọrụ | Ruo mita 300 (n'elu ala) |
| Jack ekweisi | 3.5 mm (1/8") |
| Line Out Jack (Receiver) | 3.5 mm (1/8") |
| Battery Life (Receiver) | Awa 11 |
| Charging Port (Receiver) | USB-C |
| Included Earbuds | EB-6 Behind-the-ear |
| Ihe onwunwe | Aluminom |
| Akụkụ ngwaahịa | 8 x 7 x 2 sentimita asatọ |
| Ibu Ibu | 4.24 pound |
| Onye nrụpụta | Nady |
| UPC | 634343118889 |
7. Akwụkwọ ikike na nkwado
For warranty information and technical support, please refer to the official Nady websaịtị ma ọ bụ kpọtụrụ ọrụ ndị ahịa ha ozugbo. Usoro nkwa akọwapụtara nwere ike ịdị iche site na mpaghara na ụlọ ahịa.
This product is from a small business brand. Support information can often be found on the manufacturer's official websaịtị ma ọ bụ site na onye na-ere ahịa ebe a zụrụ ngwaahịa ahụ.


