Okwu mmalite
This manual provides detailed instructions for the safe and effective use of the TOLSEN Door Lock Installation Kit. This kit is designed to simplify the process of installing deadbolts and locksets in wooden doors, ensuring clean and precise holes. Please read all instructions carefully before beginning any installation.
Important: This product is specifically designed for use with wooden doors and windows. Do not use on metal, density board, or hardwood materials as this may damage the tool or the material.
Ngwa ngwaahịa
The TOLSEN Door Lock Installation Kit includes the following components:
- 1 x Adjustable Positioning Frame (ABS plastic, yellow)
- 1 x 2-1/8 inch (54mm) Hole Saw for main lock body
- 1 x 1 inch (25mm) Hole Saw for latch bolt
- 1 x Arbor for Hole Saws

Nyocha 1: N'eluview of the TOLSEN Door Lock Installation Kit components and the three main installation steps.
Nhazi na ntuziaka ọrụ
Follow these steps to properly install a door lock using the TOLSEN kit:
Step 1: Prepare the Door and Position the Guide
Ensure the door is securely held in place. The adjustable positioning frame accommodates door thicknesses from 1-3/8 inches (35mm) to 1-3/4 inches (45mm). Place the yellow positioning frame on the edge of the door where the lock will be installed. Align it to the desired height for the lockset.
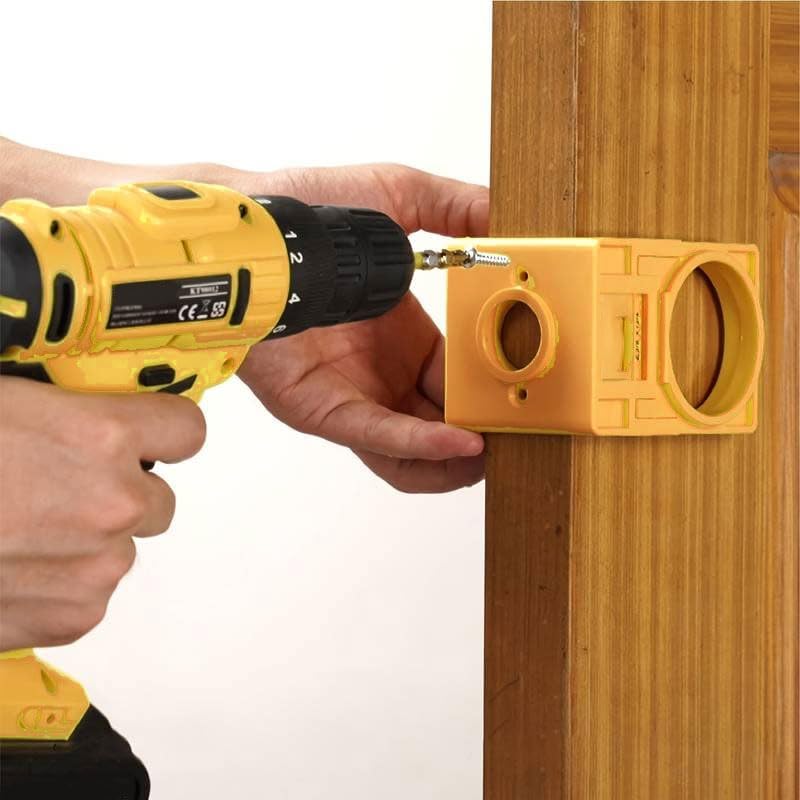
Figure 2: Securing the positioning frame to the door using a drill and screws.
Use screws to firmly attach the positioning frame to the door. This prevents movement during drilling and ensures accurate hole placement.
Step 2: Drill the Main Lock Body Hole
Attach the 2-1/8 inch (54mm) hole saw to the arbor, then secure the arbor into your drill. Insert the hole saw into the larger opening of the positioning frame on the face of the door.
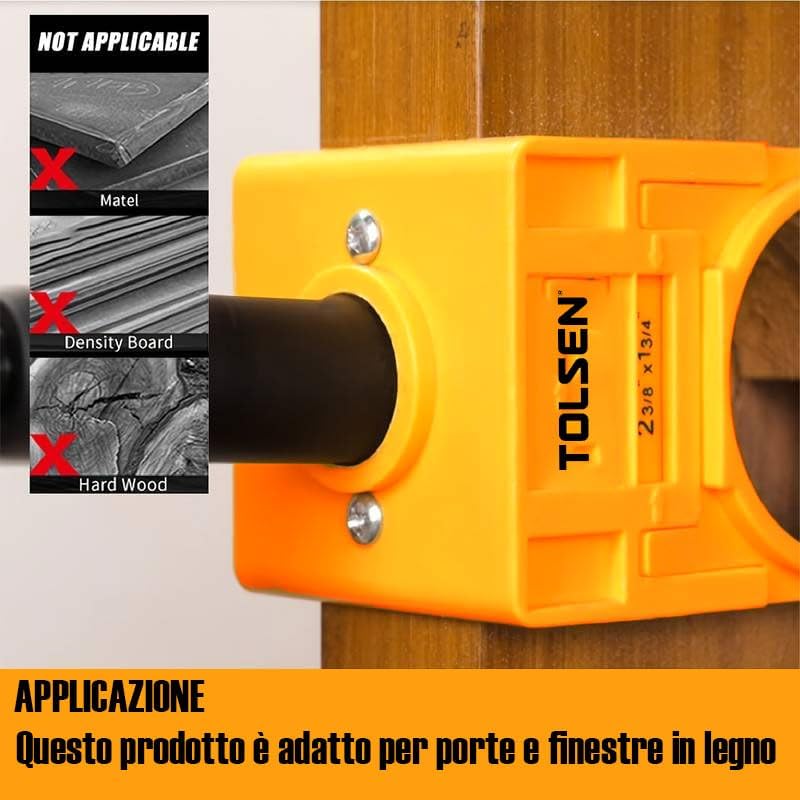
Figure 3: Drilling the main lock hole through the positioning frame. Note the material compatibility warning.
Begin drilling at a moderate speed, applying steady pressure. Allow the hole saw to cut through the wood. Drill from both sides of the door to prevent splintering and achieve a clean cut.
Step 3: Drill the Latch Bolt Hole
Remove the 2-1/8 inch hole saw and attach the 1 inch (25mm) hole saw to the arbor. Insert this smaller hole saw into the opening on the edge of the door, guided by the positioning frame.
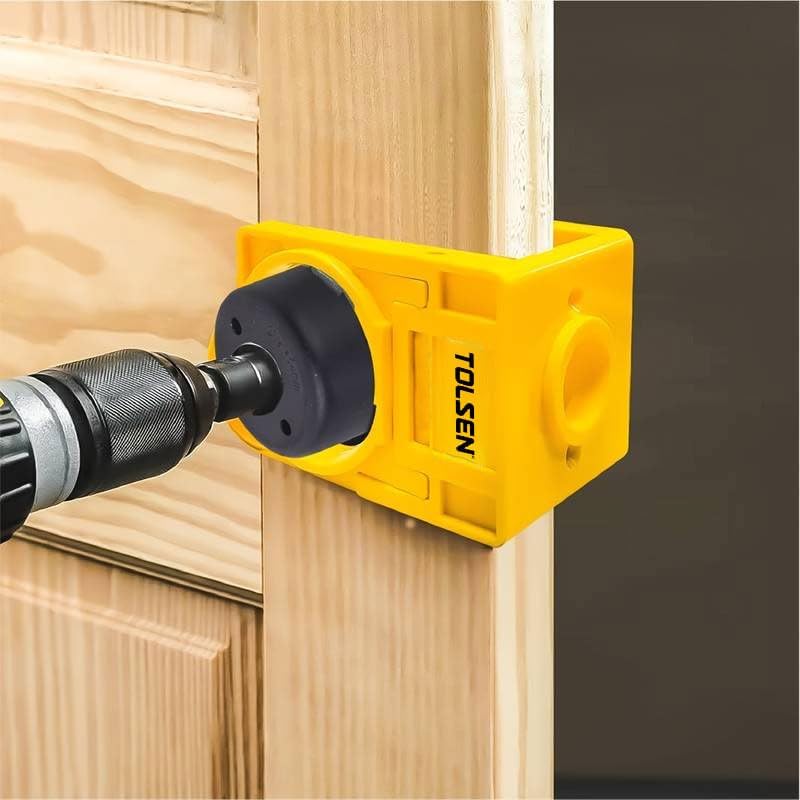
Figure 4: Drilling the latch bolt hole on the door edge.
Drill through the door edge until the hole connects with the main lock body hole. Ensure the hole is clean and free of debris.
Kwụpụ 4: Wụnye mkpọchi ọnụ ụzọ
Once both holes are drilled, remove the positioning frame and clean any sawdust from the area. You can now proceed with installing your door knob, deadbolt, or latch according to the manufacturer's instructions for your specific lockset.
Nlekọta
To ensure the longevity and performance of your TOLSEN Door Lock Installation Kit, follow these simple maintenance guidelines:
- Nhicha: After each use, clean the positioning frame and hole saws to remove sawdust and debris. A damp cloth can be used for the plastic frame.
- Nchekwa: Store the kit in a dry place, away from direct sunlight and extreme temperatures, to prevent material degradation.
- Nyocha: Periodically inspect the hole saws for wear or damage. Replace dull or damaged saws to maintain cutting efficiency and safety.
Nchọpụta nsogbu
If you encounter issues during installation, consider the following common problems and solutions:
- Splintering Wood: If the wood splinters around the hole, ensure you are drilling from both sides of the door for the main lock hole. Also, ensure your hole saws are sharp.
- Hole Not Centered: Verify that the positioning frame was securely attached and did not shift during drilling. Ensure screws are tight.
- Difficulty Cutting: Ensure your drill is set to an appropriate speed and that the hole saws are sharp. This kit is designed for wooden doors; attempting to cut other materials will cause difficulty and potential damage.
Nkọwapụta
| Njirimara | Nkọwa |
|---|---|
| Ụdị | Tolsen |
| Aha Nlereanya | Door Lock Installation Kit |
| Nọmba nlereanya | Mba |
| Ihe onwunwe | Plastic (Positioning Frame) |
| Agba | Odo |
| Adjustable Door Thickness | 1-3/8" ruo 1-3/4" (35mm ruo 45mm) |
| Included Hole Saw Sizes | 1" (25mm) and 2-1/8" (54mm) |
| Akwadoro ojiji | Installing deadbolts and locksets in wooden doors |
| Akụkụ ihe (L x W x H) | 6.5 x 7.87 x 3.15 sentimita asatọ |
| Ibu Ibu | 0.71 Pound (ihe dị ka ounces 11.3) |
Ozi nchekwa
- Always wear appropriate personal protective equipment (PPE), including safety glasses, when operating power tools.
- Ensure the workpiece (door) is stable and secured before drilling.
- Keep hands and loose clothing away from rotating parts of the drill and hole saws.
- Do not force the drill; let the tool do the work.
- Disconnect power tools from the power source before changing accessories or performing maintenance.
- Debe ụmụaka na ndị na-eguzo n'akụkụ ebe ọrụ.
Akwụkwọ ikike na nkwado
For warranty information or technical support regarding your TOLSEN Door Lock Installation Kit, please refer to the documentation provided with your purchase or contact Tolsen customer service directly. Contact details can typically be found on the manufacturer's official webngwugwu saịtị ma ọ bụ ngwaahịa.
For general inquiries, you may visit the Tolsen Store on Amazon: Tolsen Store


