1. Ozi nchekwa
Please read and understand this entire manual before attempting to assemble, operate, or install the product. Failure to do so could lead to electric shock, fire, or other injuries.
- Always disconnect power at the main circuit breaker before installation or maintenance.
- Njikọ eletriki niile ga-abụrịrị nke kwekọrọ na iwu obodo, iwu obodo, na Iwu Eletriki Mba. Ọ bụrụ na ị maghị waya eletriki, gakwuru ọkachamara ọkụ eletrik ruru eru.
- Ensure the installation site can support the weight of the fan.
- Ejila agụba ma ọ bụ ụlọ mebiri emebi arụ ọrụ fan.
- Keep hands clear of fan blades during operation.
2. Ngwaahịa gafereview
2.1 Atụmatụ
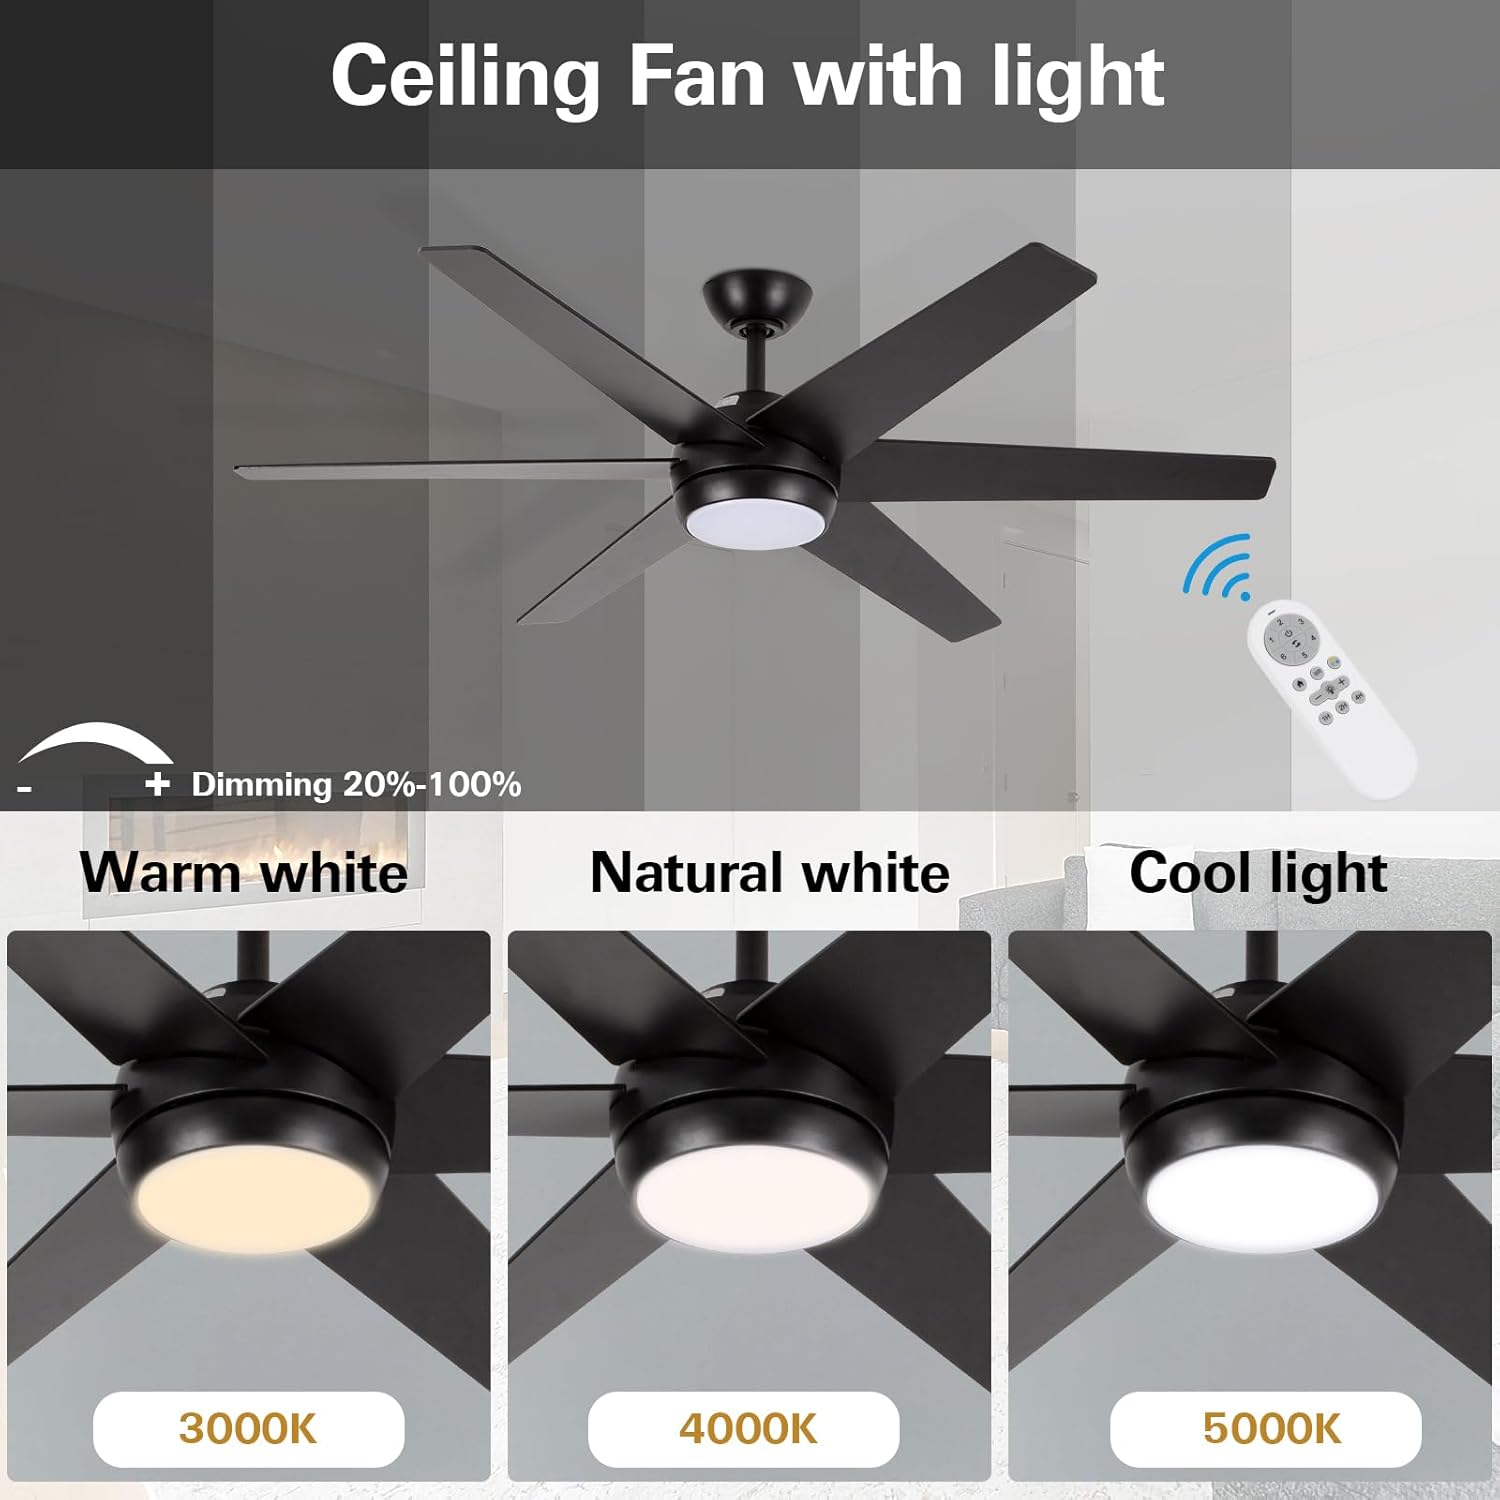
- Nhazi nke ntakiri ọgbara ọhụrụ: 52-inch ceiling fan with metal motor housing and six dual-color blades. Features an acrylic cover and flicker-free integrated LED light.
- Ìhè LED nwere ike ịgbanyụ: Replaceable 18W LED light source with three color temperature options (3000K Warm White, 4000K Natural White, 5000K Cool White) and adjustable brightness (20%–100%).
- moto na-agbanwe nwayọ nwayọ: Allows for downward airflow in summer for cooling and upward airflow in winter for warm air distribution. Designed for quiet operation.
- Multifunction Remote Control: Offers six fan speeds, a natural wind option, 1/2/4-hour timer functions, and a security anti-theft function (light turns on for 5 minutes every two hours).
2.2 Nkọwapụta
| Njirimara | Nkọwapụta |
|---|---|
| Ụdị | hykolite |
| Nọmba nlereanya | HYK-52BK-LED-RC |
| Nha | 52 sentimita asatọ |
| Agba | Nwa |
| Ihe onwunwe | Wood (blades), Metal (shade) |
| Isi Iyi Ìhè | Integrated LED (18W) |
| Okpomọkụ agba | 3000K, 4000K, 5000K |
| Icha ọkụ | 870 Lumen |
| Usoro njikwa | Njikwa anya |
| Ọsọ ndị fan | 6 speeds + Natural Wind |
| Ọrụ ngụ oge | 1, 2, 4 awa |
| Ojiji ime ime/n'èzí | Naanị ime ụlọ |
| Akụkụ ngwaahịa | 52"L x 5.9"W x 13.2"H |
2.3 Ngwaahịa Anya


3. Nwụnye
For detailed visual instructions, please refer to the official installation video below. Ensure power is disconnected at the circuit breaker before beginning installation.
Vidiyo: Official Installation Guide for hykolity 52 inch Ceiling Fan with LED Light and Remote Control. This video demonstrates the step-by-step process of assembling and mounting the fan, including wiring connections.
3.1 Step-by-Step Installation Guide
- Prepare the Downrod:
- Loosen the hanging ball screw and remove the horizontal bolt to detach the hanging ball.
- Remove the lower latch from the hanging pipe.
- Prepare the Motor Assembly:
- Partially loosen the preassembled set screws in the yoke at the top of the motor assembly.
- Assemble Downrod to Motor:
- Thread the main wiring harness through the hole at the bottom of the lifting pipe (downrod).
- Slip the downrod into the motor assembly yoke, aligning the holes for the safety pin and cotter pin.
- Tighten the set screws in the motor assembly yoke.
- Install Remote Control Receiver:
- Insert the remote control receiver (BCE) into the lifting pipe.
- Put the crossbolt back through the lifting ball to secure it, then replace the original latch and tighten the lifting screw.
- Mount the Hanging Bracket:
- Install the hanging bracket to the outlet box using the provided outlet box screws (or original screws).
- Connect the GROUND (GREEN) wires from the fan and remote control receiver to the BARE/GREEN supply wire from the ceiling.
- Connect the BLACK wire from the remote control receiver to the BLACK supply wire from the ceiling.
- Connect the WHITE wire (labeled AC IN N) from the remote control receiver to the WHITE supply wire from the ceiling.
- Connect the wire group from the remote control receiver to the wire group from the motor assembly.
- Kpọgidere onye ofufe:
- Grab the fan firmly with two hands. Slide the downrod through the opening in the hanging bracket and let the hanging ball rest on the hanging bracket.
- Tụgharịa oghere bọọlụ nkwudo ruo mgbe ọ kwụ n'ahịrị na taabụ mgbodo nghọta.
- Gently slide the remote control receiver flat-side up into the mounting bracket.
- Re-insert the screw that was removed and then tighten both screws securely.
- Wụnye Fan Blades:
- Loosen the screws and remove the installation fan blade decorative panel.
- Slide a blade through one of the narrow, rectangular openings on the motor housing, aligning holes in the blade with holes in the blade arm.
- Insert 3 blade attachment screws with fingers first and then tighten screws securely with a Phillips screwdriver. Repeat this procedure for the remaining blades.
- Wụnye Ngwa Ọkụ LED:
- Connect the wire group from the motor housing to the wire group from the LED light kit. Ensure Molex connections snap together securely.
- Jiri screwdriver Phillips mechie skru 3 niile.
- Tinye Lampndo:
- Tụgharịa lampshade clockwise to ensure fixation.
4. Ntuziaka ọrụ
The hykolity ceiling fan is operated using the included multifunction remote control.
4.1 Ọrụ njikwa anya
- Ọsọ Fan (1-6): Adjusts the fan speed from low (1) to high (6).
- Gbanyụọ/ Gbanyụọ: Powers the fan on or off.
- moto enwere ike ịtụgharị: Changes the direction of the fan blades for summer (downward airflow) or winter (upward airflow) modes.
- Mgbanwu/ Gbanyụọ: Turns the integrated LED light on or off.
- Light Dimming (20%-100%): Adjusts the brightness of the LED light.
- Color Temperature (3000K/4000K/5000K): Cycles through Warm White, Natural White, and Cool White light settings.
- Ifufe eke: Activates a mode that simulates natural breeze by varying fan speeds.
- Timer Function (1H/2H/4H): Sets the fan to automatically turn off after 1, 2, or 4 hours.
- Security Anti-Theft Function: Activates a mode where the light turns on for 5 minutes every two hours.
4.2 Reversible Motor Operation
The reversible motor feature allows you to optimize air circulation for different seasons:
- Ụdị okpomọkụ: Set the fan to rotate counter-clockwise to create a downward airflow, producing a cooling effect.
- Ụdị oyi: Set the fan to rotate clockwise to circulate warm air upwards, helping to distribute heat evenly throughout the room.
5. Nlekọta
Nlekọta anya mgbe niile na-eme ka arụmọrụ kacha mma na ogologo ndụ nke onye na-akwado uko ụlọ gị.
- Nhicha: Jiri nwayọọ, damp akwa iji hichaa agụba fan na ụlọ moto. Ejila ihe nchacha abrasive ma ọ bụ ihe mgbaze.
- Nyocha agụba: Periodically check the fan blades for any signs of damage or warping. Ensure all blade attachment screws are secure.
- Njikọ eletrik: Annually inspect all electrical connections for tightness and wear.
- Isi mmalite ọkụ: The integrated LED light source is replaceable. Contact customer service for replacement parts if needed.
6. Nchọpụta nsogbu
If you experience issues with your hykolity ceiling fan, refer to the following common problems and solutions:
| Nsogbu | Ihe nwere ike ime | Ngwọta |
|---|---|---|
| Onye ofufe anaghị ebido | No power to the fan; loose wiring connections; remote control battery dead. | Check circuit breaker; ensure all wiring connections are secure; replace remote control battery. |
| Light does not turn on/off | Loose wiring connection to light kit; LED light source failure; remote control issue. | Check light kit wiring; contact customer service for LED replacement; ensure remote is functioning correctly. |
| Fan na -eme mkpọtụ | Loose mounting screws; unbalanced blades; motor issue. | Tighten all mounting screws; ensure blades are balanced and securely attached; if noise persists, contact customer service. |
| Njikwa anya anaghị arụ ọrụ | Dead battery; remote not paired with receiver; interference. | Replace battery; refer to remote pairing instructions (if applicable, usually automatic); ensure no strong interference sources nearby. |
7. Akwụkwọ ikike na nkwado ndị ahịa
For warranty information or any further assistance, please contact hykolity customer service. Refer to the product packaging or the official hykolity websaịtị maka nkọwa akwụkwọ ikike akọwapụtara yana ozi kọntaktị.
If you encounter any issues during use, feel free to contact us for assistance.


