1. Okwu mmalite
This manual provides essential information for the safe and effective installation, operation, and maintenance of your Mad Mars 12V LED Motorcycle Scooter Turn Signals. Please read this manual thoroughly before installation and keep it for future reference.
2. Ozi nchekwa
- Nchekwa Eletriki: Always disconnect the vehicle's battery before performing any electrical work to prevent short circuits or electrical shock.
- Nwụnye ọkachamara: If you are not familiar with motorcycle or scooter electrical systems, it is highly recommended to have these turn signals installed by a qualified professional.
- Voltage ndakọrịta: These turn signals are designed for 12V DC systems only. Do not connect to higher voltage sistemu.
- Nkwanye echekwabara: Ensure the turn signals are securely mounted to prevent detachment during vehicle operation.
- CE Homologation: These turn signals are CE approved, indicating compliance with European safety standards.
3. Ihe ngwugwu
- One (1) Pair of Mad Mars 12V LED Motorcycle Scooter Turn Signals (Orange)
4. Nkọwapụta
| Njirimara | Nkọwapụta |
|---|---|
| Ụdị | ara |
| Nlereanya | Mars |
| Voltage | 12 volts DC |
| Ụdị isi iyi ọkụ | Ikanam |
| Agba ọkụ | oroma |
| Mounting Thread Diameter | 8mm |
| Length (excluding thread) | 64mm |
| Omimi | 22mm |
| Ogologo | 18mm |
| Weight (per item) | 100g (ihe dị ka) |
| Mgbakọ chọrọ | Ee |
| Asambodo | CE kwadoro |
5. Ntọala na nwụnye
Soro usoro ndị a nke ọma maka nrụnye kwesịrị ekwesị. A na-atụ aro ka e tinye ya n'ọrụ ọkachamara.
- Kwadebe ụgbọ: Hụ na agbanyụrụ ọkụ ụgbọala ahụ ma gbanyụọ batrị ahụ iji gbochie ihe egwu eletrik.
- Remove Old Turn Signals: Carefully remove the existing turn signals from your motorcycle or scooter. Note the wiring connections.
- Mount New Turn Signals: Insert the threaded bolt of the Mad Mars turn signal into the mounting hole. Secure it with the provided nut, ensuring it is tight but not overtightened. The thread diameter is 8mm.
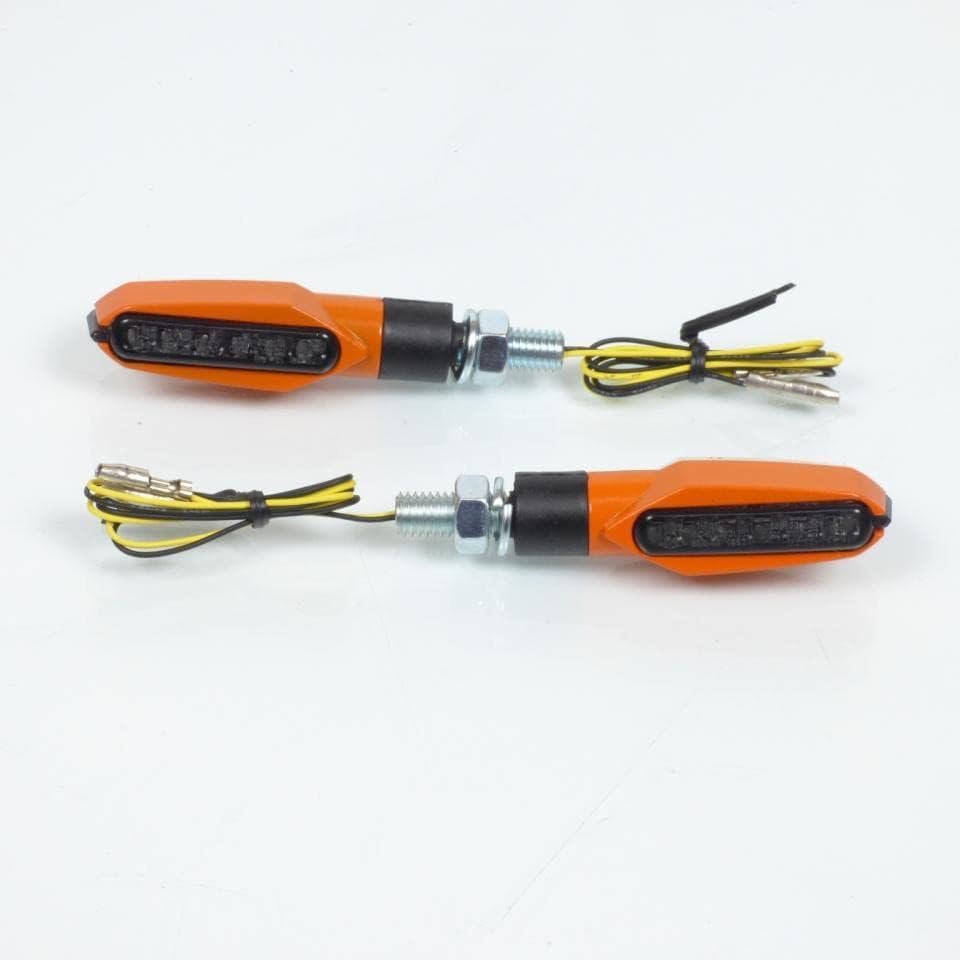
Image 1: Mad Mars 12V LED Turn Signals. This image shows a pair of orange LED turn signals with their wiring and mounting hardware.
- Njikọ waya:
- Identify the positive wire of the Mad Mars turn signal (typically yellow or red) and the negative/ground wire (typically black).
- Connect the positive wire of the turn signal to the vehicle's positive turn signal wire.
- Connect the negative wire of the turn signal to the vehicle's negative or ground wire.
- Use appropriate electrical connectors (not included) and ensure all connections are secure and insulated to prevent short circuits.
- Repeat for Second Turn Signal: Follow the same steps for the other turn signal.
- Jikọọ batrị wee nwalee: Reconnect the vehicle's battery. Turn on the ignition and test both turn signals to ensure they flash correctly. If they do not flash or flash too quickly/slowly, you may need a load resistor or an LED flasher relay (not included).

Image 2: Mad Mars 12V LED Turn Signals (Alternate View). This image provides another view of the orange LED turn signals, highlighting their compact design.
6. Ntuziaka ọrụ
Once properly installed, the Mad Mars 12V LED Turn Signals operate in conjunction with your motorcycle or scooter's existing turn signal switch. Activate the left or right turn signal switch as you normally would to indicate a turn or lane change. The LED lights will flash to provide clear visibility to other road users.
7. Nlekọta
- Nhicha: Clean the turn signal lenses periodically with a soft, damp ákwà. Zere ihe nhicha ma ọ bụ ihe mgbaze nke nwere ike imebi plastik ahụ.
- Nyocha: Regularly check the mounting bolts for tightness and inspect the wiring for any signs of wear, fraying, or corrosion. Ensure the connections remain secure.
- Ogologo ndụ LED: LED lights have a long lifespan and typically do not require replacement under normal operating conditions.
8. Nchọpụta nsogbu
- Turn Signals Not Lighting Up:
- Check all wiring connections for proper contact and insulation.
- Verify that the vehicle's battery is charged and providing 12V power.
- Inspect the vehicle's turn signal fuse.
- Turn Signals Flashing Too Fast (Hyper-flashing):
- LED turn signals draw less power than traditional incandescent bulbs, which can cause the vehicle's flasher relay to interpret a bulb outage, resulting in hyper-flashing.
- This can typically be resolved by installing a load resistor (not included) in parallel with each LED turn signal or by replacing the stock flasher relay with an LED-compatible flasher relay (not included).
- Turn Signals Not Flashing (Solid On):
- This can also be caused by incompatibility with the vehicle's flasher relay. Consider installing a load resistor or an LED-compatible flasher relay.
9. Akwụkwọ ikike na nkwado
For warranty information or technical support, please refer to the purchase documentation or contact the seller directly. Keep your proof of purchase for any warranty claims.


