1. Ozi nchekwa
Read all instructions carefully before beginning installation. Failure to follow these instructions may result in electrical shock, fire, or personal injury.
- Always disconnect power at the circuit breaker or fuse box before installation or servicing.
- Ọ bụrụ na ị maghị waya, gakwuru ọkachamara ọkụ eletrik ruru eru.
- Ensure the installation site can support the weight of the fan (approximately 3.53 kg).
- Ejila agụba ma ọ bụ ụlọ mebiri emebi arụ ọrụ fan.
- Maintain a minimum clearance of 7 feet (2.1 meters) from the floor to the bottom edge of the fan blades.
- Etinyekwala ihe n'ime ụzọ agụba fan.
2. Ihe ngwugwu
Verify that all components listed below are present before beginning installation. If any parts are missing or damaged, do not proceed with installation and contact customer support.
- Mgbakọ Ụlọ moto
- Fan Blades (4) - Reversible white/bleached oak
- Blade Brackets (4)
- Nkwado
- Canopy
- Arịọnụ mgbodo
- Mgbakọ Kit Light
- Mushroom Globe Glass
- Pull Chains (2)
- Ngwungwu ngwaike (skru, washers, akụ waya)
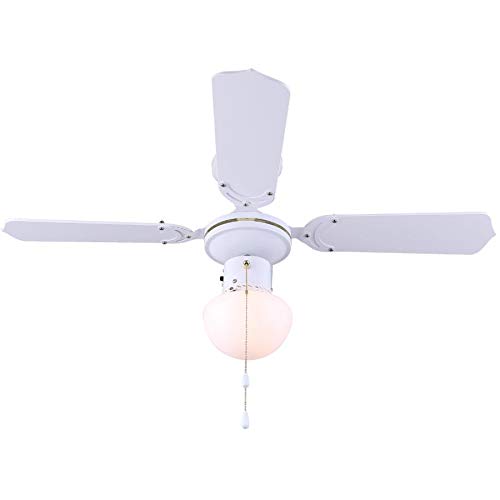
Nyocha 2.1: N'eluview of the Canarm Unity Ceiling Fan with Light, displaying the motor housing, four blades, and the central mushroom globe light.
3. Ntọala na nwụnye
A na-atụ aro ka etinyere ya n'ọkachamara. Hụ na ewepụla ike ọkụ eletrik na ihe mgbawa sekit tupu ị gaa n'ihu.
3.1 Ịkwanye Fan
- Chekwaa ihe nkwado mgbago na igbe njikọ nke elu ụlọ. Gbaa mbọ hụ na etinyere igbe njikọ ahụ nke ọma n'ihe owuwu ụlọ ma nwee ike ịkwado ibu onye ofufe.
- Feed the electrical wires from the junction box through the center hole of the mounting bracket.
- Attach the downrod to the motor housing, ensuring all screws are tightened.
- Carefully lift the fan assembly and hang it from the mounting bracket using the hook provided on the downrod.
3.2 Njikọ eletrik
Connect the fan's electrical wires to the household wiring according to the following:
- Connect the green/bare copper wire (ground) from the fan to the ground wire from the junction box.
- Connect the white wire (neutral) from the fan to the white wire from the junction box.
- Connect the black wire (hot for fan) from the fan to the black wire from the junction box.
- Connect the blue wire (hot for light) from the fan to the black or blue wire from the junction box (if separate light switch).
- Secure all connections with wire nuts and ensure no loose strands of wire are exposed.
3.3 Ịtinye Mmanya Fan
- Attach each blade to a blade bracket using the provided screws. Ensure the desired blade finish (white or bleached oak) is facing downwards.
- Secure each blade assembly to the motor housing using the screws provided. Ensure all screws are tight.
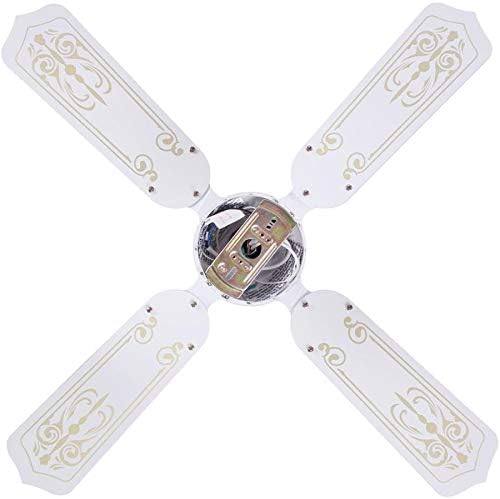

Figure 3.3: Images showing the blade attachment points on the motor housing (left) and the assembled blades from a top-down perspective (right).
3.4 Installing the Light Kit
- Connect the light kit wires to the corresponding wires from the fan motor housing (usually white to white, blue to black).
- Secure the light kit assembly to the bottom of the motor housing with the provided screws.
- Install the appropriate light bulb(s) (not included) into the sockets.
- Carefully attach the mushroom globe glass to the light kit by twisting or securing with screws, depending on the design.

Ọgụgụ 3.4: nso nso view of the fan's light kit with the mushroom globe glass.
Nzọụkwụ 3.5 ikpeazụ
- Carefully slide the canopy up against the ceiling and secure it with the provided screws.
- Weghachite ike na sekit breaker.
4. Ntuziaka ọrụ
The Canarm Unity ceiling fan is operated by two pull chains.
- Njikwa ọsọ fan: One pull chain controls the fan speed. Pull the chain repeatedly to cycle through the three available speeds (High, Medium, Low) and Off.
- Njikwa ọkụ: The second pull chain controls the light. Pull the chain to turn the light On or Off.
- Blade Reversal: To change the direction of the fan blades (e.g., for summer cooling or winter heat circulation), locate the slide switch on the motor housing. With the fan off, slide the switch to the opposite position. This fan features reversible white/bleached oak blades.

Figure 4.1: The Canarm Unity fan installed, demonstrating its function within a living space.
5. Nlekọta
Regular maintenance ensures optimal performance and extends the life of your ceiling fan.
- Nhicha: Jiri nwayọọ na-ehicha agụba fan na ụlọ moto, damp akwa . Ejila ihe nchacha abrasive ma ọ bụ ihe mgbaze.
- Ihe nkedo na-agbatị: Check all screws on the blade attachments and mounting hardware annually. Tighten any loose screws to prevent wobbling or noise.
- Ndochi oriọna ọkụ: Disconnect power before replacing light bulbs. Allow bulbs to cool before handling. Use bulbs of the correct wattage and type as specified in the fan's electrical ratings.
6. Nchọpụta nsogbu
Before attempting any repairs, ensure power is disconnected at the circuit breaker.
| Nsogbu | Ihe nwere ike ime | Ngwọta |
|---|---|---|
| Onye ofufe anaghị ebido | No power to the fan; Loose wire connections; Motor malfunction | Check circuit breaker/fuse; Verify all wire connections are secure; Contact a qualified electrician or customer support. |
| Ìhè anaghị arụ ọrụ | Bulb faulty or loose; Loose wire connections; Light kit malfunction | Replace bulb; Tighten bulb; Check light kit wiring; Contact customer support. |
| Fans na-ama jijiji | Loose blade screws; Unbalanced blades; Loose mounting bracket | Tighten all blade screws; Ensure blades are balanced (balancing kit may be needed); Verify mounting bracket is secure. |
| Ọrụ mkpọtụ | Loose screws; Motor bearings; Canopy rubbing ceiling | Check and tighten all screws; Ensure canopy is not touching the ceiling; If motor noise persists, contact customer support. |
7. Nkọwapụta
| Ụdị | Canarm |
| Nọmba nlereanya | CF2336411L |
| Akụkụ ngwaahịa | 91.44 x 91.44 x 20.32 cm (36 x 36 x 8 inch) |
| Ibu Ibu | 3.53 n'arọ |
| Agba | Ọcha |
| Ọnụọgụ agụba | 4 |
| Emecha agụba | Reversible White/Bleached Oak |
| Ọnụọgụ nke Ọsọ ọsọ | 3 |
| Ike/Wattage | 60 watt |
| Ụdị nkwụnye | Ugwu Downrod |
| Ụdị njikwa | Dọrọ Njikwa Chain |
8. Akwụkwọ ikike na nkwado
This product is covered by the manufacturer's standard warranty. Please refer to the warranty card included in your original packaging for specific terms and conditions.
For technical assistance, missing parts, or warranty claims, please contact Canarm customer support. Contact information can typically be found on the manufacturer's websaịtị ma ọ bụ na nkwakọ ngwaahịa.
Biko dowe akwụkwọ ntuziaka a maka ntụnye aka n'ọdịnihu.


