1. Ngwaahịa gafereview
The Diswoe Switch Pro Controller is a versatile wireless gaming controller designed for an enhanced gaming experience across multiple platforms. It offers universal compatibility with Nintendo Switch, Switch 2, Switch Lite, Switch OLED, Windows PC, and Android phones. Featuring Hall Effect joysticks, dual vibration motors, a 6-axis gyro sensor, and turbo functionality, this controller provides precise control and immersive feedback for a wide range of games. Its ergonomic design ensures comfort during extended play sessions, and a high-performance rechargeable battery offers long hours of uninterrupted gaming.

Foto 1: N'ihu view of the Diswoe Switch Pro Controller.
2. Ntọala na Njikọ
2.1 Ịchaji njikwa
Before first use, fully charge the controller. The controller features a built-in 550mAh rechargeable battery. Connect the controller to a standard USB Type-A wall charger using the provided USB-C cable. A full charge typically takes 2-3 hours and provides 6-8 hours of usage time.
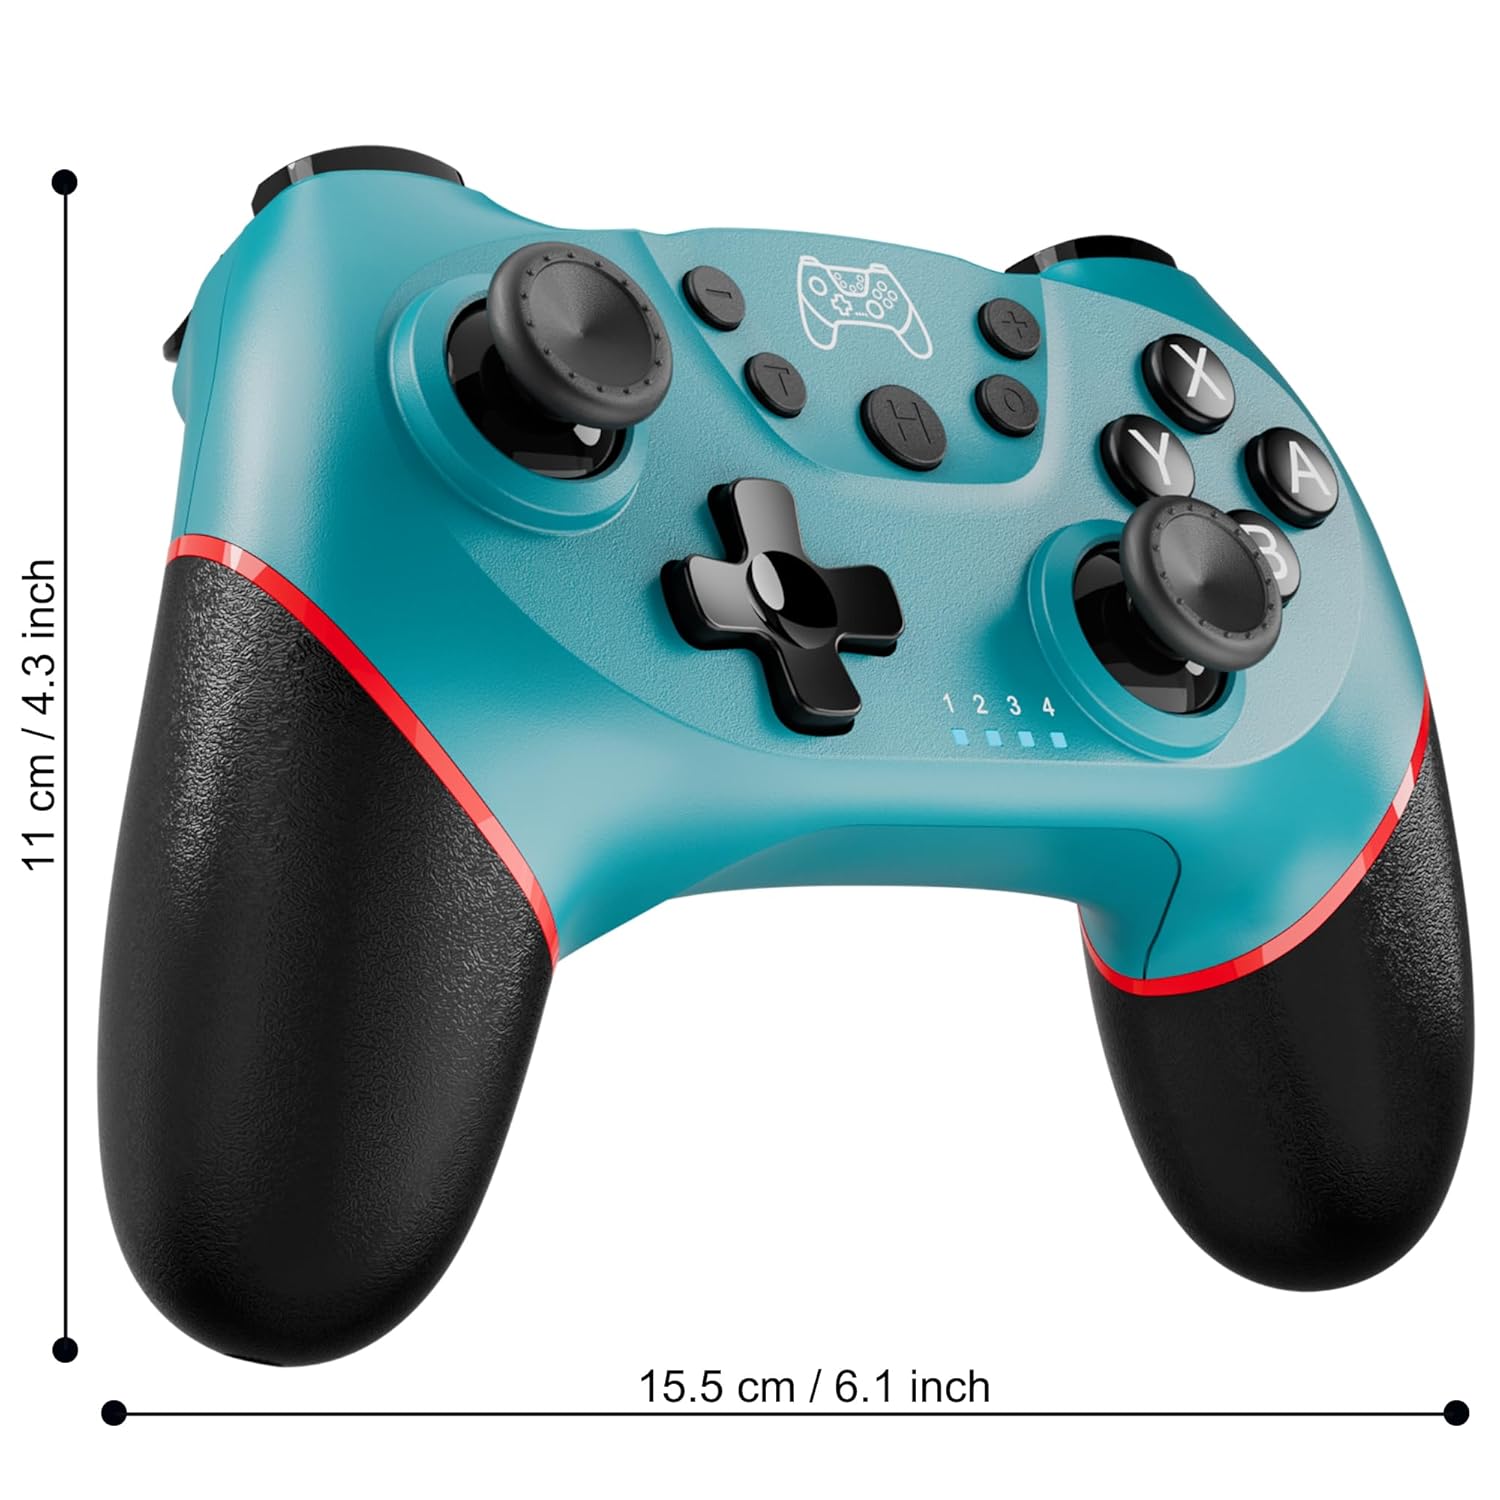
Figure 2: Charging the controller via USB-C port.
2.2 Wireless Bluetooth Connection (Nintendo Switch/Lite/OLED)
- Ensure your Nintendo Switch console is powered on and updated to the latest system version.
- Site OMlọ menu, họrọ Ndị njikwa > Gbanwee njide/usoro.
- On the Diswoe Pro Controller, press and hold the H (Home) button for 3-5 seconds until the player indicator lights begin to flash rapidly.
- Once the controller is successfully paired, the player indicator light(s) will remain solid.
- The controller provides a stable and reliable signal without delay or drop-off within 8 meters.

Figure 3: Controller pairing and one-button wake-up feature.
2.3 Wired Connection (PC)
The controller supports USB cable connection with PC. Simply connect the controller to your PC using the provided USB-C cable. No additional drivers are required for basic functionality.
IHE: The controller does not support wake-up for Switch 2 or audio functions via wired connection.
3. Ntuziaka ọrụ
3.1 Njikwa ntọala
The controller features standard button layouts for intuitive gameplay:
- Bọtịnụ A/B/X/Y: Bọtịnụ ihe omume nkịtị.
- D-Pad: Ntinye ntụziaka.
- Osisi Analog aka ekpe/aka nri: Maka ngagharị ogo 360 na njikwa igwefoto.
- L/R/ZL/ZR Buttons: Shoulder and trigger buttons for various in-game actions.
- +/- bọtịnụ: Plus and Minus buttons for menu navigation.
- Home Button (H): Returns to the console's HOME Menu.
- Bọtịnụ nseta ihuenyo: Captures screenshots during gameplay.

Ọgụgụ 4: Zuru ezu view of controller buttons.
3.2 Vibration Feedback
The controller is equipped with dual vibration motors that provide excellent haptic feedback, enhancing game immersion. The intensity of the vibration can be adjusted to suit your preference, offering three levels of vibration.
Figure 5: Illustration of adjustable vibration levels.
3.3 6-Axis Gyro Sensor
The integrated 6-axis gyro sensor allows the controller to detect its inclination and motion, providing quick and precise responses for motion-sensing games. This feature adds an extra layer of fun and control to compatible titles.

Figure 6: Controller with 6-axis gyro sensor in action.
3.4 Turbo ọrụ
Activate the turbo function for rapid, continuous input of a button press. This is particularly useful in games requiring fast, repetitive actions. The controller supports three turbo speeds: 5 shots/s, 12 shots/s, and 20 shots/s.

Figure 7: Turbo speed settings on the controller.
3.5 Ọrụ nseta ihuenyo
Capture your favorite in-game moments instantly by pressing the dedicated screenshot button. This allows for easy sharing of your gameplay experiences.

Figure 8: Location of the screenshot button.
4. Nlekọta
4.1 Nhicha
To maintain the controller's condition, wipe it regularly with a soft, dry cloth. Avoid using harsh chemicals or abrasive materials that could damage the surface.
4.2 Nlekọta batrị
- Avoid exposing the controller to extreme temperatures.
- Do not attempt to disassemble or replace the built-in battery.
- Charge the controller regularly, even if not in frequent use, to prolong battery life.
5. Nchọpụta nsogbu
5.1 Njikwa Anaghị ejikọta/Na-ejikọ
- Gbaa mbọ hụ na akwụchara onye njikwa ya nke ọma.
- Verify that the Nintendo Switch console is powered on and in the "Change Grip/Order" screen.
- Press and hold the H (Home) button on the controller for 3-5 seconds until the player indicator lights flash rapidly.
- If issues persist, try restarting both the controller and the console.
5.2 Nkwụsị Ntinye ma ọ bụ Nkwụsị
- Ensure the controller is within the 8-meter operating range of the console.
- Wedata ndabichi sitere na ngwaọrụ ikuku ndị ọzọ.
- Check for any physical obstructions between the controller and the console.
- Ensure the controller's battery is not critically low.
5.3 Joystick Drift
If you experience unintended movement from the analog sticks (joystick drift), try the following:
- Calibrate the joysticks through your Nintendo Switch system settings: Ntọala sistemụ > Ndị njikwa na ihe mmetụta > Calibrate Ogwe njikwa.
- Ensure the controller's firmware is up to date (check the manufacturer's websaịtị maka mmelite).
- Clean around the base of the joysticks with compressed air to remove any debris.
6. Nkọwapụta ngwaahịa
| Njirimara | Nkọwa |
|---|---|
| Nọmba nlereanya | ET16801 |
| Ụdị | Agbaghara |
| Ndakọrịta | Nintendo Switch/Switch 2/Switch Lite/Switch OLED, Windows PC, Android Phone |
| Njikọta | Wireless Bluetooth, Wired USB-C |
| Ike batrị | 550mAh Lithium Ion (gụnyere) |
| Oge Nchaji | Ihe ruru. 2-3 awa |
| Oge eji | Ihe ruru. 6-8 awa |
| Atụmatụ pụrụ iche | Dual Vibration Motors, 6-Axis Gyro Sensor, Turbo Function, Screenshot Button |
| Ibu Ibu | 9.9 ounces |
| Akụkụ ngwugwu | 6.42 x 4.76 x 2.6 sentimita asatọ |
| Ụbọchị mbụ dị | Disemba 11, 2019 |
7. Akwụkwọ ikike Ozi
Specific warranty details for the Diswoe Switch Pro Controller are typically provided with the product packaging or available on the official Diswoe websaịtị. Biko rụtụ aka na akụrụngwa ndị a maka usoro na ọnọdụ akwụkwọ ikike zuru oke.
8. Nkwado ndị ahịa
For further assistance, technical support, or inquiries regarding your Diswoe Switch Pro Controller, please visit the official Diswoe webma ọ bụ kpọtụrụ ngalaba ọrụ ndị ahịa ha. A na-ahụkarị ozi kọntaktị na ngwugwu ngwaahịa ahụ ma ọ bụ ọnụnọ nke akara ahụ n'ịntanetị.