1. Okwu mmalite
Welcome to the user manual for your Modecom Oberon Pro Glass USB 3.0 White PC Case. This manual provides essential information for the proper installation, operation, and maintenance of your computer chassis. Please read this manual thoroughly before beginning assembly to ensure correct setup and to prevent damage to your components or the case itself.
Akpachara anya maka nchekwa:
- Kwụpụ mgbe ọ bụla ọkụ na-esi na mgbidi mgbidi tupu ịwụnye ma ọ bụ wepụ ihe ọ bụla.
- Jiri nlezianya jide ihe ndị dị na ya iji zere mwepụ electrostatic (ESD). Chee echiche iji eriri aka na-egbochi static.
- Debe obere akụkụ na ihe nkwakọ ngwaahịa n'ebe ụmụaka nọ.
- Ensure proper ventilation around the case to prevent overheating.
2. Ngwaahịa gafereview
The Modecom Oberon Pro Glass is a stylish mid-tower PC case designed to house your computer components. It features a tempered glass side panel for showcasing your build and a clean white finish. The front panel includes convenient USB 3.0 ports for high-speed data transfer.
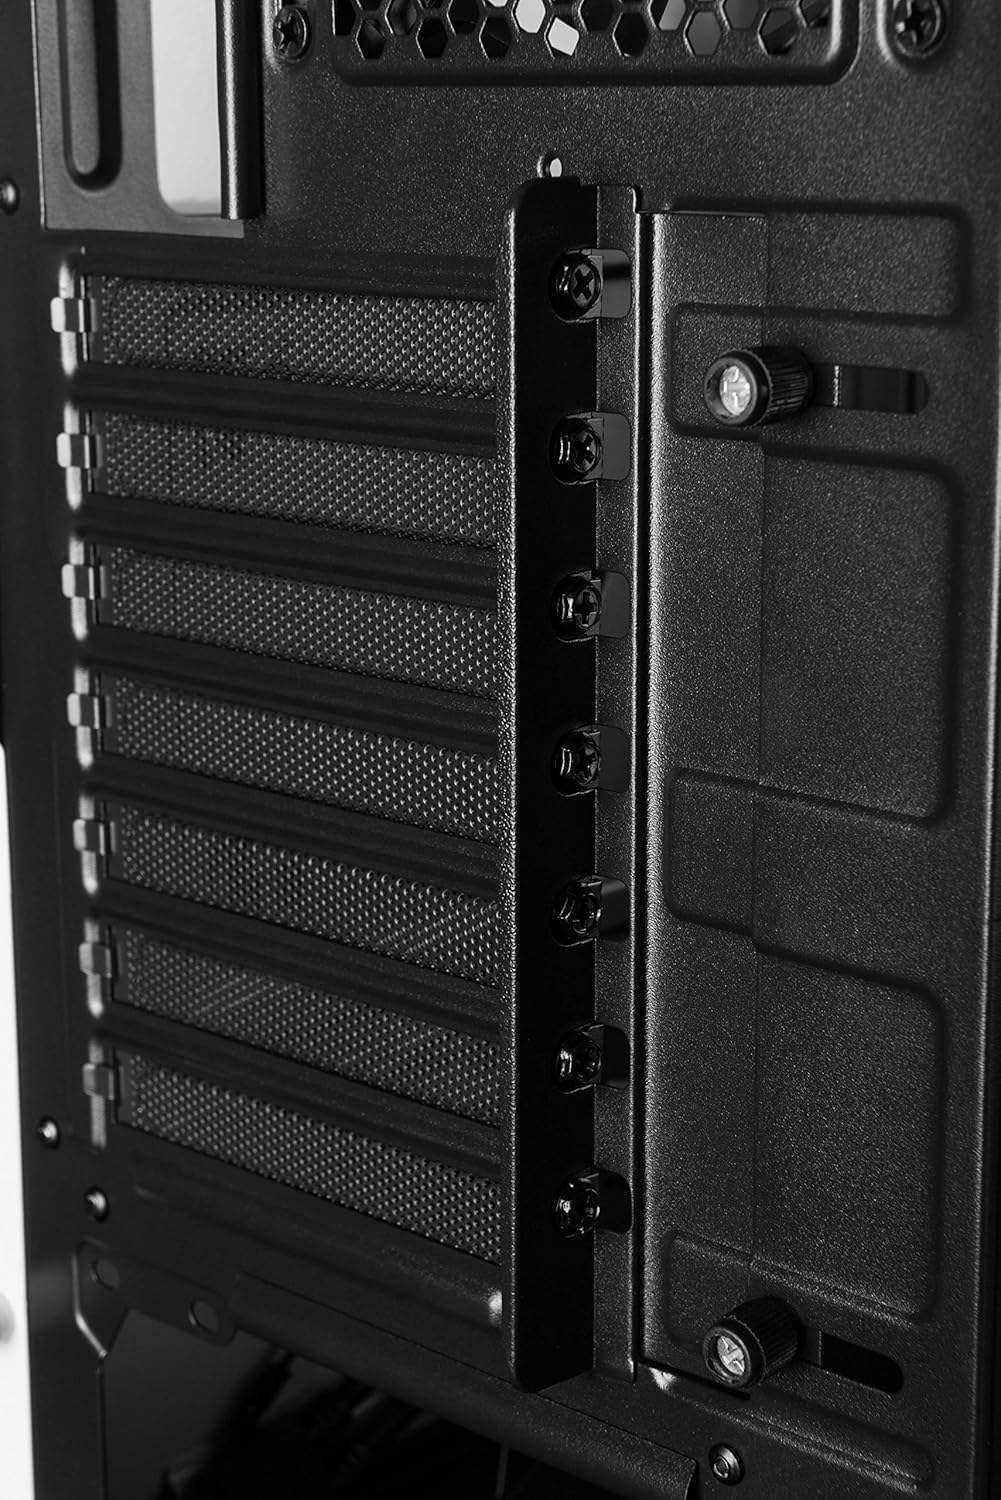
Foto 2.1: Ihu-aka nri view of the Modecom Oberon Pro Glass PC Case. This image displays the white exterior, the front panel with ventilation, and the top-mounted I/O ports including USB 3.0.
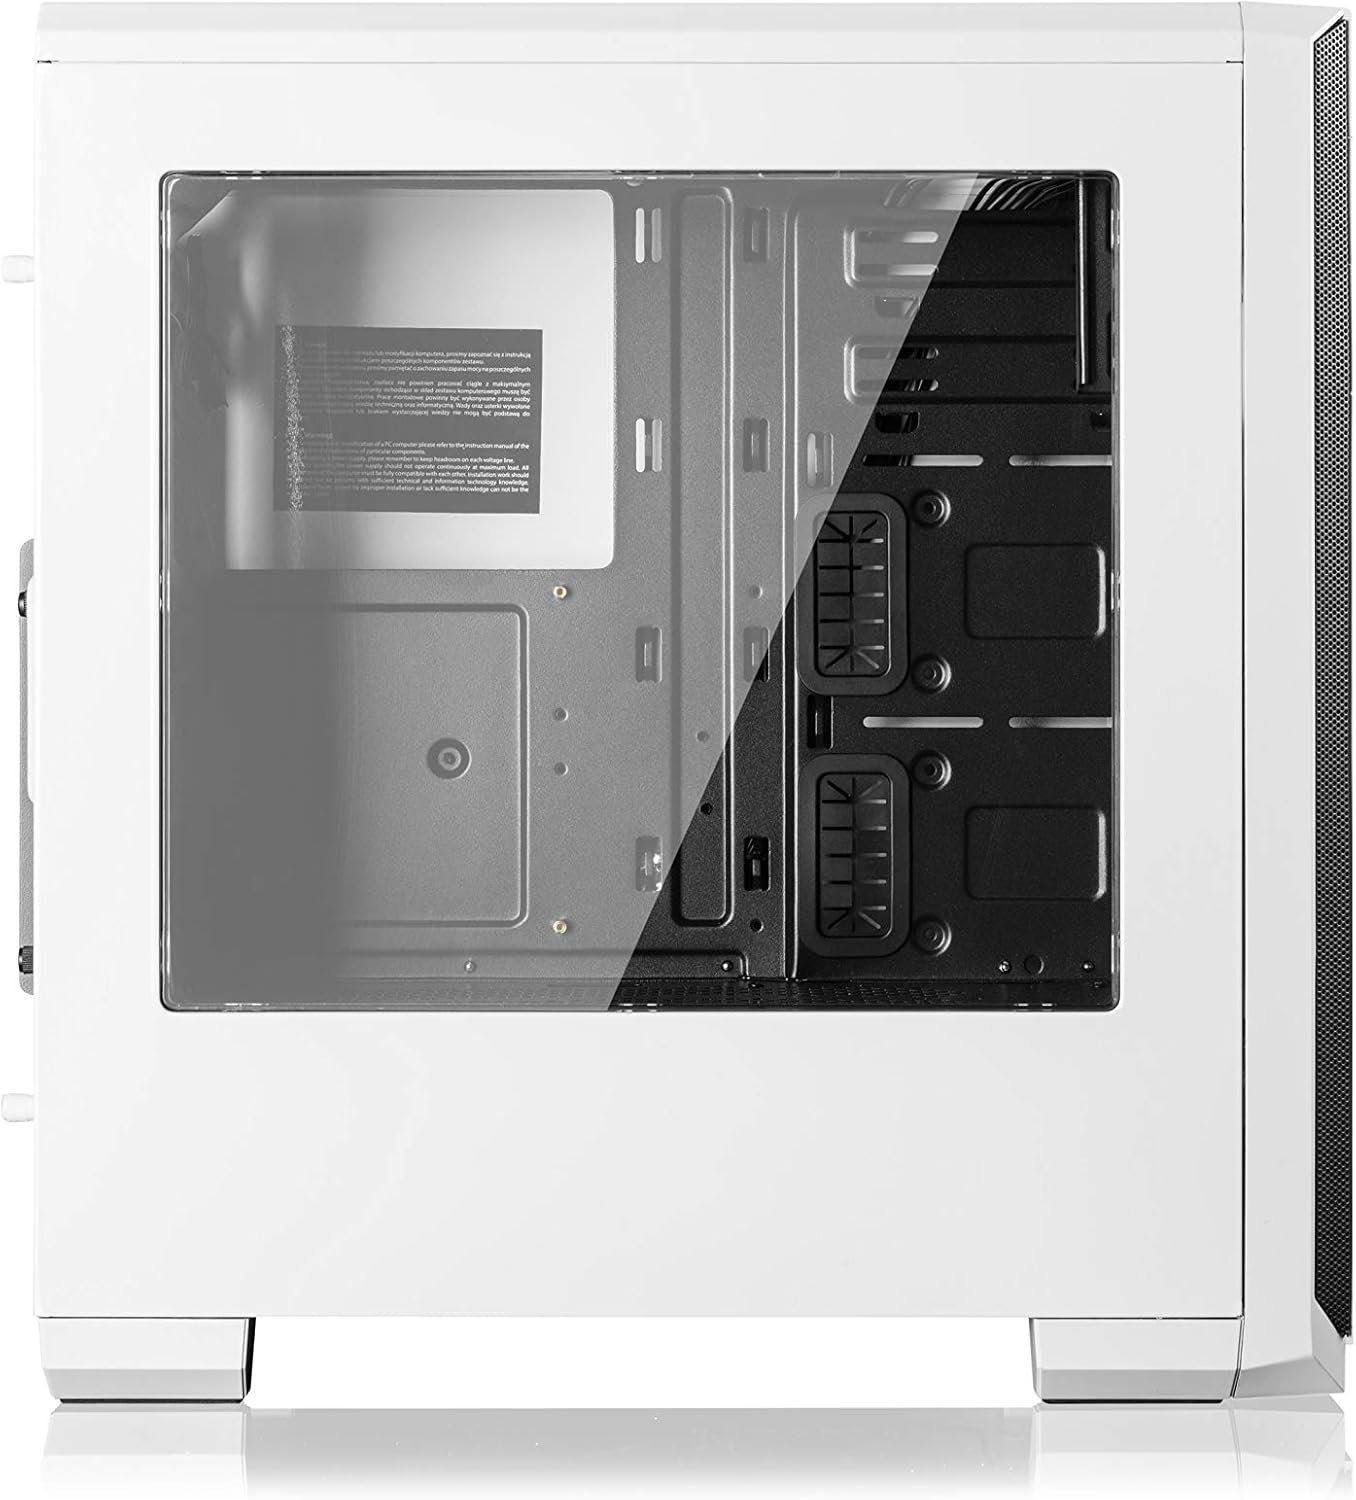
Foto 2.2: Akụkụ view of the Modecom Oberon Pro Glass PC Case, highlighting the tempered glass side panel. This panel allows for a clear view of the internal components when installed.
3. Ntọala na nwụnye
Follow these steps to install your computer components into the Modecom Oberon Pro Glass PC Case.
3.1. Mwepu na nyocha izizi
- Carefully remove the PC case from its packaging.
- Lelee akpa ahụ maka ihe ịrịba ama ọ bụla nke mmebi n'oge njem. Kpọtụrụ onye na-ere ahịa gị ozugbo ma ọ bụrụ na achọpụta mmebi.
- Remove the tempered glass side panel by unscrewing the thumb screws, typically located at the rear corners of the panel. Set the panel aside on a soft, flat surface to prevent scratches.
3.2. Nwụnye motherboard

Foto 3.1: Ime ụlọ view of the Modecom Oberon Pro Glass PC Case, showing the motherboard tray, drive bays, and cable management cutouts.
- Install the I/O shield that came with your motherboard into the designated opening at the rear of the case.
- Ensure the motherboard standoffs are correctly aligned for your motherboard's form factor (ATX, Micro ATX, or ITX). Install additional standoffs if necessary.
- Carefully place your motherboard onto the standoffs, aligning the screw holes.
- Secure the motherboard with the provided screws. Do not overtighten.
3.3. Nrụnye Ike Ike (PSU).
- Position your PSU in the dedicated compartment, typically at the bottom rear of the case.
- Align the screw holes on the PSU with those on the case's rear panel.
- Secure the PSU with the provided screws.
3.4. Storage Drive Installation (HDD/SSD)
- Locate the 3.5" HDD bays and 2.5" SSD mounting points within the case.
- For 3.5" HDDs, slide the drive into a bay and secure it with screws or tool-less clips if available.
- For 2.5" SSDs, mount them to the designated trays or screw points, typically behind the motherboard tray or in specific drive cages.
3.5. Expansion Card Installation (GPU, PCIe cards)

Foto 3.2: N'azụ ime view of the Modecom Oberon Pro Glass PC Case, illustrating the expansion slot covers and thumb screws for securing PCIe cards.
- Remove the necessary expansion slot covers from the rear of the case, corresponding to your card's slot on the motherboard.
- Insert your expansion card (e.g., graphics card) firmly into the PCIe slot on the motherboard.
- Secure the card to the case with the provided screws or retention mechanism.
3.6. Front Panel Connector Installation
- Connect the front panel cables (USB 3.0, HD Audio, Power Switch, Reset Switch, Power LED, HDD LED) to their respective headers on your motherboard. Refer to your motherboard manual for exact pin layouts.
3.7. Njikwa USB
- Jiri ihe e ji kpụọ eriri na ebe e ji ejikọta eriri ndị dị n'azụ tray motherboard hazie eriri ndị ahụ. Nke a na-eme ka ikuku na ịma mma dịkwuo mma.
- Once all components are installed and cables managed, reattach the tempered glass side panel and secure it with the thumb screws.
4. Ọrụ
After successful installation, your PC is ready for operation.
- Na-agbanye ike: Press the power button located on the top I/O panel of the case.
- Using Front Panel Ports: The front panel includes USB 3.0 ports and audio jacks. Connect your USB devices (e.g., flash drives, external hard drives) to the USB ports for data transfer. Plug your headphones or microphone into the respective audio jacks.
5. Nlekọta
Ndozi mgbe niile na-enyere aka hụ na arụmọrụ kacha mma yana ogologo ndụ nke akụrụngwa PC gị.
- Ihe nzacha uzuzu: Periodically remove and clean the dust filters (if present) to maintain good airflow and prevent dust buildup inside the case. Use compressed air or a soft brush.
- Nchacha mpụta: Jiri nwayọ hichaa elu mpụta nke ikpe ahụ, damp akwa . Zere ihe nchacha ma ọ bụ ihe mgbaze nke nwere ike imebi njedebe ma ọ bụ iko dị ọkụ.
- Tempered Glass Panel: Clean the tempered glass with a glass cleaner and a microfiber cloth to avoid streaks and scratches.
6. Nchọpụta nsogbu
If you encounter issues, consider the following basic troubleshooting steps:
- Sistemụ anaghị arụ ọrụ:
- Gbaa mbọ hụ na agbanyere PSU ma jikọọ ya nke ọma na ntinye mgbidi.
- Verify that the front panel power switch cable is correctly connected to the motherboard header.
- Lelee njikọ ike niile na motherboard na ihe ndị mejupụtara ya.
- Ọdụ ụgbọ mmiri USB anaghị arụ ọrụ:
- Confirm that the front panel USB 3.0 cable is securely connected to the corresponding header on the motherboard.
- Jiri ngwaọrụ USB dị iche iche nwalee.
- Oke mkpọtụ:
- Identify the source of the noise (e.g., case fans, CPU cooler fan, GPU fan).
- Ensure all fans are free from obstructions and properly secured.
- Clean any dust buildup on fans.
Maka okwu ndị siri ike karị, kpọtụrụ akwụkwọ ntuziaka akụrụngwa gị ma ọ bụ chọọ enyemaka ọkachamara.
7. Nkọwapụta
| Njirimara | Nkọwa |
|---|---|
| Ụdị | Modecom |
| Aha Nlereanya | Oberon Pro Glass |
| Nọmba nlereanya | AT-OBERON-PG-20-000000-0002 |
| Ụdị ikpe | Ụlọ elu etiti |
| Agba | Ọcha |
| Ihe onwunwe | Polycarbonate (PC) |
| Igwe bọọdụ dakọtara | ATX, Micro ATX, ITX |
| N'ihu I / O Ports | USB 3.0, Audio In/Out |
| Ịnye ọkụ | W/O PSU (Power Supply Unit not included) |
| Ibu Ibu | 2 kilogram |
| Koodu Akụkọ Mba Nile | 05901885248370 |
8. Akwụkwọ ikike na nkwado
Ozi akwụkwọ ikike:
Modecom provides a guarantee of spare parts availability for 2 years from the date of purchase. This ensures that essential components for repair or replacement will be accessible within this period.
Nkwado ndị ahịa:
For technical assistance, warranty claims, or further inquiries, please refer to the official Modecom website or contact your local retailer where the product was purchased. Ensure you have your product model number and proof of purchase available when seeking support.


