1. Ngwaahịa gafereview
The Keter Tall Wardrobe Plus is a versatile and durable storage solution designed for various indoor and outdoor environments such as garages, basements, hallways, attics, storage rooms, and workshops. Constructed from high-quality resin, this wardrobe offers robust storage with adjustable shelving and lockable doors for enhanced security.

Foto 1.1: N'ihu view of the Keter Tall Wardrobe Plus.
Akụkụ ndị bụ isi:
- Three (3) height-adjustable shelves, each capable of holding up to 15 kg (TÜV-certified).
- Lockable doors (padlock not included) for secure storage.
- Ergonomic soft-touch handles for comfortable use.
- Quick and easy assembly with a tool-free plug-in system.
2. Ozi nchekwa
Biko gụọ ntuziaka nchekwa niile nke ọma tupu mgbakọ na iji.
- Always follow the provided assembly instructions to ensure proper and safe installation.
- Do not overload the cabinet. Each shelf has a maximum weight capacity of 15 kg. Exceeding this limit may cause damage to the product or lead to injury.
- Exercise caution when using the ergonomic handles to prevent pinching or injury.
- Ensure the wardrobe is placed on a stable, level surface to prevent tipping.
- Debe obere akụkụ n'ebe ụmụaka nọ n'oge mgbakọ ka ịzenarị ihe egwu na-akpagbu.
3. Ntọala na Mgbakọ
The Keter Tall Wardrobe Plus features a quick and easy tool-free plug-in assembly system, typically taking approximately 15 minutes to complete.
Tupu ịmalite:
- Unpack all components and verify that all parts are present according to the packing list (refer to the included manual for the complete list).
- Choose a clear, flat, and stable area for assembly.
- Familiarize yourself with the different parts and their orientation.
Nzọụkwụ Mgbakọ:
While specific step-by-step diagrams are provided in the physical manual, the general assembly process involves:
- Connecting the base and top panels to the side panels using the plug-in system.
- Inserting the back panels into their designated grooves.
- Attaching the doors to the main frame using the integrated hinges.
- Installing the ergonomic handles onto the doors.
- Placing the adjustable shelves at your desired heights. Ensure shelves are securely seated.

Figure 3.1: Product dimensions for planning placement. Dimensions are approximately 68 cm (width) x 39 cm (depth) x 166 cm (height).

Ọgụgụ 3.2: Ọpụample of the assembled wardrobe in a garage environment.
4. Ntuziaka ọrụ
Operating the Keter Tall Wardrobe Plus is straightforward.
Ọnụ ụzọ mmeghe na mmechi:
- Grasp the ergonomic handles firmly and pull to open the doors.
- Push the doors gently until they click into place to ensure they are fully closed.
Shel na-edozi:
- Empty the shelf before attempting to adjust its height.
- Carefully lift the shelf from its current position.
- Re-insert the shelf into the desired slots on the side panels, ensuring it is level and securely seated on all four supports.

Ọgụgụ 4.1: Ime view of the wardrobe demonstrating adjustable shelf placement and storage capacity.
5. Nlekọta
To ensure the longevity and optimal performance of your Keter Tall Wardrobe Plus, follow these simple maintenance guidelines:
- Nhicha: Jiri mgbasa ozi hichapụ elu eluamp cloth and mild soap. Avoid abrasive cleaners or harsh chemicals, as these can damage the resin material.
- Nyocha: Periodically check all connections and ensure that the doors open and close smoothly. Tighten any loose screws if applicable (though this model uses a plug-in system, check for secure connections).
- Nkesa arọ: Distribute items evenly on shelves to prevent warping or damage. Do not exceed the 15 kg weight limit per shelf.
- Ojiji n'èzí: While suitable for outdoor use, prolonged exposure to extreme weather conditions (e.g., direct, intense sunlight or freezing temperatures) may affect the material over time. Consider placing it in a sheltered area if possible.
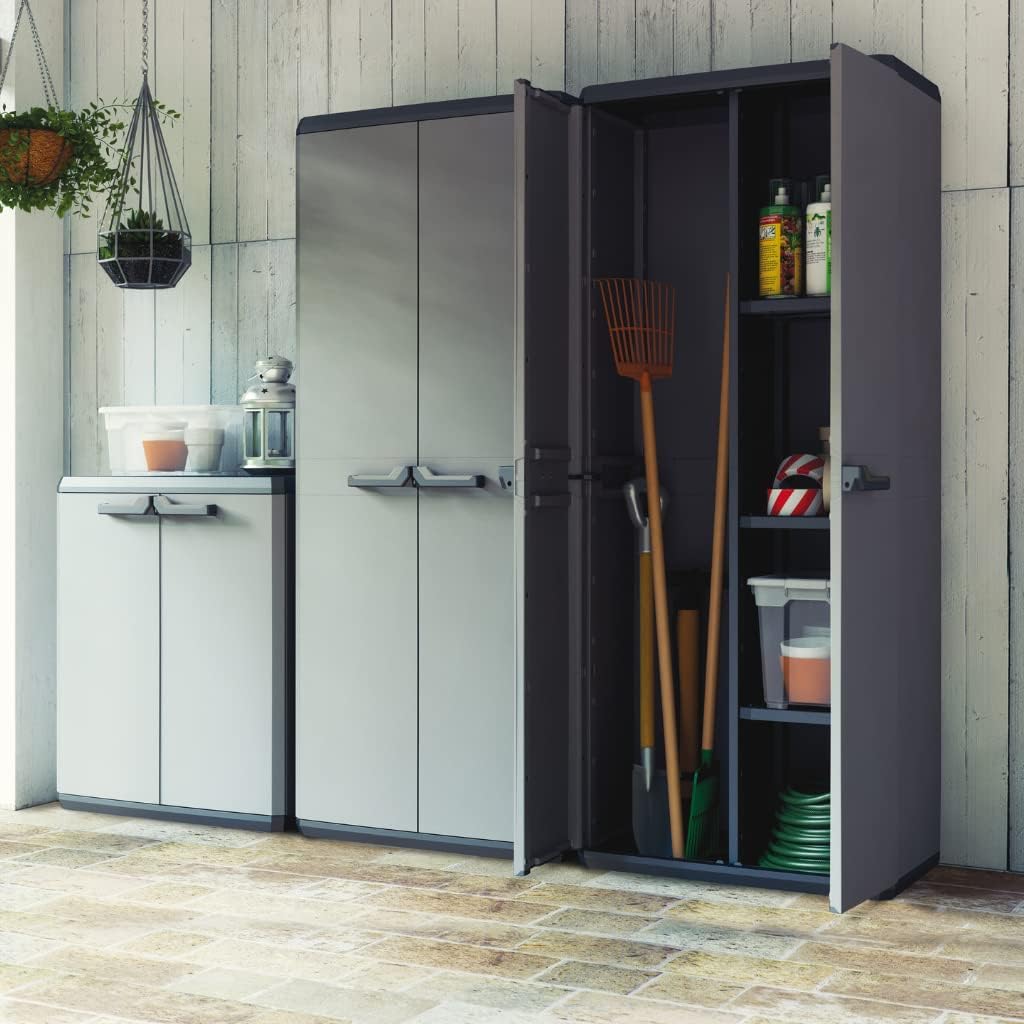
Figure 5.1: The wardrobe is suitable for various environments, including sheltered outdoor spaces.
6. Nchọpụta nsogbu
Nke a bụ ụfọdụ okwu nkịtị na ngwọta ha nwere ike ime:
| Nsogbu | Ihe nwere ike ime | Ngwọta |
|---|---|---|
| Ọnụ ụzọ anaghị emechi nke ọma. | Wardrobe is not level; obstruction in the door path; hinges misaligned. | Ensure the wardrobe is on a flat, level surface. Check for items blocking the doors. Verify hinges are correctly installed and aligned. |
| Shelves sag or are unstable. | Overloaded shelf; shelf not properly seated in supports. | Reduce the weight on the shelf (do not exceed 15 kg). Re-seat the shelf, ensuring it is fully engaged in all four support slots. |
| Kabinet ahụ na-ama jijiji mgbe e mechara mgbakọ ahụ. | Connections not fully engaged; uneven floor. | Press firmly on all connecting points to ensure they are fully clicked into place. Move the cabinet to a level surface or use shims to stabilize it. |
7. Nkọwapụta
Detailed specifications for the Keter Tall Wardrobe Plus (Model: 9727000):
| Njirimara | Nkọwa |
|---|---|
| Ụdị | Keter |
| Nọmba nlereanya | 9727000 |
| Akụkụ ngwaahịa (D x W x H) | 39 cm x 68 cm x 166 cm (ihe dị ka kilogram 11.4) |
| Ihe onwunwe | Resin (Kunsthars) |
| Agba | Agba ntụ |
| Ọnụọgụ nke shelf | 3 (nwere ike idozi) |
| Ikike ibu shelf | 15 kg per shelf (TÜV-certified) |
| Atụmatụ pụrụ iche | Adjustable shelf, Lockable doors (padlock not included) |
| Assemblydị Mgbakọ | Floor Mount, Tool-free plug-in system |
| Akwadoro ojiji | Clothing, General Storage (Garage, Basement, Hallway, Attic, Storage Room, Workshop) |
| Mba onye si | Ịtali |
8. Akwụkwọ ikike na nkwado
For information regarding warranty coverage and customer support, please refer to the purchase documentation or contact Keter customer service directly.
Iwu nloghachi:
Products purchased through Amazon.nl typically have a return policy of 30 days from the date of receipt for a refund or replacement. Please check the specific return policy at the time of purchase for the most accurate information.
For further assistance or to report any issues not covered in this manual, please visit the official Keter websaịtị ma ọ bụ kpọtụrụ ahịrị nkwado ndị ahịa ha.
Note: This manual provides general instructions. Always refer to the specific assembly and safety guidelines included with your product packaging.