1. Okwu mmalite
The EPEVER Tracer A 1210AN is an advanced Maximum Power Point Tracking (MPPT) solar charge controller designed for off-grid solar systems. It efficiently manages power flow from solar panels to batteries, ensuring optimal charging and extending battery life. This manual provides essential information for the safe and effective installation, operation, and maintenance of your Tracer A 1210AN controller.

Image 1: EPEVER MPPT Solar Charge Controller Tracer A 1210AN. This image shows the front view of the solar charge controller, highlighting its display and control buttons, along with key features and typical applications such as RVs, homes, solar power systems, camping, and marine use.
2. Ozi nchekwa
Please read all instructions and warnings carefully before installation and operation.
- Ensure all wiring is correctly polarized and securely connected to prevent damage to the controller or other components.
- Always connect the battery first, then the solar panel, and finally the load. Disconnect in the reverse order.
- Emela ka onye njikwa ahụ gbawaa ma ọ bụ gbalịa ịrụzi ya n'onwe gị. Kpọtụrụ ndị ọrụ ruru eru maka ọrụ ahụ.
- Wụnye ihe njikwa ahụ n'ebe ikuku na-anaghị apụta nke ọma, ebe ihe ndị na-ere ọkụ na anwụ na-acha kpọmkwem.
- Use appropriate circuit breakers or fuses for all connections to protect against overcurrent.
- The controller is designed for common positive grounding.
3. Akụrụngwa Ngwaahịa
The Tracer A 1210AN MPPT Solar Charge Controller incorporates advanced technology for efficient and reliable solar power management:
- Teknụzụ MPPT dị elu: Ensures high tracking efficiency, typically not less than 99.5%, and a peak conversion efficiency of 98%.
- Fast Tracking Speed: Ultra-fast tracking speed and accurate recognition of multiple power points.
- Otutu-stage Ịchaji: Na-egosi 3-stage charging algorithm (Bulk, Boost, Float, Equalize) with PWM output for optimal battery health.
- Ndakọrịta batrị: Supports various battery types, including Sealed, Gel, Flooded, and Lithium batteries (LiFePO4, Li(NiCoMn)O2).
- Ngosipụta kensinammuo: A multifunction LCD displays system information clearly.
- User Programmable: Parameters for battery types and load control are user-programmable via PC software or remote meter.
- Port Communication: Equipped with an RS485 port using industrial standard MODBUS protocol for external communication and monitoring.
- Comprehensive Electronic Protections: Includes protection against PV reverse polarity, PV short circuit, PV overcurrent, battery overcharge, battery over-discharge, battery reverse polarity, load short circuit, load overload, and overheating.
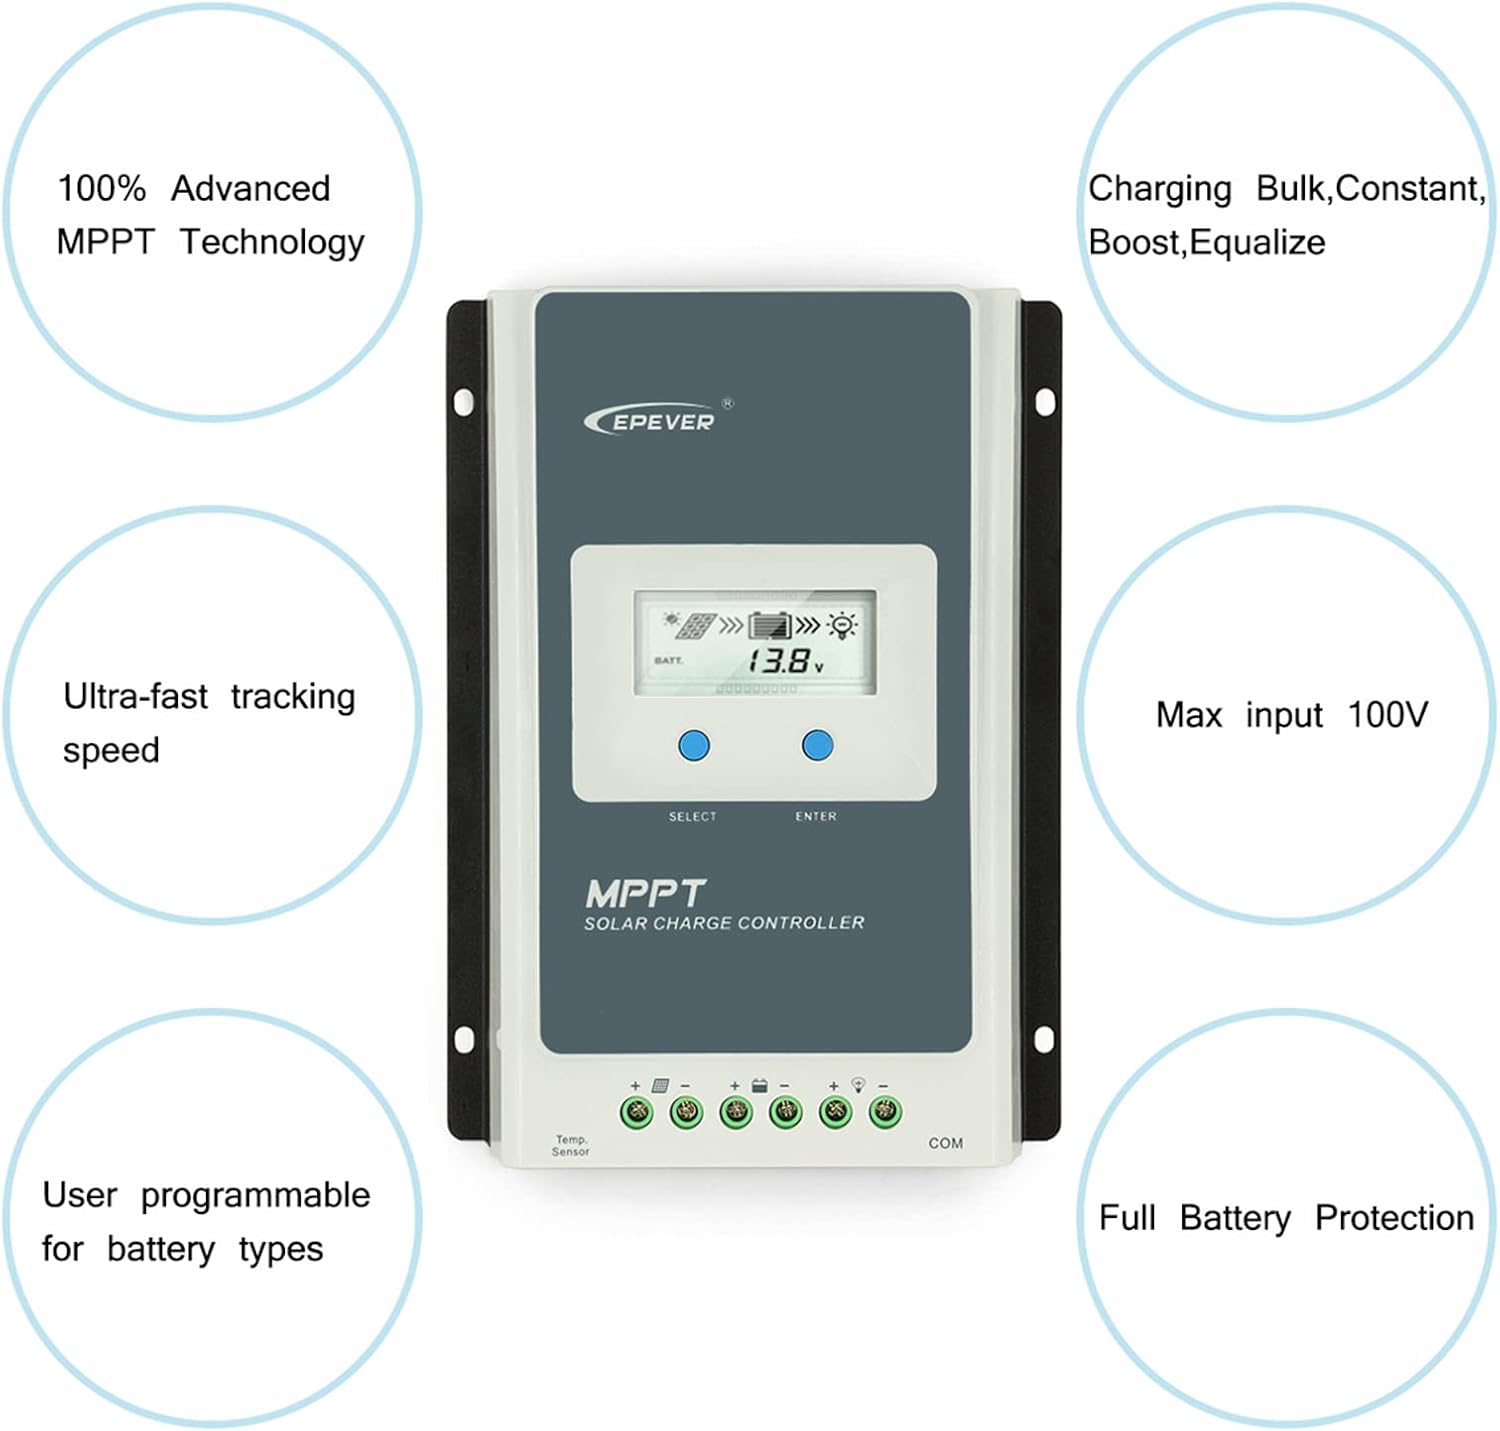
Image 2: Key features of the EPEVER MPPT Solar Charge Controller. This image illustrates the core functionalities such as 100% Advanced MPPT Technology, Ultra-fast tracking speed, User programmable for battery types, Charging Bulk/Constant/Boost/Equalize, Max input 100V, and Full Battery Protection.
4. Ntọala na nwụnye
4.1 Connection Order
Follow the correct connection sequence to ensure safe and proper operation.
- Connect Battery First: Connect the battery to the charge controller. Ensure correct polarity.
- Connect DC Load: Connect the DC load to the charge controller.
- Connect PV Panel: Connect the solar panel to the charge controller.
- Connect Inverter (Optional): If using an inverter, connect it to the battery bank.
Disconnection Order: To disconnect the system, follow the reverse order: Inverter (if applicable), PV Panel, DC Load, then Battery.

Image 3: Connection diagram for the EPEVER MPPT Solar Charge Controller. This diagram illustrates the correct wiring sequence: 1. Battery, 2. DC Load, 3. PV Panel, and 4. Inverter (optional), along with optional accessories like a temperature sensor, breaker, and communication modules (eBox-WIFI-01, MT50).
4.2 Supported Battery Types
The controller supports various battery types. Ensure you select the correct type for optimal charging.
- Iju mmiri juru
- Gel
- Sealed/AGM
- LiFePO4 (4S/8S)
- Li(NiCoMn)O2 (3S/6S/7S)
- Akọwapụtara onye ọrụ

Image 4: Display interface and supported battery types. This image shows the various screens of the controller's LCD display, including real-time data for PV current, PV voltage, batrị voltage, load current, and temperature. It also illustrates the different battery types supported: Flooded, Gel, Sealed/AGM, LiFePO4, Li(NiCoMn)O2, and User-defined.
4.3 System Configuration Calculation
Properly sizing your solar system components is crucial for efficient operation. The following formulas and example can help determine appropriate load power consumption, battery capacity, and solar panel power.
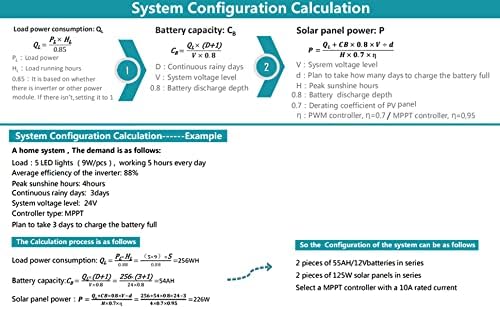
Image 5: System Configuration Calculation. This image provides formulas and an example for calculating load power consumption (Qc), battery capacity (Cb), and solar panel power (P) for a home solar system, considering factors like continuous running days, system voltage level, discharge depth, peak sunshine hours, and derating coefficients.
5. Ntuziaka ọrụ
5.1 LCD ngosi interface
The controller features an intuitive LCD display to monitor system status and parameters. Use the "SELECT" and "ENTER" buttons to navigate through the interface.
Foto 6: Zuru ezu view of the LCD display interface. This image shows various screens displaying real-time data such as PV current, PV voltage, generated energy (mWh), battery voltage, load current, and battery temperature. It also illustrates how to browse through these screens.
5.2 Setting Battery Type via LCD
It is critical to set the correct battery type on the controller to ensure proper charging and prevent battery damage.
- Navigate to the battery type setting screen using the "SELECT" button.
- Press "ENTER" to enter edit mode.
- Use "SELECT" to cycle through the available battery types (Sealed, Gel, Flooded, LiFePO4, Li(NiCoMn)O2, User).
- Press "ENTER" to confirm your selection.
Image 7: Instructions for setting the battery type via the LCD. This section of the image visually guides the user through selecting different battery types like Sealed (default), Gel, Flooded, LiFePO4 (F04, F08), Li(NiCoMn)O2 (75, 65, 35), and User-defined settings.
5.3 Ịchaji Stages
Onye njikwa ahụ na-eji usoro 3-stage charging algorithm to optimize battery charging:
- Nnukwu ego: Delivers maximum current to rapidly charge the battery.
- Agbam ume: Charges the battery at a higher voltage to ensure it reaches full capacity.
- N'elu mmiri n'Aka: Maintains the battery at a safe voltage level to prevent self-discharge and overcharging.
- Equalization Charge (for certain battery types): Periodically overcharges the battery to balance cell voltages and prevent sulfation.
6. Nlekọta
Mmezi mgbe niile na-eme ka njikwa chaja anyanwụ gị dị ogologo ma na-arụ ọrụ nke ọma.
- Nyochaa njikọ: Periodically check all wiring connections for tightness and corrosion. Loose connections can cause overheating and damage.
- Onye njikwa dị ọcha: Keep the controller clean and free from dust and debris. Ensure ventilation openings are not blocked.
- Lelee batrị: Nyochaa batrị voltage and electrolyte levels (for flooded batteries) regularly. Ensure the battery type setting on the controller matches your battery.
- Ọnọdụ gburugburu: Ensure the controller is operating within its specified temperature range and protected from moisture.
7. Nchọpụta nsogbu
The Tracer A 1210AN includes various electronic protections to prevent damage. If you encounter issues, refer to the following:
7.1 Electronic Protections
- PV Reverse Polarity Protection: Prevents damage if solar panel polarity is reversed.
- PV Short Circuit Protection: Protects against short circuits from the solar panel.
- PV Overcurrent Alarm Protection: Alerts if solar panel current exceeds safe limits.
- Battery Overcharge Protection: Prevents battery damage from excessive charging.
- Battery Over-discharge Protection: Prevents battery damage from deep discharge.
- Nchekwa polarity na-atụgharị batrị: Protects against reversed battery connections.
- Load Short Circuit Protection: Protects the load output from short circuits.
- Load Overload Protection: Protects the load output from excessive current draw.
- Nchekwa ekpo oke ọkụ: Shuts down or reduces power if the controller temperature becomes too high.
7.2 Okwu nkịtị na Ngwọta
| Nsogbu | Ihe nwere ike ime | Ngwọta |
|---|---|---|
| Enweghị ngosi na njikwa | Batrị ejikọghị ma ọ bụ obere voltage; reversed battery polarity. | Lelee njikọ batrị na voltage. Hụ na e nwere ezi ọdịiche. |
| Batrị anaghị achaji | PV panel not connected; PV panel voltage too low; PV panel short circuit; incorrect battery type setting. | Check PV connections. Ensure sufficient sunlight. Verify PV panel is not shorted. Confirm battery type setting. |
| Load not working | Load short circuit; load overload; battery low voltage disconnect; load output disabled. | Check load wiring for shorts. Reduce load. Charge battery. Enable load output in settings. |
8. Nkọwapụta
Detailed technical specifications for the EPEVER Tracer A 1210AN MPPT Solar Charge Controller.

Image 8: Specifications table for EPEVER Tracer A series controllers. This table provides comparative data for models 1210AN, 2210AN, 3210AN, and 4210AN, including product model, dimensions, max power current, power terminals, MPP voltage range, battery input voltage range, max PV input power, max PV open circuit voltage, grounding type, and weight.
| Oke | Value (Tracer A 1210AN) |
|---|---|
| Ụdị ngwaahịa | 1210AN |
| Akụkụ | 17.2 x 4.39 x 13.89 cm (6.77 x 5.47 x 1.73 inch) |
| Ibu | 0.57 n'arọ (1.32 lbs) |
| Ike dị ugbu a | 10A |
| Ọnụ ahịa ike | 12AWG (4mm²) |
| MPP Voltage Oke | (Batrị voltage + 2V) ~ 72V |
| Ntinye batrị Voltage Oke | 8 ~ 32V |
| Max PV Input Power (12V System) | 130W |
| Max PV Input Power (24V System) | 260W |
| Max PV Open Circuit Voltage | 100V (92V@25℃) |
| Nda ala | Ihe ọjọọ na-emekarị |
| Type of Power Source | Ike anyanwụ |
| Ụdị ngosi | LCD |
9. Akwụkwọ ikike & Nkwado
For warranty information and technical support, please refer to the official EPEVER websaịtị ma ọ bụ kpọtụrụ onye na-ere gị ikike. Debe nnata nzụta gị ka ihe akaebe nke ịzụrụ.
Onye nrụpụta: Ever
Akara: MGBE ọ bụla


