1. Okwu mmalite
Nkọwa ngwaahịa
The StarTech.com 7 Port USB 3.0 Hub (Model: ST7300USB3B) allows you to expand your computer's USB connectivity by adding seven external USB 3.0 ports from a single USB 3.0 host connection. This hub is designed for high-speed data transfer, supporting rates up to 5 Gbps, and is fully compliant with SuperSpeed USB 3.0 specifications. It also maintains backward compatibility with USB 2.0 and 1.x devices, ensuring versatility for all your USB peripherals.
Engineered for user convenience, the hub features a one-sided port orientation for easy access, along with built-in current overload detection and protection across all seven ports. It supports plug-and-play and hot-swap technologies, enabling seamless connection and disconnection of devices without requiring a computer restart. The hub can be bus-powered for portability or utilize the included power adapter for high-power USB devices.
Atụmatụ igodo
- Adds seven external USB 3.0 ports to a computer.
- Supports data transfer rates up to 5 Gbps (USB 3.0 SuperSpeed).
- Backward compatible with USB 2.0 and 1.x devices.
- Features one-sided port orientation for easy access.
- Includes current overload detection and protection.
- Supports plug-and-play and hot-swap functionality.
- Can be bus-powered or powered via the included AC adapter.

Image: StarTech.com 7 Port USB 3.0 Hub, showcasing its sleek black design and seven USB 3.0 ports.
2. Ihe ngwugwu
Chọpụta na akụrụngwa niile dị na ngwugwu gị:
- 1x USB 3.0 Hub
- 1x USB 3.0 Cable (3.3 ft / 1 m)
- 1x Universal Power Adapter
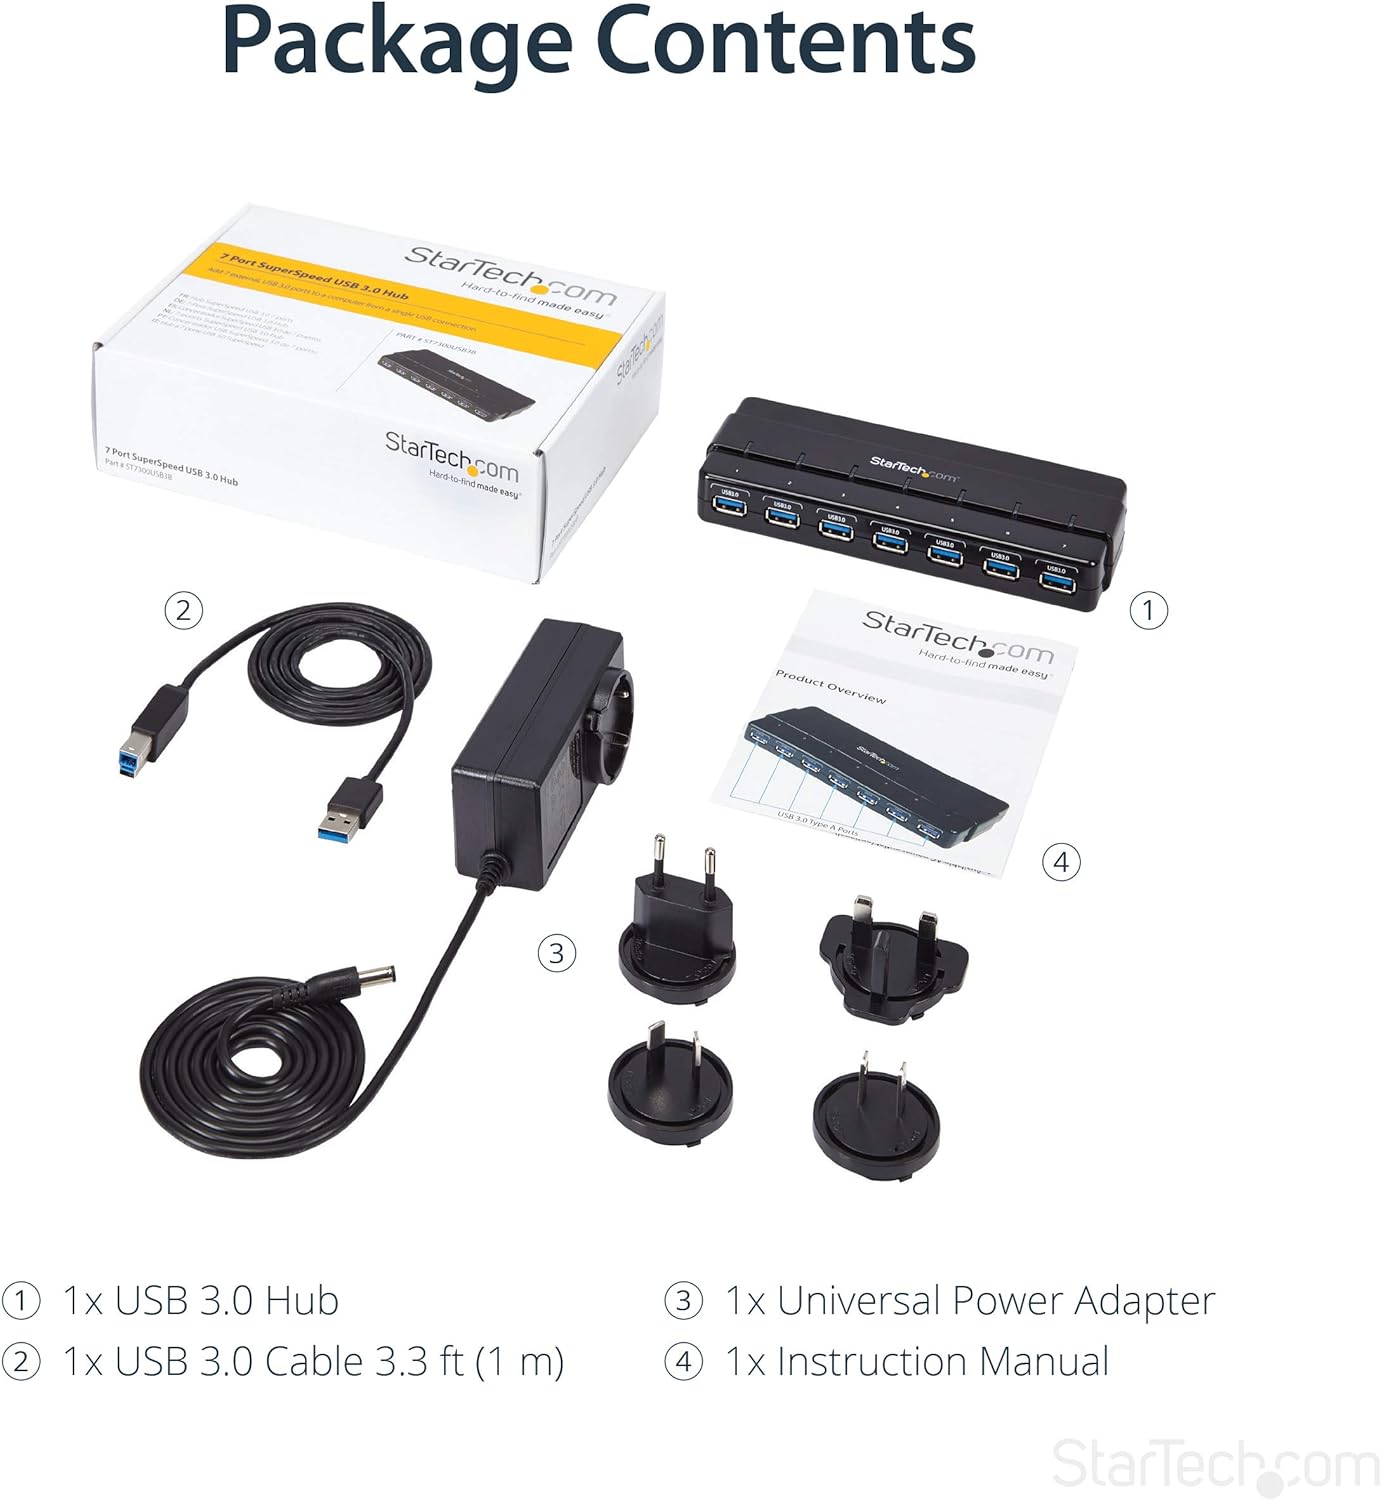
Image: The retail box, the USB 3.0 hub, the USB 3.0 cable, the universal power adapter with various international plug types, and the instruction manual.
3. Nhazi
Ijikọ Hub
- Connect to Power (Optional but Recommended for High-Power Devices): If you are connecting high-power USB devices (e.g., external hard drives, charging devices), connect the included universal power adapter to the DC power input port on the hub. Then, plug the power adapter into a wall outlet. For standard power draw devices, the hub can be bus-powered directly from your computer's USB port.
- Jikọọ na Kọmputa: Connect the included USB 3.0 cable to the USB 3.0 Type-B (Host) port on the hub. Connect the other end of the USB 3.0 cable to an available USB 3.0 port on your computer.
- Install Drivers (Not Required): The hub is plug-and-play and does not require any additional driver installation for most operating systems (OS Independent). Your computer should automatically detect and configure the hub.
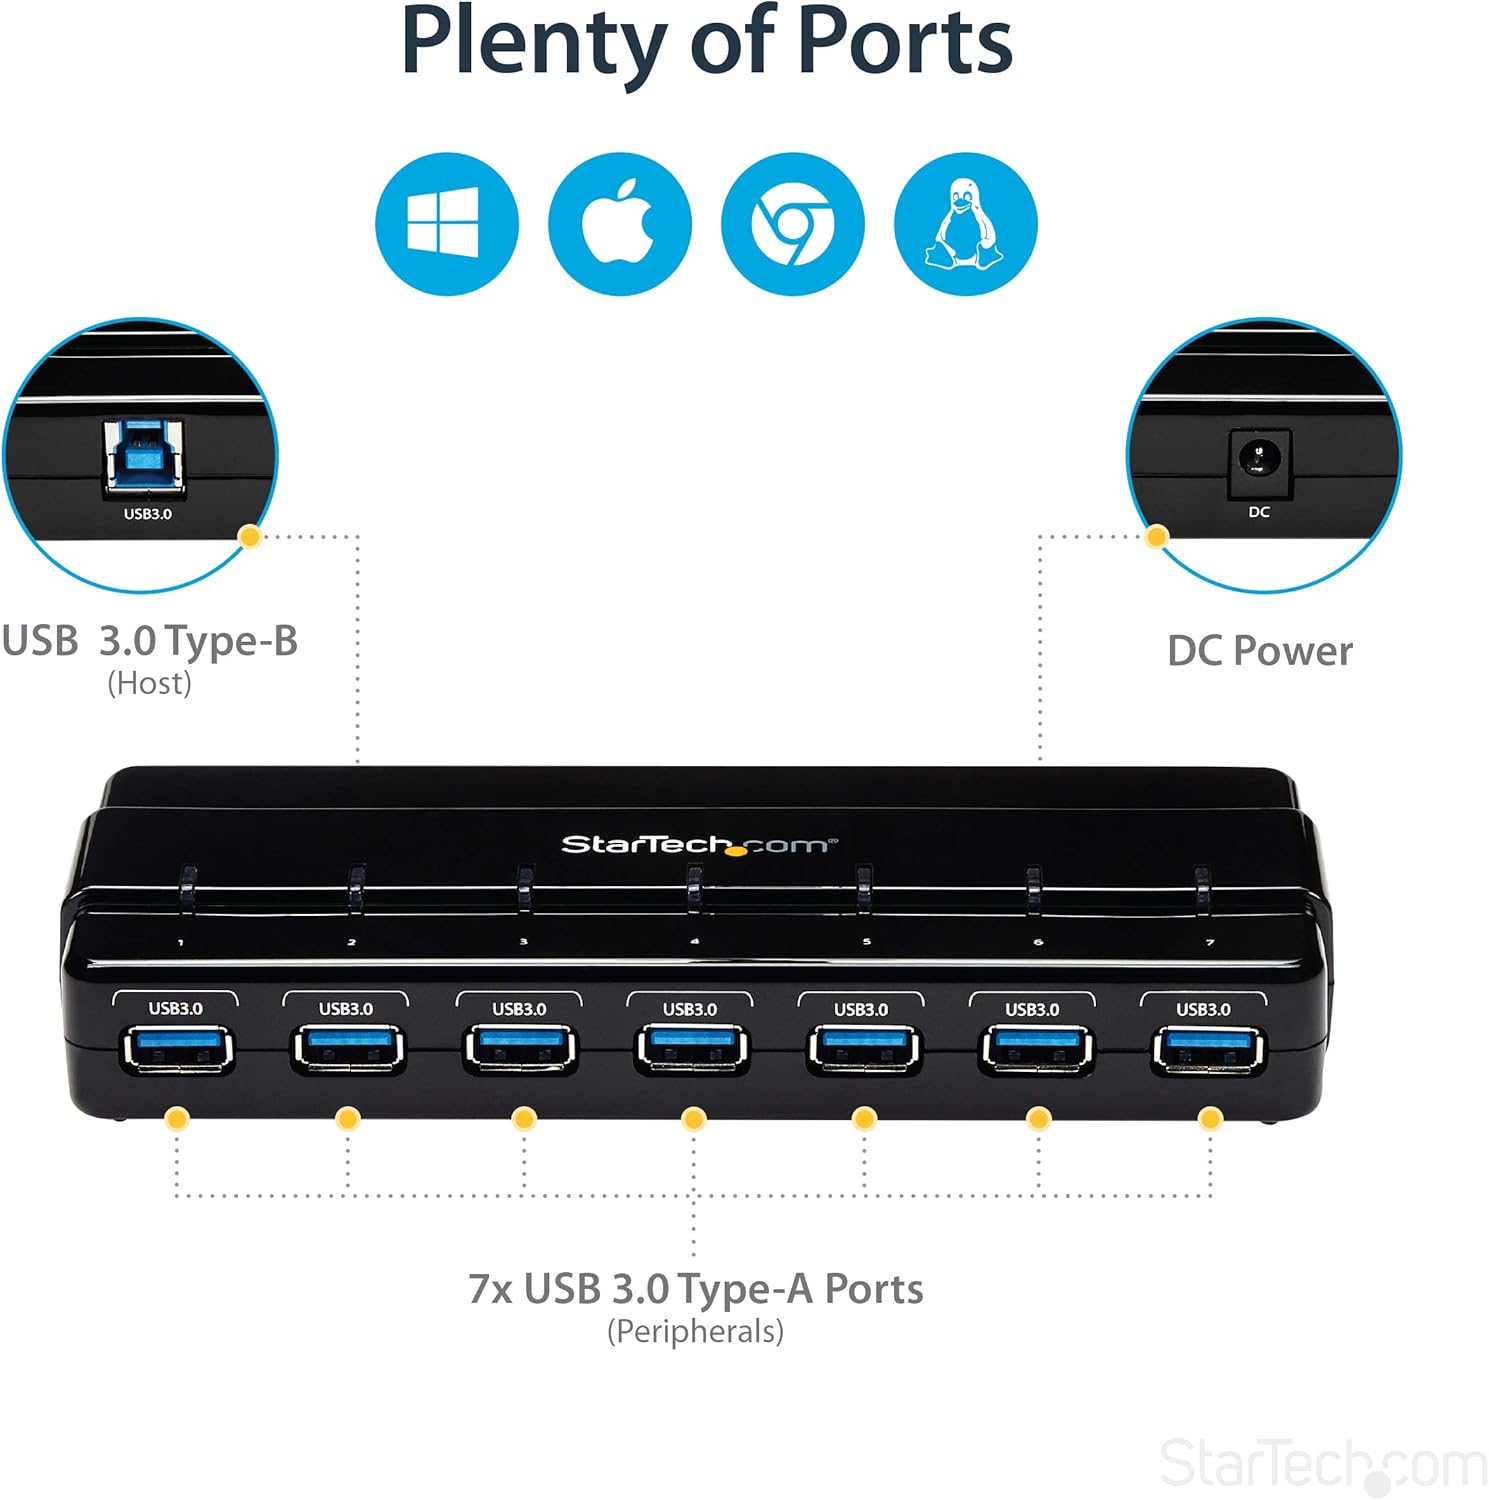
Image: A diagram illustrating the port layout of the hub, showing the USB 3.0 Type-B host port, DC power input, and the seven USB 3.0 Type-A peripheral ports.
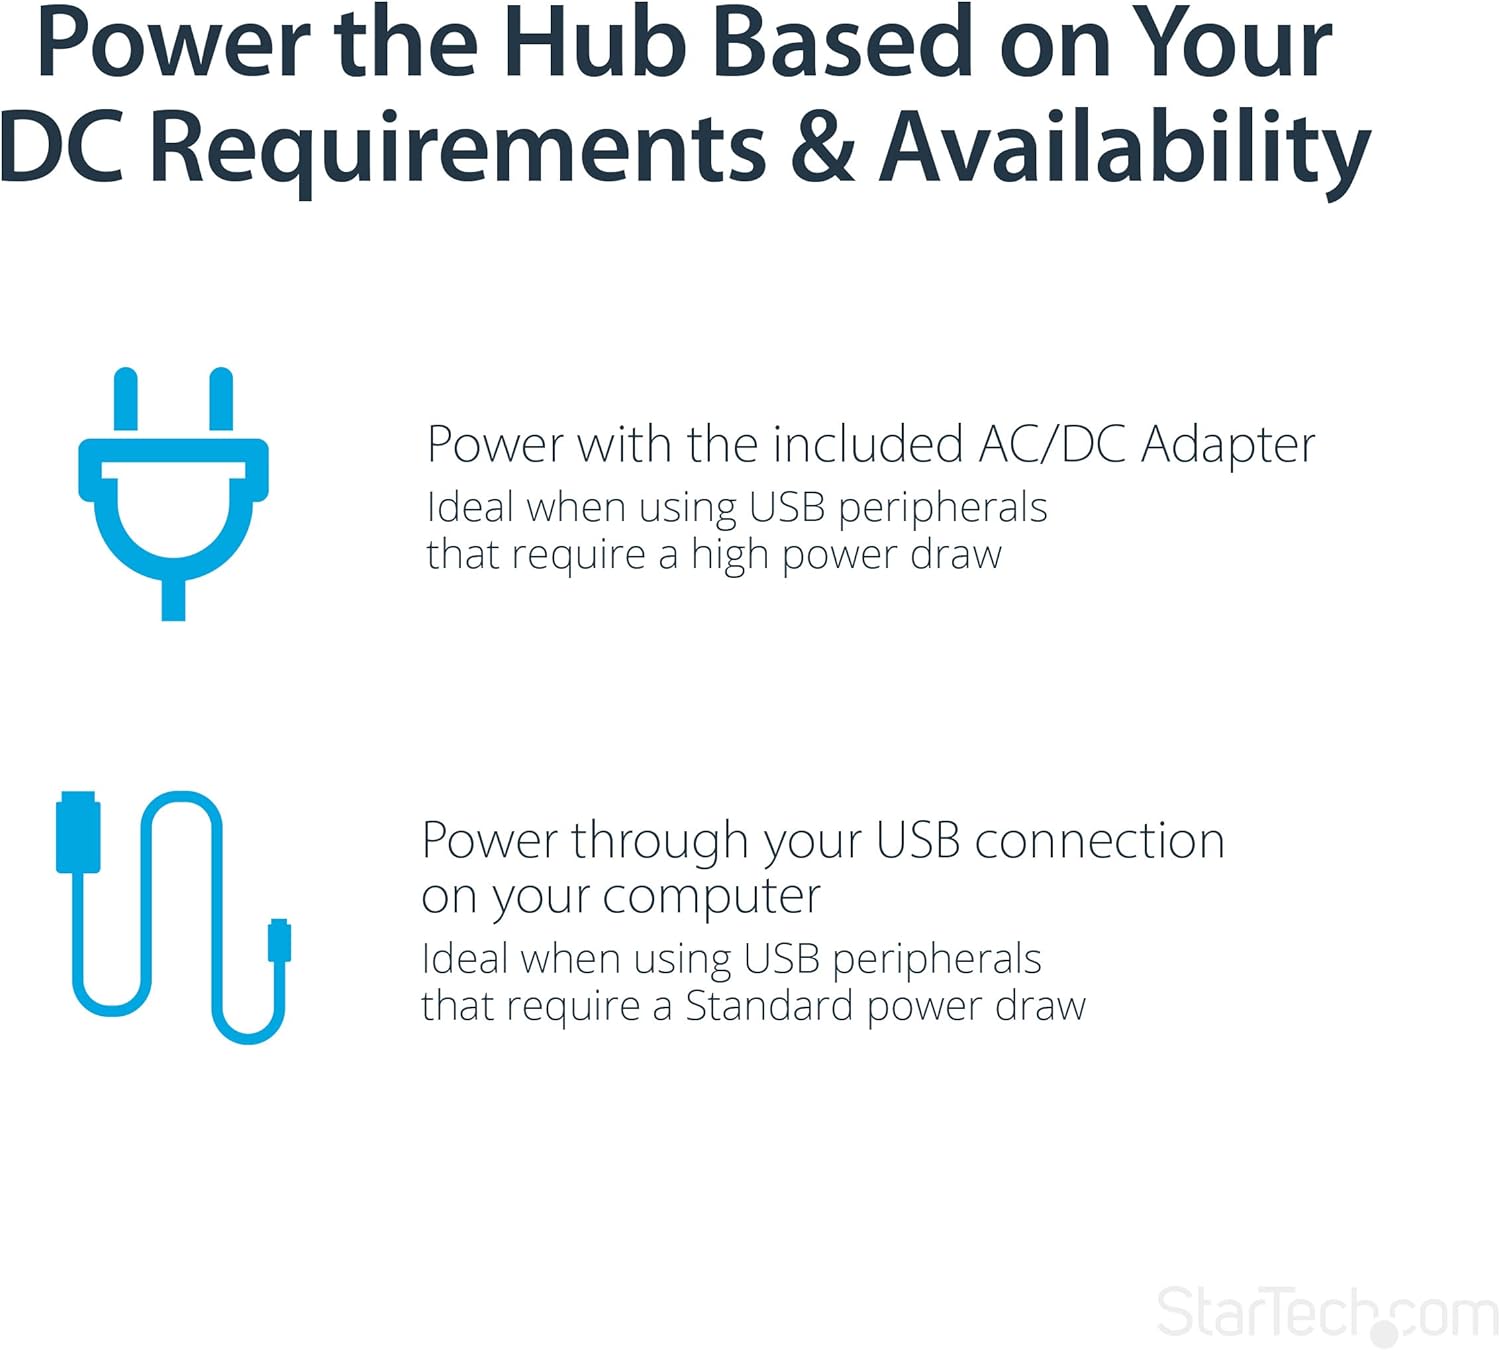
Image: A diagram explaining the two power options for the hub: using the included AC/DC adapter for high-power devices or bus power through the USB connection for standard power devices.
4. Ntuziaka ọrụ
Iji ọdụ ụgbọ mmiri USB
Once the hub is connected to your computer and powered (if necessary), you can begin connecting your USB devices to the available USB 3.0 Type-A ports. The hub supports hot-swapping, meaning you can connect and disconnect devices without needing to power down your computer or the hub.
- Njikọ ngwaọrụ: Simply plug your USB devices into any of the seven available USB 3.0 ports on the hub.
- Ihe ngosi LED: Each port on the hub features a blue LED indicator. This LED will illuminate when a device is actively connected and recognized by the system, providing a quick visual confirmation of active connections.
- Nyefee data: The hub supports SuperSpeed USB 3.0, allowing for fast data transfer with compatible devices. When connecting USB 2.0 or 1.x devices, they will operate at their respective maximum speeds.
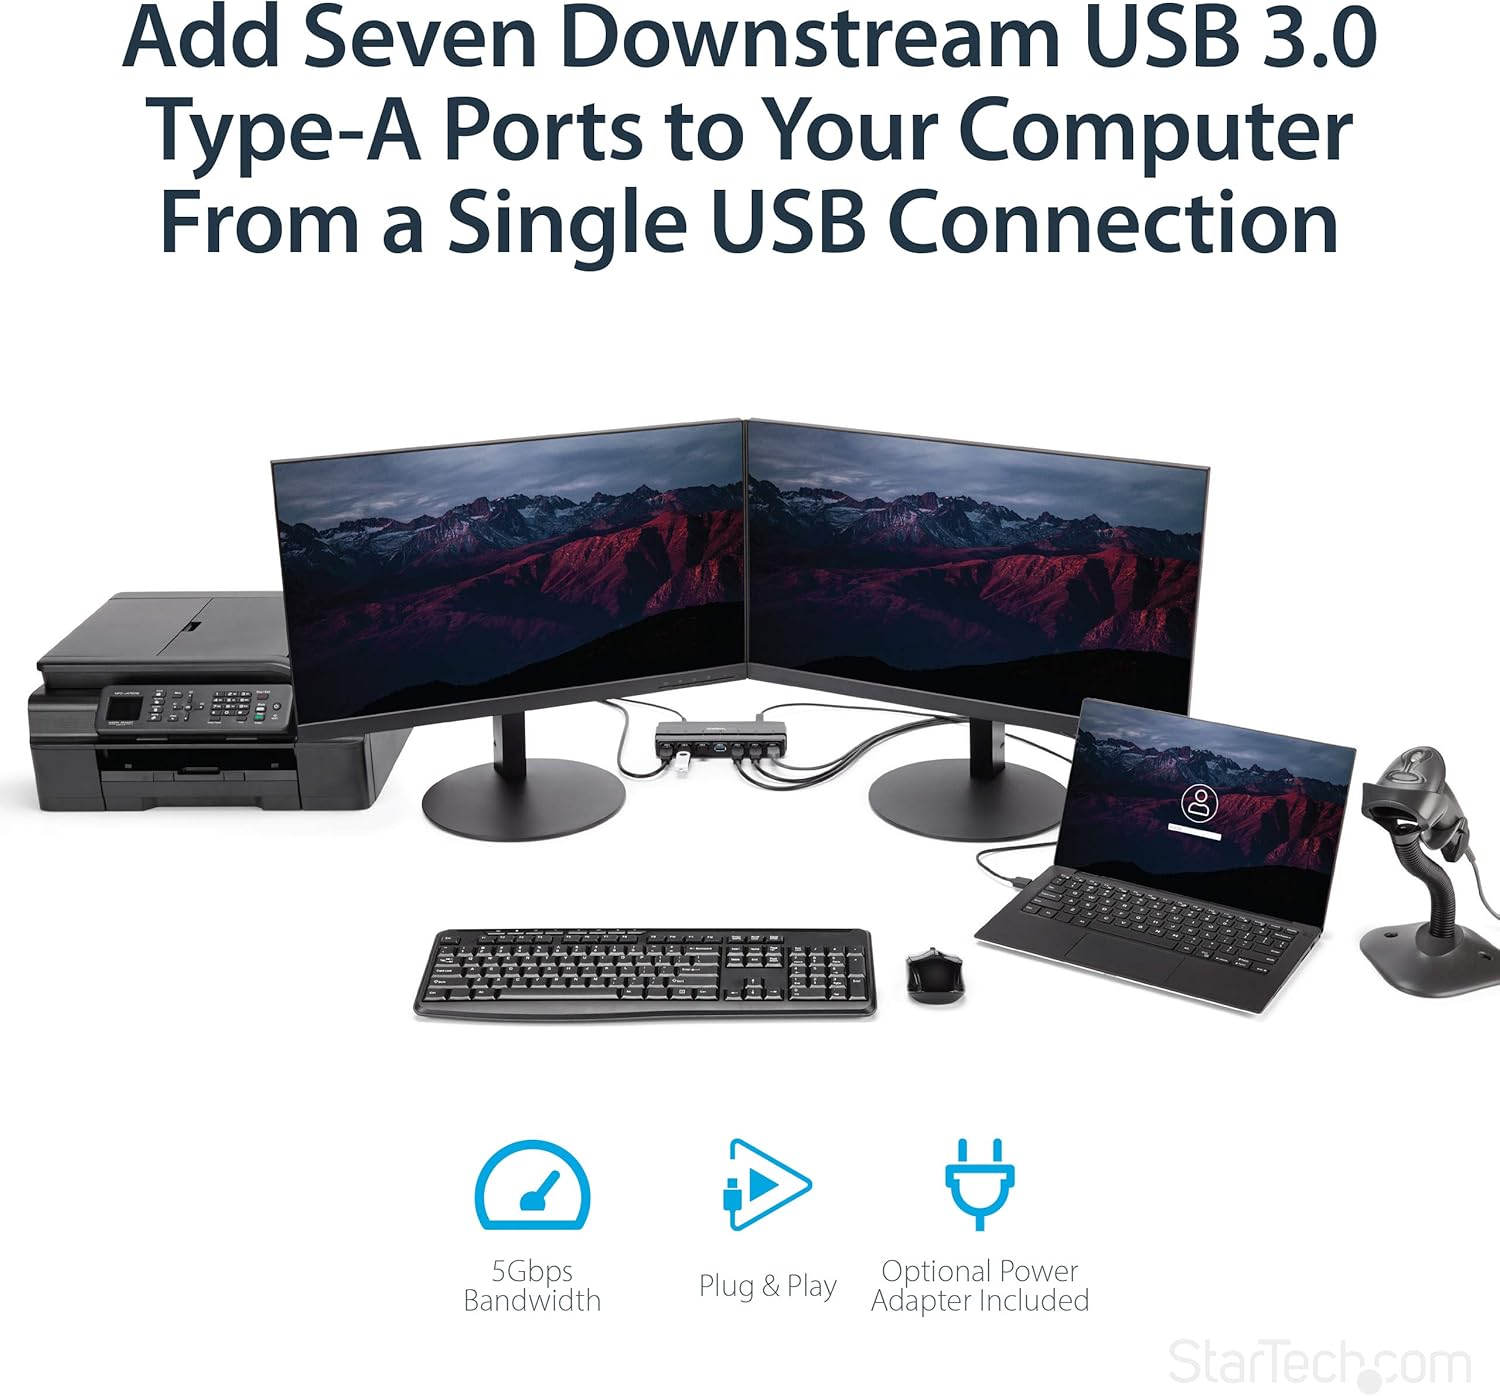
Image: The USB hub integrated into a desktop setup, connecting multiple peripherals like monitors, a printer, a laptop, and a barcode scanner, demonstrating its utility in expanding connectivity.

Foto: A azụ view of the USB hub showing cables connected to various devices, highlighting its design for easy port access and frequent use.

Foto: A n'elu-ala view of the USB hub, clearly showing the individual blue LED indicators above each USB port, which light up when a connection is active.
5. Nlekọta
To ensure the longevity and optimal performance of your StarTech.com USB 3.0 Hub, follow these simple maintenance guidelines:
- Nhicha: Use a soft, dry, lint-free cloth to clean the exterior of the hub. Avoid using abrasive cleaners, solvents, or strong chemicals, as these can damage the finish or internal components.
- Nchekwa: When not in use for extended periods, store the hub in a cool, dry place away from direct sunlight and extreme temperatures.
- Ijikwa: Handle the hub with care. Avoid dropping it or subjecting it to strong impacts, which could damage the internal circuitry or ports.
- Igwe ikuku: Ensure the hub is placed in an area with adequate ventilation to prevent overheating, especially when multiple high-power devices are connected.
6. Nchọpụta nsogbu
If you encounter issues with your StarTech.com USB 3.0 Hub, refer to the following common problems and solutions:
Device Not Recognized or Functioning
- Lelee njikọ: Ensure all cables (USB 3.0 cable to computer, power adapter to hub and wall outlet) are securely connected.
- Ịnye ọkụ: If connecting high-power devices, ensure the external power adapter is connected and functioning. Some devices require more power than can be supplied by bus power alone.
- Try Another Port: Test the device in a different port on the hub, or directly connect it to a USB port on your computer to rule out a device-specific issue.
- Malitegharịa kọmputa: Sometimes, a simple computer restart can resolve recognition issues.
- Check Device Manager (Windows) / System Information (Mac): Verify that the USB hub and connected devices are listed without errors. Update or reinstall USB drivers if necessary (though typically not required for this hub).
Ọsọ mbufe data dị nwayọ
- Njikọ USB 3.0: Ensure the hub is connected to a USB 3.0 port on your computer. If connected to a USB 2.0 port, speeds will be limited to USB 2.0 specifications.
- Ndakọrịta ngwaọrụ: Verify that the connected device itself supports USB 3.0 speeds.
- Ogo USB: Use the provided high-quality USB 3.0 cable. Low-quality or excessively long cables can affect performance.
- Ịnye ọkụ: Ensure the hub is adequately powered, especially when multiple devices are transferring data simultaneously.
Maka enyemaka ọzọ, biko rụtụ aka na onye ọrụ gọọmentị Ntuziaka onye ọrụ (PDF) or visit the StarTech.com support websaịtị.
7. Nkọwapụta
| Njirimara | Nkọwapụta |
|---|---|
| Ọnụọgụ nke ọdụ ụgbọ mmiri USB 3.0 | 7 |
| Ụdị | StarTech |
| Usoro | 7 Port SuperSpeed USB 3.0 Hub,Desktop USB Hub with Power Adapter,Black |
| Nọmba Nlereanya ihe | ST7300USB3B |
| Ngwaike Platform | Kọmputa; Mac |
| Sistemụ nrụọrụ | OS Onwe ha |
| Ibu Ibu | 5.2 ounces |
| Akụkụ ngwaahịa (LxWxH) | 8.27 x 2.8 x 0.9 sentimita asatọ |
| Agba | Nwa |
| Isi Iyi Ike | Ihe nkwụnye AC gụnyere |
| Onye nrụpụta | StarTech.com |
| Ụbọchị mbụ dị | Ọnwa Isii 16, 2014 |
| Ngwaọrụ Akụrụngwa | USB 3.0 |
| Njirimara Pụrụ Iche | Kwadoro |
| Ngwa dakọtara | Laptọọpụ, kọmpụta |
8. Akwụkwọ ikike na nkwado
StarTech.com products are backed by a comprehensive warranty. For detailed warranty information, technical support, and additional resources, please visit the official StarTech.com websaịtị ma ọ bụ rụtụ aka na akwụkwọ agụnyere.
- Ntuziaka onye ọrụ: A detailed User Guide in PDF format is available for download: Ntuziaka onye ọrụ (PDF)
- StarTech.com Store: For product information, support, and other products, visit the StarTech.com Store on Amazon.
- Atụmatụ nchebe: Extended protection plans may be available for purchase to cover your device beyond the standard warranty period.


