1. Okwu mmalite
This instruction manual provides essential information for the safe and effective use of the Gewiss 6.3 x 32 mm 4A 250V Fuse (Model GW20922). This fuse is designed to protect electrical circuits from overcurrent conditions, preventing damage to equipment and reducing fire hazards. Please read this manual thoroughly before installation and use.
2. Ozi nchekwa
Ịdọ aka ná ntị: Electrical work should only be performed by qualified personnel. Failure to follow these safety instructions may result in electric shock, fire, or serious injury.
- Always disconnect power to the circuit before installing, inspecting, or replacing fuses.
- Ensure the replacement fuse matches the original fuse's specifications (current rating, voltage rating, and dimensions). Using an incorrect fuse can lead to inadequate protection or circuit damage.
- Agafela ma ọ bụ tamper with fuses.
- Wear appropriate personal protective equipment (PPE), such as insulated gloves and safety glasses, when working with electrical circuits.
- Keep fuses away from moisture and extreme temperatures.
3. Ngwaahịa gafereview
The Gewiss 6.3 x 32 mm 4A 250V Fuse is a cylindrical glass-tube fuse with metal end caps. It is designed for general-purpose overcurrent protection in various electrical and electronic applications.
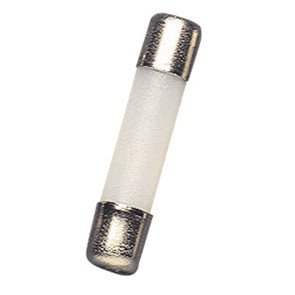
Foto 1: A single Gewiss 6.3 x 32 mm 4A 250V glass-tube fuse. This image shows the transparent glass body and the metallic end caps, which are typical for this type of electrical protection component.
Akụkụ ndị bụ isi:
- Akụkụ: 6.3 mm diameter x 32 mm length
- Ogo dị ugbu a: 4 Amperes (A)
- Voltage Rating: 250 Volts (V) AC
- Ụdị: Igwe tube fuse
- Ọrụ: Nchekwa karịrị akarị
4. Ntọala na nwụnye
Fuses are typically installed in fuse holders or clips within an electrical circuit. The installation process involves replacing an existing fuse or inserting a new one into a designated slot.
Nzọụkwụ nwụnye:
- Kwụpụ ike: Before beginning, ensure that the power supply to the circuit where the fuse will be installed or replaced is completely disconnected. Verify with a voltagọ bụ onye nyocha.
- Locate Fuse Holder: Identify the fuse holder or clips in your electrical device or panel.
- Wepụ Fuse Ochie (ọ bụrụ na ọdabara): If replacing a blown fuse, carefully remove the old fuse from its holder. Use a fuse puller tool if necessary to avoid direct contact and ensure safety.
- Tinye Fuse ọhụrụ: Gently insert the new Gewiss 6.3 x 32 mm 4A 250V Fuse into the fuse holder. Ensure it is seated firmly and correctly in the clips. Do not force the fuse.
- Weghachi ike: Once the fuse is securely in place, restore power to the circuit.
Note: Always confirm that the new fuse's specifications match the circuit's requirements.
5. Ụkpụrụ Ọrụ
The Gewiss fuse operates as a sacrificial device designed to protect an electrical circuit from overcurrent. When the current flowing through the fuse exceeds its rated amperage (4A) for a specified duration, the metallic filament inside the glass tube melts, breaking the circuit. This open circuit condition prevents excessive current from reaching and damaging sensitive components or causing overheating and potential fire hazards.
Once a fuse blows, it must be replaced. It is not resettable.
6. Nlekọta
Fuses themselves require no maintenance. Their function is to fail safely when an overcurrent condition occurs. The primary maintenance task related to fuses is their inspection and replacement.
Fuse Inspection and Replacement:
- If a circuit stops functioning, a blown fuse is a common cause.
- Nlele anya: After disconnecting power, remove the fuse and visually inspect the filament inside the glass tube. A blown fuse will typically show a broken or charred filament.
- Nnwale na-aga n'ihu: For fuses where the filament is not clearly visible, use a multimeter to check for continuity. A good fuse will show continuity (a very low resistance reading), while a blown fuse will show an open circuit (infinite resistance).
- Ndochi: Always replace a blown fuse with a new fuse of the exact same type, current rating, and voltage rating. Refer to Section 4 for installation steps.
7. Nchọpụta nsogbu
The primary issue related to a fuse is when it blows. If a fuse blows, it indicates an underlying problem in the electrical circuit it protects.
What to do if a fuse blows:
- Kwụpụ ike: Kwụpụ ọkụ eletrik ozugbo na sekit ahụ metụtara.
- Chọpụta ihe kpatara ya: A fuse blows due to an overcurrent. This can be caused by:
- Circuit dị mkpirikpi: A direct connection between live and neutral/ground wires.
- Ibu ibu: Too many devices drawing power from the same circuit.
- Faulty Appliance: A malfunctioning device connected to the circuit.
- Dochie Fuse: Once the cause is identified and resolved, replace the blown fuse with a new one of identical specifications (refer to Section 4).
- Nwale sekit: Restore power and carefully test the circuit to ensure proper operation and that the underlying issue has been resolved. If the new fuse blows again, there is still an unresolved problem in the circuit, and further investigation by a qualified electrician is recommended.
8. Nkọwapụta
| Njirimara | Uru |
|---|---|
| Ụdị | Gewiss |
| Nọmba nlereanya | GW20922 |
| Ogo dị ugbu a | 4 Ampere |
| Voltage Ntụle | 250 volts AC |
| Akụkụ | 6.3 mm x 32 mm |
| Isi iyi ike | AC |
| ASIN | B008GL6F5Y |
| GTIN | 08011564338159 |
| Mbụ Dị | Ọnwa Abụọ 12, 2020 |
9. Akwụkwọ ikike na nkwado
As a consumable electrical protection component, fuses typically do not come with a specific warranty beyond being free from manufacturing defects upon purchase. For specific warranty information or technical support regarding Gewiss products, please refer to the official Gewiss websaịtị ma ọ bụ kpọtụrụ ndị ahịa ha ozugbo.
For general electrical safety and installation advice, consult a qualified electrician.


