
1. Okwu mmalite
This manual provides essential information for the safe and effective operation, setup, and maintenance of your CREWORKS 9" x 30" Metal Lathe, Model MLM-CT-2275A. Please read this manual thoroughly before operating the machine to ensure proper usage and to prevent injury or damage.
The CREWORKS 9" x 30" Metal Lathe is designed for precision metalworking tasks including turning, threading, and drilling. Its robust construction and variable speed control make it suitable for a range of materials and applications.
2. Ntuziaka nchekwa
ỊDỌ AKA NA NTỊ: Ọ bụrụ na ịgbaso ntuziaka nchekwa ndị a nwere ike ibute nnukwu mmerụ ahụ ma ọ bụ ọnwụ.
- Ngwa nchekwa nkeonwe (PPE): Always wear safety glasses or a face shield, hearing protection, and appropriate work clothing. Do not wear loose clothing, gloves, or jewelry that can get caught in moving parts.
- Mpaghara ọrụ: Keep your work area clean, well-lit, and free from clutter. Ensure adequate space around the lathe for safe operation.
- Ọnọdụ igwe: Before each use, inspect the lathe for any damage, loose parts, or malfunctions. Do not operate a damaged machine.
- Njikọ ike: Ensure the lathe is properly grounded and connected to a suitable power supply. Disconnect power before performing any maintenance, adjustments, or when changing accessories.
- Nchebe nke arụ ọrụ: Mgbe niile hụ na workpiece na-enweghị nchebe clamped in the chuck or between centers. An improperly secured workpiece can become a dangerous projectile.
- Ngwá ọrụ: Use only sharp, correctly ground cutting tools. Ensure tools are properly installed and tightened in the tool post.
- Mwepụ mgbawa: Never remove chips or swarf with your bare hands while the machine is running. Use a brush or hook.
- Nlekọta: Never leave the machine running unattended. Keep children and unauthorized personnel away from the operating area.
- Nkwụsị ihe mberede: Mara onwe gị ebe na ọrụ nke bọtịnụ nkwụsị ihe mberede.
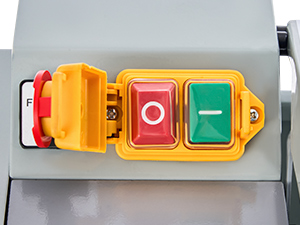
Foto 2.1: Emergency Stop Button. Press this button to immediately halt all machine operations in an emergency.
3. Ngwa ngwaahịa na eserese
Understanding the various components of your metal lathe is crucial for safe and effective operation. Refer to the diagram below for an overview of the main parts.
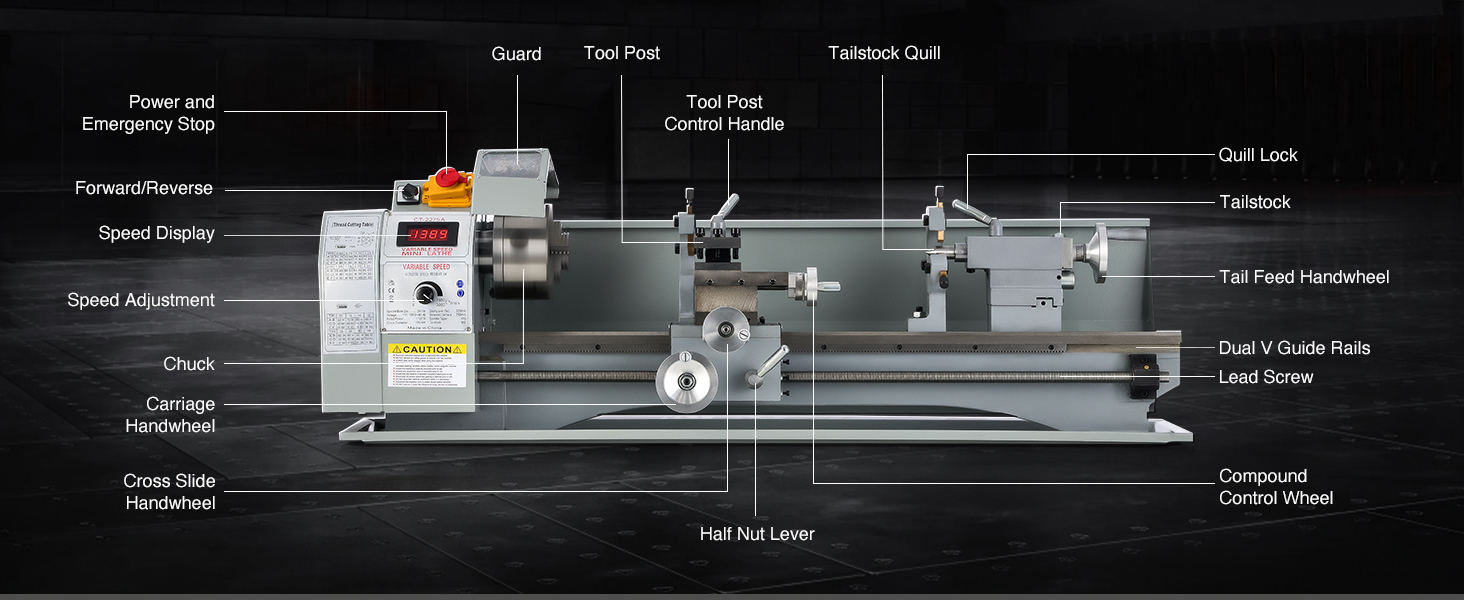
Foto 3.1: Main components of the CREWORKS 9" x 30" Metal Lathe. Key parts include the headstock, chuck, tool post, carriage, cross slide, tailstock, and lead screw.
Ngwa 3.1 igodo
- Isi ihe: Houses the main spindle, motor, and gear train.
- 3-Jaw Chuck: Used to hold cylindrical or hexagonal workpieces. The 5-inch 3-jaw chuck provides secure clamping.
- Tool Post: Holds the cutting tools. This model features a 4-way tool post.
- Ibu: Moves along the bed, carrying the cross slide and tool post. Controlled by the carriage handwheel.
- Cross Slide: Moves perpendicular to the bed, allowing for depth of cut adjustments. Controlled by the cross slide handwheel.
- Compound Rest: Mounted on the cross slide, it can be swiveled to an angle for taper turning or precise tool positioning. Controlled by the compound control wheel.
- Ọdụdọ: Supports the far end of long workpieces or holds drilling/reaming tools. Features a quill and tail feed handwheel.
- akwa: The main frame of the lathe, providing a stable base for the carriage and tailstock. Features dual V-shaped guide rails for smooth movement.
- Digital Speed Display: Provides real-time monitoring of the spindle speed.
- Njikwa ọsọ mgbanwe mgbanwe: Allows stepless adjustment of the spindle rotational speed.
- Metal Gear Set: Durable gears for efficient power transmission.

Foto 3.2: The adaptable 5-inch 3-jaw chuck, capable of holding various workpiece shapes and sizes. Internal jaws clamp from 0.1-1.6 inches (2.5-40 mm) and 1.5-5 inches (38-125 mm). External jaws clamp from 1.5-4.3 inches (38-110 mm).
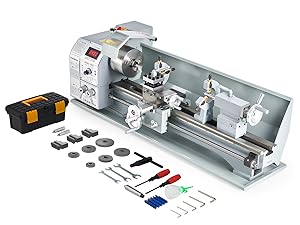
Foto 3.3: The 4-way tool post allows for quick changes between different cutting tools.

Foto 3.4: The tailstock quill, used for supporting workpieces or holding drilling tools, with clear measurement markings.
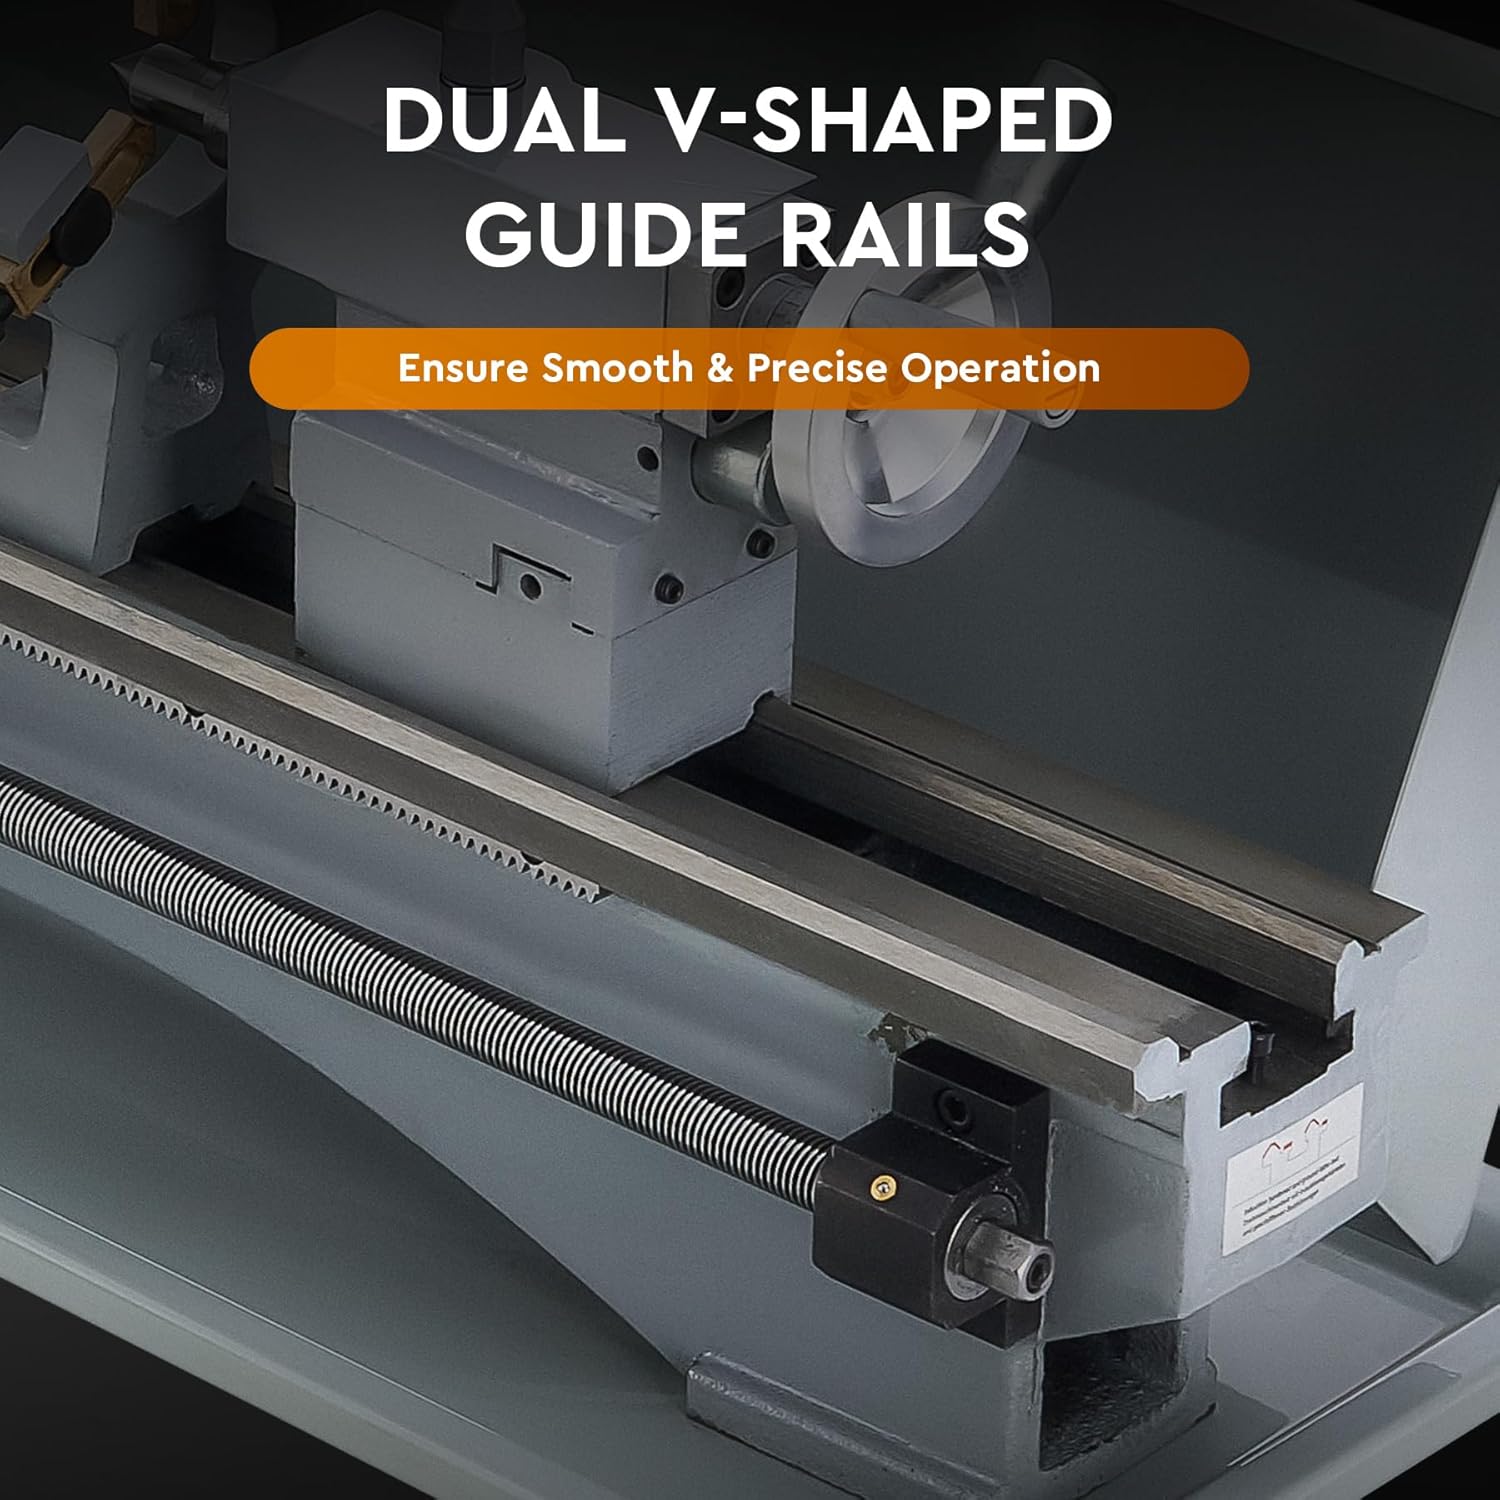
Foto 3.5: Dual V-shaped guide rails ensure precise and stable movement of the carriage and tailstock.

Foto 3.6: The digital display for monitoring and adjusting the spindle speed up to 3000 rpm.

Foto 3.7: The robust metal gear set ensures wear-resistant and efficient power transmission.
4. Ntọala na nwụnye
4.1 Mwepu na nyocha
- Carefully remove the lathe from its packaging.
- Inspect the machine for any signs of shipping damage. Report any damage to the carrier immediately.
- Verify that all components and accessories listed in the packing list are present.
4.2 Ịwụnye Lathe ahụ
The lathe should be securely mounted on a sturdy workbench or stand capable of supporting its weight (approximately 165 lbs / 75 kg) and resisting vibration during operation.
- Họrọ ebe nwere ample space for operation and maintenance, good lighting, and proper ventilation.
- Position the lathe on the workbench.
- Secure the lathe using appropriate bolts and nuts through the mounting holes in the base. Ensure it is level and stable.
4.3 Njikọ eletrik
Ensure the power supply matches the requirements specified on the machine's nameplate. The lathe requires a grounded electrical outlet.
- Jikọọ eriri ọkụ na oghere eletrik gbadoro ụkwụ.
- Do not use extension cords unless absolutely necessary, and ensure they are rated for the machine's power requirements.
5. Ntuziaka ọrụ
Before operating, ensure you have read and understood all safety instructions.
5.1 Usoro Ọrụ Dị Mkpa
- Ike Na: Turn on the main power switch. The digital display should illuminate.
- Workpiece Mounting:
- Open the chuck jaws using the chuck key.
- Insert the workpiece and tighten the jaws securely. Ensure the workpiece is centered and runs true.
- Remove the chuck key immediately after tightening.
- Nwụnye akụrụngwa:
- Select the appropriate cutting tool for your operation.
- Mount the tool securely in the tool post, ensuring the cutting edge is at the correct height (on center with the workpiece).
- Tighten the tool post locking screws.
- Ndozi ọsọ ọsọ: Use the variable speed control knob to set the desired spindle RPM. Monitor the speed on the digital display. Start with lower speeds for larger diameters or harder materials, and gradually increase as needed.
- Initiate Spindle Rotation: Press the green start button. The spindle will begin to rotate.
- Ọrụ ịkpụ:
- Advance the cutting tool slowly towards the workpiece using the cross slide handwheel.
- Engage the carriage handwheel or power feed for longitudinal movement.
- Apply cutting fluid as necessary.
- Kwụsị ọrụ: Press the red stop button or the emergency stop button to halt the spindle.
- Workpiece Removal: Once the spindle has completely stopped, loosen the chuck jaws and remove the workpiece.
5.2 Specific Operations
The CREWORKS Metal Lathe is capable of various operations, including:

Foto 5.1: Examples of applications for the 9" x 30" Mini Metal Lathe, including turning, threading, and drilling.
- Na-atụgharị: Reducing the diameter of a workpiece. Adjust the cross slide for depth of cut and the carriage for longitudinal feed.
- Na-eche ihu: Creating a flat surface on the end of a workpiece. Use the cross slide to feed the tool across the face.
- Ịkụ ala: Creating holes in the workpiece. Mount a drill chuck in the tailstock and feed it into the rotating workpiece.
- Ịgụ: Cutting external or internal threads. This requires precise gear settings (refer to the threading chart on the machine or in a detailed threading guide) and careful engagement of the half-nut lever.
6. Nlekọta
Nlekọta anya mgbe niile na-eme ka ogologo ndụ na ịrụ ọrụ kachasị mma nke lathe gị.
6.1 Nhicha
- After each use, clean all chips and swarf from the machine bed, carriage, and other surfaces. Use a brush or shop vacuum.
- Wipe down all exposed metal surfaces with a clean cloth to prevent rust.
6.2 mmanu mmanu
- Regularly lubricate the lead screw, guide rails, and other moving parts with appropriate machine oil.
- Check and replenish gearbox oil if applicable (refer to specific instructions on the machine for oil type and level).
6.3 Adjustments and Inspections
- Periodically check the tightness of all fasteners.
- Inspect drive belts for wear and tension.
- Ensure the chuck jaws operate smoothly and are free from damage.
- Verify that the tailstock is aligned correctly.
7. Nchọpụta nsogbu
This section addresses common issues you might encounter with your lathe.
| Nsogbu | Ihe nwere ike ime | Ngwọta |
|---|---|---|
| Lathe anaghị amalite | No power supply; Emergency stop engaged; Overload protection tripped. | Check power connection; Release emergency stop; Reset circuit breaker. |
| Spindle speed inconsistent | Loose drive belt; Motor issue; Control board malfunction. | Check and adjust belt tension; Contact customer support if motor or control board is suspected. |
| Workpiece not running true | Improperly clamped workpiece; Chuck jaws worn or damaged; Tailstock misalignment. | Re-clamp workpiece securely; Inspect and replace chuck jaws if necessary; Adjust tailstock alignment. |
| Oke ịma jijiji ma ọ bụ mkpọtụ | Loose mounting; Unbalanced workpiece; Worn bearings; Loose components. | Tighten mounting bolts; Balance workpiece; Inspect bearings; Check all fasteners. |
If you encounter problems not listed here or if solutions do not resolve the issue, please contact CREWORKS customer support.
8. Nkọwapụta
Detailed technical specifications for the CREWORKS 9" x 30" Metal Lathe (Model MLM-CT-2275A).

Foto 8.1: Visual representation of the lathe's dimensions and key specifications.
| Njirimara | Nkọwapụta |
|---|---|
| Nlereanya | MLM-CT-2275A |
| Ihe onwunwe | Cast Iron, Stainless Steel, ABS |
| Enyere ike | 1.5 HP (1100W) |
| Na-efegharị n'elu akwa | 8.7 inch (220 mm) |
| Anya n'etiti Centers | 29.5 inch (750 mm) |
| Spindle Bore | 1.5 inch (38 mm) |
| Chuck dayameta | 5 inch (125 mm) |
| Max. Spindle Speed | 3000 rpm |
| Spindle Taper | MT#5 |
| Tailstock Taper | MT#2 |
| Metric Thread Range | 0.5-2.5 mm |
| Inch Thread Range | 10–44 tpi |
| Akụkụ ngwaahịa (L x W x H) | 43.7 x 16.9 x 13.6 sentimita asatọ |
| Nha ịbụ | 165.3 lbs (75 n'arọ) |
9. Akwụkwọ ikike na nkwado ndị ahịa
For warranty information, technical assistance, or to order replacement parts, please contact CREWORKS customer support. Refer to your purchase documentation for specific warranty terms and contact details.
You can typically find support information on the official CREWORKS websaịtị ma ọ bụ site na onye na-ere ahịa gị.