
ESX VMX1000DAB
ESX Vision VMX1000DAB User Manual
Universal 1-DIN Multi-Angle Media Moniceiver with 10 Inch Touchscreen
Okwu mmalite
Thank you for choosing the ESX Vision VMX1000DAB Multi-Angle Media Moniceiver. This device is a universal 1-DIN car multimedia system featuring a 10-inch touchscreen display. It offers advanced connectivity options including wireless Apple CarPlay and Android Auto, DAB+ digital radio, Bluetooth hands-free calling and audio streaming, and a versatile media player. This manual provides essential information for the proper installation, operation, and maintenance of your VMX1000DAB unit.
Kedu ihe dị na Igbe ahụ
Carefully unpack your ESX Vision VMX1000DAB and ensure all items are present:
- VMX1000DAB Moniceiver Unit
- Nnata GPS
- DAB+ Window Adhesive Antenna
- Igwe okwu mpụga
- Mounting Hardware and Cables (ISO harness, USB cables, RCA cables)
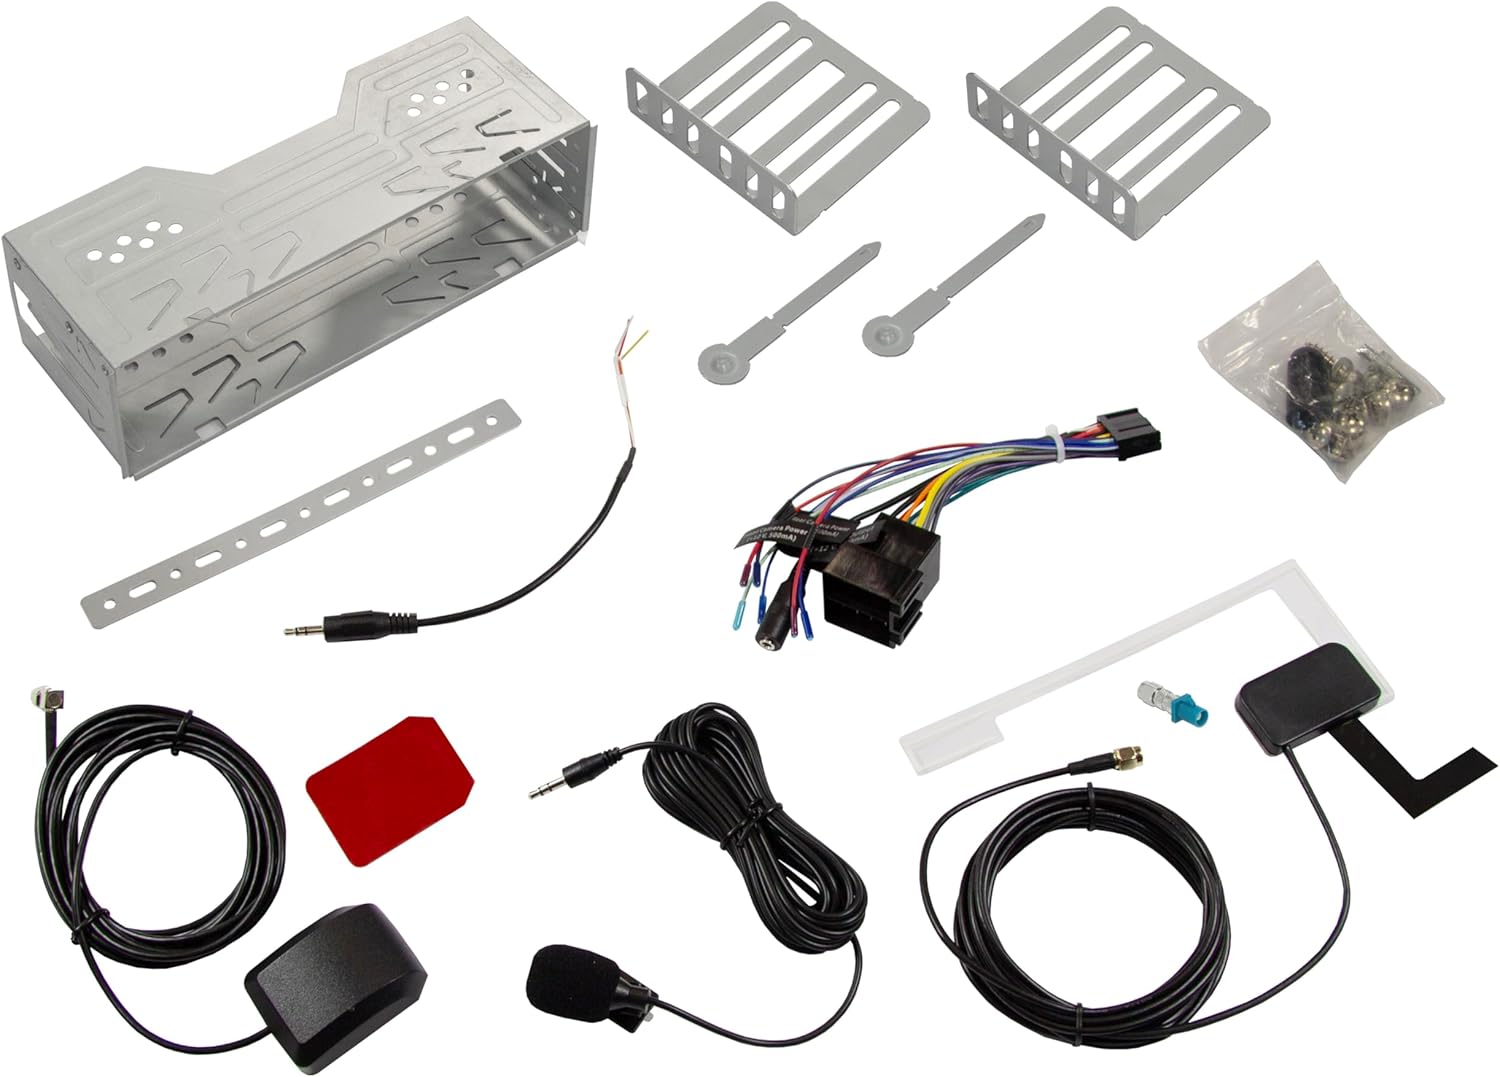
Image: All components included in the ESX Vision VMX1000DAB package.
Ntọala na nwụnye
The VMX1000DAB is designed for universal 1-DIN installation. Professional installation is recommended to ensure correct wiring and functionality.
1. Ịkwanye Unit
- Install the 1-DIN chassis into your vehicle's dashboard opening using the provided mounting cage and brackets.
- The 10-inch monitor is multi-angle adjustable and removable for anti-theft protection. To attach, slide the monitor onto the front of the main unit until it clicks securely into place. To remove, press the release button (if applicable) and slide it off.

Image: The VMX1000DAB unit with its detachable monitor.
2. Njikọ njikọ
Connect the wiring harness, antennas, and external devices to the rear of the moniceiver. Refer to the wiring diagram provided with your unit for specific connections.
- Ike/Ọkà Okwu: Connect the main ISO harness to your vehicle's wiring.
- Ọdụ ụgbọ mmiri USB-A: Two USB-A ports are available. One for media playback and charging (1.5A), and another specifically for Apple CarPlay/Android Auto and charging (1.5A).
- Mbupu RCA: Six 4V RCA preamplifier outputs (FL/FR/RL/RR/SUB1/SUB2) for connecting external ampndị na -enye ndụ.
- RCA AUX Inputs: Stereo audio (L/R) and video input for external sources.
- Ntinye igwefoto: Dedicated RCA inputs for front and rear cameras.
- Antenna GPS: Connect the GPS receiver for optimized navigation.
- DAB+ Antenna: Connect the included DAB+ window adhesive antenna for digital radio reception.
- Igwe okwu na mpụga: Plug in the external microphone for clear hands-free calls.
- Njikwa Wheel Steel: Connect to your vehicle's analog steering wheel controls (learnable function).

Image: Rear connections of the VMX1000DAB unit.
Ntuziaka ọrụ
The VMX1000DAB features a user-friendly interface controlled via its 10-inch touchscreen, a large volume knob, and four function keys.
1. Njikwa ntọala
- Gbanyụọ/ Gbanyụọ: Press and hold the power button (usually integrated with the volume knob).
- Olu: Rotate the large knob to adjust the volume.
- Igodo ọrụ: Use the dedicated function keys for quick access to common features.
- Ihuenyo mmetụ aka: Navigate menus and control functions by touching the display icons.

Image: VMX1000DAB Home Screen with various application icons.
2. Apple CarPlay & Android Auto
The VMX1000DAB supports both wireless and wired (via USB) Apple CarPlay and Android Auto. This allows you to mirror and control compatible smartphone apps directly from the 10-inch touchscreen.
- Njikọ ikuku: Enable Bluetooth and Wi-Fi on your smartphone and pair it with the VMX1000DAB. Follow the on-screen prompts to initiate CarPlay or Android Auto.
- Njikọ waya: Connect your smartphone to the dedicated USB-A port using a certified USB cable.
- Atụmatụ: Access navigation apps (e.g., Google Maps with Live Trading), music streaming services (e.g., Spotify), phone calls, messages, and other compatible applications.
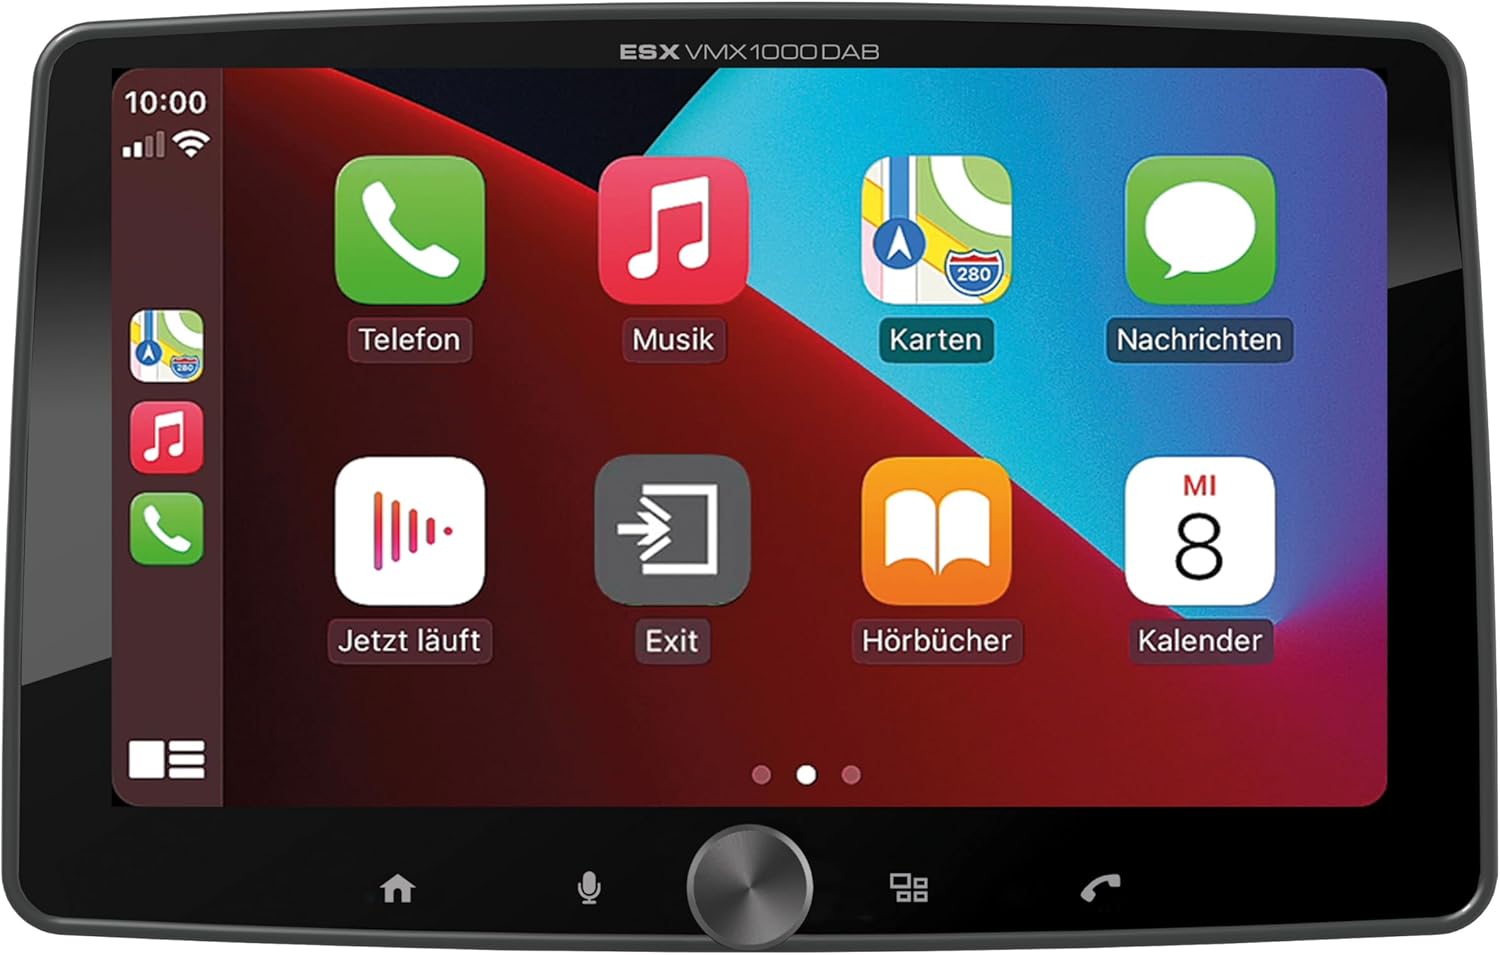
Image: Apple CarPlay interface on the VMX1000DAB.
3. Radio Functions
- DAB+ Redio Dijitalụ: Select the DAB+ source to enjoy high-quality digital radio. Ensure the DAB+ antenna is properly installed.
- Redio FM/AM: Tune into FM or AM stations. The RDS (Radio Data System) function provides station information and traffic announcements where available.
- Ntọala ọdụ ọdụ: Chekwaa ọdụ ọdụ ọkacha mmasị gị maka ịnweta ngwa ngwa.
4. Njikọ Bluetooth
- Na-ejikọta: Go to the Bluetooth menu on the moniceiver and your smartphone. Chọọ maka and select the VMX1000DAB to pair.
- Oku na-anaghị aka: Make and receive calls directly through the moniceiver using the external microphone and your car's speakers.
- Ngụgharị ọdịyo: Play music from your smartphone via Bluetooth audio streaming (A2DP).
5. Mgbasa ozi
The integrated media player supports various audio, video, and photo formats from USB storage devices.
- Ụdị dakọtara: AVI, FLV, MOV, MKV, WMV (video); WMA, MP3, FLAC (audio); JPEG, PNG, BMP (photo).
- USB playback: Insert a USB drive into the media USB-A port. The unit will automatically detect and allow you to browse and play media files.
6. Camera Inputs
Connect front and rear cameras to the dedicated RCA inputs for enhanced safety and parking assistance. The unit will automatically switch to the rear camera view when reverse gear is engaged (if properly wired).
7. Ntọala ụda
The VMX1000DAB features a 4 x 80 Watt max integrated amplifier. Access the equalizer (EQ) and sound settings to customize your audio experience. Future software updates (available from ESX homepage) will include advanced audio features such as variable high-pass/low-pass filters, time alignment for front, rear, and subwoofer, and dual HD camera input support.
Nlekọta
To ensure the longevity and optimal performance of your ESX Vision VMX1000DAB, follow these maintenance guidelines:
- Na-ehicha ihuenyo: Jiri akwa dị nro, nke na-enweghị lint, jiri nwayọ hichaa ihuenyo mmetụ ahụ. Maka isi ike smudges, ntakịrị dampen akwa na mmiri ma ọ bụ ihe na-echebe ihuenyo. Zere ihe na-emebi emebi ma ọ bụ kemịkalụ siri ike.
- Na-ehicha Ngalaba: Wipe the main unit and buttons with a dry, soft cloth. Do not allow liquids to enter the unit.
- Njikọ: Lelee njikọ eriri USB niile kwa oge iji hụ na echedoro ha na enweghị mmebi.
- Mmelite ngwanrọ: Check the official ESX homepage for available software updates to benefit from new features and improvements.
Nchọpụta nsogbu
If you encounter issues with your VMX1000DAB, refer to the following common troubleshooting steps:
- Enweghị ike: Check the power connections and the vehicle's fuse box. Ensure the unit is properly seated in its harness.
- Enweghị ụda: Verify speaker connections. Check volume levels and ensure the mute function is not active. Confirm that the correct audio source is selected.
- Okwu njikọ Bluetooth: Ensure Bluetooth is enabled on both the moniceiver and your smartphone. Delete previous pairings and attempt to re-pair. Try restarting both devices.
- CarPlay/Android Auto anaghị ejikọ: For wired connections, try a different USB cable or port. For wireless, ensure Wi-Fi is also enabled on your phone. Check for any software updates for your phone or the moniceiver.
- Nnabata redio adịghị mma: Check the antenna connection. For DAB+, ensure the adhesive antenna is correctly positioned and not obstructed.
- Ihuenyo mmetụ anaghị anabata: Try restarting the unit. If the issue persists, a factory reset might be necessary (refer to the on-screen settings for this option).
- Monitor Detachment: Ensure the monitor is fully inserted and clicked into place. If it detaches easily, inspect the locking mechanism for any damage.
If these steps do not resolve the issue, please contact customer support or a qualified technician.
Nkọwapụta
| Njirimara | Nkọwa |
|---|---|
| Ụdị | ESX |
| Nọmba nlereanya | VMX1000DAB |
| Teknụzụ Njikọta | AUX, Bluetooth, USB, Wi-Fi |
| Usoro njikwa | Touch, Mechanical Knob |
| Atụmatụ pụrụ iche | Apple CarPlay/Android Auto (Wireless & USB), Removable Monitor with CLICK System |
| Ngwa dakọtara | Smartphones |
| Ọnọdụ mmepụta ọdịyo | Stereo |
| Ndekọ vidiyo | AVI, FLV, MOV, MKV, WMV |
| Ụdị ọdịyo | WMA, MP3, FLAC |
| Ụdị onyonyo | JPEG, PNG, BMP |
| Ike mmepụta (RMS) | 80 Watts (per channel, max) |
| Mkpokọta Wattage | 320 watts (max) |
| Ọnụọgụ nke ọwa | 4 |
| Tupuampihe mmepụta ihe | 4V RCA (FL/FR/RL/RR/SUB1/SUB2) |
| Ntinye USB | USB Type A (with 1.5A charging) |
| Ihe ngwugwu | Moniceiver, GPS receiver, DAB+ window adhesive antenna |
Akwụkwọ ikike na nkwado
Ozi akwụkwọ ikike: Please refer to your purchase documentation, retailer, or the official ESX websaịtị maka usoro na ọnọdụ nkwa zuru ezu metụtara mpaghara gị.
Nkwado ndị ahịa: For technical assistance, troubleshooting beyond this manual, or inquiries regarding service, please contact your authorized ESX dealer or visit the official ESX homepage for support resources and contact information.
Mmelite ngwanrọ: New functions and software updates are periodically released and made available free of charge via the ESX homepage. It is recommended to check for updates to ensure your device has the latest features and performance enhancements.
Ask a question about this manual
Ask about setup, troubleshooting, compatibility, parts, safety, or missing instructions. Manuals+ will review the question and use this page’s manual context to help answer it.