1. Okwu mmalite
Thank you for choosing the DOVAMAN B120 Portable Bandsaw. This manual provides essential information for the safe and effective operation, maintenance, and troubleshooting of your new tool. Please read this manual thoroughly before initial use and keep it for future reference.
The DOVAMAN B120 is a versatile 10A corded bandsaw designed for cutting various materials including wood, plastic, and metal pipes. It features a 5-inch cutting capacity, 6-speed variable control, and an adjustable cutting angle from 0° to 45°. Its convertible base allows for both handheld and stable table saw operation.
2. Ntuziaka nchekwa
Na-ebute nchekwa ụzọ mgbe niile mgbe ị na-arụ ọrụ ike. Ọdịda ịgbaso ntuziaka ndị a nwere ike ibute nnukwu mmerụ ahụ ma ọ bụ mmebi ihe onwunwe.
- Ngwa nchekwa nkeonwe (PPE): Always wear safety glasses, hearing protection, and appropriate work gloves. Avoid loose clothing or jewelry that could get caught in moving parts.
- Mpaghara ọrụ: Ensure your work area is clean, well-lit, and free from clutter. Keep children and bystanders away from the operating area.
- Ihe eji arụ ọrụ echedoro: Mgbe niile clamp the workpiece firmly in the vise or secure it properly before cutting to prevent movement and kickback.
- Nchekwa agụba: Ensure the blade guard is properly in place and functioning before operating the saw.
- Isi mmalite ike: Connect the tool to a grounded power outlet. Do not modify the plug.
- Zere imebiga ihe ókè: Nọgide na-enwe ụkwụ kwesịrị ekwesị na nguzozi oge niile.
- Kpupu mgbe ejighi ya: Disconnect the saw from the power source before making adjustments, changing accessories, or storing the tool.
- Ngwa nyocha: Before each use, inspect the saw for any damage, loose parts, or worn blades. Do not operate a damaged tool.
- Ndakọrịta ihe: Use the correct blade type for the material being cut.
3. Ihe ngwugwu
Chọpụta na ihe niile dị mgbe ị na-ebupụ:
- 1 x DOVAMAN Portable Band Saw
- 1 x Band Saw Base
- 2 x Saw Blades
- 1 x S4 Hex Wrench
- 1 x S5 Socket Component
- Akwụkwọ ntuziaka onye ọrụ 1 x (akwụkwọ a)
4. Nhazi
4.1 Na-agbakwunye ntọala ahụ
The bandsaw can be used handheld or mounted to the included base for stationary operation. To attach the base:
- Align the bandsaw unit with the mounting points on the base.
- Secure the bandsaw to the base using the provided screws and tools. Ensure all connections are tight.
- The base includes a spring-loaded catch to hold the saw in an open position when not in use or for specific operations.

Image: The DOVAMAN B120 Portable Bandsaw shown with its base attached, ready for use. Two spare saw blades are visible next to the unit.
4.2 Ntinye na Nrụgide Agụba
Proper blade installation and tension are crucial for safe and effective cutting.
- Remove Guard & Loosen Tension: Use the S4 hex wrench to remove the blade guard and loosen the blade tension mechanism.
- Install Saw Band: Carefully place the new saw blade onto the wheels, ensuring the teeth are pointing in the correct cutting direction (refer to directional arrows on the saw).
- Tighten Band & Reinstall Guard: Apply appropriate tension to the blade using the tensioning knob, then reattach the blade guard securely.
- Test Start & Check: Briefly run the saw to ensure the blade tracks correctly and there are no unusual noises.

Image: A four-step visual guide demonstrating the process of changing the saw blade, including removing the guard, installing the new blade, tensioning, and reattaching the guard.
4.3 Na-edozi akụkụ ịkpụ
The saw's base allows for angle adjustments from 0° to 45° for miter cuts.
- Loosen the locking mechanism for the angle adjustment on the base.
- Pivot the saw to the desired angle, using the angle markings on the base as a guide.
- Tighten the locking mechanism securely to fix the angle.

Image: Comparison of the bandsaw set for a 0-degree straight cut and a 45-degree miter cut, illustrating the adjustable angle feature of the base.
5. Ntuziaka ọrụ
5.1 Mgbanwe Ọsọ na Mgbanye/Mgbanyụ Ike
- The saw features an On/Off switch and a release switch on the handle.
- Use the 6-speed adjustment dial to select the appropriate blade speed (0.4 to 2.6 m/s) for your material. Lower speeds are generally for harder materials, higher speeds for softer materials.
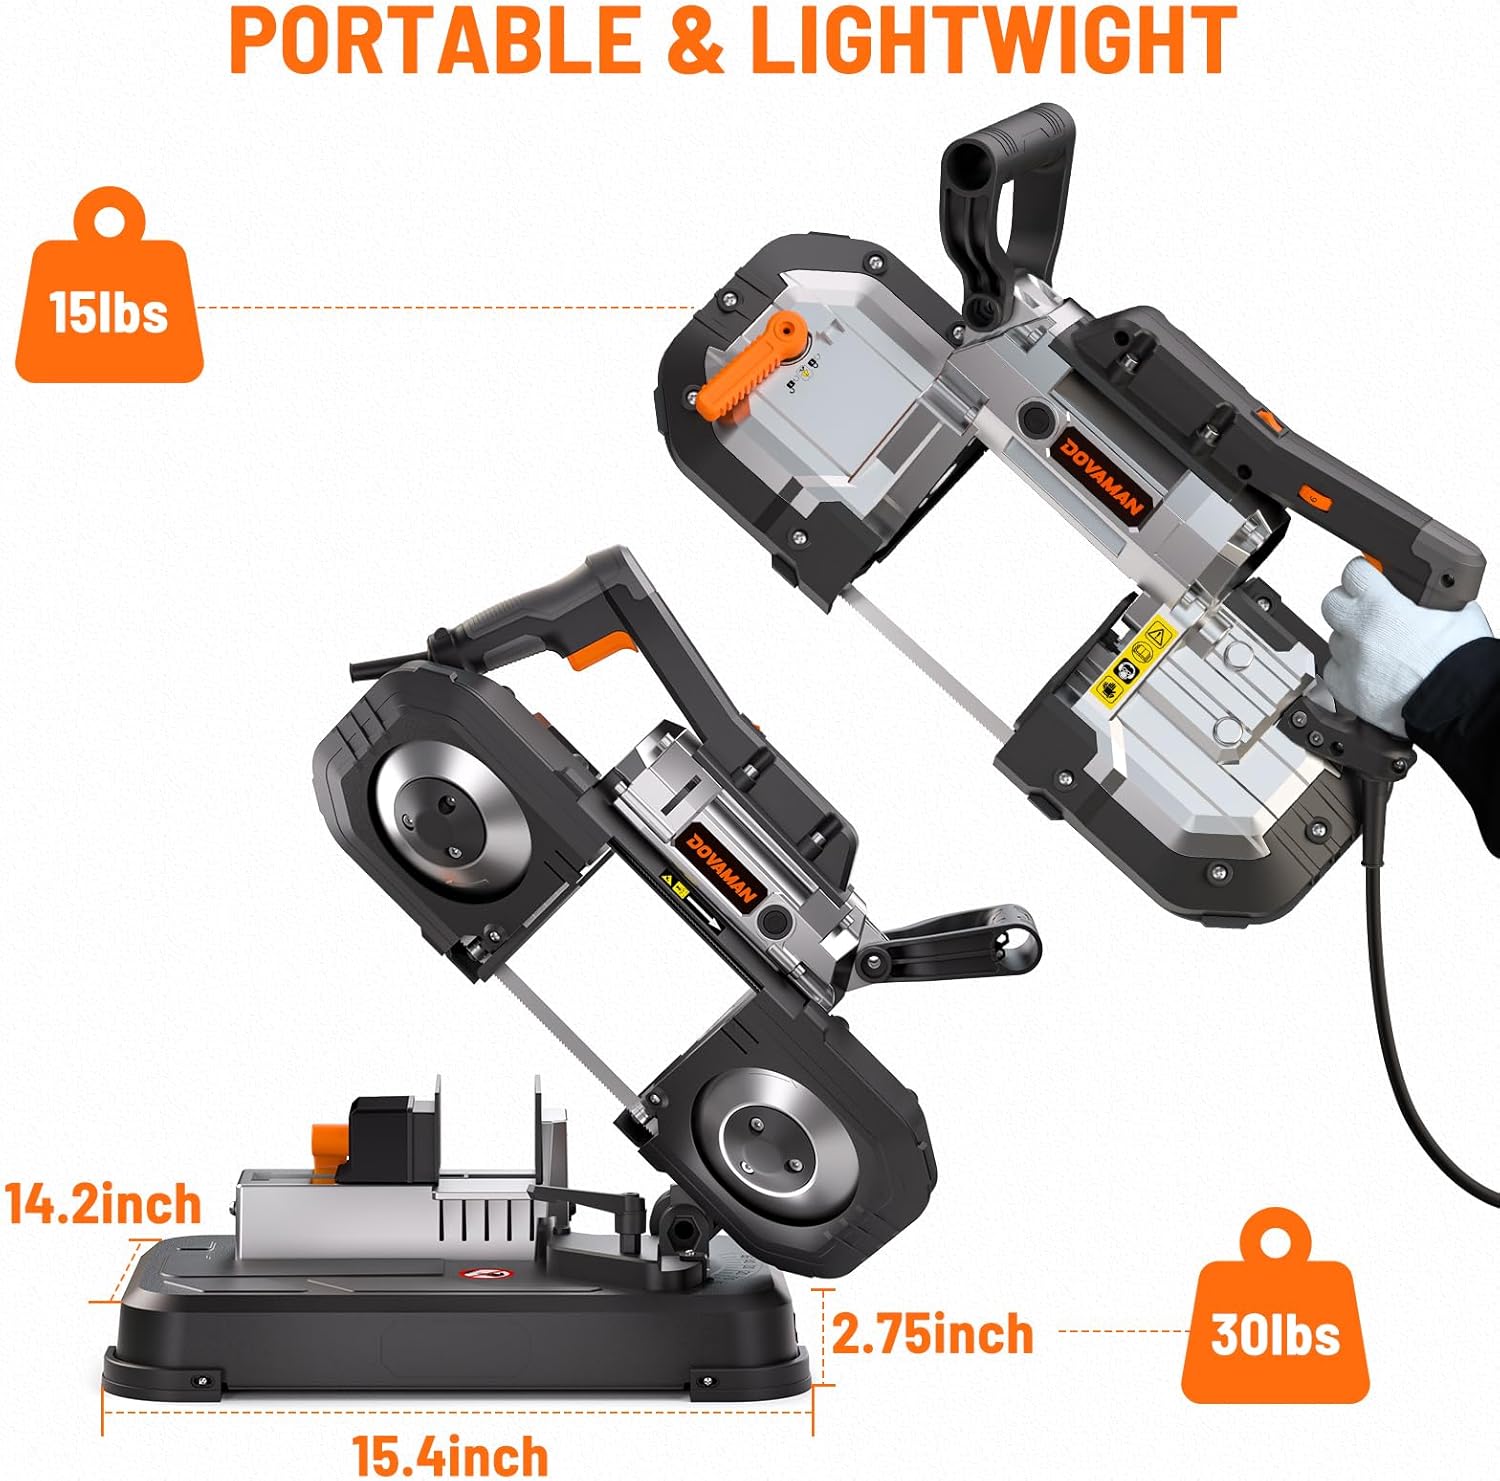
Image: A labeled diagram highlighting key components of the bandsaw, including the power controls and speed adjustment dial.

Image: A user adjusting the 6-speed dial on the bandsaw while cutting a PVC pipe, demonstrating the variable speed control.
5.2 Material Clamping na Ịcha
Always ensure the material is securely clamped before initiating a cut.
- Place the material to be cut into the vise.
- Adjust the moving clamping jaw to firmly hold the material against the fixed clampagba agba.
- Lower the saw slowly and steadily through the material. Avoid forcing the blade, as this can lead to premature blade wear or damage.
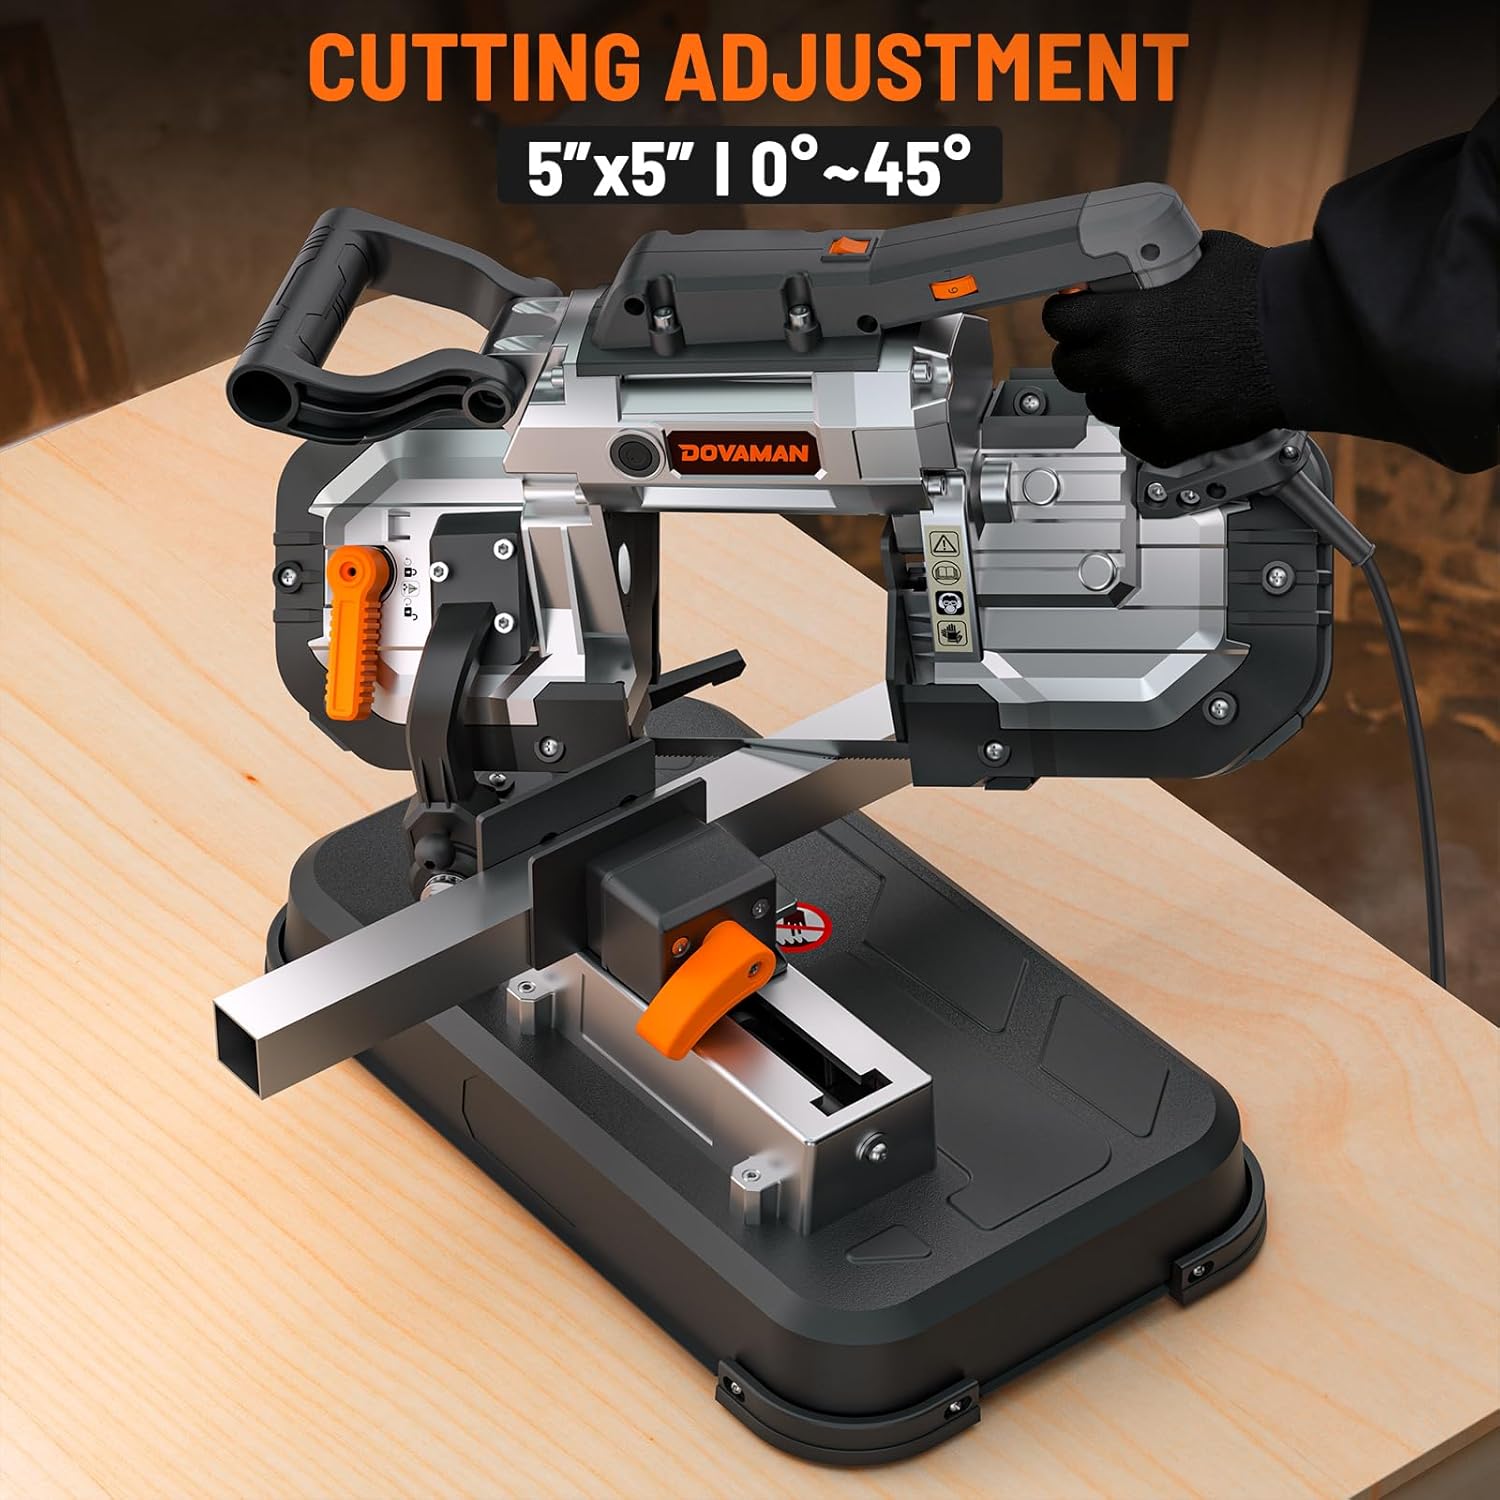
Image: The bandsaw set up for stationary cutting, with a metal workpiece secured in the vise, illustrating the cutting adjustment capabilities.
5.3 ọkụ ọkụ ọkụ
The integrated LED work light illuminates the cutting area for improved visibility. Activate it using the dedicated LED switch on the handle.

Image: The bandsaw in handheld operation, with its LED work light active, providing illumination for precise cutting of a metal workpiece.
5.4 Ihe Ndị Dị Mkpa
The DOVAMAN B120 is suitable for cutting a wide range of materials:
- Steel siri ike
- Metal (various forms like pipes, bars)
- PVC plastic
- Osisi

Image: A visual representation of various materials the bandsaw can cut, including solid steel, metal pipes, PVC plastic, and wood.
6. Nlekọta
Regular maintenance ensures the longevity and optimal performance of your bandsaw.
- Nhicha: After each use, unplug the saw and use a brush or compressed air to remove sawdust and metal shavings from the blade, wheels, and motor vents.
- Nyocha agụba: Regularly inspect the blade for dullness, damage, or missing teeth. Replace worn blades promptly.
- Blade Tension: Check blade tension periodically and adjust as needed to prevent blade slippage or breakage.
- mmanu mmanu: Refer to the detailed product diagram for any specific lubrication points, if applicable.
- Nchekwa: Store the bandsaw in a dry, secure location out of reach of children.
7. Nchọpụta nsogbu
This section addresses common issues you might encounter with your bandsaw.
- Saw anaghị amalite:
- Lelee ma ọ bụrụ na etinyere eriri ọkụ na ebe nchekwa na-arụ ọrụ.
- Ensure the On/Off switch is engaged and the safety release switch is pressed.
- Gbaa mbọ hụ na enweghị ike gịtage ma ọ bụ ihe mgbawa sekit.
- Agụba anaghị egbutu nke ọma ma ọ bụ kee ya:
- The blade may be dull or damaged; replace it if necessary.
- Blade tension might be incorrect; adjust according to Section 4.2.
- Ensure the correct blade type is used for the material.
- Reduce feed pressure; do not force the cut.
- Oke ịma jijiji ma ọ bụ mkpọtụ:
- Check blade tension and ensure it is properly installed.
- Lelee agụba ahụ maka mmebi ma ọ bụ mgbagọ.
- Ensure all mounting screws for the base are tight.
- Mbelata na-ezighi ezi:
- Verify the material is securely clamped.
- Check the angle adjustment settings.
- Ensure the blade is not dull or damaged.
Ọ bụrụ na ị zutere nsogbu anaghị ekpuchi ebe a, biko kpọtụrụ nkwado ndị ahịa.
8. Nkọwapụta
| Njirimara | Nkọwapụta |
|---|---|
| Ụdị | DOVAMAN |
| Nọmba nlereanya | B120 |
| Isi Iyi Ike | Igwe ọkụ eletrik |
| moto Ampoge | 10A |
| Wattage | 1200 watt |
| Ike ịkpụ | 5 inch |
| Ihe agụba | M24 |
| Ntọala ọsọ mgbanwe | 6-Speed (0.4 to 2.6 m/s) |
| Adjustable Cutting Angle | 0°-45° |
| Akụkụ ngwaahịa | 16"L x 15"W x 23"H |
| Ibu Ibu | 34 pound |
| Njirimara Pụrụ Iche | Bevel Capability, LED Work Light |
| UPC | 734376720186 |
9. Akwụkwọ ikike na nkwado
DOVAMAN is committed to providing quality products and customer satisfaction. For any questions, concerns, or technical assistance, please contact our customer service team.
- Ndị ọrụ nlekọta ndị ahịa: We offer 24/7 online customer service with quick-response support. Refer to your purchase documentation for contact details.
- Ozi akwụkwọ ikike: Specific warranty details are provided with your product purchase. Please retain your proof of purchase for warranty claims.