
1. Okwu mmalite
Daalụ maka ịzụrụasing the Datewink ZQ02375 Mini Moving Head Light. This compact and versatile stage light is designed to create dynamic lighting effects for various events, including DJ parties, home gatherings, and small venues. Featuring RGBW LEDs, a green laser, and multiple control modes, this fixture offers both performance and ease of use. Please read this manual thoroughly before operation to ensure safe and optimal performance.
2. Ntuziaka nchekwa
- Nchekwa Eletriki: Always connect the fixture to a grounded power outlet. Ensure the voltage matches the product's specifications (AC100V-240V 50/60Hz). Disconnect power before cleaning or servicing.
- Nkwanye: Install the fixture in a well-ventilated area, away from heat sources and flammable materials. Maintain a minimum distance of 0.20m from flammable surfaces. The maximum temperature of the external surface is 120°C.
- Ijikwa: Avoid direct eye exposure to the light source. Do not open the housing; there are no user-serviceable parts inside.
- gburugburu: This product is designed for indoor use only (IP20 protection level). Do not expose it to rain, moisture, or extreme temperatures outside the -20°C to 40°C working environment.
- Ịkwanye: When mounting overhead, always use a safety cable. Ensure the mounting surface or structure can support the weight of the fixture.
3. Ihe ngwugwu
Nyochaa na etinyere ihe niile edepụtara n'okpuru na ngwugwu gị:
- Mini Moving Head Light (1 unit)
- Eriri ike (otu unit)
- Light Hook Bracket (1 unit)
- Mounting Screws (2 units)
- Njikwa anya (otu nkeji)
- Ntuziaka Ntuziaka (otu nkeji)

Figure 3.1: Contents included in the Datewink ZQ02375 package.
4. Ngwaahịa gafereview
Akụkụ ndị bụ isi:
- Ultra-Compact & Lightweight Design: Easy to transport and install in various small venues.
- Stunning Multi-Effect Lighting: Equipped with 3 x 10W RGBW LEDs, 12 x 0.2W RGB LEDs, and a green laser for vibrant beams, starry sky effects, and colored halos.
- High-Performance & Energy-Efficient Optics: Acrylic lenses and premium LEDs ensure stable, vivid light output with excellent color rendition. Optimal projection distance: 3-5 meters.
- Nhọrọ Njikwa Dị Iche Iche: Supports Auto-run, Sound activation, Master-slave, DMX512, and Remote Control modes.
- Ihe owuwu na-adịgide adịgide: Crafted from robust ABS material for longevity.
Ngwa:
The Datewink ZQ02375 Mini Moving Head Light features a robust design with intuitive controls and versatile connectivity.

Foto 4.1: N'ihu view of the Datewink ZQ02375 Mini Moving Head Light.

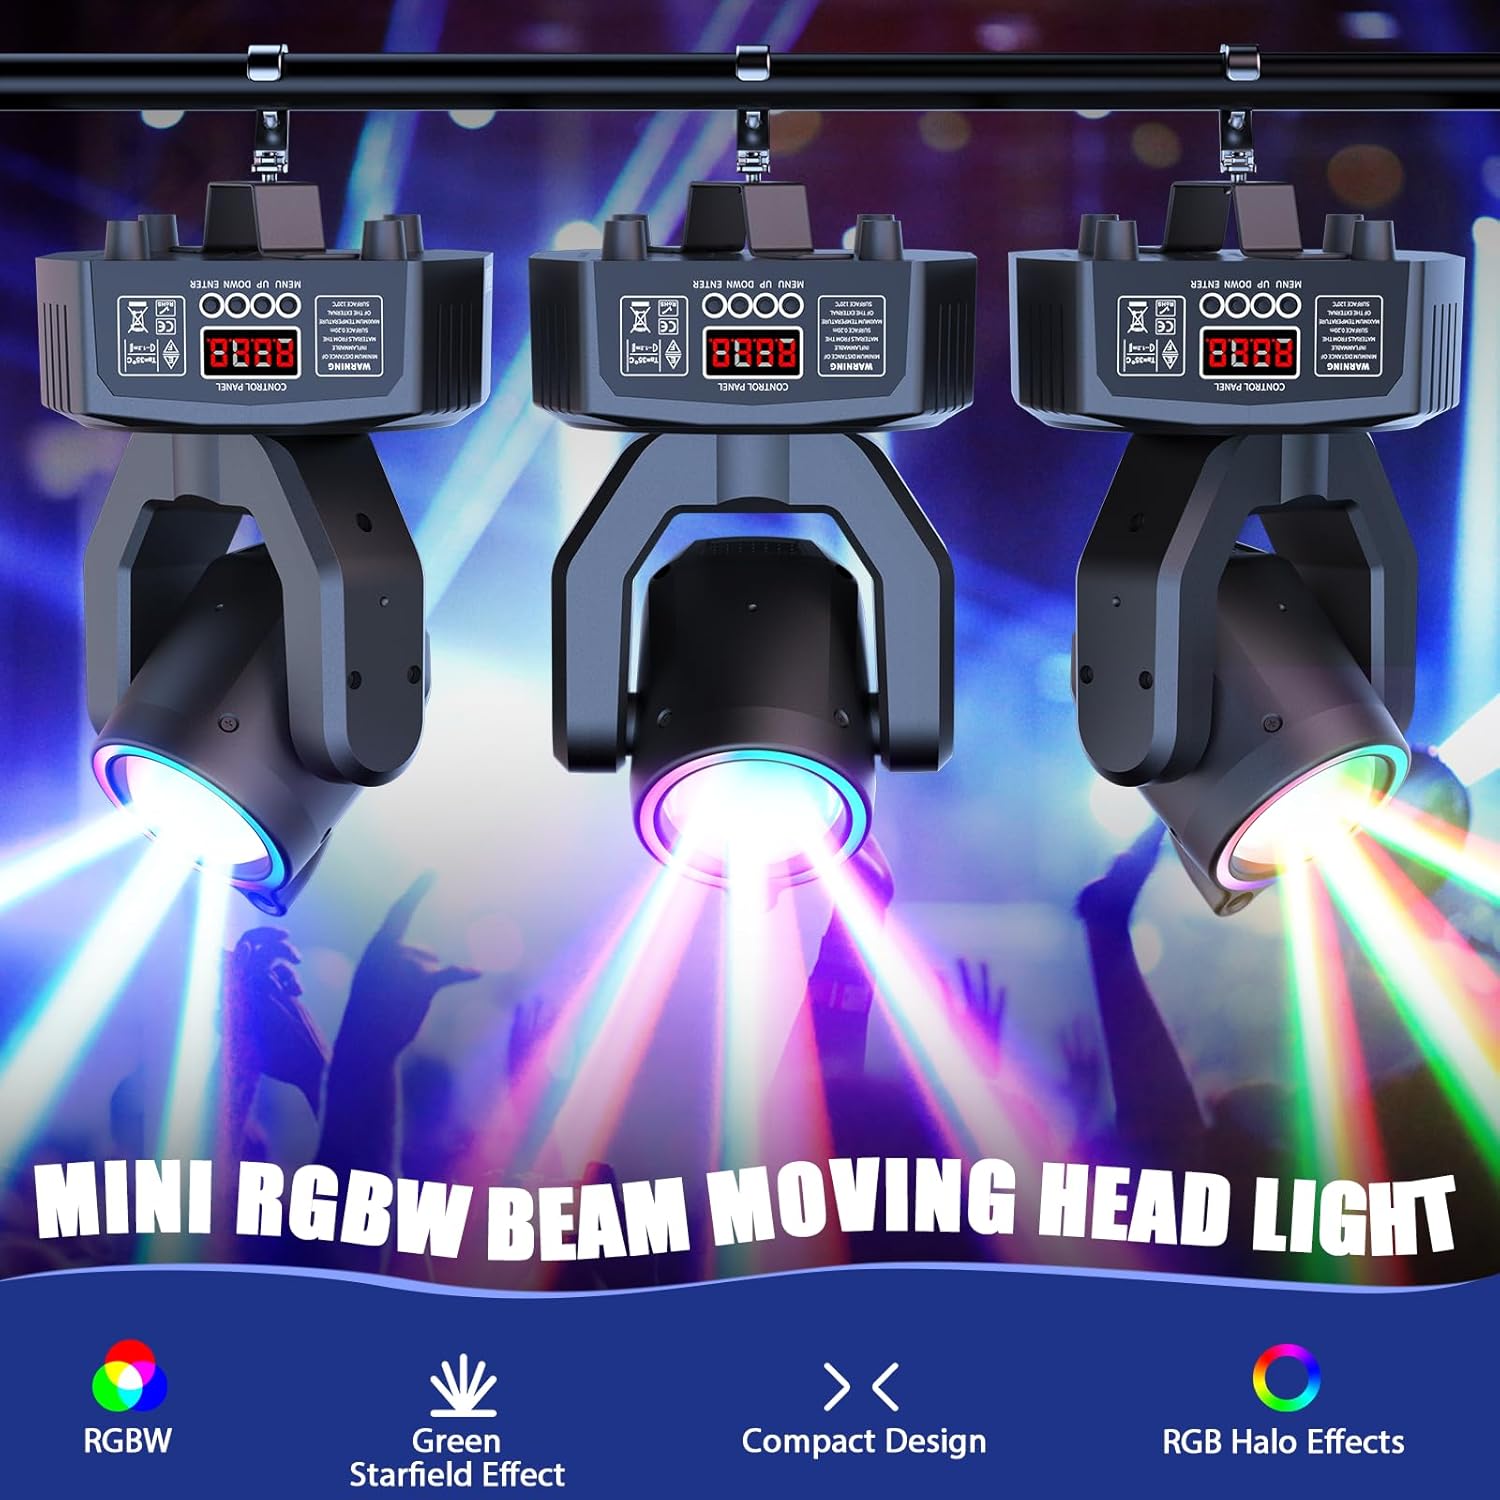
Figure 4.2: Multiple Datewink ZQ02375 lights creating dynamic beam effects.

Ọgụgụ 4.3: Ọpụamples of versatile multi-effect lighting, including monochromatic and color mixing modes.

Figure 4.4: Close-up of the 4-digit digital display and control buttons (Menu, Up, Down, Enter) on the base of the light.
Ọgụgụ 4.5: N'azụ view showing DMX IN, DMX OUT (3-pin XLR), and Power Connection.

Figure 4.6: Product dimensions: 5.63"L x 5.43"W x 8.11"H (14.3cm x 13.8cm x 20.6cm). X-Axis rotation: 450°, Y-Axis rotation: 180°.
Vidiyo ngwaahịa:
Video 4.1: Demonstration of the Datewink Moving Head Light's features and effects. This video showcases various lighting modes, movement capabilities, and the overall performance of the fixture.
5. Nhazi
5.1 Ịkwalite ihe ndozi
The Mini Moving Head Light can be placed on a flat surface or mounted to a truss or ceiling using the included hook bracket and screws. Ensure the mounting location is stable and can safely support the fixture's weight (0.85kg / 1.87lb).
- Ndokwa n'elu: Place the fixture on a stable, level surface. The rubber feet on the base provide stability.
- Nkwanye n'elu: Attach the hook bracket to the bottom of the fixture using the provided screws. Securely fasten the bracket to a truss or mounting bar. Always use a safety cable (not included) as a secondary attachment to prevent accidental falls.
5.2 Njikọ ike
Connect the included power cable to the power input on the rear of the fixture and then to a suitable AC100V-240V 50/60Hz power outlet.
5.3 DMX Njikọ (Nhọrọ)
For DMX control, connect a 3-pin XLR cable from your DMX controller's output to the DMX IN port of the first fixture. For multiple fixtures, daisy-chain them by connecting the DMX OUT of the first fixture to the DMX IN of the next, and so on. Ensure the last fixture in the chain has a DMX terminator (not included) for stable signal transmission.
6. Ụdị arụ ọrụ
The fixture offers several operating modes, selectable via the control panel or remote control.

Nyocha 6.1: N'eluview of the five customizable control modes: DMX (13CH), Master/Slave, Sound-activated, Remote Control, and Auto.
6.1 Ogwe njikwa
Use the 4-digit digital display and the MENU, UP, DOWN, ENTER buttons on the base of the fixture to navigate and select modes.
- NchNhr: Na-eme okirikiri site na nhọrọ menu isi.
- Elu/ala: Navigates through sub-options or adjusts values.
- Tinye: Confirms selection or saves settings.
6.2 Ọrụ njikwa anya
The included remote control provides convenient access to various functions and modes.

Figure 6.2: Layout of the remote control with button functions.
- Gbanyụọ/gbanyụọ: Gbanyụọ ma ọ bụ gbanyụọ ọkụ.
- Ụdị DMX: Activates DMX control.
- UTgbọala: Cycles through built-in automatic programs.
- Ọsọ +/-: Adjusts the speed of automatic programs.
- olu: Na-eme ka ọnọdụ agbanyere ụda rụọ ọrụ.
- MIC +/-: Adjusts sound sensitivity in VOICE mode.
- Igodo ọnụọgụ (1-9, 0): Selects specific pre-programmed effects or DMX channels (refer to DMX chart for details).
6.3 Master-Slave Mode
To synchronize multiple fixtures without a DMX controller, set one unit as the Master and others as Slaves. Connect the DMX OUT of the Master unit to the DMX IN of the first Slave unit, and continue daisy-chaining. Ensure all units are set to the correct Master/Slave mode via their control panels.
7. DMX Channel Chart (13 Channels)
This fixture utilizes 13 DMX channels for comprehensive control. Below is a typical channel assignment. Specific values may vary; refer to the on-screen display for exact settings.
| Ọwa | Ọrụ | Oke ọnụ ahịa | Nkọwa |
|---|---|---|---|
| 1 | Pan Movement | 0-255 | Horizontal movement (0-450°) |
| 2 | Pan dị mma | 0-255 | Fine adjustment for Pan |
| 3 | Ntugharị Tilt | 0-255 | Vertical movement (0-180°) |
| 4 | Tilt Ọma | 0-255 | Fine adjustment for Tilt |
| 5 | Ọsọ | 0-255 | Movement speed (slow to fast) |
| 6 | Dimmer | 0-255 | Overall brightness (0-100% linear) |
| 7 | Strobe | 0-255 | Strobe effect (1-20Hz) |
| 8 | Uhie uhie | 0-255 | Ike uhie (0-100%) |
| 9 | Green ikanam | 0-255 | Ike akwụkwọ ndụ akwụkwọ ndụ (0-100%) |
| 10 | Igwe ọkụ na-acha anụnụ anụnụ | 0-255 | Ike na-acha anụnụ anụnụ (0-100%) |
| 11 | Ọcha ọkụ ọkụ | 0-255 | Ike ọcha (0-100%) |
| 12 | Laser Green | 0-255 | Green laser effect (on/off, patterns) |
| 13 | Ọrụ/Ụdị | 0-255 | Internal programs, sound active, etc. |
8. Nlekọta
- Nhicha: Regularly clean the lens and housing with a soft, lint-free cloth. Do not use abrasive cleaners or solvents. Ensure the fixture is powered off and cooled down before cleaning.
- Nyocha: Periodically check power cables, DMX cables, and mounting hardware for any signs of wear or damage. Replace any damaged components immediately.
- Nchekwa: When not in use, store the fixture in a dry, dust-free environment, preferably in its original packaging or a protective case.
9. Nchọpụta nsogbu
| Nsogbu | Ihe nwere ike ime | Ngwọta |
|---|---|---|
| Enweghị ike | Power cable disconnected; no power from outlet; blown fuse. | Check power cable connection; test outlet with another device; replace fuse if necessary. |
| Enweghị mmepụta ọkụ | Dimmer channel at 0; fixture in blackout mode; LED failure. | Check DMX dimmer channel or remote settings; ensure fixture is not in blackout; contact support if LEDs are faulty. |
| Enweghị njikwa DMX | Incorrect DMX address; faulty DMX cable; DMX terminator missing. | Verify DMX address setting; check DMX cable connections; use a DMX terminator on the last fixture. |
| Njikwa anya anaghị arụ ọrụ | Battery depleted; remote not pointed at sensor; interference. | Replace remote battery; ensure clear line of sight to the fixture's IR sensor; reduce interference. |
10. Nkọwapụta
| Oke | Uru |
|---|---|
| Ntinye Voltage | AC100V-240V 50 / 60Hz |
| Protocol Njikwa | 433MHz (for remote) |
| Effective Control Distance | 1-8 mita |
| Isi Iyi Ìhè | 3x 10W RGBW LED + 12x 0.2W RGB LEDs + 1x Green Beam Light |
| Ogologo amụma kacha mma | 3-5 mita |
| Average LED Life | awa 10,000 |
| Mgbidi Dimming | 0-100% Linear Dimming |
| Ọnụego strok | 1-20Hz |
| RGBW Beam Effect | Ee |
| Green Star Effect | Ee |
| Colorful Light Strip Horse Racing Effect | Ee |
| Operation Angle (X-Axis) | 450° |
| Operation Angle (Y-Axis) | 180° |
| Ụdị ọrụ | Auto, Voice Control, Master/Slave, D-M-X, Remote Control |
| Ọwa njikwa | 13CH |
| Protocol | Standard D-M-X512 Protocol |
| Njikọ Data | Three-core XLR Input/Output |
| Ngosipụta | 4-digit Digital Display |
| Ọkwa nchekwa | IP20 |
| Environment na-arụ ọrụ | -20°C ~ 40°C |
| Ihe onwunwe | Aluminum alloy structure/plastic shell |
| Nha ngwaahịa (L x W x H) | 14.3cm x 13.8cm x 20.6cm (5.6in x 5.4in x 8.1in) |
| Nha ịbụ | 0.85kk (1.87lb) |
11. Akwụkwọ ikike na nkwado
This Datewink product is covered by a Akwụkwọ ikike nke onye nrụpụta ụbọchị 180 site na ụbọchị ịzụrụ. Akwụkwọ ikike a na-ekpuchi ntụpọ dị na ngwa na arụ ọrụ n'okpuru ojiji nkịtị.
For technical support, warranty claims, or any questions regarding your product, please contact our customer service team:
- Email: support@datewink.com (example)
- Websaịtị: Datewink Official Store
Please have your model number (ZQ02375) and purchase information ready when contacting support.