
1. Okwu mmalite
Welcome to the AlgoLaser T150 Pro 3W Mini Laser Engraver Machine user manual. This document provides essential information for the safe and effective operation of your new laser engraver. The T150 Pro is a high-precision tool designed for DIY enthusiasts, hobbyists, and small business owners, enabling the creation of personalized gifts, home decor, and custom products. Its compact, tank-inspired design ensures stability and durability, delivering professional engraving results.
This machine is suitable for engraving various materials including wood, acrylic, and leather. It is ideal for personal projects, small business production, and educational settings. Please read this manual thoroughly before operating the device to ensure proper usage and to maximize its potential.

Image 1.1: The AlgoLaser T150 Pro Mini Laser Engraver, highlighting its robust design.
2. Ozi nchekwa
Operating a laser engraver involves inherent risks. Adhere to all safety guidelines to prevent injury and damage to the equipment.
- Nchedo anya: Always wear the provided laser safety goggles when the machine is operating. Direct exposure to the laser beam can cause severe and permanent eye damage.
- Igwe ikuku: Operate the engraver in a well-ventilated area or use an appropriate fume extraction system. Engraving certain materials can produce harmful fumes and particles.
- Ihe ize ndụ ọkụ: The laser can ignite flammable materials. Never leave the machine unattended during operation. Keep a fire extinguisher nearby.
- Ndakọrịta ihe: Only engrave materials approved for laser processing. Avoid PVC, vinyl, ABS, and other materials that produce toxic or corrosive fumes when laser cut or engraved.
- Ụmụaka na anụ ụlọ: Keep children and pets away from the operating area. This device is not a toy.
- Nkwụsị ihe mberede: Mara ebe na ọrụ nke bọtịnụ nkwụsị mberede ahụ.
- Nchọpụta Ntụda: The T150 Pro features advanced tilt detection technology that automatically turns off the laser if the machine shifts by more than 20 degrees, enhancing safety during operation.
3. Ihe ngwugwu
Verify that all items listed below are included in your package. If any components are missing or damaged, please contact customer support.

Image 3.1: Visual representation of the AlgoLaser T150 Pro package contents.
- X-axis Frame
- Laser Engraver/Cutter Unit
- Modul laser (3W)
- Ihe nkwụnye ọkụ
- Goggles Safety Laser
- Screwdriver and Wrench Set
- Isi mkpịsị aka aka
- Hexagon Screws M5x30
- 2mm Gauge Block (for focusing)
- Material Kit (sample materials)
- eriri USB
4. Ngwaahịa gafereview na Atụmatụ
The AlgoLaser T150 Pro is engineered for precision and ease of use, offering a range of features for both beginners and experienced users.
- Professional-Grade Engraving: Ideal for crafters, small shop owners, and creative entrepreneurs, capable of working with wood, metal, acrylic, leather, and more.
- Enwere ike ibugharị & Nchekwa oghere: Compact and lightweight design suitable for desktops in homes, classrooms, and workshops.
- Nnukwu ebe ọrụ: Features a 150 x 150 mm engraving area.
- Oke ọsọ: Achieves engraving speeds of up to 8000 mm/min with high precision.
- Arụmọrụ emelitere: Equipped with an upgraded chip for advanced image processing, offering 200% more computing power.
- Nhazi ngwa ngwa: 90% pre-assembled design allows for rapid deployment.
- Built-in Security: Advanced tilt detection automatically shuts off the laser if the machine shifts by 20 degrees.
- Enwere ike ịgbasa: Compatible with optional rotary rollers for engraving cylindrical objects.

Image 4.1: The T150 Pro seamlessly integrates into a desktop environment.

Image 4.2: Performance enhancement through upgraded chip technology.

Foto 4.3: Ọpụamples of creative applications with the AlgoLaser T150 Pro.
5. Ntuziaka Nhazi
The AlgoLaser T150 Pro is designed for quick and easy setup, with most components pre-assembled.
5.1 Mgbakọ izizi
- Carefully unpack all components from the box and verify against the package contents list.
- Debe etiti isi ahụ n'elu ebe kwụsiri ike ma dị larịị.
- Attach the laser module to the X-axis frame. Ensure it is securely fastened according to the included quick start guide.
- Connect the power adapter and USB cable to the machine and your computer.
5.2 Ilekwasị anya na Laser ahụ
Accurate focusing is crucial for optimal engraving results.
- Place the material to be engraved on the working platform.
- Position the 2mm gauge block on top of the material, directly under the laser module.
- Adjust the height of the laser module until its bottom edge lightly touches the top of the gauge block.
- Remove the gauge block. The laser is now focused for the material.
5.3 Using Clip-On Risers
For engraving thicker materials or when using rotary attachments, clip-on risers can be used to increase the working height.
- Simply clip the risers onto the base of the engraver to elevate the entire unit.
- Ensure all risers are securely attached and the machine remains stable.

Image 5.1: Key setup and feature highlights including assembly, risers, and safety features.
6. Ntuziaka ọrụ
This section outlines the basic steps for operating your AlgoLaser T150 Pro.
6.1 Nwụnye na Njikọ Ngwanrọ
- Install the recommended engraving software (e.g., LightBurn, LaserGRBL) on your computer. Refer to the software's documentation for detailed installation instructions.
- Connect the AlgoLaser T150 Pro to your computer via the USB cable.
- Launch the engraving software and ensure the machine is recognized and connected.
6.2 Na-akwado atụmatụ gị
- Import or create your desired design within the engraving software.
- Adjust the design size and position to fit your material and the 150x150mm working area.
- Select appropriate engraving parameters (laser power, speed, passes) based on your material type. Consult material settings guides for recommendations.
6.3 Ịmalite Usoro Ịkpụ Ihe
- Place your material on the engraving platform and ensure it is stable.
- Perform a frame test (if available in your software) to verify the engraving area and alignment before starting the laser.
- Ensure you are wearing laser safety goggles.
- Initiate the engraving process from the software. Monitor the machine closely during operation.
6.4 Using Optional Accessories
The T150 Pro can be expanded with optional accessories for specialized engraving tasks.
- Rotary Roller (ARR): For engraving cylindrical objects like bottles or tumblers. Follow the accessory's specific instructions for installation and software configuration.
- Rotary Attachment for Spheres/Rings (ARC): For engraving spherical or ring-shaped items. Refer to the accessory manual for setup and usage.
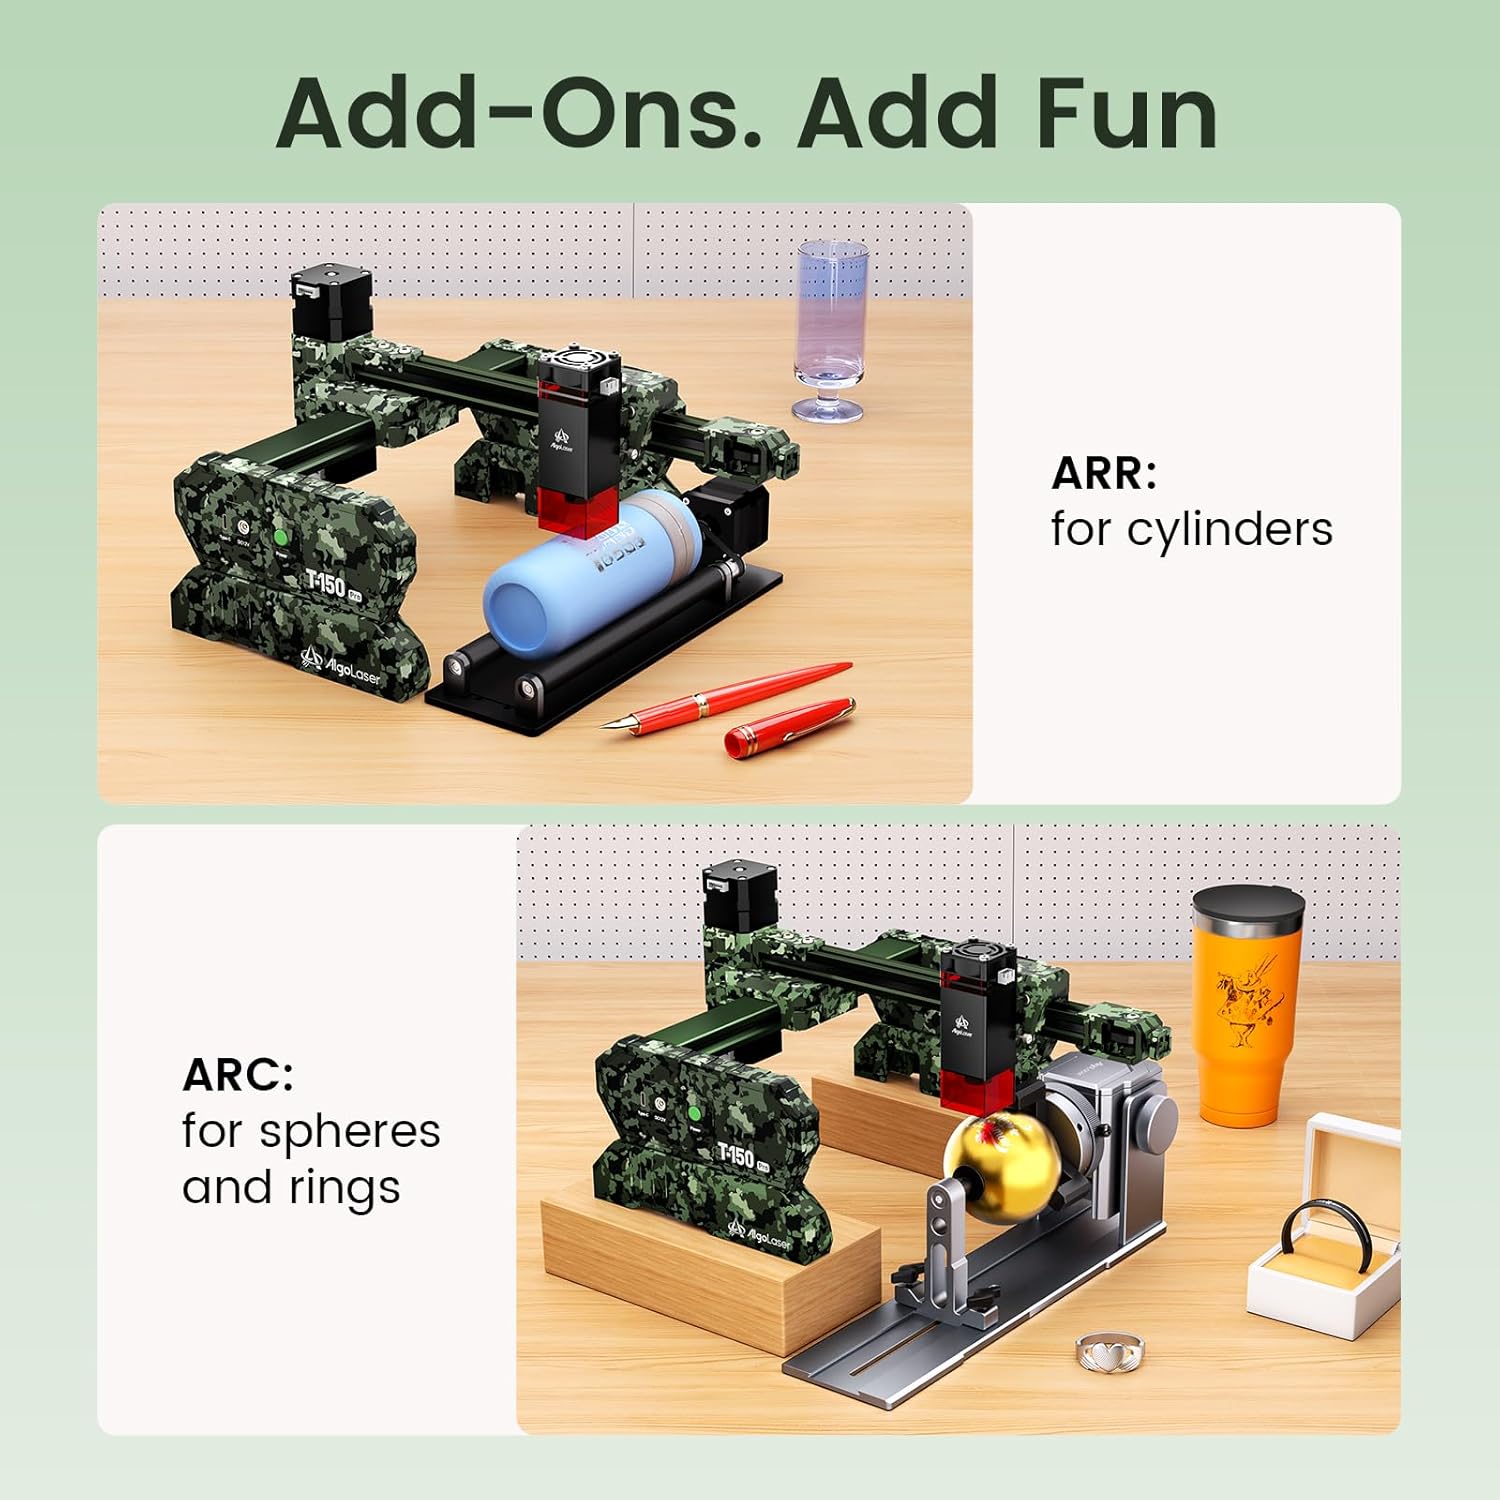
Image 6.1: Optional accessories for specialized engraving tasks.
6.5 Operation Demonstration Video
Video 6.1: A demonstration of the AlgoLaser T150 Pro 3W Laser Engraver Machine in operation, showcasing the engraving process on a material.
7. Nlekọta
Regular maintenance ensures the longevity and optimal performance of your AlgoLaser T150 Pro.
- Na-ehicha oghere: Periodically clean the laser lens with a specialized lens cleaning solution and a lint-free cloth. A dirty lens can reduce laser power and engraving quality.
- Na-ehicha igwe: Keep the engraving area and the machine's exterior free from dust, debris, and material residue. Use a soft brush or compressed air.
- mmanu mmanu: Check the guide rails and moving parts for smooth operation. Apply a small amount of appropriate lubricant if necessary, following manufacturer recommendations.
- Mmelite femụwe: Check the official AlgoLaser website for any available firmware updates to ensure your machine has the latest features and bug fixes.
- Nchekwa: Mgbe ejighị ya, chekwaa ihe osise ahụ na ebe dị ọcha, kpọrọ nkụ, pụọ na ìhè anyanwụ kpọmkwem na oke okpomọkụ.
8. Nchọpụta nsogbu
This section addresses common issues you might encounter with your AlgoLaser T150 Pro.
- Igwe anaghị agba ọkụ:
- Check if the power adapter is securely connected to both the machine and a working power outlet.
- Ensure the power switch on the machine is in the 'ON' position.
- Mmepụta Laser Na-anaghị agba ọkụ/Na-adịghị ike:
- Verify that the laser module is correctly installed and connected.
- Check the laser focus. Recalibrate using the 2mm gauge block.
- Ensure laser power settings in the software are appropriate for the material.
- Clean the laser lens for any obstructions or dirt.
- Engraving Quality is Poor/Inconsistent:
- Re-check laser focus.
- Ensure the material is flat and securely placed on the platform.
- Adjust engraving speed and power settings. Too fast or too slow, or incorrect power, can affect quality.
- Check for any loose belts or mechanical components that might cause vibrations.
- Software Not Connecting to Machine:
- Ensure the USB cable is properly connected to both the machine and the computer.
- Restart both the software and the machine.
- Check device manager (Windows) or system information (macOS) to see if the USB device is recognized. Reinstall USB drivers if necessary.
- Gbalịa ọdụ ụgbọ mmiri ma ọ bụ eriri USB dị iche.
- Machine Stops Mid-Engraving:
- Check for any error messages in the software.
- Ensure the machine is on a stable surface; the tilt detection feature may have activated if the machine was bumped.
- Verify that the USB connection is stable and not interrupted.
If you encounter issues not covered here, please refer to the support section for assistance.
9. Nka na ụzụ nkọwa
| Njirimara | Nkọwapụta |
|---|---|
| Nọmba nlereanya | T150 Pro |
| Ike Laser | 3W (3000mW) |
| Klas laser | Class 1 (IEC 60825-1 / FDA 21 CFR 1040.10) |
| Mpaghara ihe osise | 150mm x 150mm (5.91"L x 5.91"W) |
| Ọsọ Ịkpụ Ihe Kachasị Elu | 8000 mm/min |
| Ụdị ọrụ | Akpaaka |
| Njikọta | USB |
| Ngwa ndakọrịta | LightBurn, LaserGRBL, Mobile Apps |
| Atụmatụ nchekwa | Tilt Detection (20 degrees) |
| Akụkụ ngwaahịa (ihe dị ka) | 360mm (14.17 in) L x 305mm (12.01 in) W x 143mm (5.63 in) H |
| UPC | 671891151166 |

Image 9.1: Physical dimensions of the AlgoLaser T150 Pro.
10. Akwụkwọ ikike na nkwado
Your AlgoLaser T150 Pro comes with a commitment to quality and customer satisfaction.
10.1 Akwụkwọ ikike mkpuchi
Ngwaahịa a kpuchiri site na 1-afọ akwụkwọ ikike from the date of purchase. This warranty covers manufacturing defects and malfunctions under normal use. It does not cover damage caused by misuse, accidents, unauthorized modifications, or failure to follow the instructions in this manual.
10.2 Nkwado ndị ahịa
For any questions, technical assistance, or warranty claims, please contact our dedicated customer service team. We offer 24/7 ọrụ ndị ahịa to provide quick solutions and setup instructions.
- Ozi mkpọtụrụ: Please refer to the contact details provided on the product packaging or the official AlgoLaser websaịtị.
- When contacting support, please have your product model number (T150 Pro) and purchase information ready.