Okwu mmalite
The OLIGHT Goshawk 1600 is a high-performance, rechargeable bike light designed for both mountain and urban riding. It features a powerful 1600-lumen output, a long-lasting battery, and a wireless remote control for convenient operation. This manual provides detailed instructions for the proper setup, operation, maintenance, and troubleshooting of your Goshawk 1600 bike light.
The Goshawk 1600 bike light mounted on a bicycle, showcasing its compact design and integration with a bike computer.
Akụkụ ndị bụ isi:
- Mmepụta dị ike: Delivers up to 1600 lumens with distinct high and low beam modes.
- Anti-Glare Low Beam: Features a sharp cut-off line to prevent glare for oncoming traffic.
- Extended High Beam: Provides broad and long-distance illumination for dark paths.
- Batrị na-adịte aka: Rechargeable high-capacity battery offers up to 15 hours of continuous runtime.
- Nchaji USB-C: Fast and reliable recharging via a USB-C port.
- Ihe mgbochi mmiri IPX6: Protects against heavy rain and harsh conditions.
- Njikwa ikuku ikuku: Allows for easy mode adjustments and maximum output activation.
- Ọrụ ebe nchekwa: Retains previous settings upon reactivation.
- Under-Bar Mounting: Sleek design keeps handlebars clear and stable.
- Nchekwa mkpọchi: Na-egbochi ịgbalite na mberede.
- Ihe owuwu na-adịgide adịgide: Robust aluminum housing for efficient heat management.
Ntuziaka nhazi
Ọdịnaya ngwugwu:
Tupu ịmalite, hụ na ihe niile dị na ya dị:
- Goshawk 1600 Bike Light (x1)
- Handlebar Out-Front Mount (x1)
- Remote Control (including strap) (x1)
- Metal GoPro Adapter (x1)
- Nylon Shims (28mm/32mm/35mm) (x3)
- kposara (x2)
- 2mm hex igodo (x1)
- 3mm hex igodo (x1)
- USB-C eriri USB (x1)
- Akwụkwọ ntuziaka onye ọrụ (x1)

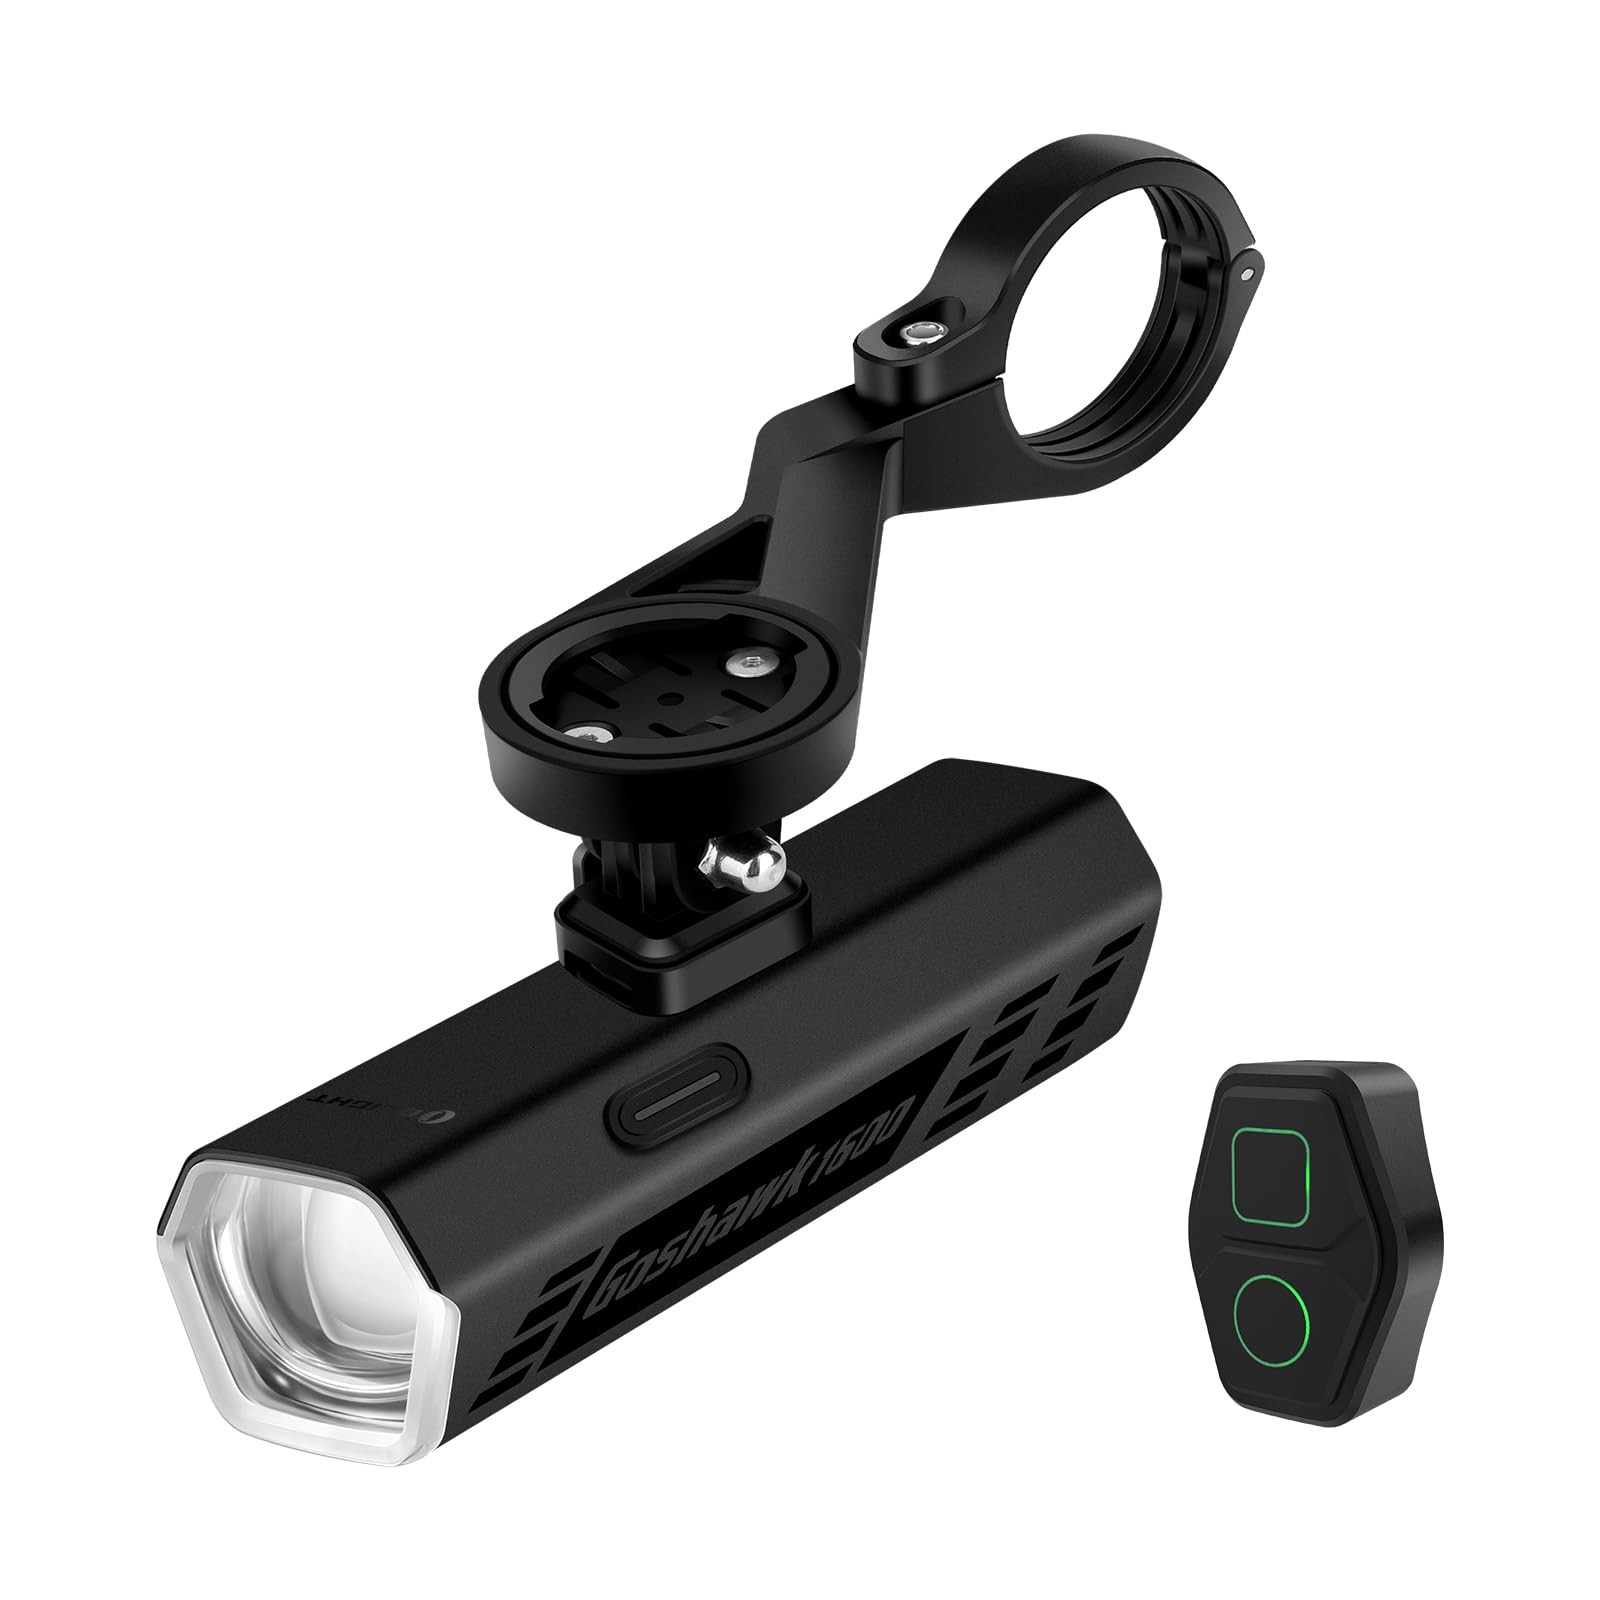
Nfefeview of the Goshawk 1600 components, including the light unit, handlebar mount, remote control, and various adapters and tools.
Mounting the Bike Light:
- Select Appropriate Shim: Choose the nylon shim that best fits your handlebar diameter (28mm, 32mm, or 35mm) to ensure a secure fit for the handlebar out-front mount.
- Attach Mount to Handlebar: Position the handlebar out-front mount on your handlebar. Use the provided screws and hex key to tighten the mount securely. Ensure the mount is centered and stable.
- Install GoPro Adapter (Optional): If using a GoPro-compatible device, attach the metal GoPro adapter to the top of the out-front mount.
- Attach Bike Light: Slide the Goshawk 1600 bike light onto the quick-release mechanism of the out-front mount until it clicks into place. Ensure it is firmly secured. The light should be positioned underneath the handlebars.

The under-bar mounting system allows for a clean cockpit setup, securing the light below the handlebars with a quick-release mechanism.
Mounting the Remote Control:
Attach the wireless remote control to a convenient location on your handlebar using the provided strap. Ensure it is within easy reach for safe operation during your ride.

The wireless remote control provides seamless adjustments, allowing for one-touch activation of full brightness while keeping hands on the bars.
Ntuziaka ọrụ
Ịchaji batrị:
Before first use, fully charge the Goshawk 1600. The USB-C charging port is located on the rear of the light unit.
- Open the protective cover of the USB-C port.
- Jikọọ eriri USB-C enyere na ọkụ na isi iyi ike USB (dịka ọmụmaatụ, kọmputa, ihe nkwụnye mgbidi).
- The battery indicator will show charging status. A full charge is indicated when the light turns solid green.
- Close the protective cover firmly after charging to maintain water resistance.

The USB-C charging port is conveniently located and protected by a cover, also functioning as a power source for other electronic devices.
Powering On/Off and Mode Selection:
The Goshawk 1600 can be operated using the button on the light unit or the wireless remote control.
- Gbanyụọ/ Gbanyụọ: Press and hold the main button on the light or the power button on the remote for approximately 1 second.
- Ụdị okirikiri: Short press the main button on the light or the mode button on the remote to cycle through available brightness modes (Low Beam Low, Low Beam Mid, Low Beam High, High Beam Low, High Beam Mid, High Beam High, Day Flash, Night Flash).
- Ọrụ ebe nchekwa: The light will remember the last used mode when turned off and on again.
- Instant Max Output: Tap the designated button on the remote control for immediate access to maximum output.

The low beam provides a distinct cut-off line to prevent glare, while the high beam offers increased coverage and distance for dark environments.
Nchekwa mkpọchi:
To prevent accidental activation and conserve battery during transport or storage, the Goshawk 1600 features a lock function.
- Gbanyụọ mkpọchi: While the light is off, press and hold the main button for 3 seconds. The indicator light will flash to confirm locking.
- Gbanyụọ mkpọchi: Press and hold the main button for 3 seconds again. The light will turn on in the last used mode.

The lock protection feature prevents unintended activation, preserving battery life and ensuring readiness when needed.
Ihe ngosi batrị:
The battery indicator on both the light unit and the remote control provides real-time battery status:
- Akwụkwọ ndụ akwụkwọ ndụ: Batrị 75% - 100% fọdụrụ
- Edo edo: Batrị 25% - 75% fọdụrụ
- Uhie: Batrị 10% - 25% fọdụrụ
- Uhie na-egbuke egbuke: Less than 10% battery remaining (recharge immediately)

The easy-to-read battery indicator keeps you informed of the remaining power, ensuring you are prepared for your ride.
Nlekọta
Nhicha:
Regular cleaning helps maintain the performance and longevity of your Goshawk 1600.
- Jiri nwayọ hichaa ahụ ọkụ, damp akwa iji wepu unyi na irighiri ihe.
- Clean the lens gently with a microfiber cloth to ensure maximum light output. Avoid abrasive materials.
- Ensure the USB-C port cover is clean and properly sealed after charging to maintain its IPX6 waterproof rating.

The Goshawk 1600 features an IPX6 waterproof rating, protecting it from heavy rain and splashes, making it suitable for all weather conditions.
Nchekwa:
When storing the light for extended periods:
- Charge the battery to approximately 50-70% before storage.
- Chekwaa n'ebe dị jụụ, kpọrọ nkụ na-adịghị na ìhè anyanwụ kpọmkwem.
- Recharge the battery every 3-6 months to prevent deep discharge and prolong battery life.
Nchọpụta nsogbu
If you encounter issues with your Goshawk 1600, refer to the following common problems and solutions:
| Nsogbu | Ihe nwere ike ime | Ngwọta |
|---|---|---|
| Ìhè anaghị agbanwuo | Low battery; Light is locked; Faulty connection | Charge the battery; Deactivate lock protection (press and hold main button for 3 seconds); Ensure light is securely mounted. |
| Njikwa anya anaghị arụ ọrụ | Remote battery low; Remote not paired; Obstruction | Check remote battery indicator; Refer to remote pairing instructions (if applicable, not detailed in provided data); Ensure no physical obstructions between remote and light. |
| Nsonaazụ ọkụ adịghị ada | Low battery; Dirty lens | Recharge the battery; Clean the light lens with a soft cloth. |
| Ịchaji anaghị arụ ọrụ | Cable issue; Port issue; Power source issue | Try a different USB-C cable; Ensure USB-C port is clean and free of debris; Try a different USB power source. |
Ọ bụrụ na nsogbu ahụ dịgidere mgbe ị nwara azịza ndị a, biko kpọtụrụ nkwado ndị ahịa.
Nkọwapụta
The following table outlines the key specifications of the OLIGHT Goshawk 1600 bike light:

A visual summary of the Goshawk 1600's key performance and physical specifications.
| Njirimara | Nkọwa |
|---|---|
| Ụdị | ÌGWIGHT |
| Nlereanya | Goshawk 1600 |
| Agba | Nwa |
| Ihe onwunwe | Aluminom |
| Isi Iyi Ike | Akwanyere batrị |
| Ọkwa Nguzogide mmiri | IPX6 enweghị mmiri |
| Ụdị nkwụnye | Ugwu Handlebar |
| Ọnụọgụ nke Ntọala | 13 |
| Oke Mbupụta Ìhè | 1600 Lumen |
| Oge ịgba ọsọ kacha | Awa 15 |
| Max Throw | 177 mita |
| Ike ọkụ | 7800 CD |
| Ibu | 234 g |
| Akụkụ | 113 x 31 x 27.5 mm |
Output Table:
The following table details the various output modes and their corresponding runtimes:

Detailed output table illustrating lumen levels and runtimes for each mode, measured according to ANSI/NEMA FL 1-2009 standards. Runtimes may vary based on environmental conditions.
Ozi akwụkwọ ikike
The OLIGHT Goshawk 1600 comes with a Akwụkwọ ikike ndụ for products purchased after January 1st, 2023. This warranty covers defects in materials and workmanship under normal use. For specific terms and conditions, or to make a warranty claim, please refer to the official OLIGHT websaịtị ma ọ bụ kpọtụrụ nkwado ndị ahịa.
Nkwado ndị ahịa
For further assistance, technical support, or inquiries regarding your OLIGHT Goshawk 1600 bike light, please contact OLIGHT customer service through their official website. You can typically find contact information, FAQs, and additional resources on the manufacturer's support page.