
1. Okwu mmalite
This manual provides detailed instructions for the setup, operation, and maintenance of your Itari M102 Label Maker Machine. Please read this manual thoroughly before using the device to ensure proper function and longevity.
2. Ihe ngwugwu
Chọpụta na ihe niile dị na ngwugwu gị:
- Itari M102 Label Maker Machine
- 3 Rolls of Thermal Labels (1.57" x 1.18" / 40mm x 30mm)
- USB Type-C Nchaji USB
- Akwụkwọ ntuziaka (akwụkwọ a)

Image 2.1: The Itari M102 Label Maker Machine shown with the included label rolls.
3. Ngwaahịa gafereview
Familiarize yourself with the components of your label maker.
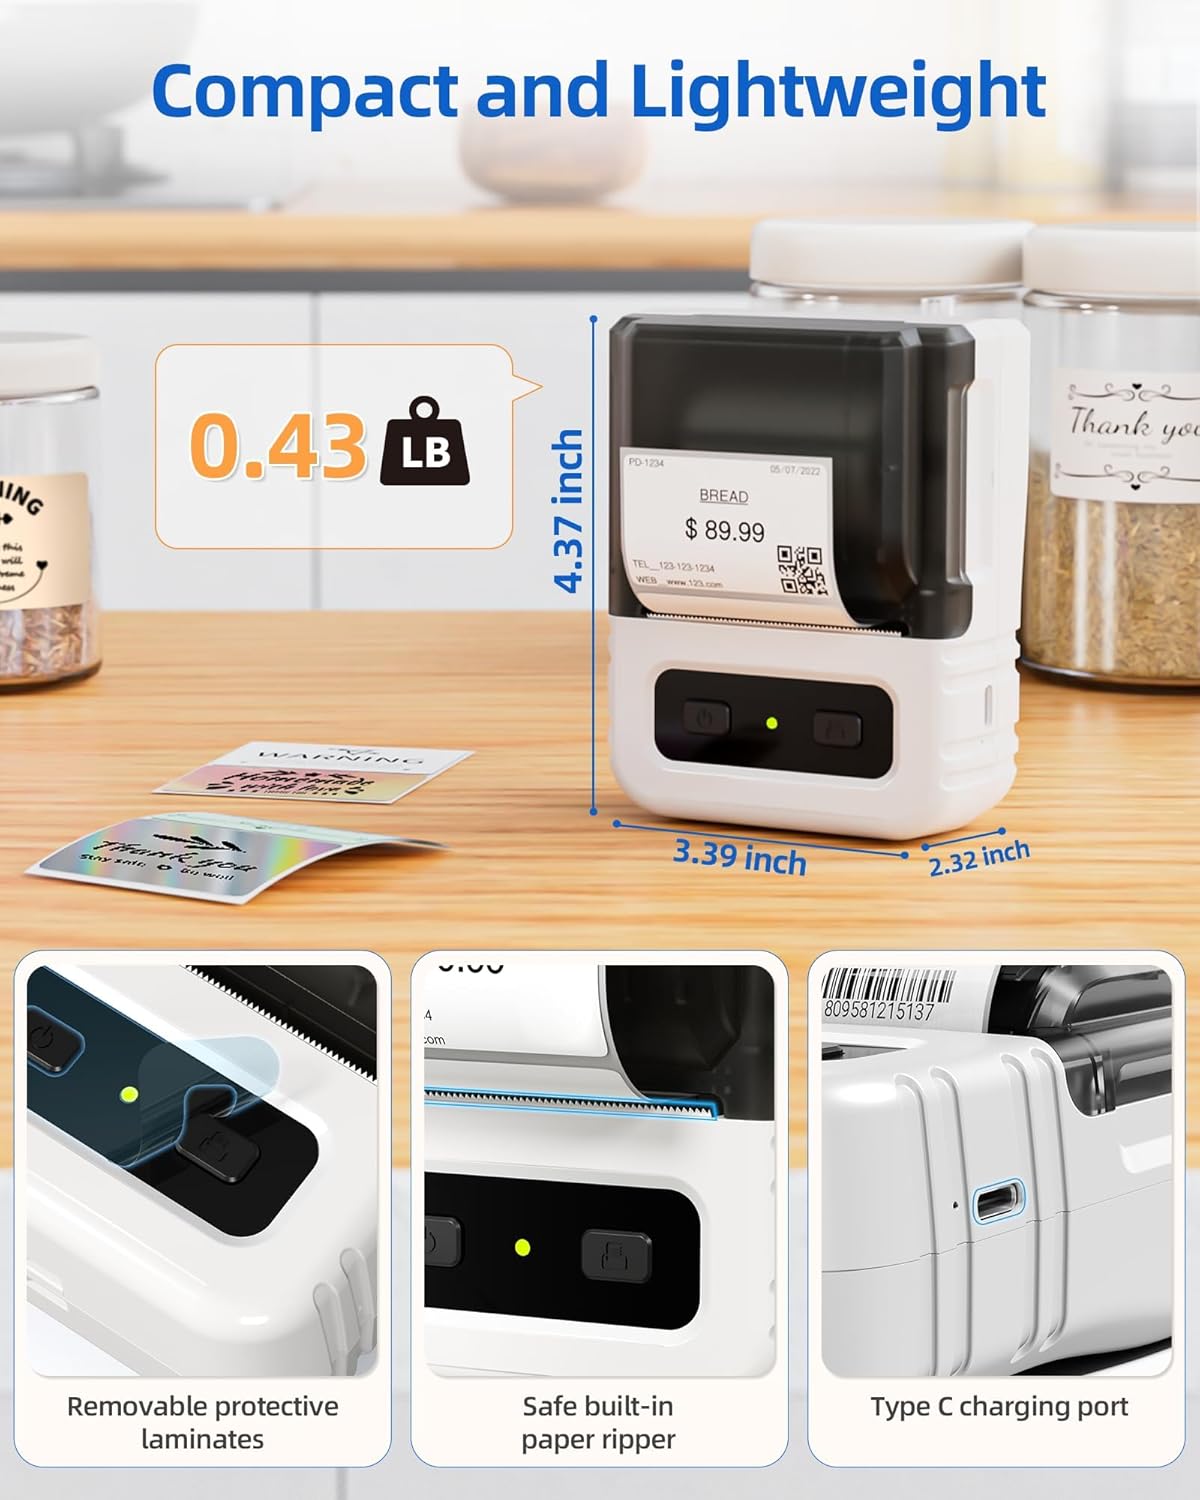
Foto 3.1: Zuru ezu view highlighting the dimensions, safe built-in paper ripper, removable protective laminates, and Type-C charging port.
Akụkụ ndị bụ isi:
- Bọtịnụ ike: A na-eji gbanye/ gbanyụọ ngwaọrụ.
- Label Compartment: Holds the label roll.
- Adjustable Guide: Ensures proper alignment for various label widths (supports 20-50mm wide labels).
- Oghere Mpụga Akwụkwọ: Ebe akara e biri ebi pụtara.
- Built-in Paper Ripper: For cleanly detaching printed labels.
- Ụdị-C ọdụ ụgbọ mmiri: Maka ịchaji batrị dị n'ime.
4. Nhazi
4.1. Ịchaji ngwaọrụ
Before first use, fully charge the label maker. Connect the provided USB Type-C cable to the charging port on the device and a compatible USB power adapter (not included). A full charge takes approximately 2 hours and provides up to 1 month of typical usage.
4.2. Ịbugo aha
- Mepee mkpuchi nke ngalaba akara ahụ.
- Insert a roll of thermal labels into the compartment, ensuring the labels feed from the bottom and the printing side faces upwards.
- Adjust the label guides to fit the width of your label roll snugly. The device supports labels from 20mm to 50mm wide.
- Pull a small portion of the label paper out through the paper exit slot.
- Mechie mkpuchi nkebi akara ahụ nke ọma.

Image 4.1: The label compartment open, illustrating how to insert a label roll and adjust the width guides.
4.3. Ngwa nwụnye na Njikọta
The Itari M102 Label Maker connects wirelessly via Bluetooth to your smartphone or tablet, and via USB to computers. Download the dedicated label editing application from your device's app store (e.g., Apple App Store for iOS, Google Play Store for Android).
- Maka njikọ Bluetooth:
- Gbanye onye na-eme ihe ngosi ahụ.
- Kwado Bluetooth na ekwentị mkpanaaka gị.
- Open the Itari label app and follow the in-app instructions to search for and pair with your M102 device. Pairing typically takes less than 2 seconds.
- Maka njikọ USB:
- Connect the label maker to your computer using the USB Type-C cable.
- Install the necessary drivers or software for your operating system (Windows, macOS, Chrome OS, Linux) as prompted or available on the Itari support websaịtị.

Image 4.2: Illustrates wireless Bluetooth connectivity for iOS and Android, and USB connectivity for Chrome OS, Windows, Mac OS, and Linux.
5. Ntuziaka ọrụ
5.1. Creating and Customizing Labels
The Itari label app provides extensive customization options:
- Ndebiri: Access over 300 free label templates for various uses (address, price, food, clothing, cable, jewelry, folder labels, etc.).
- Fonts & Symbols: Choose from over 100 fonts and 1000 symbols to personalize your labels.
- Foto: Embed images into your label designs.
- Ndezi ederede: Adjust text size, style, alignment, and add multiple lines.
- Koodu barcode na koodu QR: Generate and print various types of barcodes and QR codes.
5.2. Akara Ebipụta
- Ensure the label maker is powered on and connected to your device (Bluetooth or USB).
- Open the Itari label app and create or select your desired label design.
- Confirm the label size in the app matches the loaded label roll.
- Tap the 'Print' button in the app.
- The label maker will print the label. Use the built-in paper ripper to cleanly detach the label from the roll.
6. Nlekọta
6.1. Nhicha
To maintain print quality and device longevity:
- Turn off the label maker before cleaning.
- Gently wipe the print head with a soft, lint-free cloth moistened with isopropyl alcohol. Allow it to dry completely before use.
- Jiri akwa dị nro hichaa mpụga nke ngwaọrụ ahụ. Ejila kemịkalụ siri ike ma ọ bụ ihe mkpocha abrasive.
6.2. Nchekwa Akara
Store thermal labels in a cool, dry place away from direct sunlight and heat to prevent premature fading or damage to the thermal coating.
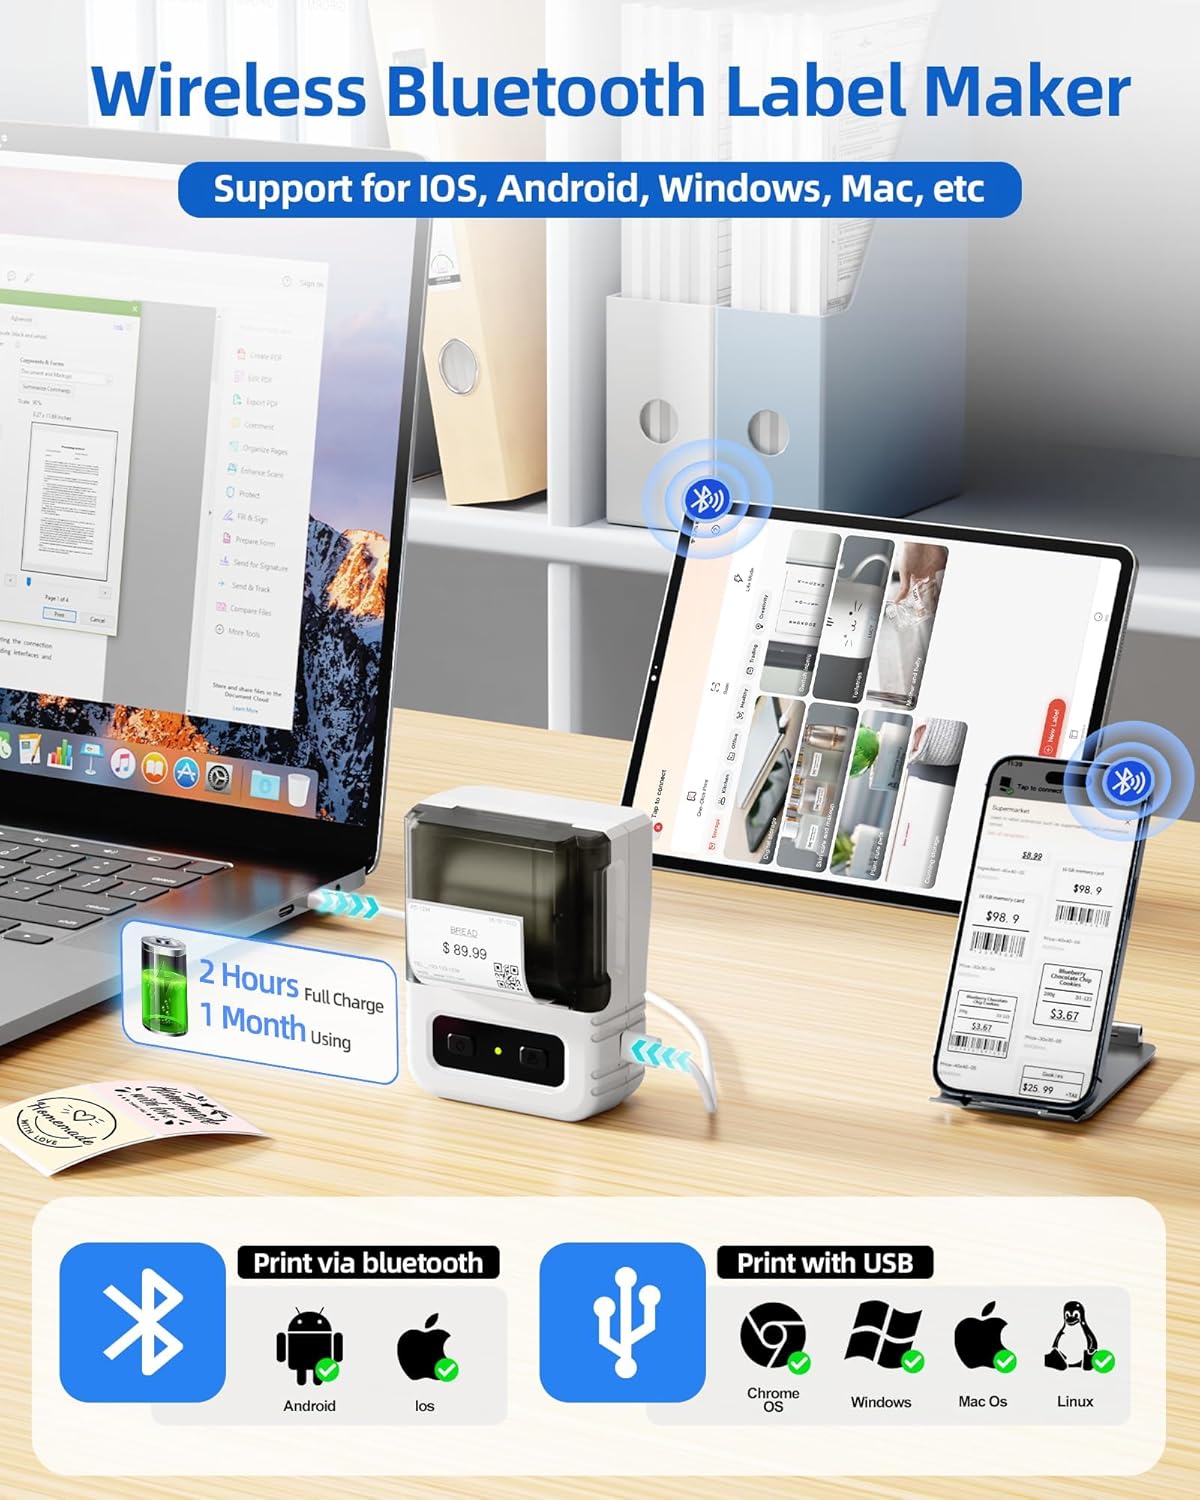
Image 6.1: Itari thermal label rolls, highlighting the 1.57" x 1.18" (40mm x 30mm) size, 230 sheets per roll, and high-quality thermal paper.
7. Nchọpụta nsogbu
If you encounter issues with your Itari M102 Label Maker, refer to the following common problems and solutions:
| Nsogbu | Ihe nwere ike ime | Ngwọta |
|---|---|---|
| Ngwaọrụ anaghị agbanwu | Batrị dị ala | Charge the device using the provided USB Type-C cable. |
| No print or faint print |
|
|
| Ọdịda njikọ Bluetooth |
|
|
| Labels jam |
|
|
8. Nkọwapụta
- Ụdị: M102
- Teknụzụ mbipụta: Thermal (enweghị ink)
- Supported Label Width: 20mm - 50mm
- Included Label Size: 1.57" x 1.18" (40mm x 30mm)
- Njikọta: Bluetooth, USB Type-C
- Ndụ batrị: Up to 1 month of typical use (2 hours full charge)
- Akụkụ: Approximately 4.37" (H) x 3.39" (W) x 2.32" (D)
- Arọ: Ihe dị ka 0.43 lbs (0.195 n'arọ)
9. Akwụkwọ ikike na nkwado
For warranty information and technical support, please refer to the contact details provided with your purchase or visit the official Itari websaịtị. Debe nnata nzụta gị dị ka ihe akaebe nke ịzụrụ maka nkwupụta ikike.