1. Okwu mmalite
Daalụ maka ịzụrụasing the Urageuxy Wireless Indoor/Outdoor Thermometer with 3 Sensors. This device provides accurate, real-time temperature and humidity readings for up to four locations simultaneously (one indoor, three outdoor/remote). It features a clear LCD display with backlight, comfort indicators, and records of daily maximum and minimum values. This manual will guide you through the setup, operation, and maintenance of your new thermometer.
2. Ozi nchekwa
- Do not expose the main unit or sensors to extreme force, shock, dust, temperature, or humidity.
- Do not immerse the main unit in water. The remote sensors are splash-proof but should not be submerged.
- Do not attempt to open the main unit or sensors. This will void the warranty.
- Use only fresh batteries of the specified type. Do not mix old and new batteries.
- Tụfuo batrị ejiri rụọ ọrụ nke ọma, na-agbaso iwu mpaghara.
- Debe ebe ụmụaka na-apụghị iru.
3. Ihe ngwugwu
Biko lelee ọdịnaya nke ngwugwu ahụ ka ị hụ na ihe niile dị:
- 1 x Main Display Unit (Indoor Console)
- 3 x Ihe mmetụta dịpụrụ adịpụ ikuku
- 1 x Akwụkwọ ntuziaka
4. Ngwaahịa gafereview
Ngalaba ngosi isi
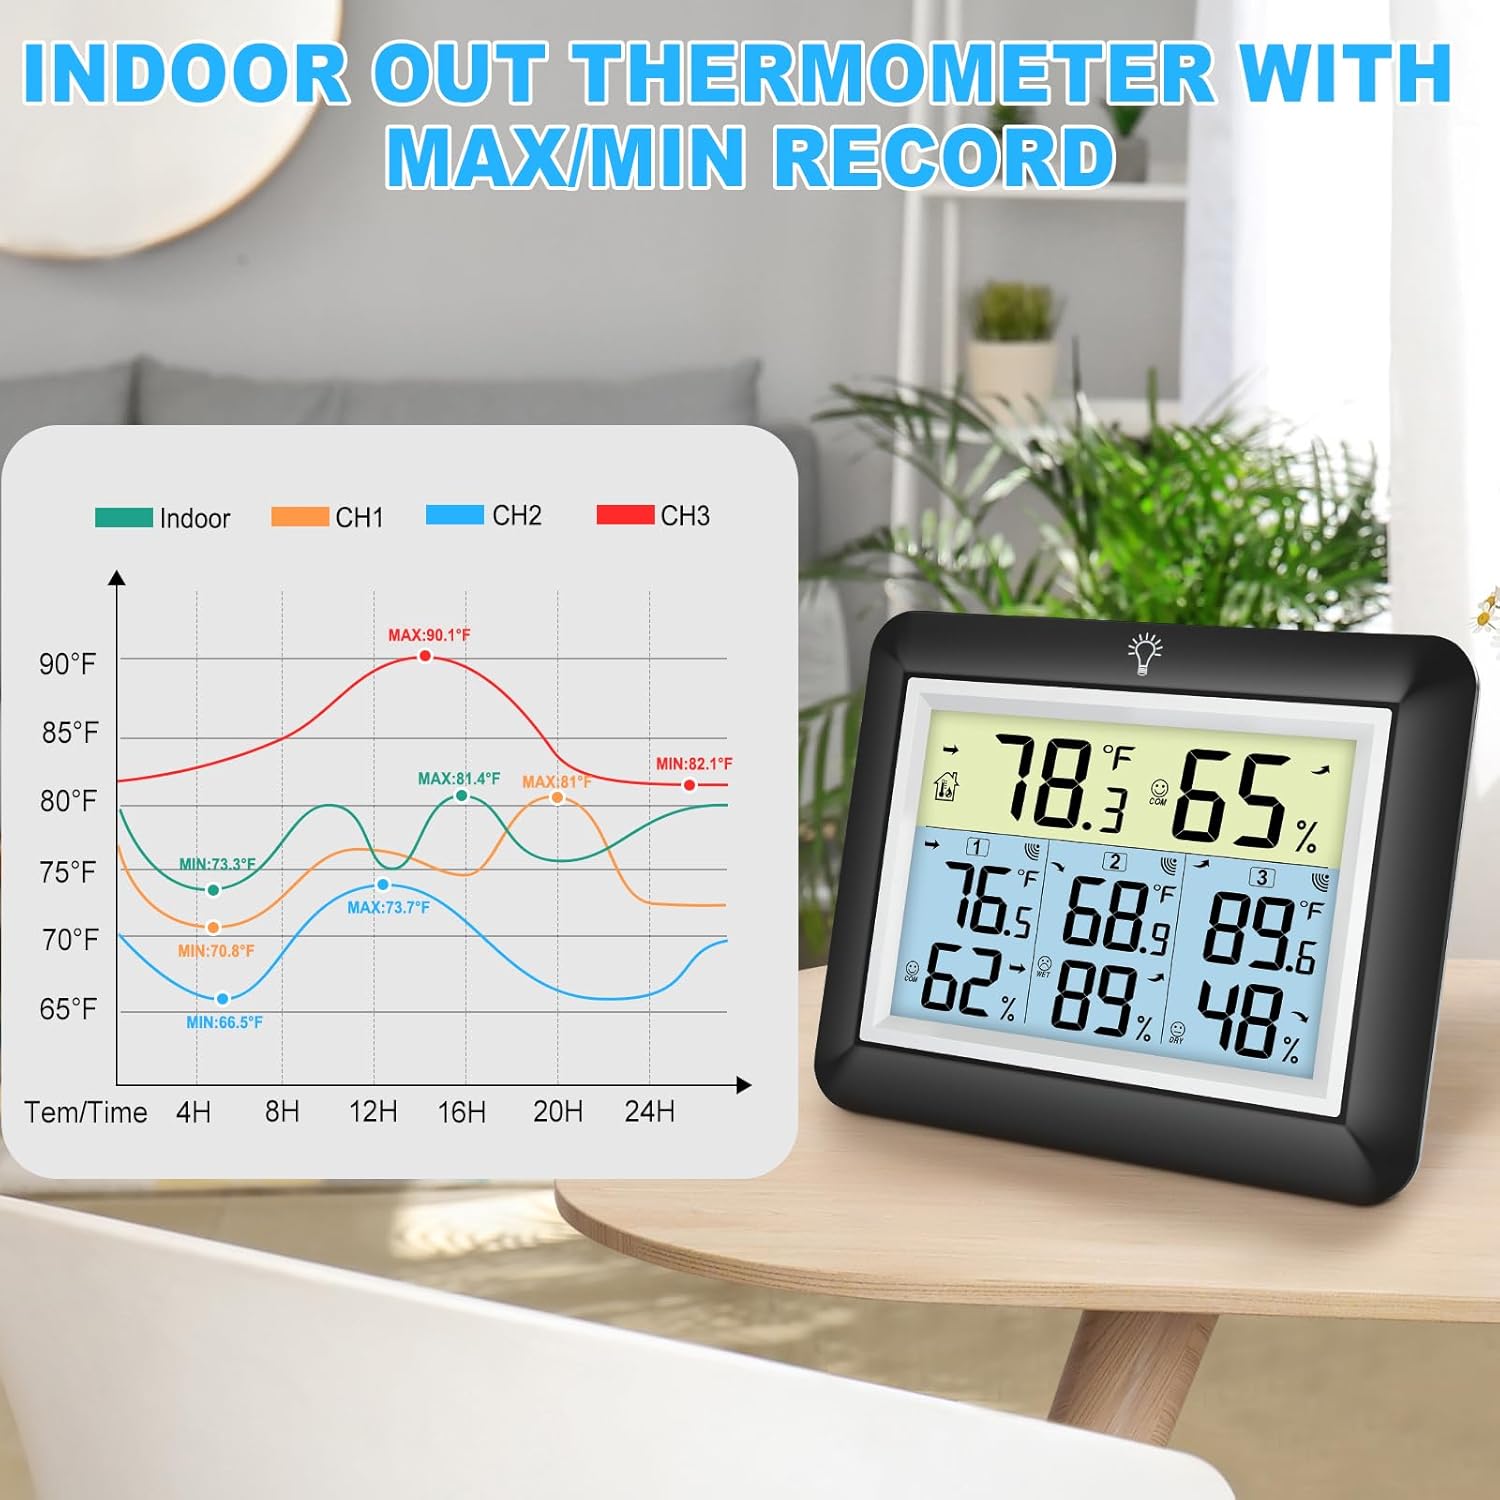
The main display unit shows indoor temperature and humidity, along with readings from up to three remote sensors. It features a large LCD screen with a backlight for easy viewing.


Wireless Remote Sensors
Each remote sensor measures temperature and humidity and transmits data wirelessly to the main unit. They are designed for outdoor use but should be placed in a sheltered location to avoid direct rain or prolonged sun exposure.
5. Nhazi
5.1 Ntinye batrị
For the Main Display Unit:
- Mepee mkpuchi nke batrị dị n'azụ nke isi ngwaọrụ ahụ.
- Insert 3 AAA batteries (not included) according to the polarity markings (+ and -).
- Mechie mkpuchi oghere batrị.
For the Wireless Remote Sensors:
- Open the battery compartment cover on the back of each sensor.
- Insert 2 AAA batteries (not included) according to the polarity markings (+ and -).
- Mechie mkpuchi oghere batrị.

Njikọ Sensọ 5.2
The main unit will automatically search for and connect to the remote sensors once batteries are installed. Ensure both the main unit and sensors are within range during initial setup.
- Place the main unit and sensors close to each other during the initial pairing process.
- The main unit will display readings for each connected sensor (CH1, CH2, CH3).
- If a sensor does not connect, press the 'CHANNEL' button on the main unit to cycle through channels or press the 'RESET' button on the sensor to re-initiate pairing.
5.3 Sensor Placement Guidelines
For optimal performance and accurate readings, consider the following:
- Oke nnyefe: The wireless sensors have a transmission range of up to 328 feet (100 meters) in open areas. Walls, metal structures, and other electronic devices can reduce this range.
- Ndokwa n'èzí: While splash-proof, place outdoor sensors under a roof or in a sheltered area to protect them from direct rain and prolonged direct sunlight.
- Zere isi mmalite ọkụ: Do not place sensors near heat sources (e.g., vents, appliances) or in direct sunlight, as this can lead to inaccurate temperature readings.
- Ọtụtụ ebe: Utilize the three sensors to monitor different areas such as a greenhouse, baby room, wine cellar, kitchen, or garage.


6. Ntuziaka ọrụ
6.1 Display Readings
Ihuenyo LCD gosipụtara ozi ndị a:
- Okpomọkụ na iru mmiri dị n'ime ụlọ: Shown at the top of the display.
- Remote Sensor Readings: Temperature and humidity for each connected sensor (CH1, CH2, CH3) are displayed below the indoor readings.
- Comfort Icons: Indicates the current humidity level (DRY, COMFORT, WET).
- Ngosipụta ihe na-ewu ewu: Arrows next to temperature and humidity values show if they are rising, falling, or stable.
6.2 °C/°F Switcher
To switch between Celsius (°C) and Fahrenheit (°F), press the '°C/°F' button located on the back of the main unit.
Ndekọ 6.3 kacha elu/min
The device automatically records the daily maximum and minimum temperature and humidity values for both indoor and all remote sensors. These records reset every 24 hours.
- Press the 'MIN/MAX' button on the back of the main unit to view the maximum recorded values.
- Press the 'MIN/MAX' button again to view the minimum recorded values.
- Pịa nke ugboro atọ iji laghachi na ọgụgụ dị ugbu a.

6.4 Ọrụ ọkụ azụ
The main unit features an adjustable backlight for improved visibility in low-light conditions.
- Touch the light bulb icon on the top of the main unit to activate the backlight for 5 seconds.
- Press and hold the light bulb icon for more than 5 seconds to keep the backlight on for 30 minutes.


6.5 Comfort Indicator
The comfort indicator provides a quick visual reference for the current humidity level, helping you maintain an ideal environment.
- Akọrọ: iru mmiri <45%
- Nkasi obi: 45% ≤ iru mmiri ≤ 65%
- Mmiri: iru mmiri> 65%


7. Nlekọta
7.1 Nhicha
Jiri nro, d hichaa isi ihe na ihe mmetụta.amp cloth. Do not use abrasive cleaners or solvents, as they may damage the plastic components and electronic circuits.
7.2 nnọchi batrị
Replace batteries when the low battery indicator appears on the display. Always replace all batteries in a unit at the same time with new ones of the same type.
7.3 Nchekwa
If the device will not be used for an extended period, remove the batteries from both the main unit and sensors to prevent leakage and damage.
8. Nchọpụta nsogbu
| Nsogbu | Ihe nwere ike ime | Ngwọta |
|---|---|---|
| Enweghị ngosipụta na isi ngwaọrụ. | Batrị anwụọla ma ọ bụ etinyeghị ya nke ọma. | Dochie batrị ọhụrụ, na-ahụ na polarity ziri ezi. |
| Remote sensor not displaying readings or showing '---'. | 1. Sensor out of range. 2. Batteries are dead. 3. Interference. 4. Sensor not paired. | 1. Move sensor closer to the main unit. 2. Replace sensor batteries. 3. Move away from other electronic devices. 4. Press the 'RESET' button on the sensor and then cycle channels on the main unit. |
| Ọgụgụ na-ezighi ezi. | 1. Sensor exposed to direct sunlight or heat source. 2. Poor ventilation around sensor. | 1. Relocate sensor to a shaded, well-ventilated area. 2. Ensure proper airflow around the sensor. |
| Ìhè azụ anaghị arụ ọrụ. | Low battery or malfunction. | Replace main unit batteries. If issue persists, contact support. |
9. Nkọwapụta
- Akara: Urageuxy
- Ụdị: WS0170BKY
- Oke okpomọkụ nke ime ụlọ: 32°F ruo 140°F (0°C ruo 60°C)
- Oke okpomoku dị n'èzí: -40°F ruo 140°F (-40°C ruo 60°C)
- Okpomọkụ ziri ezi: ±2°F / ±1°C
- Iru mmiri iche: 10% ruo 99% RH
- Ikike iru mmiri: ± 5% RH
- Oke nnyefe ikuku: Ruo mita 100 (ụkwụ 328) n'ebe mepere emepe
- Isi Iyi Ike (Isi Ngalaba): Batrị 3 x AAA (anaghị etinye ya)
- Power Source (Remote Sensor): Batrị 2 x AAA (anaghị etinye ya)
- Atụmatụ pụrụ iche: Backlit LCD, Comfort Indicator, Min/Max Record, Fast Refresh
- Ihe: Acrylonitrile Butadiene Styrene (ABS)
- Nha Ngwaahịa (Isi Ngalaba): 0.78"D x 4.33"W x 0.78"H (ihe dị ka)
- Ibu ihe: 9.9 ounces (0.28 Kilogram)
10. Akwụkwọ ikike & Nkwado
10.1 Ozi akwụkwọ ikike
Urageuxy products are manufactured to high-quality standards. This product is covered by a limited warranty against defects in materials and workmanship for a period of one year from the original purchase date. This warranty does not cover damage caused by misuse, accident, unauthorized modification, or improper installation.
10.2 Nkwado ndị ahịa
If you encounter any issues or have questions regarding your Urageuxy Wireless Indoor/Outdoor Thermometer, please contact our customer support team. For the quickest assistance, please refer to the contact information provided on the product packaging or the official Urageuxy websaịtị.
Nkwado n'ịntanetị: Gaa leta Ụlọ Ahịa Urageuxy dị na Amazon maka ajụjụ ndị a na-ajụkarị na ozi ngwaahịa.
Vidiyo a na-enye nkọwa zuru okeview of the Urageuxy Indoor Outdoor Thermometer with 3 Remote Sensors, demonstrating its features and functionality.