
1. Okwu mmalite
The DETONGER DP26 is a portable thermal label printer designed for various labeling needs in home, office, kitchen, school, and small business environments. It utilizes direct thermal technology, eliminating the need for ink or toner, and connects via Bluetooth to Android, iOS, and PC devices for convenient label creation and printing.
2. Ozi nchekwa
- Do not disassemble or modify the printer.
- Keep the printer away from water and high temperatures.
- Use only recommended label paper to ensure optimal performance and prevent damage.
- Avoid touching the print head immediately after printing, as it may be hot.
- Store the printer and labels in a cool, dry place.
3. Ihe ngwugwu
Mgbe imepechara ngwugwu ahụ, chọpụta na ihe niile dị:
- DETONGER DP26 Label Printer
- Label Roll (included)
- Igwe nchaji USB
- Akwụkwọ ntuziaka onye ọrụ
4. Ngwaahịa gafereview
Familiarize yourself with the components of your DP26 label printer.
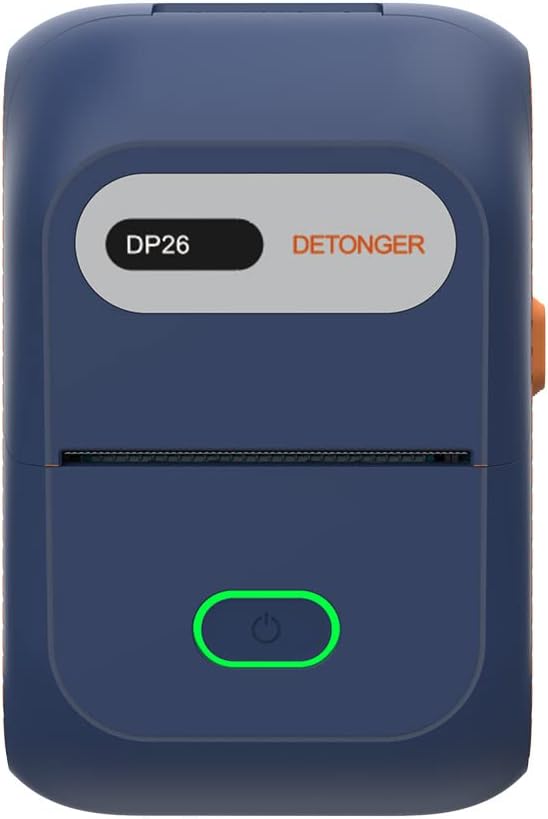
Foto 4.1: N'ihu view of the DP26 printer.

Ọgụgụ 4.2: N'akuku view highlighting the USB-C port and lid release button.
- Bọtịnụ ike: Press and hold to turn on/off. Short press to feed labels.
- Label Output Slot: Where printed labels exit.
- Ọdụ USB-C: Maka ịchaji ngwaọrụ.
- Bọtịnụ mwepụta mkpuchi: Press to open the printer cover for label installation.
5. Nhazi
5.1 Ịchaji ngwa nbipute
Before initial use, fully charge the printer using the provided USB-C cable. Connect the cable to the printer's USB-C port and a compatible power adapter (not included). The indicator light will show charging status.
5.2 Loading Label Paper
Proper label loading is crucial for clear printing.
Video 5.1: Demonstrates how to open the printer, install the label roll, and close the lid. It also shows the power and feed button functions.
- Press the lid release button to open the printer cover.
- Insert the label roll into the compartment, ensuring the labels face upwards and the leading edge extends slightly out of the print head area.
- Adjust the sliding baffles to secure the label roll in place.
- Close the printer cover firmly until it clicks.
- Press the power button briefly to feed a label and ensure it is correctly positioned.
5.3 Ngwa nwụnye
The DETONGER DP26 printer operates with the "WePrint" application, available for Android and iOS devices.

Figure 5.3: Visual guide for app download and initial setup steps.
- Scan the QR code in the printer's packaging or search for "WePrint" in your device's app store (Google Play Store for Android, Apple App Store for iOS).
- Download and install the "WePrint" application.
- No login, registration, or subscription is required to use the app's features.
5.4 Njikọ Bluetooth
Connect your printer to the "WePrint" app via Bluetooth.
- Ensure the DP26 printer is powered on.
- Kwado Bluetooth na ekwentị mkpanaaka gị.
- Open the "WePrint" app. The app will automatically search for nearby DETONGER printers.
- Select your printer from the list within the app to establish a connection. Mara: Do not connect via your phone's general Bluetooth settings; connect directly through the "WePrint" app.
6. Ntuziaka ọrụ
6.1 Creating Labels
The "WePrint" app offers extensive customization options for your labels.

Nyocha 6.1: N'eluview of the "WePrint" app's features for label design.
- Ndebiri: Access a vast array of built-in templates for various scenarios (industrial, home, retail, jewelry, etc.).
- Ederede: Add text with support for multiple fonts (e.g., Arial, Verdana, Tahoma), sizes, and styles.
- Barcodes/QR Codes: Generate and print barcodes (e.g., UPC 6901234567892) and QR codes for product information or inventory management.
- Akara na Akara ngosi: Incorporate various symbols and icons to enhance your labels.
- Foto: Add simple images or logos to your labels.
6.2 Mbipụta Aha
Once your label design is complete, you can print it directly from the app.
Video 6.2: Demonstrates the unboxing, paper loading, Bluetooth connection, and printing process for the DP26 printer.
- Review your label design in the "WePrint" app.
- Tap the "Print" button.
- Adjust print settings such as number of copies, print darkness, and print speed if necessary.
- Confirm printing. The printer will rapidly produce your labels.
6.3 Label Quality
The DP26 printer uses direct thermal technology to produce durable labels.
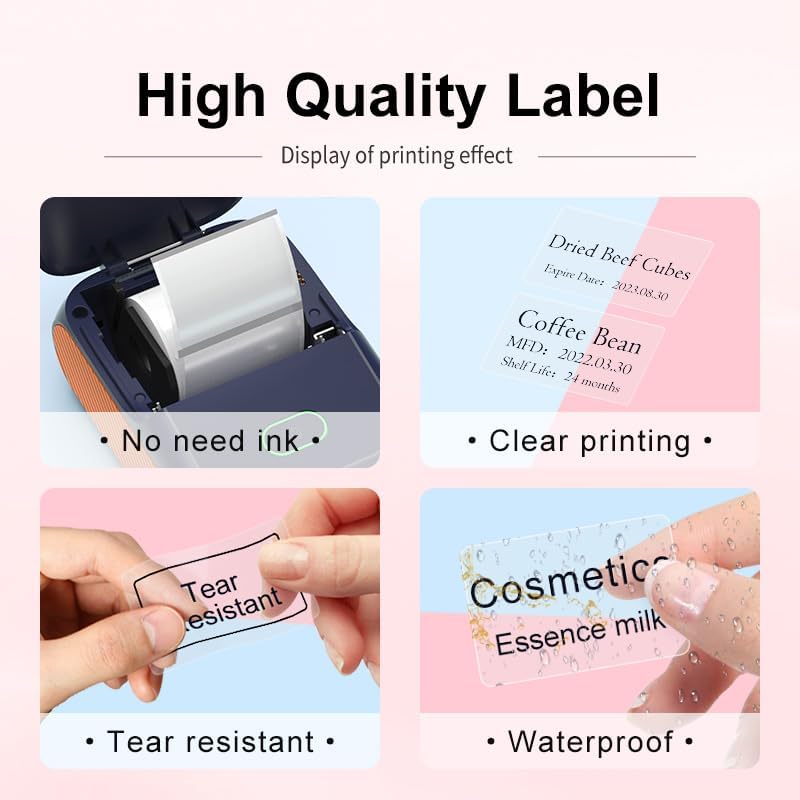
Figure 6.3: Features of the thermal labels, including inkless printing, clarity, tear resistance, and waterproofing.
- Mbipụta Inkless: No ink or toner cartridges are required, reducing operational costs.
- Clear Printing: Provides 203 DPI print quality for sharp text and graphics.
- Na-adịgide adịgide: Labels are designed to be scratch-resistant, tear-resistant, and waterproof, suitable for various applications.
7. Nlekọta
7.1 Na-ehicha isi mbipụta
To maintain print quality, clean the print head regularly.
- Gbanyụọ igwe nbipute ahụ wee gbanyụọ eriri ike ahụ.
- Mepee mkpuchi ngwa nbipute.
- Gently wipe the print head with a cotton swab lightly dampetinyere ya na mmanya isopropyl.
- Allow the print head to dry completely before closing the cover and turning on the printer.
7.2 Nchekwa
Store the printer in a clean, dry environment away from direct sunlight and extreme temperatures. Remove the label roll if the printer will not be used for an extended period.
8. Nchọpụta nsogbu
- Igwe nbipute anaghị ejikọ site na Bluetooth: Ensure the printer is powered on and fully charged. Connect through the "WePrint" app, not your device's general Bluetooth settings. Restart both the printer and your device.
- Ọdịmma mbipụta na-adịghị mma: Check if the label roll is loaded correctly and the labels are facing the right direction. Clean the print head as described in the maintenance section. Ensure the label paper is compatible.
- Akara ndị anaghị enye nri: Open the cover and re-seat the label roll. Ensure no obstructions are in the label path. Press the feed button to advance a label.
- Igwe nbipute anaghị agbanwu: Hụ na ngwa nbipute ahụ nwere chajị zuru oke. Ọ bụrụ na nsogbu ahụ anọgide, kpọtụrụ ndị ọrụ nkwado ndị ahịa.
9. Nkọwapụta
| Njirimara | Nkọwapụta |
|---|---|
| Aha Nlereanya | DP26 |
| Ụdị | EKWU MMA |
| Teknụzụ obibi akwụkwọ | Thermal |
| Teknụzụ Njikọta | Bluetooth, USB |
| Ogo mgbasa ozi kacha | 1.97 x 3.94 inch (50mm x 100mm) |
| Nkwado Obosara Aha | 20-50mm (0.78-1.97 sentimita) |
| Mmepụta ngwa nbipute | Monochrome |
| Ibu Ibu | 10.6 ounces (0.3 Kilogram) |
| Akụkụ ngwaahịa | 5.12"D x 3.23"W x 2.36"H |
| Batrị | 1500 mAh*7.4V rechargeable battery (1 AA battery included for internal component, not user replaceable) |
| Wattage | 11.1 Watt awa |
10. Akwụkwọ ikike Ozi
The DETONGER DP26 Portable Thermal Label Printer comes with a standard manufacturer's warranty. Please refer to the warranty card included in your package or contact DETONGER customer support for specific details regarding warranty coverage and duration.
11. Nkwado
For further assistance, technical support, or inquiries regarding your DETONGER DP26 printer, please visit the official DETONGER website or contact their customer service department. Contact information can typically be found on the product packaging or the brand's Amazon store page.
Ị nwere ike ịga na DETONGER Store on Amazon maka ozi ndị ọzọ na akụrụngwa nkwado.