Okwu mmalite
This manual provides comprehensive instructions for the proper setup, operation, maintenance, and storage of your Sekey 10x10 Pop Up Canopy. Please read all instructions carefully before assembly and use to ensure safe and efficient operation.
The Sekey 10x10 Pop Up Canopy is designed to provide instant outdoor shade, blocking up to 99% of UV rays. Its robust construction and user-friendly design make it suitable for various outdoor activities.

Image: The Sekey 10x10 Pop Up Canopy providing shade in diverse environments such as a bustling market, a serene snowy landscape, and a comfortable backyard patio.
Akụrụngwa na ihe agụnyere
Your Sekey 10x10 Pop Up Canopy package includes the following items:
- Pre-assembled Carbon Steel Frame
- 420D Oxford Fabric Canopy Top with Silver Coating
- Akpa ebu ibu
- 4 Sandbags (fillable)
- 4 Wind Ropes
- 8 Ogige ala

Image: A complete overview of the Sekey 10x10 Pop Up Canopy's components, including the folded frame, canopy fabric, carry bag, sandbags, ropes, and ground stakes.
Ntuziaka nhazi
- Mepee Frame ahụ: Place the folded frame in the desired location. With a person at each corner, gently pull the outer legs outwards to begin unfolding the frame. Continue until the frame is partially open.
- Attach the Canopy Top: Drape the canopy fabric over the partially opened frame. Secure the four nylon adhesive tabs on the top fabric to the corresponding corners of the frame.
- Kpochie Frame: Underneath the canopy, place one hand on the upper frame and use the other hand to push the central hub straight up until it clicks into the central pole, locking the frame in place.
- Gbanwee Ogologo: Press the red button on each leg to extend the legs to your desired height. There are 3 height settings available. Ensure all four legs are set to the same height for stability.
- Chekwaa Canopy: Fasten the wind ropes to the canopy corners and use the provided ground stakes to anchor them firmly into the ground. Fill the four sandbags with sand and attach them to the footpads of the canopy legs for additional stability.

Image: The one-push setup mechanism, demonstrating how to easily open the canopy frame by pushing the central lock button.

Image: Visual guide detailing the setup process, including opening the metal frame, locking it, attaching the canopy top, and adjusting the height.
Video: A detailed demonstration of how to install your Sekey Pop Up Canopy, showing each step of the assembly process.
Ntuziaka ọrụ
Ndozi elu
The canopy features 3 adjustable height settings. To change the height, press the red button located on each leg and slide the inner leg up or down to the desired position. Ensure the button clicks securely into place at the chosen height.
Chekwaa Canopy
For optimal stability, especially in windy conditions, always utilize the provided sandbags, wind ropes, and ground stakes. The extra-wide footpads are designed to accommodate sandbags, and the deep crossbar joints enhance wind resistance.
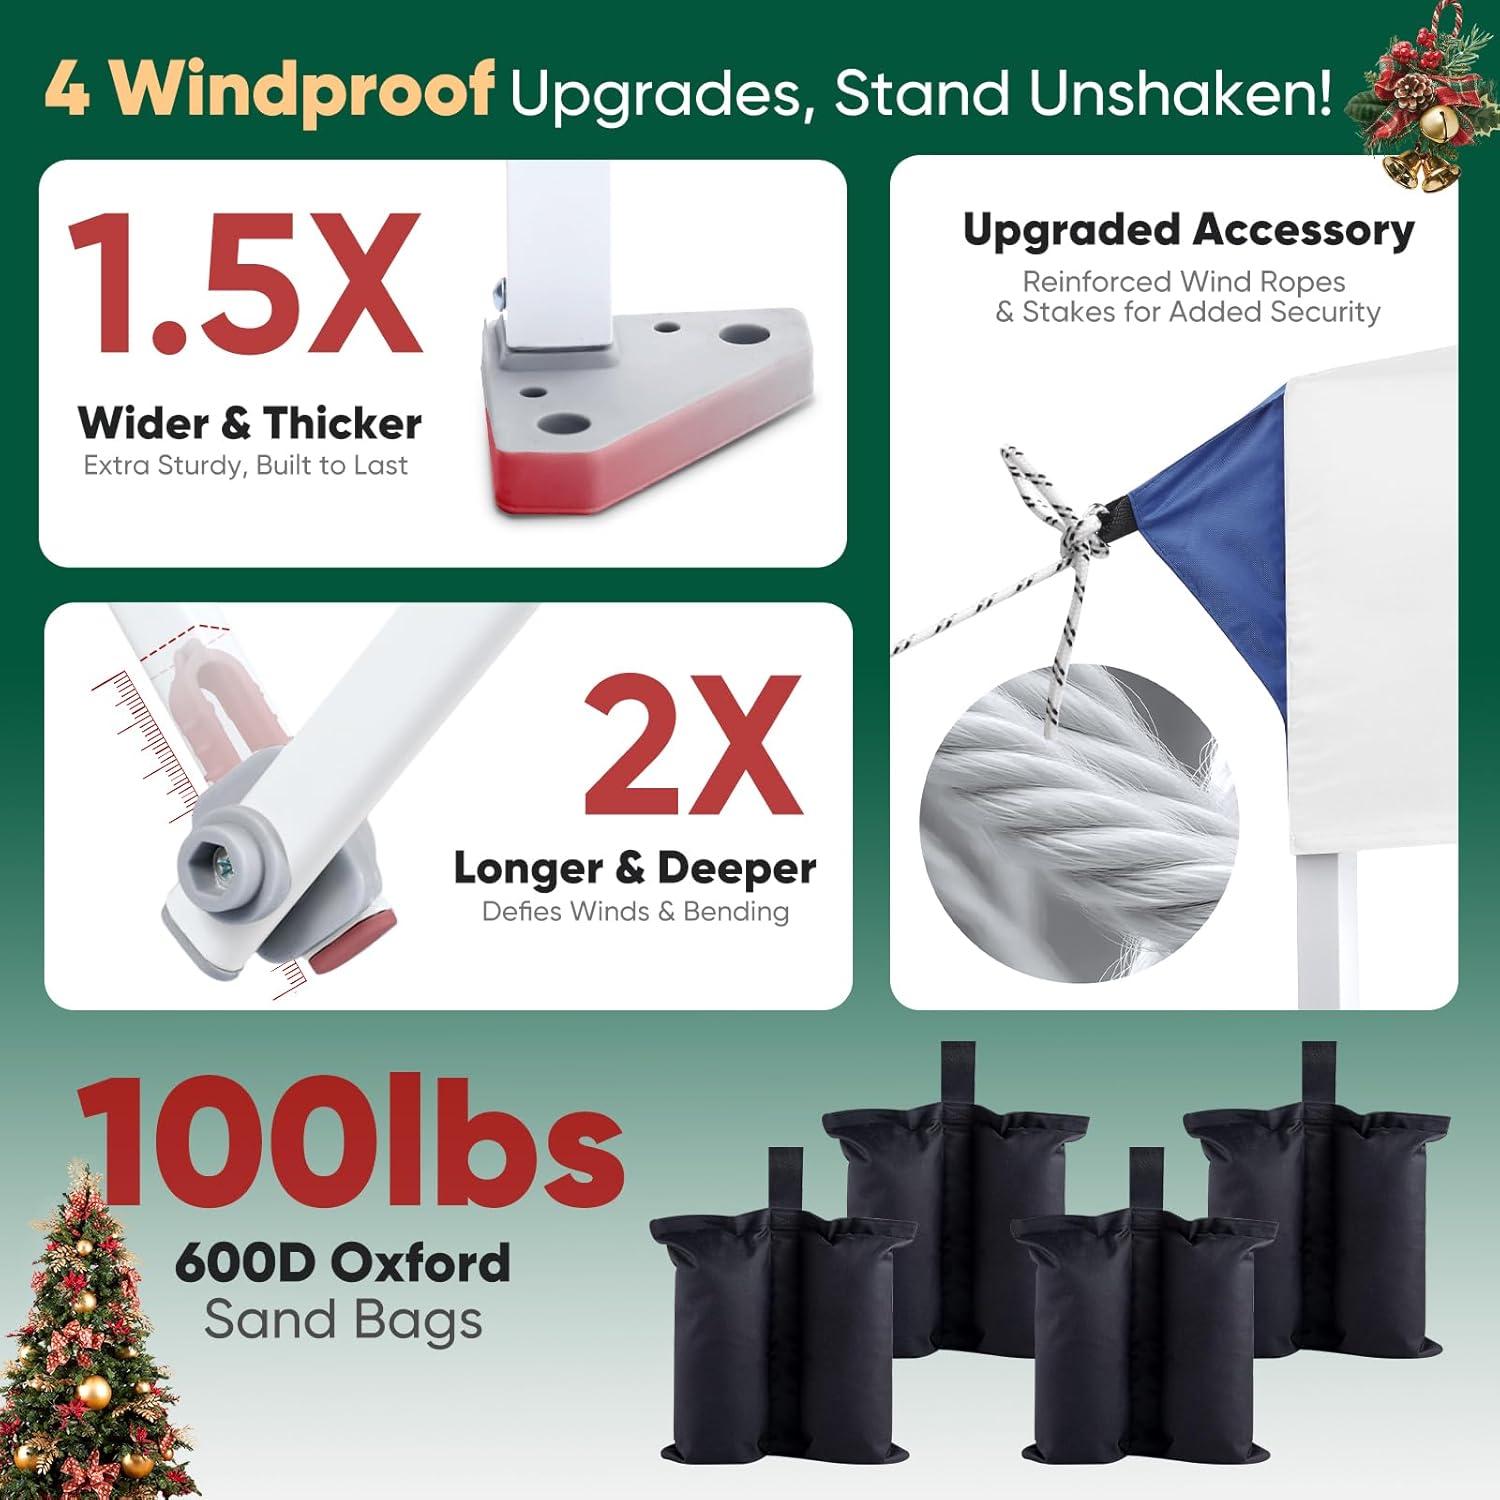
Foto: Zuru ezu view of the canopy's enhanced stability features, such as wider footpads, deeper crossbar joints, and the use of wind ropes and stakes.
Nlekọta
- Nhicha: Clean the canopy fabric with mild soap and water. Avoid harsh chemicals that may damage the fabric or silver coating.
- ihicha: Ensure the canopy fabric is completely dry before folding and storing to prevent mildew and mold.
- Nchekwa: Store the canopy in its portable carry bag in a cool, dry place away from direct sunlight when not in use.
- Nyocha: Regularly inspect the frame, fabric, ropes, and stakes for any signs of wear, damage, or rust. Replace damaged components as needed.
Nchọpụta nsogbu
- Canopy instability in wind: Ensure all legs are fully extended and locked. Use all provided sandbags (filled), wind ropes, and ground stakes. In severe weather conditions, it is recommended to take down the canopy to prevent damage.
- Difficulty with setup/takedown: Ensure the central lock button is fully engaged or disengaged. If the frame is stiff, gently rock it side to side while pushing/pulling. Lubricate joints if necessary.
- Rusting on frame: While the carbon steel frame is durable, prolonged exposure to moisture can lead to rust. Dry the frame thoroughly before storage. Consider applying a rust-inhibiting spray if storing in humid environments.
- Fabric damage (rips/tears): Avoid dragging the canopy fabric on rough surfaces. Ensure the frame is fully extended before attaching the fabric to prevent undue tension. In case of minor tears, repair kits may be available or contact customer support.
Nkọwapụta
| Ụdị | Sekey |
| Nlereanya | 10x10ft Pop Up Canopy |
| Ihe onwunwe | Alloy Steel frame with 420D Oxford Top |
| Agba | Ọcha |
| Ibu Ibu | 31.5 pound (14.33 Kilogram) |
| Akụkụ ngwaahịa | 120"L x 120"W x 98.43"H |
| Nchekwa ìhè ultraviolet | 99% (UPF 50+) |
| Ọkwa Nguzogide mmiri | Waterproof |
| Mpaghara ala | 100 Square Feet |
| Mgbakọ chọrọ | Ee |
Akwụkwọ ikike na nkwado
Your Sekey 10x10 Pop Up Canopy comes with a 12-month warranty. For any questions, concerns, or warranty claims, please contact the seller directly through your purchase platform. On Amazon, navigate to "My orders," find the order ID for your canopy, and click "Contact seller."
Ozi nchekwa dị mkpa
Always ensure proper ventilation when using the canopy. Secure the canopy with sandbags, ropes, and stakes in windy conditions. Avoid prolonged exposure to direct sunlight to minimize UV exposure.