1. Ngwaahịa gafereview
The Aufero Laser Engraver Machine is designed for precision engraving and cutting, featuring a 10W diode laser output and a spacious 17x15.7 inch engraving platform. This beginner-friendly machine incorporates safety features such as X&Y axis limit switches to enhance positioning accuracy and prevent collisions. The unique knife-edge platform, also known as a vector grid platform, provides a flat surface with narrow, parallel, and closely spaced slits, ideal for various engraving and cutting tasks. Its design allows for a removable, size-adjustable working panel.
Key specifications include a 32-bit MCU motherboard, support for up to 921600 baud rate, an engraving speed of 12000mm/min, and a fine laser spot size of 0.1 x 0.05mm. The engraving platform is constructed from all-metal with high-precision CNC processing, ensuring durability and resistance to laser heat.

Nyocha 1.1: N'eluview of the Aufero Laser Engraver Machine, showcasing its design and the 10W Aufero branding on the engraving surface.
2. Ozi nchekwa
This laser engraver is a Class 4 laser product. Class 4 lasers are high-power lasers that can cause severe eye and skin injuries from direct or scattered exposure. They can also pose a fire hazard. Adherence to all safety guidelines is critical for safe operation.
- Nchedo anya: Always wear appropriate laser safety goggles that are rated for the specific wavelength and power of this laser (10W diode laser). Never look directly into the laser beam or its reflection.
- Nchekwa akpụkpọ: Avoid direct exposure of skin to the laser beam.
- Igwe ikuku: Operate the machine in a well-ventilated area to dissipate fumes and smoke produced during engraving and cutting, which can be harmful. Consider using an exhaust system.
- Nchekwa ọkụ: Keep a fire extinguisher nearby. Do not leave the machine unattended during operation, especially when cutting flammable materials. Ensure the work area is clear of combustible materials.
- Ndakọrịta ihe: Only engrave or cut materials known to be safe for laser processing. Avoid materials that produce toxic fumes or catch fire easily.
- Nkwụsị ihe mberede: Familiarize yourself with the location and operation of the emergency stop button or power switch to quickly shut down the machine in an emergency.
- Ụmụaka na anụ ụlọ: Debe ụmụaka na anụ ụlọ ka ha ghara ịnọ ebe a na-arụ ọrụ.
- Elu nke kwụsiri ike: Place the machine on a stable, level, and non-flammable surface.
3. Atụmatụ
- Powerful 10W Diode Laser: Capable of engraving and cutting a wide range of materials with precision.
- Ebe Nkịtị Ukwuu: A generous 15.7 x 15.7 inch (400mm x 400mm) working area accommodates larger projects.
- Ọrụ Ọsọ Ọsọ: Engraving speeds up to 12000mm/min for efficient workflow.
- Precision Laser Spot: A fine 0.1 x 0.05mm laser spot ensures detailed and accurate results.
- Advanced Motherboard: Equipped with a 32-bit MCU for stable and fast processing, supporting high baud rates up to 921600.
- X&Y Axis Limit Switches: Enhance positioning accuracy and prevent the laser head from exceeding the working area, protecting the machine from collisions.
- All-Metal Knife-Edge Platform: Durable and heat-resistant, designed for optimal material support and smoke extraction during operation. The platform is made from high-precision CNC processed metal.
- Removable and Adjustable Working Panel: The unique splicing design allows for size adjustment and easy removal of the working panel, offering flexibility for various project sizes and cleaning.
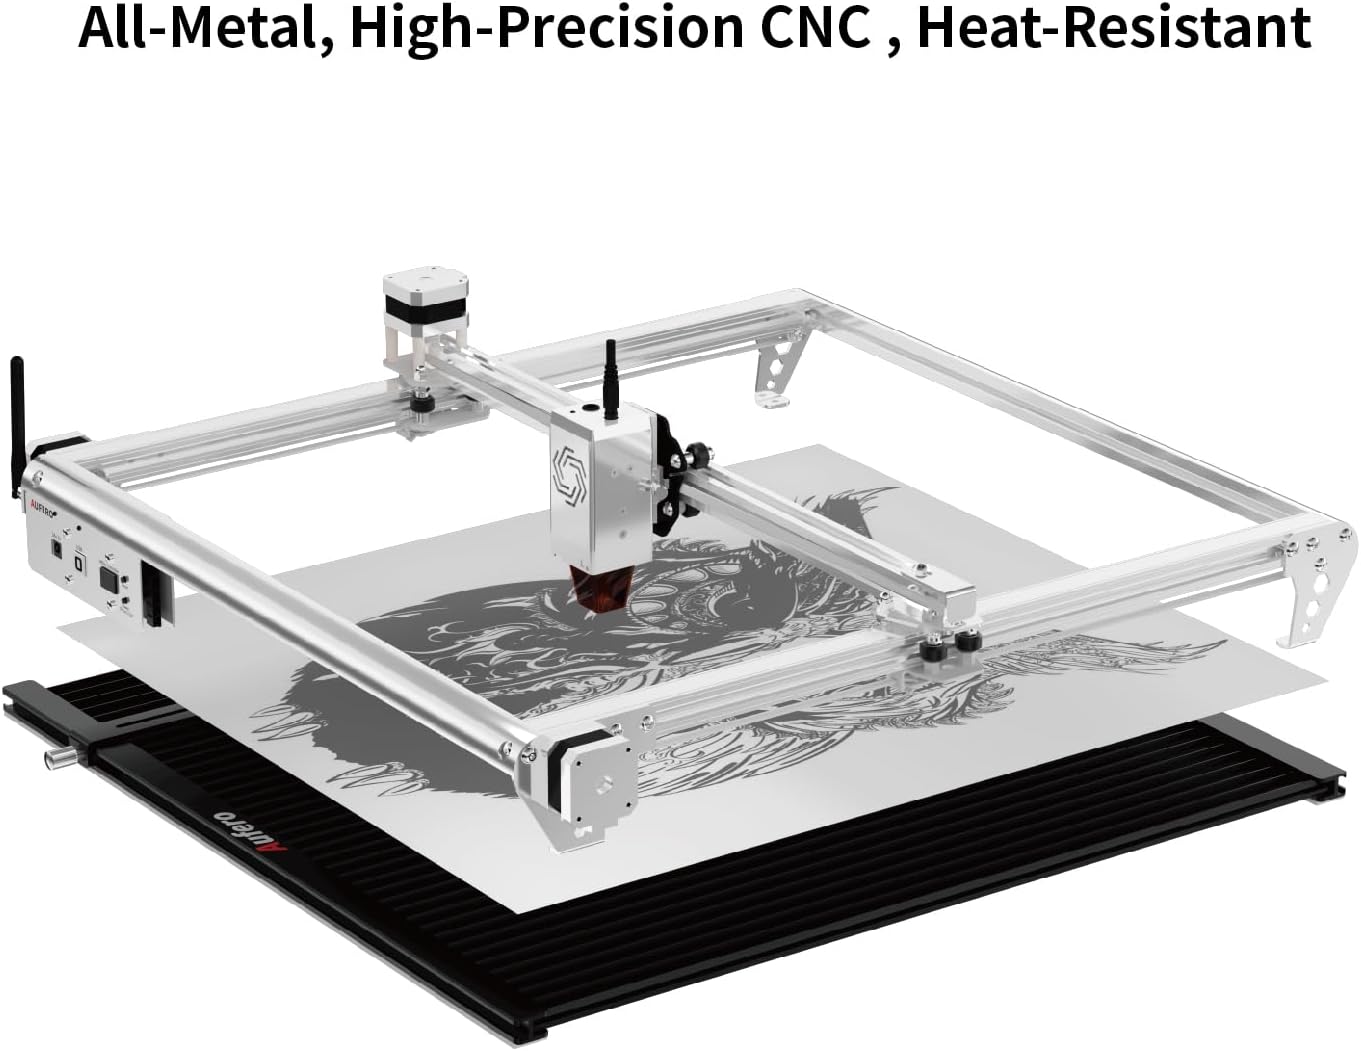
Figure 3.1: Illustration of the Aufero Laser Engraver's all-metal construction and the knife-edge platform, designed for durability and heat resistance.

Ọgụgụ 3.2: Zuru ezu view of the unique removable and adjustable working bed, highlighting its features such as rotatable screws, movable fixed corners, and square notches for protection.
4. Nhazi
Proper setup is essential for the safe and effective operation of your Aufero Laser Engraver. Follow these general steps:
- Iwepu: Jiri nlezianya wepụ ihe niile dị na nkwakọ ngwaahịa. Nyochaa na akụkụ niile edepụtara na listi nkwakọ dị ugbu a na adịghị emebi emebi.
- Mgbakọ: Assemble the frame according to the provided assembly instructions. Ensure all screws are tightened securely.
- Laser Module Installation: Install the laser module onto the gantry. Ensure it is firmly seated and the electrical connections are secure.
- Working Platform Setup: Place the knife-edge working platform on a stable, level, and non-flammable surface. The platform should be positioned directly beneath the laser's working area.
- Njikọ eriri: Connect the power cable, USB cable (if applicable), and any other necessary cables to the machine and your computer.
- Nwụnye ngwanrọ: Install the recommended laser control software on your computer. Refer to the software's specific instructions for installation and driver setup.
- Ventilation Setup: Ensure adequate ventilation for the work area. If using an enclosure or exhaust system, set it up according to its instructions.
- Ngwa nchekwa: Always have your laser safety goggles readily available and wear them before powering on the machine.
5. Ntuziaka ọrụ
This section provides general guidance for operating the Aufero Laser Engraver. Specific operations may vary based on the software used.
- Nkwadebe ihe:
- Select a material suitable for laser engraving or cutting. Common materials include wood, acrylic, leather, and certain metals (for engraving).
- Place the material securely on the knife-edge working platform. Ensure it is flat and does not move during operation.
- Nkwadebe Nhazi:
- Create or import your design using the laser control software.
- Adjust the design size and position to fit your material and desired output.
- Ntọala oke:
- Set the laser power, speed, and number of passes based on the material type and desired effect (engraving or cutting). Refer to material testing guides or recommended settings within your software.
- Ensure the laser focus is correctly set for your material thickness.
- Framing/Preview:
- Use the framing function in your software to preview the laser's path on the material without firing the laser at full power. This helps confirm correct positioning.
- Malite ọrụ:
- Ensure all safety precautions are in place, including wearing laser safety goggles and having adequate ventilation.
- Malite usoro ịkpụ ihe ma ọ bụ ịkpụ ihe site na ngwanrọ ahụ.
- Monitor the machine closely during operation. Be prepared to use the emergency stop if any issues arise.
- Mmecha:
- Once the operation is complete, wait for the laser to stop completely and for any fumes to clear before removing the material.
- Carefully remove the engraved or cut material.
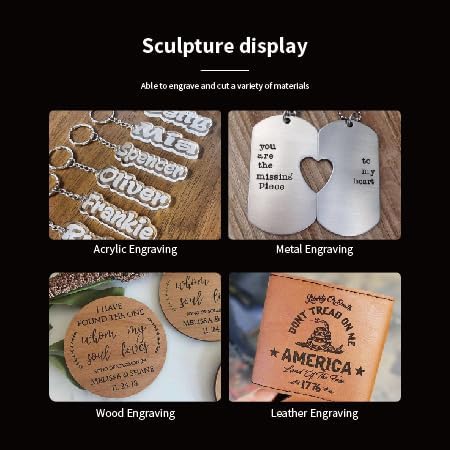
Ọgụgụ 5.1: Ọpụamples of various materials that can be engraved, including acrylic, metal, wood, and leather, demonstrating the machine's versatility.
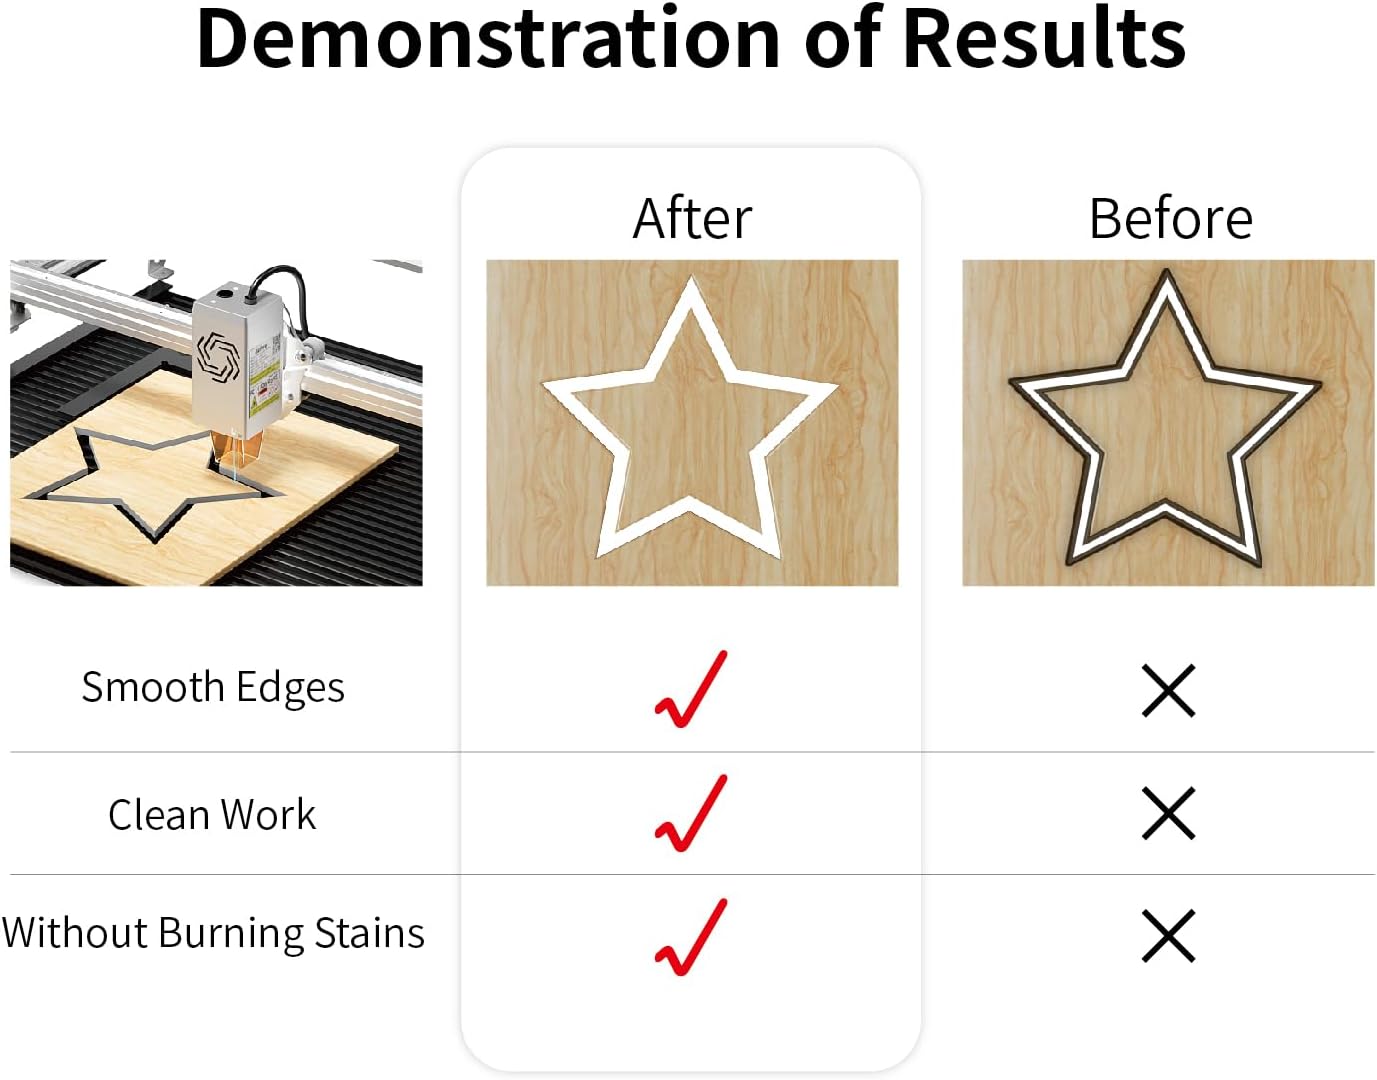
Figure 5.2: Demonstration of optimal laser cutting results, highlighting smooth edges, clean work, and the absence of burning stains when proper settings are applied.
6. Nlekọta
Regular maintenance ensures the longevity and optimal performance of your Aufero Laser Engraver.
- Cleaning the Laser Lens: The laser lens can accumulate dust and debris, affecting laser performance. Gently clean the lens with a specialized lens cleaning solution and a lint-free cloth or cotton swab. Perform this regularly, especially after extended use.
- Cleaning the Working Platform: The knife-edge platform can collect residue from engraved materials. Clean it regularly to maintain optimal air circulation and prevent buildup.
- Lubricating Guide Rails: Periodically apply a small amount of lubricant to the guide rails to ensure smooth movement of the laser module.
- Checking Belts: Inspect the timing belts for tension and wear. Adjust or replace them if necessary to maintain engraving accuracy.
- Nchacha izugbe: Keep the entire machine free of dust and debris. Use compressed air to clear hard-to-reach areas.
- Gbanyụọ mgbe anaghị eji ya: Always power off and unplug the machine when not in use for extended periods.
7. Nchọpụta nsogbu
This section addresses common issues you might encounter with your laser engraver.
| Nsogbu | Ihe nwere ike ime | Ngwọta |
|---|---|---|
| Laser anaghị agba ọkụ ma ọ bụ mmepụta adịghị ike |
|
|
| Engraving/Cutting is not precise or distorted |
|
|
| Igwe anaghị ejikọta na kọmputa |
|
|
| Material burning or excessive smoke |
|
|
8. Nkọwapụta
| Njirimara | Nkọwa |
|---|---|
| Ike mmepụta laser | 10,000 mW (10W) |
| Klas laser | Klas 4 |
| Mpaghara ihe osise | 15.7 x 15.7 sentimita (400mm x 400mm) |
| Ọsọ ihe osise | Ruo 12000 mm/min |
| Nha ntụpọ Laser | 0.1 x 0.05 mm |
| Motherboard | 32-bit MCU |
| Nkwado ọnụego Baud | Ruo 921600 |
| Machie Mgbanwe | X & Y Axis |
| Ụdị Platform | All-metal Knife-Edge (Vector Grid) |
| Akụkụ Platform | 17 x 15.7 inches (approx. 432mm x 400mm) |
| Ụbọchị mbụ dị | Ọktoba 7, 2024 |
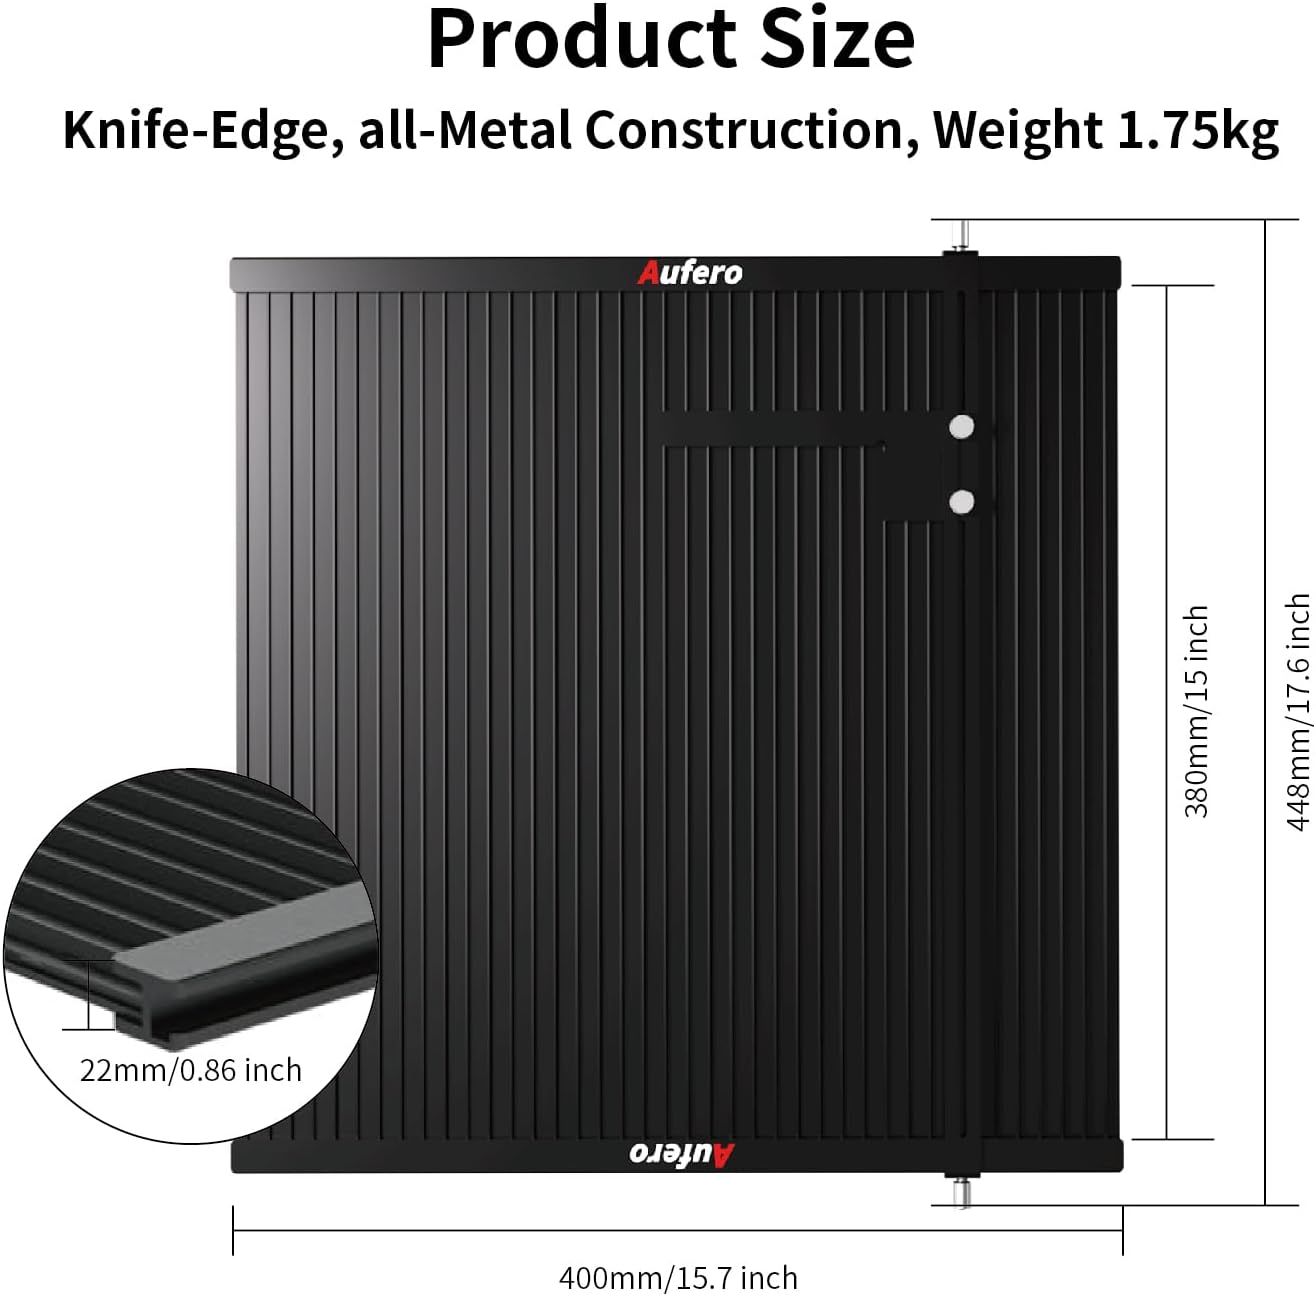
Figure 8.1: Product size and dimensions of the knife-edge working platform, indicating its all-metal construction and weight.
9. Akwụkwọ ikike na nkwado
For warranty information and technical support, please refer to the documentation included with your product or contact Aufero Technology directly. As per Amazon's return policy, this product may be eligible for returns within 30 days of purchase. For specific warranty terms and conditions, please consult the manufacturer's official website or the warranty card provided with your machine.
You can visit the official Aufero Store on Amazon for additional resources and contact information: Aufero Store