
THOKWOK TK-X4SC
THOKWOK TK-X4SC Motorcycle Bluetooth Headset User Manual
Model: TK-X4SC
1. Okwu mmalite
Thank you for choosing the THOKWOK TK-X4SC Motorcycle Bluetooth Headset. This device is designed to enhance your riding experience by providing seamless communication, entertainment, and navigation capabilities. Featuring advanced Bluetooth 5.1 technology, powerful noise cancellation, and a user-friendly LCD screen, the TK-X4SC allows for group intercom with up to 6 riders, music sharing, and hands-free calling. Please read this manual thoroughly to ensure proper installation, operation, and maintenance of your headset.

Image: Two TK-X4SC main units.
2. Kedu ihe dị na Igbe ahụ
Nyochaa na etinyere ihe niile ndị a na ngwugwu gị:
- TK-X4SC Main Unit (x2)
- Headphone Cable & Charging Cable (x2)
- Boom Microphone & Button Microphone (x2 sets)
- Clamp with Screws & Velcro Clip (x2 sets)
- Akwụkwọ ntuziaka onye ọrụ (x1)
- Speaker Pad (x4)
- Allen Wrench (x2)

Image: All included components of the TK-X4SC Double Pack.
3. Ngwaahịa gafereview
The TK-X4SC features a compact design with an intuitive LCD screen and a rotating wheel for easy operation.

Image: LCD screen interface and its indicators.
3.1. Atụmatụ igodo
- Ngosipụta LCD: Provides clear information on battery status, current mode, and FM channel.
- Rotating Wheel: Allows for user-friendly volume adjustment and channel selection.
- Bluetooth Bluetooth: Na-eme ka njikọ ikuku kwụsiri ike ma dị irè.
- Ịkagbu mkpọtụ: Advanced DSP and CVC technology for clear audio.
- Ihe mgbochi mmiri IP67: Emebere ya ka ọ nagide ọnọdụ ihu igwe dị iche iche.

Foto: Ofeview of TK-X4SC key features.
4. Nwụnye
Follow these steps to install the TK-X4SC headset on your helmet.
4.1. Choosing a Microphone
The TK-X4SC comes with two interchangeable microphones to suit different helmet types:
- Igwe okwu Boom: Recommended for open-face or flip-face (modular) helmets.
- Button Microphone: Recommended for full-face helmets.

Image: Microphone options for different helmet types.
4.2. Ịwụnye Isi Ngwaọrụ
- Họrọ usoro mgbanye: Use either the screw clamp or the adhesive velcro clip. The screw clamp offers a more secure attachment.
- Tinye Clamp/Clip: Secure the chosen mounting accessory to the side of your helmet. Ensure it is firmly attached.
- Mount Main Unit: Slide the TK-X4SC main unit onto the mounted clamp or clip until it clicks into place.
4.3. Installing Speakers and Microphone
- Nkwanye ọkà okwu: Attach the speakers inside the helmet's ear pockets using the velcro pads. Ensure they are positioned directly over your ears for optimal sound.
- Ndokwa igwe okwu: Position the chosen microphone (boom or button) near your mouth, ensuring it is not obstructed.
- Jikọọ eriri: Plug the speaker and microphone cables into the corresponding ports on the TK-X4SC main unit. Route cables neatly under the helmet padding.
5. Nhazi
5.1. Ịchaji ngwaọrụ
Before first use, fully charge the TK-X4SC.
- Connect the charging cable to the TK-X4SC and a USB power source.
- The LCD screen will indicate charging status.
- Ụgwọ zuru ezu na-ewe ihe dịka awa 2.5.
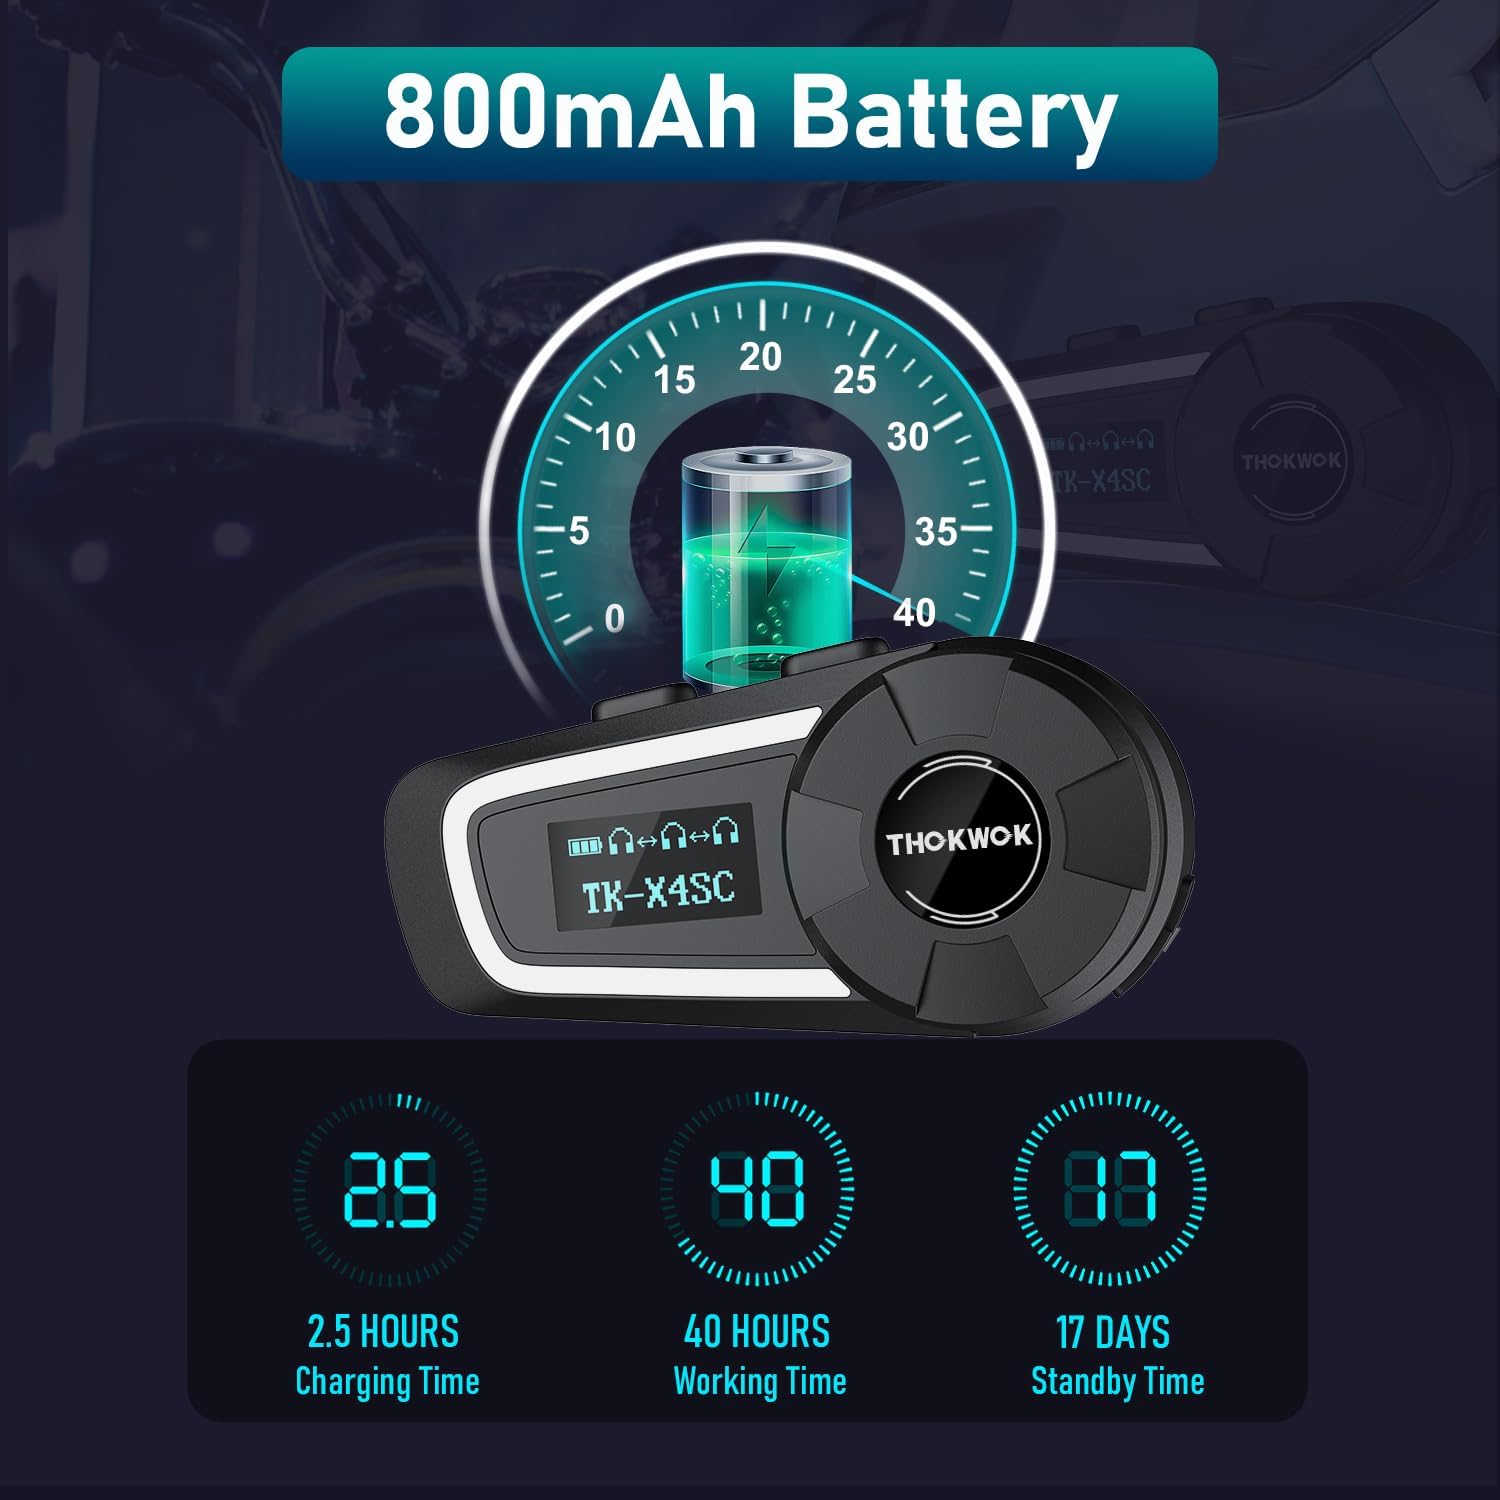
Image: Battery life and charging information.
5.2. Initial Bluetooth Pairing with Mobile Device
- Ike Na: Pịa ma jide bọtịnụ ike ruo mgbe ihuenyo LCD gbanye ọkụ.
- Tinye Ụdị Mmakọ: Refer to the user manual for specific button combinations to enter Bluetooth pairing mode (usually indicated by a flashing Bluetooth icon on the LCD).
- Search on Device: On your mobile phone or other Bluetooth device, search for available Bluetooth devices.
- Select TK-X4SC: Choose "TK-X4SC" from the list of found devices.
- Kwenye njikọ: Once paired, the LCD will show a stable Bluetooth icon.
5.3. Universal Pairing
The TK-X4SC supports universal pairing with other brands of Bluetooth headsets. Follow the pairing instructions for both devices to establish a connection.

Image: Universal pairing and voice command features.
6. Ntuziaka ọrụ
6.1. Gbanyụọ / gbanyụọ
- Ike Na: Pịa ma jide bọtịnụ Ike maka ihe dị ka sekọnd abụọ.
- Gbanyụọ: Pịa ma jide bọtịnụ Ike maka ihe dị ka sekọnd abụọ.
6.2. Mgbanwe olu
- Dịkwuo Mpịakọta: Rotate the wheel clockwise.
- Belata Mpịakọta: Rotate the wheel counter-clockwise.
6.3. Intercom Communication
The TK-X4SC supports group intercom for up to 6 riders, with an optimal performance for 4 units.
- Pairing Multiple Units: For one-click connection of up to four TK-X4SC units, refer to the detailed instructions in the included user manual.
- Initiate Intercom: Press the Intercom button to start communication with paired riders.
- End Intercom: Press the Intercom button again to end the conversation.

Image: Group intercom capabilities and range.
6.4. Music Playback and Sharing
- Kpọọ/Kwụsị Egwu: Press the Multi-function button (refer to manual for exact button).
- Next / Gara aga Track: Rotate the wheel or use specific buttons as per manual.
- Ịkekọrịta egwu: Two riders can enjoy the same song simultaneously. Follow the music sharing pairing instructions in the manual.

Image: Music sharing feature between two riders.
6.5. Oku ekwenti
- Oku azaa: Pịa bọtịnụ Multi-function.
- Oku ngwụcha: Pịa bọtịnụ Multi-function.
- Jụ oku: Pịa ma jide bọtịnụ ọtụtụ ọrụ.
- Voice Assistant (Siri/Google Assistant): Double-press the Multi-function button to activate.
6.6. Redio FM
- Turn On/Off FM: Press the FM button (refer to manual).
- Nyochaa ọwa: Rotate the wheel to scan for stations.
7. Nlekọta
7.1. Nhicha
- Jiri ihe dị nro hichaa isi ihe, damp akwa .
- Ejila kemịkal siri ike ma ọ bụ ndị na -ehicha ihe.
- Hụ na ọdụ ụgbọ mmiri niile kpọrọ nkụ tupu ịchaji ma ọ bụ jikọọ eriri.
7.2. Nchekwa
- Chekwaa ngwaọrụ ahụ n'ebe dị jụụ, kpọrọ nkụ mgbe ọ naghị eji ya.
- Zere oke okpomọkụ.
- Charge the battery periodically if storing for extended periods to maintain battery health.

Image: IP67 Waterproof feature.
8. Nchọpụta nsogbu
| Nsogbu | Ngwọta enwere ike |
|---|---|
| Device won't power on. | Ensure the battery is charged. Connect to a charger and try again. |
| Cannot pair with phone/intercom. |
|
| Enweghị ụda ma ọ bụ obere olu. |
|
| Intercom connection unstable. |
|
| LCD screen not working. | Gbalịa ịmalitegharị ngwaọrụ ahụ. Ọ bụrụ na nsogbu ahụ ka dị, kpọtụrụ nkwado ndị ahịa. |
9. Nkọwapụta
| Njirimara | Nkọwa |
|---|---|
| Aha Nlereanya | TK-X4SC |
| Ụdị Bluetooth | 5.1 |
| Njikwa mkpọtụ | Active Noise Cancellation (DSP & CVC) |
| Intercom Range | Up to 2000m (6 riders), 800m (2-way) |
| Intercom Group | Up to 6 units (optimal for 4 units) |
| Ike batrị | 800mAh lithium ion |
| Oge Nchaji | Ihe ruru. awa 2.5 |
| Oge ọrụ | Up to 40 hours (music or intercom) |
| Oge Njikere | Up to 500 hours (approx. 17 days) |
| Mmiri Nguzogide | Ihe mgbochi mmiri IP67 |
| Ndị na-ekwu okwu | Φ40mm Hi-Fi Stereo |
| Akụkụ | 3.15 x 1.5 x 1.1 sentimita asatọ |
| Ibu Ibu | 45 grams (1.59 ounces) |
| Atụmatụ pụrụ iche | Built-in FM Radio, LCD Display Screen, Music Sharing, Universal Pairing, Voice Assistant |

Image: Speaker and battery details.
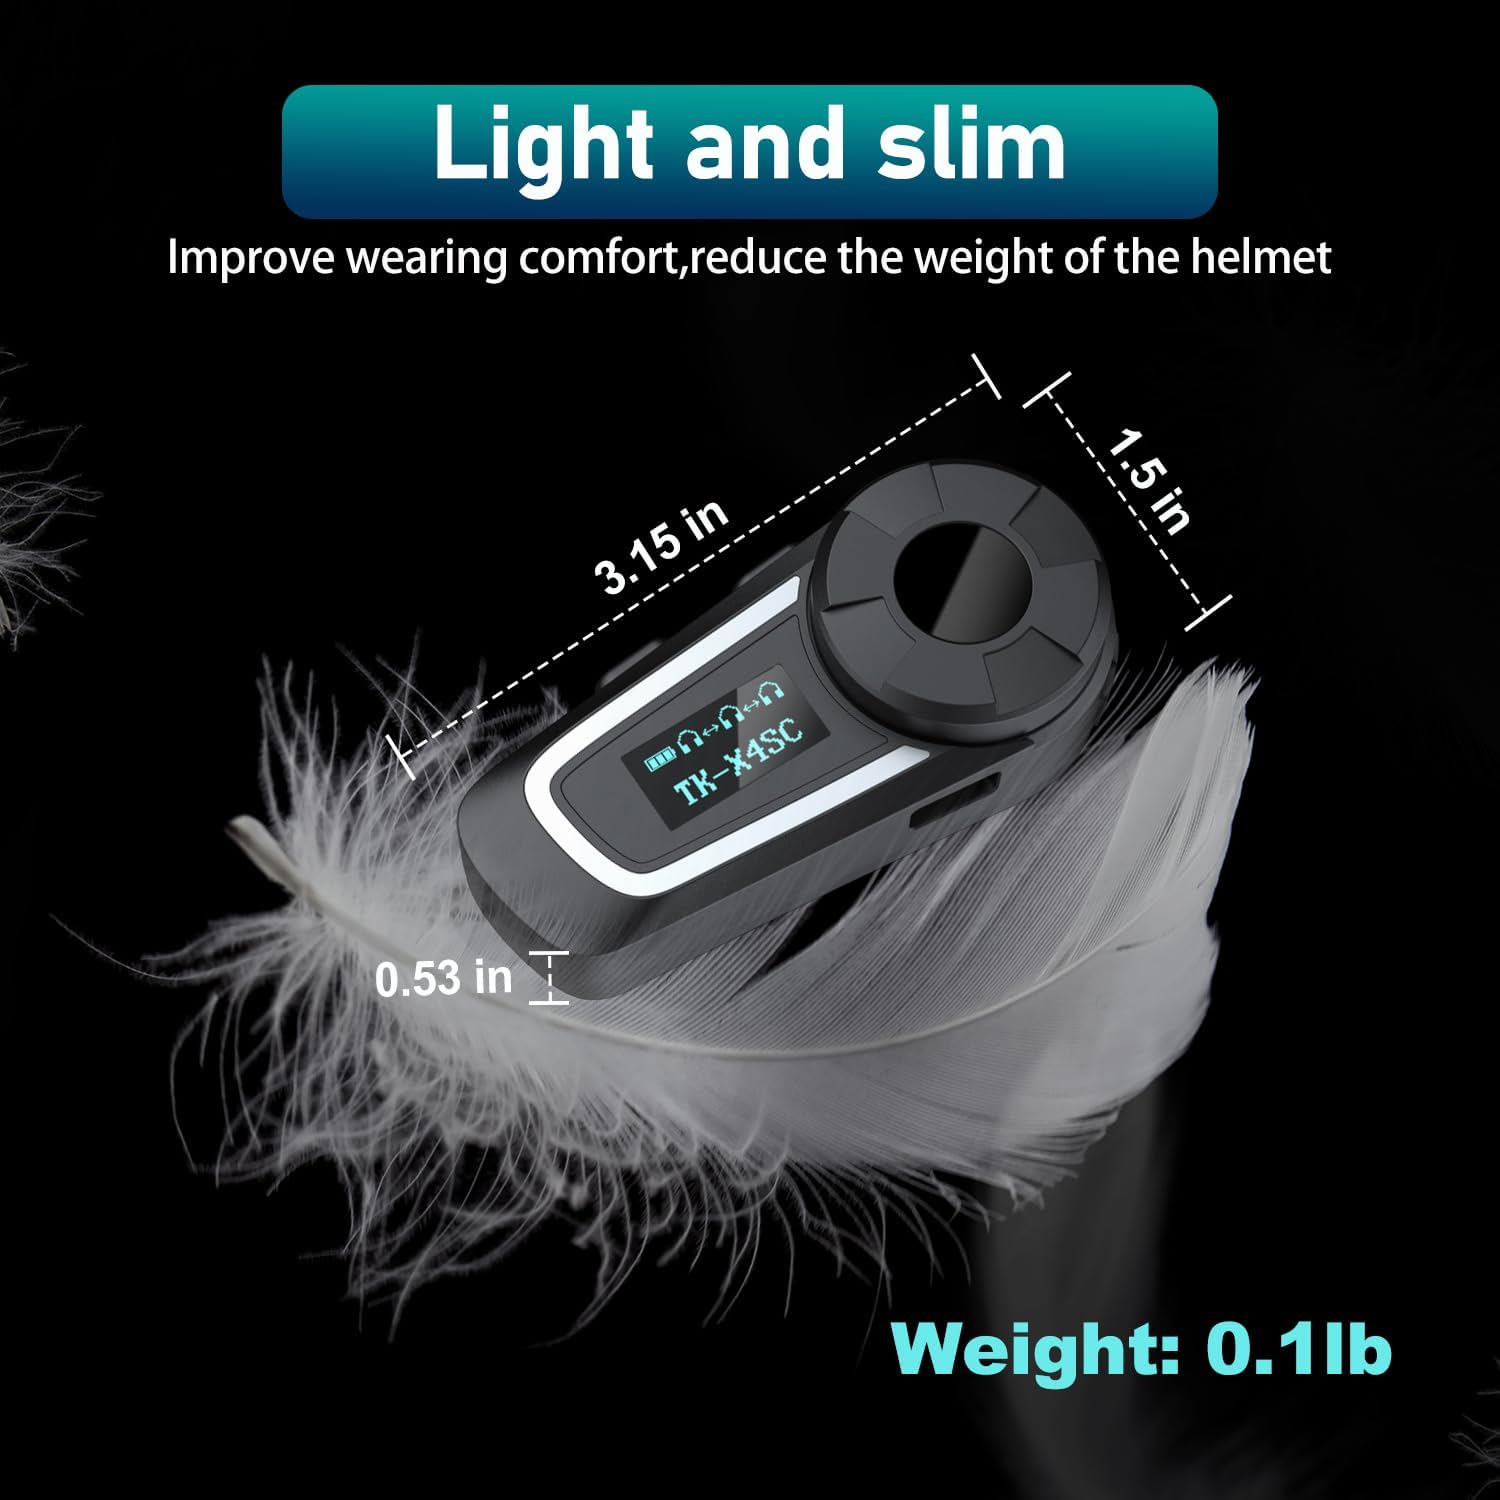
Image: Physical dimensions and weight of the TK-X4SC unit.
10. Ozi nchekwa
- Na-ebute ụzọ mgbe niile maka nchekwa okporo ụzọ. Ejila ngwaọrụ ahụ rụọ ọrụ n'ụzọ ga-eme ka ị ghara ịnya ụgbọala.
- Maintain appropriate volume levels to hear ambient sounds and traffic.
- Anwala ịkwasa ma ọ bụ gbanwee ngwaọrụ ahụ.
- Keep the device away from open flames or extreme heat.
- Tụfuo batrị dịka iwu mpaghara siri dị.
11. Akwụkwọ ikike na nkwado
For warranty information, technical support, or any inquiries regarding your THOKWOK TK-X4SC headset, please refer to the contact information provided with your purchase or visit the official THOKWOK websaịtị.
Ask a question about this manual
Ask about setup, troubleshooting, compatibility, parts, safety, or missing instructions. Manuals+ will review the question and use this page’s manual context to help answer it.