
1. Okwu mmalite
The EazeID M950 is a versatile label maker designed for home, office, and school use. It offers two primary printing modes: direct input via its integrated QWERTY keyboard and wireless control through the 'Print Master' mobile application via Bluetooth. Featuring a rechargeable battery and a backlit LCD screen, the M950 provides convenience and clarity for all your labeling needs. This manual provides detailed instructions for setting up, operating, and maintaining your device.
2. Ihe ngwugwu
Biko chọpụta na agụnyere ihe niile edepụtara n'okpuru na ngwugwu gị:
- 1 x EazeID M950 Label Maker
- 1 x 3M21 Black on White Label tape (12mm*4M)
- 1 x Type-C Data Cable
- Igbe nkwakọ ngwaahịa 1 x
- Akwụkwọ ntuziaka onye ọrụ 1 x (akwụkwọ a)

Figure 2.1: EazeID M950 Label Maker package contents.
3. Ngwaahịa gafereview
The EazeID M950 Label Maker features a compact design with an integrated QWERTY keyboard and a backlit LCD screen for ease of use. It utilizes thermal printing technology, eliminating the need for ink or toner.

Foto 3.1: N'ihu view of the EazeID M950 Label Maker and accessories.

Figure 3.2: Key features and components of the EazeID M950 Label Maker.
4. Nhazi
4.1 Ịchaji ngwaọrụ
The M950 Label Maker is equipped with a built-in 1200mAh rechargeable lithium battery. Before first use, or when the battery is low, charge the device using the provided Type-C USB cable.
- Connect the Type-C end of the cable to the charging port on the side of the label maker.
- Connect the USB-A end of the cable to a 5V-2A charging adapter (not included) or a compatible USB port.
- The device will indicate charging status on the LCD screen. A full charge typically takes 1-2 hours.
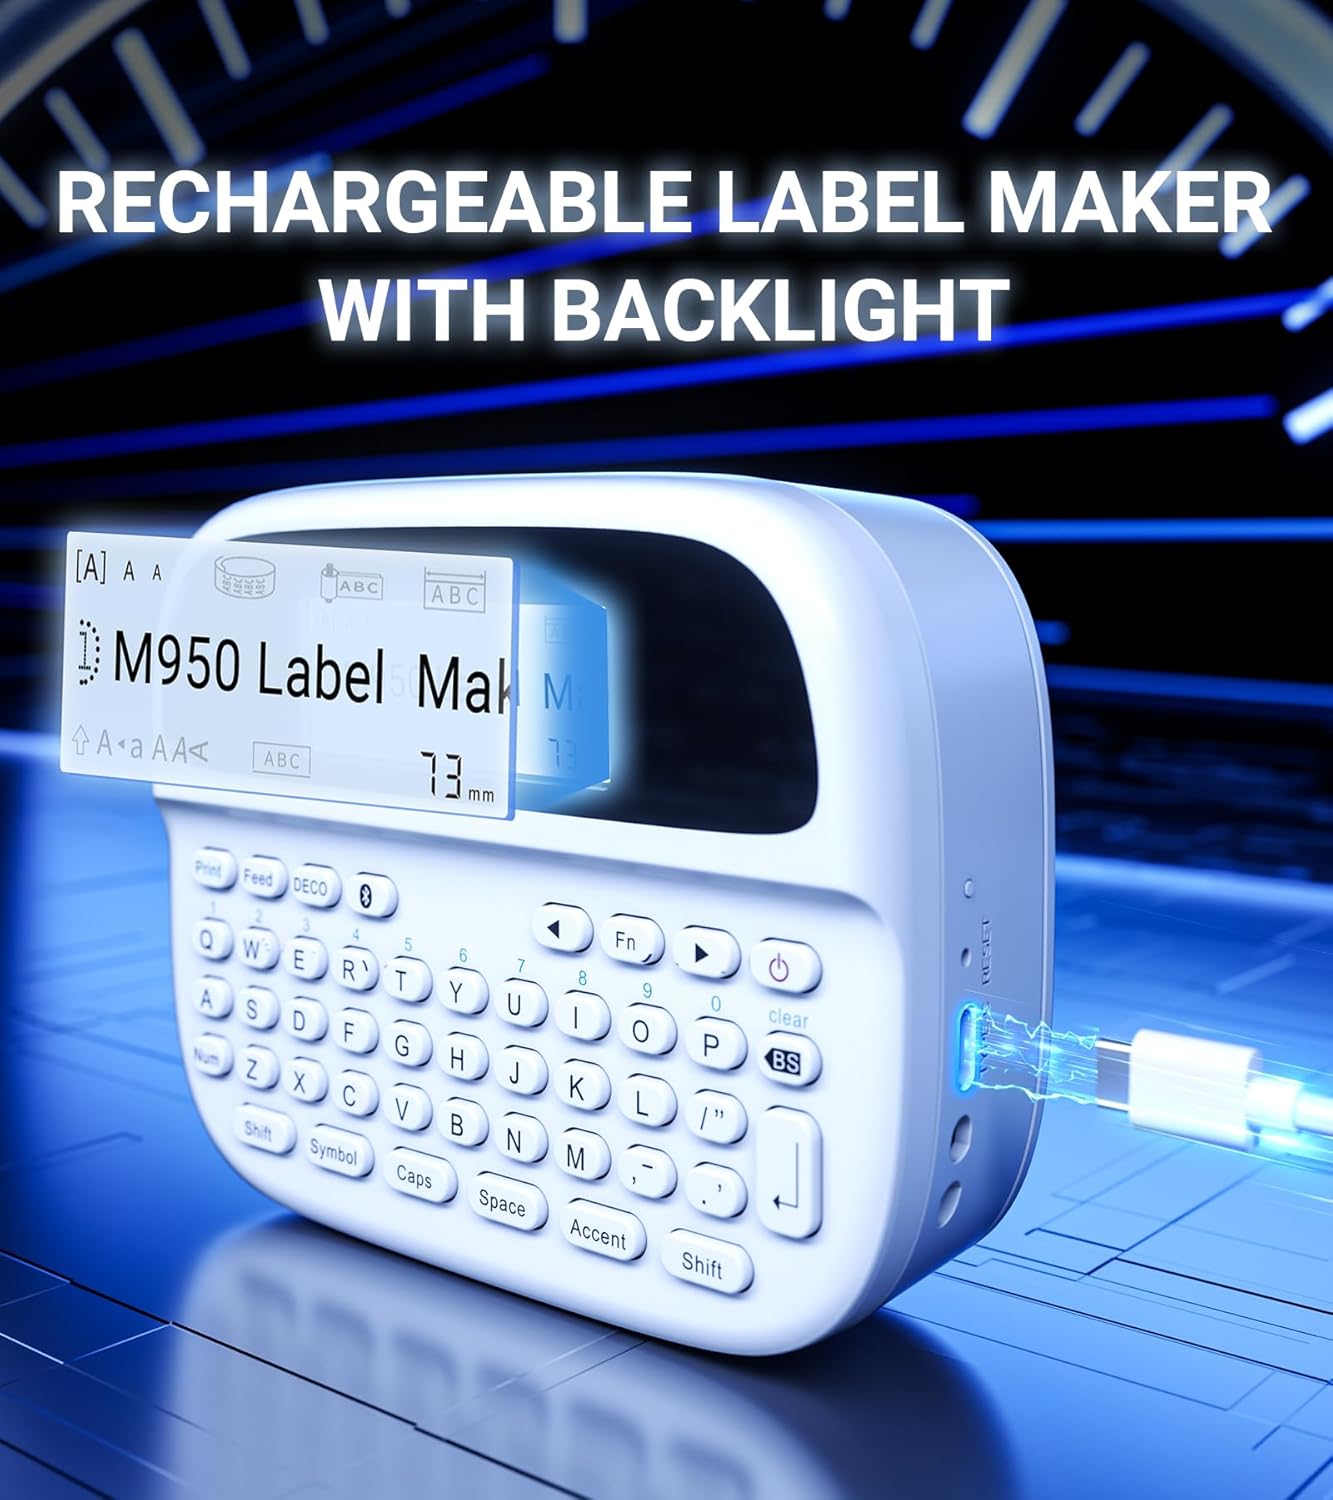
Figure 4.1: Charging the EazeID M950 Label Maker.
4.2 Ịwụnye teepu akara
To install or replace the label tape cassette:
- Ensure the label maker is powered off.
- Locate the tape compartment cover on the top of the device. Gently open the cover.
- Insert the label tape cassette into the compartment, ensuring it clicks into place. The tape should feed smoothly out of the slot.
- Close the tape compartment cover securely.

Ọgụgụ 4.2: Ime view of the M950 label maker showing tape cassette placement.
5. Ntuziaka ọrụ
5.1 Gbanyụọ/ gbanyụọ
- Iji gbanye: Pịa ma jide Ike button (usually marked with a power symbol) until the LCD screen illuminates.
- Ka ịgbanyụ: Pịa ma jide Ike button again until the screen turns off.
5.2 Direct Printing via QWERTY Keyboard
The M950 features an ergonomic QWERTY keyboard for direct label creation.
- Ike Na: Gbanye onye na-eme ihe ngosi ahụ.
- Input Text: Use the QWERTY keyboard to type your desired label text. The text will appear on the backlit LCD screen.
- Formatting Options: Use the function keys (e.g., Fn, Akara, Okpu, Ụda olu) to access various fonts, sizes, symbols, and other formatting options.
- Bipụta: Pịa Bipụta button to generate the label.
- Bee: Use the built-in cutter to cleanly separate the printed label from the tape roll.

Figure 5.1: Using the QWERTY keyboard for direct label printing.
5.3 Bluetooth App Printing (Print Master App)
For advanced features and customization, connect your M950 to the 'Print Master' app via Bluetooth.
- Budata ngwa: Download the 'Print Master' app from your device's app store (available on Android and iOS).
- Power On & Bluetooth: Turn on the label maker and ensure Bluetooth is enabled on both the label maker and your smartphone.
- Jikọọ: Open the 'Print Master' app. The app will search for nearby EazeID label makers. Select 'EazeID M950' from the list to connect.
- Design Label: Use the app's interface to create your label. The app offers a vast library of customizable templates, over 1000 patterns, 100+ frames, 100+ fonts, barcodes, and QR codes.
- Bipụta: Once your label is designed, tap the 'Print' icon in the app.
- Bee: Use the built-in cutter on the label maker to separate the printed label.

Figure 5.2: The EazeID M950 supports both keyboard and Bluetooth app printing modes.

Figure 5.3: Connecting to the 'Print Master' app via Bluetooth.
6. Nlekọta
6.1 Na-ehicha ngwaọrụ
To ensure optimal performance and longevity of your label maker:
- Gbanyụọ ngwaọrụ tupu ihicha.
- Use a soft, dry cloth to wipe the exterior of the label maker.
- For the print head, gently wipe with a cotton swab lightly dampHapụ ya ka ọ kpọọ nkụ kpamkpam tupu e jiri ya.
- Ejila ihe nchacha abrasive ma ọ bụ ihe mgbaze.
6.2 Nlekọta batrị
Ka iwelie ndụ batrị:
- Zere ịchaji batrị ugboro ugboro.
- Chaji ngwaọrụ ahụ mgbe niile, ọbụlagodi na ọ naghị adị na ojiji mgbe niile.
- Chekwaa ngwaọrụ ahụ n'ebe dị jụụ, kpọrọ nkụ mgbe ọ naghị eji ya ogologo oge.
7. Nchọpụta nsogbu
If you encounter issues with your EazeID M950 Label Maker, refer to the following common problems and solutions:
| Nsogbu | Ihe nwere ike ime | Ngwọta |
|---|---|---|
| Ngwaọrụ anaghị agbanwu ọkụ | Batrị dị ala; Nsogbu ngwaọrụ adịghị | Chaji ngwaọrụ ahụ ruo opekata mpe nkeji iri atọ. Ọ bụrụ na ọ ka na-azaghị, kpọtụrụ onye na-akwado ya. |
| No print or faint print | Tape installed incorrectly; Print head dirty; Low battery | Reinstall tape cassette. Clean the print head. Charge the device. |
| Njikọ Bluetooth ada ada | Bluetooth off; App not updated; Device too far | Ensure Bluetooth is enabled on both devices. Update 'Print Master' app. Move label maker closer to smartphone. Restart both devices. |
| Labels are difficult to peel | Specific label tape characteristic | Ensure you are using genuine EazeID label tape. Try bending the label backing slightly to separate. |
8. Nkọwapụta
Technical specifications for the EazeID M950 Label Maker:
- Aha nlereanya: EazeID M950 Label Maker
- Teknụzụ mbipụta: Thermal
- Mkpebi Bipụta: 203 DPI
- Njikọta: Bluetooth, USB Ụdị C
- Nha mgbasa ozi kacha: 12mm (0.47 inch)
- Batrị: 1200mAh Lithium Ion (enwere ike ịchaji, gụnyere)
- Usoro njikwa: App (Print Master), QWERTY Keyboard
- Atụmatụ pụrụ iche: Backlit LCD Screen, Built-in Cutter, Portable
- Akụkụ ngwaahịa: Ihe dịka 1 x 1 x 1 sentimita asatọ
- Ibu ihe: 1.06 pound
- Ngwa gụnyere: Label maker, tape, USB-C cable, user manual

Figure 8.1: EazeID M950 Label Maker dimensions and key features.
9. Akwụkwọ ikike na nkwado
The EazeID M950 Label Maker comes with a limited warranty. For specific warranty terms and conditions, please refer to the warranty card included in your product packaging or visit the official EazeID websaịtị.
For technical support, troubleshooting assistance, or inquiries about replacement parts and accessories, please contact EazeID customer service through the contact information provided on the official websaịtị ma ọ bụ ikpo okwu ịzụrụ ihe.