
1. Okwu mmalite
The MASTECH MS8236 is a versatile 2-in-1 digital multimeter and network cable track tester designed for electrical and network diagnostics. This device combines the functions of a digital multimeter for measuring electrical parameters with a network cable tester for verifying cable integrity and a tone generator for tracing wires. It is suitable for professional and DIY use in various applications.
2. Ozi nchekwa
Always adhere to basic safety precautions when using this device to prevent personal injury or damage to the meter or equipment under test. Read all instructions carefully before use.
- Do not exceed the maximum input values specified for each function.
- Kpachara anya nke ukwuu mgbe ị na-arụ ọrụ na sekit ndị dị ndụ.
- Ensure the function switch is in the correct position before making measurements.
- Ejila mita ahụ ma ọ bụrụ na ọ dị ka ọ mebiri emebi ma ọ bụ ọ bụrụ na ụzọ ule mebiri emebi.
- Replace batteries immediately when the low battery indicator appears to ensure accurate readings.
- Avoid using the device in environments with high humidity, extreme temperatures, or explosive gases.
- Always disconnect power to the circuit before testing continuity or resistance.
3. Ngwaahịa gafereview
The MASTECH MS8236 integrates a digital multimeter with a detachable cable tracker/tone generator. The main unit features a clear digital display, function selector dial, and input jacks. The cable tracker assists in identifying and tracing network and telephone lines.
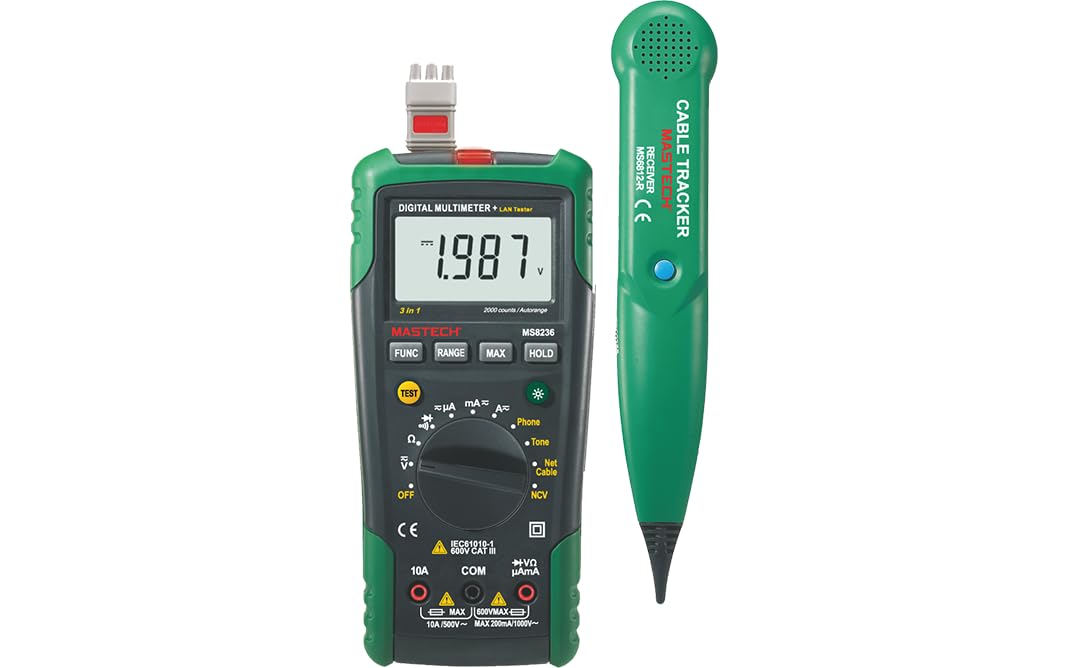
Figure 3.1: MASTECH MS8236 Digital Multimeter and Cable Tracker. The image shows the main multimeter unit on the left and the separate cable tracker unit on the right. Both are green and black.
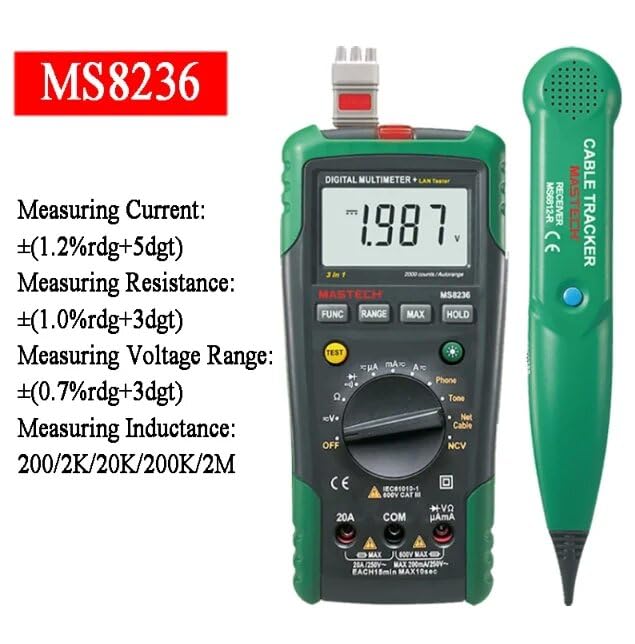
Figure 3.2: Close-up of the MASTECH MS8236 Multimeter Display and Controls. The display shows '1.987 V' and the function dial indicates various measurement modes including V, A, Ohm, Diode, Continuity, Phone, Net Cable, and NCV.
Akụkụ ndị bụ isi:
- Ngosipụta: ọnụ ọgụgụ 2000
- Ranging: Auto & Manual
- Onye na-akpọtụrụ Voltage (NCV) Nchọpụta
- Diode Open Voltagihe: 1.7V
- Continuity Buzzer: Activates below 70Ω
- Ọrụ Jide Data
- Ngosipụta batrị dị ala
- Gosipụta ọkụ azụ
- Gbanyụọ ike akpaaka
- Network Cable Check: Tests for open circuits, shorts, miss-wires, reversals, split pairs, and shield detection. Supports T568A, T568B, 10Base-T.
- Telephone Line Check: Identifies line states (Busy, Ringing, Clear) and continuity.
- Tone Function: For tracking cables and diagnosing break points.
4. Nhazi
4.1. Mwepu na nyocha
Carefully unpack the MS8236 and all accessories. Inspect the device for any signs of damage. If any damage is found, contact your supplier immediately.
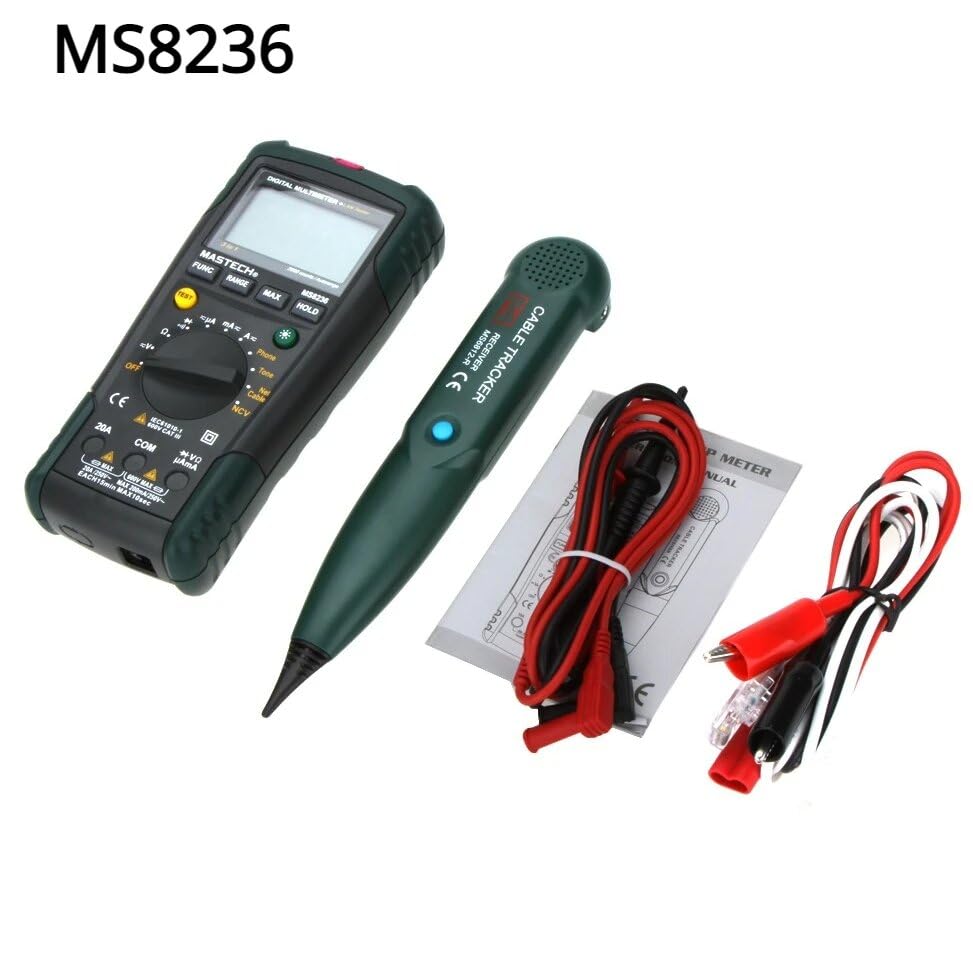
Figure 4.1: MASTECH MS8236 Kit Contents. The image displays the multimeter, cable tracker, red and black test leads, a network cable adapter, and a small instruction manual.
4.2. Ntinye batrị
The MS8236 requires 2 LR44 batteries, which are included. To install or replace batteries:
- Locate the battery compartment cover on the back of the multimeter unit.
- Jiri screwdriver mepee oghere batrị.
- Insert the 2 LR44 batteries, observing the correct polarity (+/-).
- Mechie mkpuchi batrị nke ọma.
5. Ntuziaka ọrụ
5.1. Basic Multimeter Functions
Connect the test leads to the appropriate input jacks (COM for black lead, VΩmA for red lead for most measurements, or 20A for high current). Select the desired function using the rotary switch.
- VoltagNha e (DCV/ACV): Turn the rotary switch to the 'V' position. Select DC or AC voltage if applicable. Connect test leads in parallel to the circuit.
- Nha Ugbu a (DCA/ACA): Turn the rotary switch to the 'A' position. Select DC or AC current. Connect test leads in series with the circuit. Ensure the correct input jack (mA or 20A) is used.
- Resistance Measurement (Ω): Turn the rotary switch to the 'Ω' position. Ensure the circuit is de-energized. Connect test leads across the component.
- Nnwale diode (→|): Turn the rotary switch to the diode symbol. Connect the red lead to the anode and the black lead to the cathode of the diode.
- Nnwale na-aga n'ihu ()))): Turn the rotary switch to the continuity symbol. The buzzer will sound if the resistance is below approximately 70Ω.
5.2. Network Cable Check
This function tests the integrity of network cables (RJ45). It can detect open circuits, shorts, miss-wires, reversals, split pairs, and shield detection for T568A, T568B, and 10Base-T standards.
- Turn the rotary switch to the 'Net Cable' position.
- Connect one end of the network cable to the RJ45 port on the main multimeter unit.
- Connect the other end of the network cable to the RJ45 port on the remote cable tracker unit.
- Observe the display for test results, which will indicate the cable status. The device also features a debug mode for detailed fault identification.
5.3. Telephone Line Check
This function allows for checking the state of a working telephone line and its continuity.
- Turn the rotary switch to the 'Phone' position.
- Connect the telephone line to the appropriate port on the main unit.
- The device will identify the state of the line as Busy, Ringing, or Clear. It can also judge the continuity of the telephone cables or wires.
5.4. Tone Function
The tone function is used with the cable tracker to trace cables and wires and diagnose break points.
- Turn the rotary switch to the 'Tone' position.
- Connect the test leads or RJ11/RJ45 plug to the cable you wish to trace.
- Use the remote cable tracker unit to follow the cable. The tracker will emit an audible tone when it detects the signal from the main unit, helping to locate the cable and identify breaks.
5.5. Ndị na-abụghị kọntaktị Voltage (NCV) Nchọpụta
The NCV function allows for detecting AC voltage na-enweghị kọntaktị kpọmkwem na onye na-eduzi ya.
- Tụgharịa ihe mgba ọkụ ahụ gaa n'ọnọdụ 'NCV'.
- Move the top part of the multimeter near a live AC voltage isi iyi.
- The device will indicate the presence of AC voltage through an audible alarm and/or visual indicator.
5.6. Ọrụ ndị ọzọ
- Jide data: Pịa bọtịnụ 'JIDE' iji mee ka ihe a na-agụ n'elu ihe ngosi ahụ gbụchie. Pịa ọzọ ka ọ hapụ.
- Ìhè azụ: Press the backlight button (often labeled with a light bulb symbol) to illuminate the display for better visibility in low-light conditions.
- Gbanyụọ ike akpaaka: The device will automatically power off after a period of inactivity to conserve battery life.
6. Nlekọta
6.1. Nhicha
Jiri mgbasa ozi hichapụ ikpe ahụamp cloth and mild detergent. Do not use abrasives or solvents. Ensure the device is completely dry before use.
6.2. Ngbanwe batrị
When the low battery indicator appears on the display, replace the batteries as described in Section 4.2. Remove batteries if the device will not be used for an extended period.
7. Nchọpụta nsogbu
- Enweghị ngosipụta ma ọ bụ ngosipụta dị nro: Check battery installation and charge level. Replace batteries if necessary.
- Ọgụgụ na-ezighi ezi: Ensure test leads are properly connected and the correct function is selected. Verify the circuit is de-energized for resistance/continuity tests.
- Network cable test failure: Ensure both ends of the cable are securely connected to the main unit and remote. Check for physical damage to the cable or connectors.
- No tone from cable tracker: Verify the main unit is in 'Tone' mode and properly connected to the cable. Check the cable tracker's battery.
8. Nkọwapụta
The following table outlines the general and electrical specifications for the MASTECH MS8236.

Figure 8.1: MASTECH MS8236 Features and Specifications Table. This image provides detailed electrical specifications for DC Voltage, AC Voltage, DC Current, AC Current, and Resistance, including ranges, resolutions, and accuracies.
| Oke | Oke | Mkpebi | Izi ezi |
|---|---|---|---|
| DC Voltage | 200mV/2V/20V/200V/600V | 0.1mV/1mV/10mV/100mV/1V | ± (0.5%+5) |
| AC Voltage | 200mV/2V/20V/200V/600V | 0.1mV/1mV/10mV/100mV/1V | ± (0.8%+5) |
| DC ugbu a | 200µA/2000µA/20mA/200mA/2A/10A | 0.1µA/1µA/10µA/0.1mA/1mA/10mA | ± (1.2%+5) ±(2.0%+10) for 10A |
| AC Ugbu a | 200µA/2000µA/20mA/200mA/2A/10A | 0.1µA/1µA/10µA/0.1mA/1mA/10mA | ± (1.5%+5) ±(3.0%+10) for 10A |
| Nguzogide | 200Ω/2kΩ/20kΩ/200kΩ/2MΩ/20MΩ | 0.1Ω/1Ω/10Ω/100Ω/1kΩ/10kΩ | ± (1.0%+5) ±(1.5%+5) for 20MΩ |
| Diode Open Voltage | 1.7V | ||
| Ịga n'ihu Buzzer | <70Ω | ||
| Ngosipụta | 2000 na-agụta | ||
| Na-agba ọsọ | Akpaaka & Akwụkwọ ntuziaka | ||
| Onye na-akpọtụrụ Voltagonye nchọpụta | Ee | ||
| Gbanyụọ ike akpaaka | Ee | ||
| Jide data | Ee | ||
| Ngosipụta batrị dị ala | Ee | ||
| Gosipụta ọkụ azụ | Ee | ||
| Isi Iyi Ike | 2 batrị LR44 (gụnyere) | ||
| Akụkụ ngwaahịa | 16 x 9 x 5 cm | ||
| Ibu Ibu | 500 g | ||
| Ihe onwunwe | Acrylonitrile Butadiene Styrene (ABS) | ||
| Asambodo | CE, RoHS | ||
9. Akwụkwọ ikike na nkwado
For warranty information and technical support, please refer to the documentation provided with your purchase or contact the seller or manufacturer directly. Specific warranty terms may vary by region and retailer.